Jet HVBS-56M Operating Instructions And Parts Manual
Horizontal/vertical bandsaw
Hide thumbs
Also See for HVBS-56M:
- Owner's manual (17 pages) ,
- Brochure (56 pages) ,
- Operating instructions and parts manual (24 pages)
Table of Contents
Advertisement
Quick Links
This .pdf document is bookmarked
Operating Instructions and Parts Manual
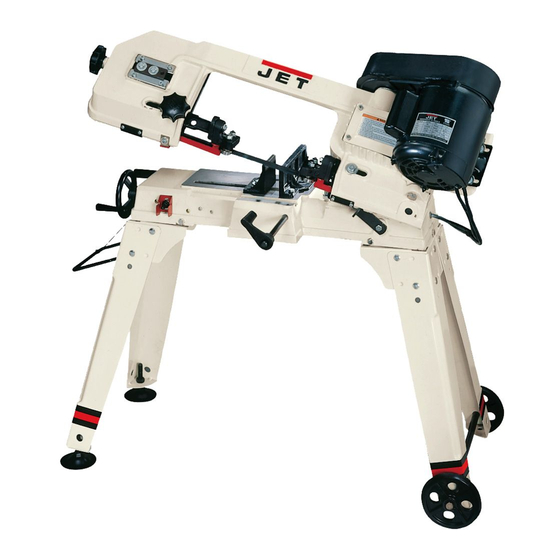
Horizontal/Vertical Bandsaw
Model: HVBS-56M
WALTER MEIER (Manufacturing) Inc.
427 New Sanford Road
LaVergne, Tennessee 37086
Part No. M-414458
Ph.: 800-274-6848
Revision G2 03/2010
www.waltermeier.com
Copyright © 2010 Walter Meier (Manufacturing) Inc.
Advertisement
Table of Contents

Related Manuals for Jet HVBS-56M


Summary of Contents for Jet HVBS-56M
- Page 1 This .pdf document is bookmarked Operating Instructions and Parts Manual Horizontal/Vertical Bandsaw Model: HVBS-56M WALTER MEIER (Manufacturing) Inc. 427 New Sanford Road LaVergne, Tennessee 37086 Part No. M-414458 Ph.: 800-274-6848 Revision G2 03/2010 www.waltermeier.com Copyright © 2010 Walter Meier (Manufacturing) Inc.
-
Page 2: Warranty And Service
Walter Meier is consistently adding new products to the line. For complete, up-to-date product information, check with your local Walter Meier distributor, or visit waltermeier.com. WARRANTY JET products carry a limited warranty which varies in duration based upon the product (MW = Metalworking, WW = Woodworking). WHAT IS COVERED? This warranty covers any defects in workmanship or materials subject to the exceptions stated below. -
Page 3: Table Of Contents
Blade-Table Squareness ........................15 Adjusting Automatic Shut-Off ......................15 Adjusting the Vise ..........................15 Lubrication ............................16 Breakdown for Bow Assembly ......................17 Breakdown for Base Assembly ......................18 Parts List for the HVBS-56M Bandsaw ....................19 Wiring Diagram..........................22... -
Page 4: Warning
Warning Read and understand the entire instruction manual before operating machine. This bandsaw is designed and intended for use by properly trained and experienced personnel only. If you are not familiar with the proper and safe use of a bandsaw, do not use until proper training and knowledge have been obtained. -
Page 5: Minimum Gage For Cord
19. Some dust created by power sanding, sawing, grinding, drilling and other construction activities contain chemicals known to cause cancer, birth defects or other reproductive harm. Some examples of these chemicals are: • Lead from lead based paint. • Crystalline silica from bricks, cement and other masonry products. •... -
Page 6: Grounding Instructions
Grounding Instructions Caution: This tool must be grounded while in use to protect the operator from electric shock. In the event of a malfunction or breakdown, grounding provides a path of least resistance for electric current to reduce the risk of electric shock. This tool is equipped with an electric cord having an equipment-grounding conductor and a grounding plug. -
Page 7: Specifications
The conversion from 115V to 230V operation must be done by a qualified electrician. Specifications Model Number ........................HVBS-56M Stock Number .......................... 414458 Horizontal Capacity: Round @ 90° ..........................5” Round @ 45° ..........................3” Rectangle @ 90° ................5”(H) x 5-3/4”(W), and 2”(H) x 6”(W) Rectangle @ 45°... -
Page 8: Unpacking And Clean-Up
Unpacking and Clean-Up Note: Read and understand the entire manual before attempting setup or operation. 1. Remove all contents form the shipping carton. 2. Inspect contents for shipping damage and report any damage to your distributor. 3. Wipe bed and vise assembly with clean cloth to remove excess oil used to prevent rust. - Page 9 5. Attach a cross brace to the opposite end of the bed using three 5/16”x1” hex cap bolts, six 5/16” flat washers, and secure with three 5/16” hex nuts. Tighten the nut on the end of the bed first followed by the nuts on the sides.
-
Page 10: Vertical Cutting Plate Assembly
11. Slide pulley cover (A, Fig. 5) around motor shaft and worm gear shaft. Secure with two hex cap screws and washers (B, Fig. 5). 12. Lift motor with one hand while the other hand places V-belt (C, Fig.5) on both pulleys. 13. -
Page 11: Electrical Connections
All electrical connections must be completed by a qualified electrician. Failure to comply may cause serious injury! The HVBS-56M bandsaw is rated at 115/230V and comes from the factory prewired 115V. To switch to 230V operation, follow the wiring diagram found on the inside of the motor junction box. -
Page 12: Changing Blade Speed
Changing Blade Speed the blade guide assemblies as far apart as possible. Lock in place. 1. Disconnect the machine from the power 4. Depress blade. Finger pressure should source. cause approximately .004" deflection. Turn blade tension knob (B, Fig. 12) until the 2. -
Page 13: Changing Blades
Changing Blades 3. Loosen nut (B, Fig. 14) and turn nut (C, Fig. 14) to adjust eccentric bearing to a 1. Disconnect machine from the power clearance of .001". Tighten nut (B, Fig. 14) source. to lock. 2. Raise the saw arm to the vertical position 4. -
Page 14: Adjusting Blade Tracking
Adjusting Blade Tracking feed pressure. If they are still burned and heavy, reduce the blade speed. Optimum feed pressure has been set when the chips are curled, WARNING silvery, and warm. Blade tracking adjustment requires running the saw with the back cover open! This adjustment must be completed by qualified persons only! Failure to comply may cause serious injury! -
Page 15: Blade-Table Squareness
Blade-Table Squareness 3. Adjust the blade guides so they are as close as possible to the material without interfering. 1. The band saw blade must be perpendicular 4. There is a scale on the back side of the bed to the table to ensure a straight cut. This to aid in setting up the vise for 90°... -
Page 16: Lubrication
Lubrication 5. Place arm in the horizontal position. Wipe out remaining oil with a rag. Ball bearings on the blade guide assemblies and 6. Fill gear box with approximately 1/2 pint of the blade wheels are permanently sealed and MOBIL SHC 634. require no lubrication. -
Page 17: Breakdown For Bow Assembly
Breakdown for Bow Assembly... -
Page 18: Breakdown For Base Assembly
Breakdown for Base Assembly... -
Page 19: Parts List For The Hvbs-56M Bandsaw
Parts List for the HVBS-56M Bandsaw Index Part Description Size Qty. 1 ..TS-0051031 ......Hex Cap Bolt ........5/16”x3/4”....4 2 ..TS-0561011 ......Hex Nut..........1/4” ......1 3 ..TS-0680021 ......Flat Washer..........1/4” ......4 4 ..HVBS56M-04 ......Stand Leg ................4 4-1 ..HVBS56M-04-1 ......Cross Brace ................2 5 ..HVBS56M-05 ......Washer .................. - Page 20 Index Part Description Size Qty. 49 ..HVBS462-049 ......Mitering Vise Plate ..............1 50 ..TS-0081031 ......Hex Cap Bolt ........5/16”x3/4”....6 51 ..TS-0680031 ......Flat Washer..........5/16” ......3 52 ..TS-0081071 ......Hex Cap Bolt ........5/16”x1-1/2”....1 53 ..TS-0091071 ......Hex Cap Screw ........7/16”x2” ..... 1 54 ..HVBS56M-054 ......Pivot Bracket ................
- Page 21 Index Part Description Size Qty. 94 ..HVBS462-094 ......Worm Gear (w/Shaft) .............. 1 95 ..HVBS462-095 ......Spring Pin ................1 96 ..HVBS462-096 ......Bearing Bushing ..............1 97 ..TS-0050011 ......Hex Cap Bolt ........1/4”x1/2” ....3 98 ..HVBS56M-098 ......Clamp ..................2 99 ..HVBS462-099 ......Spacer ................... 1 100 ..HVBS462-100 ......Flat Cross Head Screw ......5/32”x3/8”....
-
Page 22: Wiring Diagram
Wiring Diagram... - Page 23 Notes...
- Page 24 WALTER MEIER (Manufacturing) Inc. 427 New Sanford Road LaVergne, Tennessee 37086 Phone: 800-274-6848 www.waltermeier.com...
Need help?
Do you have a question about the HVBS-56M and is the answer not in the manual?
Questions and answers