Crestron TPS-4L Operations & Installation Manual
3.6-inch wall mount touchpanel
Hide thumbs
Also See for TPS-4L:
- Operations & installation manual (44 pages) ,
- Design manual (84 pages) ,
- Quick manual (60 pages)

Related Manuals for Crestron TPS-4L


Summary of Contents for Crestron TPS-4L
- Page 1 Crestron Isys TPS-4L ® 3.6-Inch Wall Mount Touchpanel Operations & Installation Guide...
- Page 2 This document was prepared and written by the Technical Documentation department at: Crestron Electronics, Inc. 15 Volvo Drive Rockleigh, NJ 07647 1-888-CRESTRON All brand names, product names and trademarks are the property of their respective owners. ©2007 Crestron Electronics, Inc.
-
Page 3: Table Of Contents
® Crestron Isys TPS-4L 3.6-Inch Wall Mount Touchpanel Contents 3.6-Inch Wall Mount Touchpanel: TPS-4L Introduction ..........................1 Features and Functions ....................1 Specifications ......................2 Physical Description....................4 Industry Compliance ....................6 Setup ............................7 Network Wiring......................7 Identity Code ....................... 7 Configuring the Touchpanel.................. -
Page 5: Inch Wall Mount Touchpanel: Tps-4L
• Stylish flush wall mount design | 10 designer colors * Custom-engraved bezel can be designed and obtained by using the Crestron Engraver software. Version 2.6.1.0 and Crestron Database 17.6.0 or later are available from the Crestron website www.crestron.com ®... -
Page 6: Specifications
Crestron control systems. Versatile Flush-Mount Design The TPS-4L is designed for easy flush-mount installation in a wall, lectern or similar flat surface. Mounting clips furnished with the TPS-4L facilitate a clean installation in post-construction drywall and many furniture applications. Additional mounting options are available. - Page 7 2.13 in (5.40 cm) Weight 15 oz (0.43 kg) 1. The latest software versions can be obtained from the Crestron website. Refer to the NOTE following these footnotes. 2. Crestron 2-Series control systems include the AV2 and PRO2. Consult the latest Crestron Product Catalog for a complete list of 2-Series control systems.
-
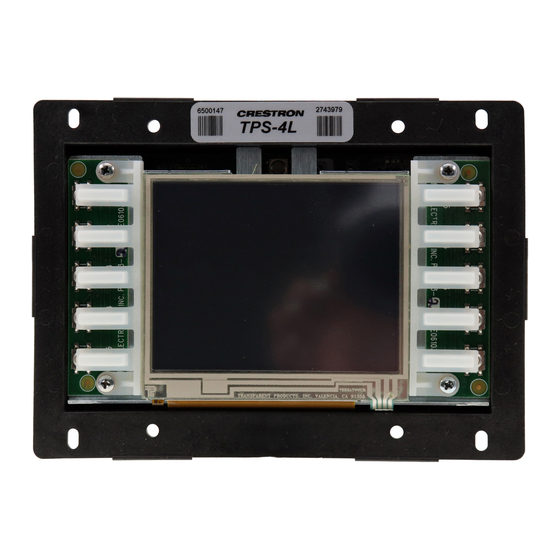
Page 8: Physical Description
Crestron Isys TPS-4L NOTE: Crestron software and any files on the website are for authorized Crestron dealers and Crestron Authorized Independent Programmers (CAIP) only. New users may be required to register to obtain access to certain areas of the site (including the FTP site). - Page 9 PIN 8 Green LED indicates link status Yellow LED indicates Ethernet activity. SIGNAL SIGNAL YELLOW GREEN TX + TX - RC - (Continued on following page) 3.6-Inch Wall Mount Touchpanel: TPS-4L • 5 Operations & Installation Guide – DOC. 6449A...
-
Page 10: Industry Compliance
Pin 1 is on the far left. Industry Compliance As of the date of manufacture, the TPS-4L has been tested and found to comply with specifications for CE marking and standards per EMC and Radiocommunications Compliance Labelling. -
Page 11: Setup
For more details, refer to “Check Network Wiring” on page 27. Identity Code The Net ID of the TPS-4L has been factory set to 03. The Net IDs of multiple TPS-4L devices in the same system must be unique. The Net ID is set using the internal setup menu (refer to “Interface Menu”... -
Page 12: Configuring The Touchpanel
NOTE: The touch screen responds to both finger and stylus commands. Since the screen is small, Crestron recommends that a stylus (not supplied) be used to ensure the accuracy of commands. Use a stylus that will not damage the surface of the screen. -
Page 13: Setup Menu
Ethernet. The CIP Enable and Disable buttons determine the touchpanel’s ability to communicate with other Crestron devices using CIP. CIP must be enabled for the touchpanel to communicate with other Crestron Ethernet devices. After the Cresnet ID setting has been verified and the communications protocol has been selected, press Return to save the settings and return to the SETUP MENU. -
Page 14: Diagnostics Menu
DIAGNOSTICS MENU The Diagnostics button from the MAIN MENU should only be used under supervision from a Crestron customer service representative during telephone support. Many options available from the DIAGNOSTICS MENU, shown to the left, are numeric in nature and their interpretation is beyond the scope of this manual. -
Page 15: Mounting Options
Mounting to the Wall The TPS-4L is designed to be mounted in a wall or lectern. Two overlay cutout templates (0V40078) are supplied. One is in the shape of the required opening; the other is similar to a frame, with the inner area of the frame the shape of the required opening. - Page 16 Screw, #06-AB, 2-1/2”, Pan Head 2014276 NOTE: The following drawings are not to scale. Do not attempt to use them to prepare the hole in the mounting surface. TPS-4L Cutout Dimensions (4007314, 1 of 2) 4 1/4 in (105 mm) 5 1/2 in (140 mm) 12 •...
- Page 17 4. Remove the template, and then cut out and remove the traced shape to produce the required opening. NOTE: Before inserting the TPS-4L in the mounting hole, ensure that all required cables have been installed in the wall. 5. Install the four supplied #6x 2-½” screws and mounting clips as shown in the diagram on the next page (two on the top and two on the bottom).
- Page 18 Attaching the Screws and Mounting Clips 6. Connect the Cresnet cable, using the supplied mating connector, to the Cresnet port; attach the Ethernet cable, if required, and position the TPS-4L in the mounting hole. Insert the TPS-4L Into the Mounting Surface 14 •...
-
Page 19: Touchpanel Removal
Use the Crestron Engraver software package to obtain a custom-engraved bezel for the TPS-4L. Install the bezel as follows. 1. Carefully position the bezel over the face of the touchpanel. 2. Ensure that the bezel is oriented properly and press against the TPS-4L until the bezel snaps into place. Touchpanel Removal... -
Page 20: Recommended Cleaning
Doing so can crack the screen and damage the touchpanel. Label the Buttons Use Crestron Engraver software to print custom labels for the TPS-4L’s front panel buttons and LEDS. Crestron recommends printing on 100-pound paper. Paper weighing less than 100 pounds will tend to crumple while sliding in, while paper weighing more than 100 pounds may not fit. -
Page 21: Programming Software
Have a question or comment about Crestron software? Answers to frequently asked questions (FAQs) can be viewed in the Online Help section of the Crestron website. To post a question or view questions you have submitted to Crestron’s True Blue Support, log in at http://support.crestron.com. - Page 22 Crestron Isys TPS-4L • To incorporate the TPS-4L into the system, drag the PRO2 from the Control Systems folder of the Device Library and drop it in the System Views. • The System Views lower pane displays the PRO2 system tree. This tree can be expanded to display and configure the communications ports.
- Page 23 TPS-4L 3.6-Inch Wall Mount Touchpanel • Additional TPS-4L devices are assigned different Net ID (for Cresnet devices) or IP ID (for Ethernet devices) numbers as they are added. • If necessary, double click a device to open the “Device Settings” window and change the Net ID or IP ID as shown in the following figures.
-
Page 24: Programming With Visiontools Pro-E
Pre-recorded WAV files for voice prompts and responses are available from Crestron. These files can be stored into and programmed for use in the touchpanel directly or may be edited with the Sound Recorder. For example, the individual files can be combined to create custom messages. - Page 25 This conversion to a 16-bit image may cause the loss of some subtle shading. To compensate for this, use the dithering to simulate the original shading. Various dithering types are available. Refer to the illustrations on the next page. 3.6-Inch Wall Mount Touchpanel: TPS-4L • 21 Operations & Installation Guide – DOC. 6449A...
-
Page 26: Multibyte International Characters
Multibyte character fonts require more than the usual eight bits to specify a character. This occurs when a language has more than 256 characters (2 ) in a font. 22 • 3.6-Inch Wall Mount Touchpanel: TPS-4L Operations & Installation Guide – DOC. 6449A... -
Page 27: Example Program
Windows. Example Program An example program for the TPS-4L is available from the Crestron website (www.crestron.com/exampleprograms). 3.6-Inch Wall Mount Touchpanel: TPS-4L • 23 Operations & Installation Guide – DOC. 6449A... -
Page 28: Uploading And Upgrading
Use the Address Book in Crestron Toolbox to create an entry for the TPS-4L using the expected communication protocol (Indirect). Select the Cresnet ID of the TPS-4L and the address book entry of the control system that is connected to the TPS-4L. -
Page 29: Programs, Projects And Firmware
• Select Functions | IP Table Setup. • Add, modify or delete entries in the IP table. The TPS-4L can have only one IP table entry. • A defined IP table can be saved to a file or sent to the device. -
Page 30: Problem Solving
3.6-Inch Wall Mount Touchpanel Crestron Isys TPS-4L Problem Solving Troubleshooting The following table provides corrective action for possible trouble situations. If further assistance is required, please contact a Crestron customer service representative. TPS-4L Troubleshooting TROUBLE POSSIBLE CAUSE(S) CORRECTIVE ACTION Device does not... -
Page 31: Check Network Wiring
Cresnet power usage of the entire chain. If the unit is home-run from a Crestron system power supply network port, the Cresnet power usage of that unit is the Cresnet power usage of the entire run. The wire gauge and the Cresnet power usage of the run should be used in the following equation to calculate the cable length value on the equation’s left side. -
Page 32: Reference Documents
For assistance in your local time zone, refer to the Crestron website (www.crestron.com/offices) for a listing of Crestron worldwide offices. You can also log onto the online help section of the Crestron website (www.crestron.com/onlinehelp) to ask questions about Crestron products. First-time users will need to establish a user account to fully benefit from all available features. -
Page 33: Software License Agreement
This Agreement may only be modified by a writing signed by an authorized officer of Crestron. Updates may be licensed to You by Crestron with additional or different terms. This is the entire agreement between Crestron and You relating to the Software and it supersedes any prior representations, discussions, undertakings, communications or advertising relating to the Software. - Page 34 “applets” incorporated into the Software), the accompanying media and printed materials and any copies of the Software are owned by Crestron or its suppliers. The Software is protected by copyright laws and international treaty provisions. Therefore, you must treat the Software like any other copyrighted material, subject to the provisions of this Agreement.
-
Page 35: Return And Warranty Policies
Purchasers should inquire of the dealer regarding the nature and extent of the dealer's warranty, if any. CRESTRON shall not be liable to honor the terms of this warranty if the product has been used in any application other than that for which it was intended or if it has been subjected to misuse, accidental damage, modification or improper installation procedures. - Page 36 Crestron Electronics, Inc. Operations & Installation Guide – DOC. 6449A 15 Volvo Drive Rockleigh, NJ 07647 (2014335) Tel: 888.CRESTRON 12.07 Fax: 201.767.7576 Specifications subject to www.crestron.com change without notice.
Need help?
Do you have a question about the TPS-4L and is the answer not in the manual?
Questions and answers