Lexmark MS310 Quick Refence Manual
Hide thumbs
Also See for MS310:
- Service manual (267 pages) ,
- User manual (205 pages) ,
- Manual (110 pages)
Table of Contents
Advertisement
Quick Links
Advertisement
Table of Contents

Subscribe to Our Youtube Channel
Related Manuals for Lexmark MS310


Summary of Contents for Lexmark MS310
-
Page 1: Quick Reference
Quick Reference www.lexmark.com... -
Page 2: Table Of Contents
Contents Learning about the printer................5 Using the printer control panel.........................5 Understanding the printer control panel light sequences................6 Loading paper and specialty media..............9 Setting the paper size and type.........................9 Configuring Universal paper settings......................10 Using the standard bin and paper stop....................10 Loading trays............................11 Loading the multipurpose feeder......................15 Linking and unlinking trays........................19 Linking and unlinking trays ..........................19... - Page 3 Imaging unit low [84.xy] ...........................49 Imaging unit nearly low [84.xy] ........................49 Imaging unit very low [84.xy]..........................50 Non-Lexmark imaging unit, see User’s Guide [33.xy] ..................51 Replace imaging unit, 0 estimated pages remain [84.xy] .................52 Reinstall missing or unresponsive imaging unit [31.xy] ..................53 Replace unsupported imaging unit [32.xy] .......................54...
- Page 4 Too many trays attached [58]...........................84...
-
Page 5: Learning About The Printer
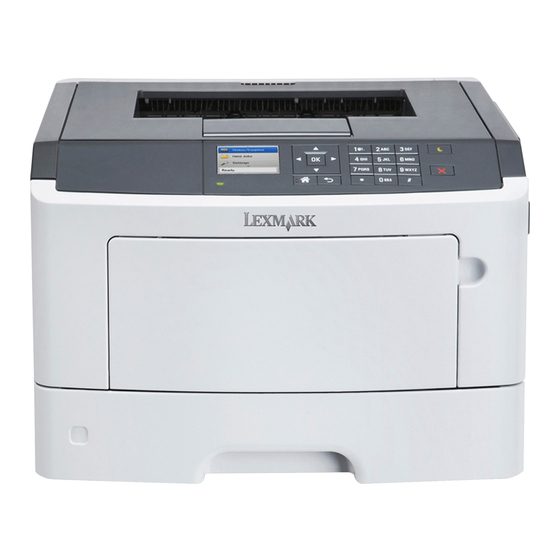
Learning about the printer Note: For network printers or printers connected to a print server, you can also check the status of your printer through the Embedded Web Server. Using the printer control panel Light or button Color Description Error light Yellow An error has occurred. -
Page 6: Understanding The Printer Control Panel Light Sequences
Light or button Color Description Sleep button and light Amber Use this to enable Sleep mode or Hibernate mode. Start button and light Green Use this to initiate a print job. Stop or cancel button Use this to cancel a print job. Understanding the printer control panel light sequences The printer control panel lights can mean different things, depending on the light sequence. - Page 7 Message Replace unsupported imaging unit Toner cartridge, imaging unit mismatch Canceling print job Flushing buffer Resolution reduced Non-Lexmark toner cartridge Non-Lexmark imaging unit Printer had to restart Toner cartridge very low Imaging unit very low Toner cartridge nearly Imaging unit nearly low...
- Page 8 Light sequence Message Waiting Busy Not ready If the printer control panel light sequence matches a light sequence in the “Primary light sequence” column of the following table, then press twice quickly on the printer control panel. Search for a matching light sequence in the “Supplemental light sequence”...
-
Page 9: Loading Paper And Specialty Media
Primary light sequence Supplemental light sequence Message Incorrect paper size Memory full Paper jam, clear standard bin Paper jam, remove standard tray to clear duplex Paper jam, open rear door Paper jam, remove standard tray to clear duplex Paper jam, remove standard tray to clear duplex Paper jam, open front... -
Page 10: Configuring Universal Paper Settings
Using the printer settings on the computer Depending on your operating system, access the Paper menu using the Local Printer Settings Utility or Printer Settings. Note: The paper size and type settings will be saved until you reset factory default settings. Configuring Universal paper settings The Universal paper size is a user‑defined setting that lets you print on paper sizes that are not preset in the printer menus. -
Page 11: Loading Trays
To open the paper stop, pull it so that it flips forward. Note: Close the paper stop when moving the printer to another location. Loading trays CAUTION—POTENTIAL INJURY: To reduce the risk of equipment instability, load each tray separately. Keep all other trays closed until needed. - Page 12 ‑ Blinking Squeeze and then slide the width guide tab to the correct position for the size of the paper you are loading.
- Page 13 Squeeze and then slide the length guide tab to the correct position for the size of the paper you are loading. Notes: • For some paper sizes like letter, legal, and A4, squeeze and slide the length guide tab backward to accommodate their length.
- Page 14 Flex the sheets back and forth to loosen them, and then fan them. Do not fold or crease the paper. Straighten the edges on a level surface. Load the paper stack. Note: Make sure the paper is below the maximum fill indicator located on the side of the width guide. Notes: •...
-
Page 15: Loading The Multipurpose Feeder
Insert the tray. From the Embedded Web Server or your computer, set the paper size and type in the Paper menu to match the paper loaded in the tray. Notes: • If the printer is not connected to a network, then access the Paper menu using Local Printer Settings Utility or Printer Settings, depending on your operating system. - Page 16 Pull the multipurpose feeder extender. Pull the extender gently so that the multipurpose feeder is fully extended and open. Squeeze the tab on the left width guide, and then move the guides for the paper you are loading.
- Page 17 Prepare the paper or specialty media for loading. • Flex sheets of paper back and forth to loosen them, and then fan them. Do not fold or crease the paper. Straighten the edges on a level surface. • Hold transparencies by the edges. Flex the stack of transparencies back and forth to loosen them, and then fan them.
- Page 18 • Load paper, transparencies, and card stock with the recommended printable side faceup and the top edge entering the printer first. For more information on loading transparencies, see the packaging the transparencies came in. Note: When loading A6‑size paper, make sure the multipurpose feeder extender rests lightly against the edge of the paper so that the last few sheets of paper remain in place.
-
Page 19: Linking And Unlinking Trays
• Load letterhead faceup with the top edge entering the printer first. For two‑sided (duplex) printing, load letterhead facedown with the bottom edge of the sheet entering the printer first. • Load envelopes with the flap on the left side facedown. Warning—Potential Damage: Never use envelopes with stamps, clasps, snaps, windows, coated linings, or self‑stick adhesives. -
Page 20: Configuring A Custom Paper Type Name
Notes: • Print a network setup page or menu settings page, and then locate the IP address in the TCP/IP section. The IP address appears as four sets of numbers separated by periods, such as 123.123.123.123. • If you are using a proxy server, then temporarily disable it to load the Web page correctly. Click Settings >... -
Page 21: Assigning A Custom Paper Type
• If you are using a proxy server, then temporarily disable it to load the Web page correctly. Click Settings > Paper Menu > Custom Types. Select a custom paper type name, and then select a custom paper type. Note: Plain Paper is the factory default paper type for all user‑defined custom names. Click Submit. -
Page 22: Adjusting Toner Darkness
For Windows users With a document open, click File > Print. Click Properties, Preferences, Options, or Setup. Adjust the settings, if necessary. Click OK > Print. For Macintosh users Customize the settings in the Page Setup dialog. With a document open, choose File > Page Setup. Choose a paper size or create a custom size to match the paper loaded. -
Page 23: Canceling A Print Job
Canceling a print job Canceling a print job from the computer For Windows users Open the printers folder. In Windows 8 From the Search charm, type run, and then navigate to: Apps list > Run > type control printers > OK In Windows 7 or earlier Click or click Start, and then click Run. -
Page 24: [X]-Page Jam, Open Front Door. [20Y.xx]
Access area Description Standard bin Rear door Standard 250‑sheet tray (Tray 1) Optional 250‑ or 550‑sheet tray (Tray 2) Multipurpose feeder door Front door Notes: • When Jam Assist is set to On, the printer automatically flushes blank pages or pages with partial prints to the standard bin after a jammed page has been cleared. - Page 25 ‑ On ‑ On If the printer control panel light sequence matches the light sequence in the preceding illustration, then press twice quickly to see the supplemental light sequence. ‑ On ‑ On ‑ On...
- Page 26 If the supplemental light sequence matches the light sequence in the preceding illustration, then do the following. CAUTION—HOT SURFACE: The inside of the printer might be hot. To reduce the risk of injury from a hot component, allow the surface to cool before touching it. Press the button on the right side of the printer, and then open the front door.
- Page 27 Place the imaging unit aside on a flat, smooth surface. Warning—Potential Damage: Do not expose the imaging unit to direct light for more than 10 minutes. Extended exposure to light can cause print quality problems. Lift the green flap in front of the printer. Firmly grasp the jammed paper on each side, and then gently pull it out.
- Page 28 Insert the imaging unit by aligning the arrows on the side rails of the unit with the arrows on the side rails inside the printer, and then insert the imaging unit into the printer. Insert the toner cartridge by aligning the side rails of the cartridge with the arrows on the side rails inside the printer, and then insert the cartridge into the printer.
-
Page 29: [X]-Page Jam, Open Rear Door. [20Y.xx]
[x]‑page jam, open rear door. [20y.xx] ‑ On ‑ On If the printer control panel light sequence matches the light sequence in the preceding illustration, then press twice quickly to see the supplemental light sequence. ‑ On ‑ On ‑ On... - Page 30 If the supplemental light sequence matches the light sequence in the preceding illustration, then do the following. Press the button on the right side of the printer, and then open the front door. Gently pull down the rear door. CAUTION—HOT SURFACE: The inside of the printer might be hot. To reduce the risk of injury from a hot component, allow the surface to cool before touching it.
-
Page 31: [X]-Page Jam, Clear Standard Bin. [20Y.xx]
Close the rear and front doors. From the printer control panel, press to clear the message and continue printing. [x]‑page jam, clear standard bin. [20y.xx] ‑ On ‑ On... - Page 32 If the printer control panel light sequence matches the light sequence in the preceding illustration, then press twice quickly to see the supplemental light sequence. ‑ On ‑ On ‑ On If the supplemental light sequence matches the light sequence in the preceding illustration, then do the following. Firmly grasp the jammed paper on each side, and then gently pull it out.
-
Page 33: [X]-Page Jam, Remove Tray 1 To Clear Duplex. [23Y.xx]
[x]‑page jam, remove tray 1 to clear duplex. [23y.xx] ‑ On ‑ On If the printer control panel light sequence matches the light sequence in the preceding illustration, then press twice quickly to see the supplemental light sequence. Supplemental light sequences Light sequence ‑... - Page 34 Light sequence ‑ On ‑ Blinking ‑ On ‑ On ‑ On ‑ On If the supplemental light sequence matches any of the light sequences in the preceding illustrations, then do the following. CAUTION—HOT SURFACE: The inside of the printer might be hot. To reduce the risk of injury from a hot component, allow the surface to cool before touching it.
- Page 35 Locate the blue lever, and then pull it down to release the jam. Note: If the jammed paper is not visible in the duplex area, then open the rear door, and then gently remove the jammed paper. Make sure all paper fragments are removed. Firmly grasp the jammed paper on each side, and then gently pull it out.
-
Page 36: [X]-Page Jam, Remove Tray [X]. [24Y.xx]
[x]‑page jam, remove tray [x]. [24y.xx] ‑ On ‑ On If the printer control panel light sequence matches the light sequence in the preceding illustration, then press twice quickly to see the supplemental light sequence. Supplemental light sequences Light sequence ‑... - Page 37 Light sequence ‑ On ‑ On ‑ On ‑ On If the supplemental light sequence matches any of the light sequences in the preceding illustrations, then do the following. Pull out the tray completely. Firmly grasp the jammed paper on each side, and then gently pull it out. Note: Make sure all paper fragments are removed.
-
Page 38: [X]-Page Jam, Clear Manual Feeder. [250.Xx]
Insert the tray. From the printer control panel, press to clear the message and continue printing. [x]‑page jam, clear manual feeder. [250.xx] ‑ On ‑ On If the printer control panel light sequence matches the light sequence in the preceding illustration, then press twice quickly to see the supplemental light sequence. - Page 39 ‑ On ‑ On ‑ On ‑ On If the supplemental light sequence matches the light sequence in the preceding illustration, then do the following. From the multipurpose feeder, firmly grasp the jammed paper on each side, and then gently pull it out. Note: Make sure all paper fragments are removed.
-
Page 40: Understanding The Printer Messages
Check if both the toner cartridge and imaging unit are MICR (Magnetic Ink Character Recognition) or non-MICR supplies. Note: For a list of supported supplies, see the “Ordering supplies” section of the User's Guide or visit www.lexmark.com. Change the toner cartridge or imaging unit so that both are MICR or non‑MICR supplies. Notes: •... -
Page 41: Cartridge Low [88.Xx]
Cartridge low [88.xx] ‑ On ‑ On If the printer control panel light sequence matches the light sequence in the preceding illustration, then you may need to order a toner cartridge. If necessary, press on the printer control panel to continue printing. Cartridge nearly low [88.xy] ‑... -
Page 42: Cartridge Very Low [88.Xy]
‑ On ‑ On If the printer control panel light sequence matches the light sequence in the preceding illustration, then press the printer control panel, if necessary, to continue printing. Cartridge very low [88.xy] ‑ Blinking ‑ On ‑ On If the printer control panel light sequence matches the light sequence in the preceding illustration, then you may need to replace the toner cartridge very soon. -
Page 43: Non-Lexmark Cartridge, See User's Guide [33.Xy]
Your Lexmark printer is designed to function best with genuine Lexmark supplies and parts. Use of third-party supplies or parts may affect the performance, reliability, or life of the printer and its imaging components. -
Page 44: Replace Cartridge, 0 Estimated Pages Remain [88.Xy]
Replace cartridge, 0 estimated pages remain [88.xy] ‑ On ‑ On If the printer control panel light sequence matches the light sequence in the preceding illustration, then press twice quickly to see the supplemental light sequence. ‑ On ‑ Blinking ‑... -
Page 45: Replace Cartridge, Printer Region Mismatch [42.Xy]
For more information, see the instruction sheet that came with the supply or see the “Replacing supplies” section of the User’s Guide. Note: If you do not have a replacement toner cartridge, then see the “Ordering supplies” section of the User’s Guide or visit www.lexmark.com. Replace cartridge, printer region mismatch [42.xy] ‑ On... - Page 46 If the printer control panel light sequence matches the light sequence in the preceding illustration, then press twice quickly to see the supplemental light sequence. ‑ On ‑ Blinking ‑ On If the supplemental light sequence matches the light sequence in the preceding illustration, then install a toner cartridge that matches the region number of the printer.
-
Page 47: Reinstall Missing Or Unresponsive Cartridge [31.Xy]
Reinstall missing or unresponsive cartridge [31.xy] ‑ On ‑ On If the printer control panel light sequence matches the light sequence in the preceding illustration, then press twice quickly to see the supplemental light sequence. ‑ On ‑ On ‑ On... -
Page 48: Replace Unsupported Cartridge [32.Xy]
For more information, see the instruction sheet that came with the supply. Note: If you do not have a replacement toner cartridge, then see the “Ordering supplies” section of the User’s Guide or visit www.lexmark.com. -
Page 49: Imaging Unit Messages
Imaging unit messages Imaging unit low [84.xy] ‑ Blinking ‑ On If the printer control panel light sequence matches the light sequence in the preceding illustration, then you may need to order an imaging unit. If necessary, press on the printer control panel to continue printing. Imaging unit nearly low [84.xy]... -
Page 50: Imaging Unit Very Low [84.Xy]
‑ Slowly blinking ‑ Blinking ‑ On If the printer control panel light sequence matches the light sequence in the preceding illustration, then press the printer control panel, if necessary, to continue printing. Imaging unit very low [84.xy] ‑ Blinking ‑... -
Page 51: Non-Lexmark Imaging Unit, See User's Guide [33.Xy]
Your Lexmark printer is designed to function best with genuine Lexmark supplies and parts. Use of third-party supplies or parts may affect the performance, reliability, or life of the printer and its imaging components. -
Page 52: Replace Imaging Unit, 0 Estimated Pages Remain [84.Xy]
If the printer control panel light sequence matches the light sequence in the preceding illustration, then replace the imaging unit. For more information, see the instruction sheet that came with the supply. Note: If you do not have a replacement imaging unit, then see the “Ordering supplies” section of the User’s Guide or visit www.lexmark.com. -
Page 53: Reinstall Missing Or Unresponsive Imaging Unit [31.Xy]
Reinstall missing or unresponsive imaging unit [31.xy] ‑ On ‑ Blinking If the printer control panel light sequence matches the light sequence in the preceding illustration, then press twice quickly to see the supplemental light sequence. ‑ On ‑ On ‑... -
Page 54: Replace Unsupported Imaging Unit [32.Xy]
For more information, see the instruction sheet that came with the supply. Note: If you do not have a replacement imaging unit, then see the “Ordering supplies” section of the User’s Guide or visit www.lexmark.com. -
Page 55: Paper Loading Messages
Paper loading messages Change [paper source] to [custom type name], load [orientation] ‑ Blinking ‑ On If the printer control panel light sequence matches the light sequence in the preceding illustration, then try one or more of the following: • Load the tray or feeder with the correct size and type of paper, and then press on the printer control panel to continue printing. -
Page 56: Change [Paper Source] To [Custom String] Load [Orientation]
Change [paper source] to [custom string] load [orientation] ‑ Blinking ‑ On If the printer control panel light sequence matches the light sequence in the preceding illustration, then try one or more of the following: • Load the tray or feeder with the correct size and type of paper, and then press on the printer control panel to continue printing. -
Page 57: Change [Paper Source] To [Paper Size] Load [Orientation]
Change [paper source] to [paper size] load [orientation] ‑ Blinking ‑ On If the printer control panel light sequence matches the light sequence in the preceding illustration, then try one or more of the following: • Load the tray or feeder with the correct size and type of paper, and then press on the printer control panel to continue printing. -
Page 58: Change [Paper Source] To [Paper Type] [Paper Size] Load [Orientation]
Change [paper source] to [paper type] [paper size] load [orientation] ‑ Blinking ‑ On If the printer control panel light sequence matches the light sequence in the preceding illustration, then try one or more of the following: • Load the tray or feeder with the correct size and type of paper, and then press on the printer control panel to continue printing. -
Page 59: Incorrect Paper Size, Open [Paper Source] [34]
Incorrect paper size, open [paper source] [34] ‑ On ‑ On If the printer control panel light sequence matches the light sequence in the preceding illustration, then press twice quickly to see the supplemental light sequence. ‑ On ‑ On ‑... -
Page 60: Load [Paper Source] With [Custom Type Name] [Orientation]
‑ On If the supplemental light sequence matches the light sequence in the preceding illustration, then try one or more of the following: • Load the correct size of paper. • From the printer control panel, press to clear the light sequence and print using a different tray. •... -
Page 61: Load [Paper Source] With [Custom Type String] [Orientation]
If the printer control panel light sequence matches the light sequence in the preceding illustration, then try one or more of the following: • Load the tray or feeder with the correct size and type of paper. • From the printer control panel, press to continue printing. -
Page 62: Load [Paper Source] With [Paper Size] [Orientation]
Load [paper source] with [paper size] [orientation] ‑ On ‑ On If the printer control panel light sequence matches the light sequence in the preceding illustration, then try one or more of the following: • Load the tray or feeder with the correct size of paper. •... -
Page 63: Load [Paper Source] With [Paper Type] [Paper Size] [Orientation]
Load [paper source] with [paper type] [paper size] [orientation] ‑ On ‑ On If the printer control panel light sequence matches the light sequence in the preceding illustration, then try one or more of the following: • Load the tray or feeder with the correct size and type of paper. •... -
Page 64: Load Manual Feeder With [Custom Type Name] [Orientation]
Load Manual Feeder with [custom type name] [orientation] ‑ On ‑ On If the printer control panel light sequence matches the light sequence in the preceding illustration, then try one or more of the following: • Load the multipurpose feeder with the correct size and type of paper. •... -
Page 65: Load Manual Feeder With [Custom Type String] [Orientation]
Load Manual Feeder with [custom type string] [orientation] ‑ On ‑ On If the printer control panel light sequence matches the light sequence in the preceding illustration, then try one or more of the following: • Load the multipurpose feeder with the correct size and type of paper. •... -
Page 66: Load Manual Feeder With [Paper Size] [Orientation]
Load Manual Feeder with [paper size] [orientation] ‑ On ‑ On If the printer control panel light sequence matches the light sequence in the preceding illustration, then try one or more of the following: • Load the feeder with the correct size and type of paper. •... -
Page 67: Load Manual Feeder With [Paper Type] [Paper Size] [Orientation]
Load Manual Feeder with [paper type] [paper size] [orientation] ‑ On ‑ On If the printer control panel light sequence matches the light sequence in the preceding illustration, then try one or more of the following: • Load the multipurpose feeder with the correct size and type of paper. •... -
Page 68: Remove Paper From Standard Output Bin
Remove paper from standard output bin ‑ Blinking If the printer control panel light sequence matches the light sequence in the preceding illustration, then do the following: Remove the paper stack from the standard output bin. From the printer control panel, press to continue printing. - Page 69 ‑ On ‑ On If the printer control panel light sequence matches the light sequence in the preceding illustration, then press twice quickly to see the supplemental light sequence. ‑ On ‑ Blinking ‑ On If the supplemental light sequence matches the light sequence in the preceding illustration, then try one or more of the following: •...
-
Page 70: Standard Parallel Port Disabled [56]
Standard parallel port disabled [56] ‑ On ‑ On If the printer control panel light sequence matches the light sequence in the preceding illustration, then press twice quickly to see the supplemental light sequence. ‑ On ‑ Slowly blinking ‑ Slowly blinking... -
Page 71: Standard Network Software Error [54]
‑ On If the supplemental light sequence matches the light sequence in the preceding illustration, then try one or more of the following: • From the printer control panel, press to continue printing. Note: The printer discards any data received through the parallel port. •... - Page 72 If the printer control panel light sequence matches the light sequence in the preceding illustration, then press twice quickly to see the supplemental light sequence. ‑ On ‑ On ‑ On If the supplemental light sequence matches the light sequence in the preceding illustration, then try one or more of the following: •...
-
Page 73: Standard Usb Port Disabled [56]
Standard USB port disabled [56] ‑ On ‑ On If the printer control panel light sequence matches the light sequence in the preceding illustration, then press twice quickly to see the supplemental light sequence. ‑ On ‑ Blinking ‑ Blinking... -
Page 74: Insufficient Memory Error Messages
‑ On If the supplemental light sequence matches the light sequence in the preceding illustration, then try one or more of the following: • From the printer control panel, press to continue printing. Note: The printer discards any data received through the USB port. •... - Page 75 If the printer control panel light sequence matches the light sequence in the preceding illustration, then press twice quickly to see the supplemental light sequence. ‑ On ‑ On ‑ On If the supplemental light sequence matches the light sequence in the preceding illustration, then try one or more of the following: •...
-
Page 76: Insufficient Memory To Support Resource Save Feature [35]
Insufficient memory to support Resource Save feature [35] ‑ On ‑ On If the printer control panel light sequence matches the light sequence in the preceding illustration, then press twice quickly to see the supplemental light sequence. ‑ On ‑ Blinking ‑... -
Page 77: Memory Full [38]
If the supplemental light sequence matches the light sequence in the preceding illustration, then press on the printer control panel to clear the light sequence. The job will be printed without using Resource Save. Memory full [38] ‑ On ‑ On If the printer control panel light sequence matches the light sequence in the preceding illustration, then press twice quickly to see the supplemental light sequence. -
Page 78: Miscellaneous Messages
‑ On ‑ On ‑ On ‑ On If the supplemental light sequence matches the light sequence in the preceding illustration, then try one or more of the following: • From the printer control panel, press to continue printing. A data loss will occur. •... -
Page 79: Complex Page, Some Data May Not Have Printed [39]
Complex page, some data may not have printed [39] ‑ On ‑ On If the printer control panel light sequence matches the light sequence in the preceding illustration, then press twice quickly to see the supplemental light sequence. ‑ On ‑... -
Page 80: Ppds Font Error [50]
If the supplemental light sequence matches the light sequence in the preceding illustration, then try one or more of the following: • From the printer control panel, press to continue printing. A data loss may occur. • From the printer control panel, press to cancel the print job. - Page 81 If the printer control light sequence matches the light sequence in the preceding illustration, then press twice quickly to see the supplemental light sequence. ‑ On ‑ Blinking ‑ On If the supplemental light sequence matches the light sequence in the preceding illustration, then try one or more of the following: •...
-
Page 82: Printer Had To Restart. Last Job May Be Incomplete
‑ Blinking ‑ Blinking ‑ Blinking ‑ On If the printer control panel light sequence matches the light sequence in the preceding illustration, then press the printer control panel to continue printing. For more information, visit http://support.lexmark.com or contact customer support. -
Page 83: Service Error
If the printer control panel light sequence matches the light sequence in the preceding illustration, then turn off the printer, and then turn it back on. If the lights are still blinking after 10 seconds, then the printer may need to be serviced. Visit http://support.lexmark.com or contact your system support person. - Page 84 Too many trays attached [58] ‑ On ‑ On If the printer control panel light sequence matches the light sequence in the preceding illustration, then press twice quickly to see the supplemental light sequence. ‑ On ‑ On...
- Page 85 ‑ On ‑ On If the supplemental light sequence matches the light sequence in the preceding illustration, then do the following: Turn off the printer. Unplug the power cord from the electrical outlet. Note: Optional trays lock together when stacked. Remove stacked trays one at a time from the top to the bottom.
Need help?
Do you have a question about the MS310 and is the answer not in the manual?
Questions and answers