Table of Contents
Advertisement
Quick Links
Advertisement
Table of Contents

Subscribe to Our Youtube Channel
Related Manuals for TechniSat DigitRadio 250


Summary of Contents for TechniSat DigitRadio 250
-
Page 1: Instruction Manual
Instruction manual DigitRadio 250 DAB+/DAB FM Radio... -
Page 2: Table Of Contents
Contents Contents Illustrations Items in the Box Using the Radio Safely Setting Up the Radio Using Batteries/Rechargeable Batteries Disposal Instructions Directives & Standards Features of the Radio Preparing the Radio for Use Improving Aerial Reception Using Headphones Switching the Radio On/Off Using the Radio for the First Time Adjusting the Speaker Volume Switching between DAB &... - Page 3 Scan Settings Audio Settings Display Backlight Factory Default Settings Software Version Technical Data...
-
Page 4: Illustrations
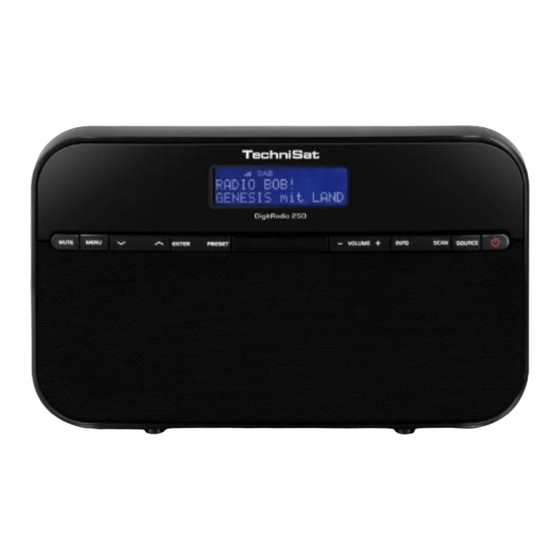
Illustrations ON/OFF Enter Source Tuning up/down Scan Menu Info Mute Volume +/- Headphone jack Speaker Telescopic aerial LCD Display DC jack Preset Battery compartment... -
Page 5: Items In The Box
Items in the Box Please ensure that all the following accessories are in the box: • DAB+/DAB FM Radio with telescopic aerial • Mains adapter, 5V, 1000 mA • Instruction manual Using the Radio Safely Please read all the safety instructions carefully and store them for future reference. - Page 6 • Do not operate the radio near to bathtubs etc. or where water may splash onto the radio. • If you take the radio from a cold to a warm environment, condensation may collect inside the radio. In this case, wait around an hour before using the radio.
-
Page 7: Setting Up The Radio
Setting Up the Radio • Place the radio on a firm, secure and horizontal surface. Make sure the area is well ventilated. • Do not place the radio on soft surfaces such as carpets and blankets or near to curtains and wall hangings. •... - Page 8 • Leaking batteries may damage the radio. If you are not going to use the radio for a long time, remove the batteries from the battery compartment. Caution! • Leaking or damaged batteries can irritate the skin. Use suitable protective gloves. Clean the battery compartment with a dry cloth.
- Page 9 Replacing Batteries > Open the battery compartment (16) by pressing gently on the arrows on the battery compartment cover and sliding the cover in the direction of the arrows to remove the cover. > Remove any batteries from the compartment. >...
-
Page 10: Disposal Instructions
Disposal Instructions Risk of suffocation! Keep packaging and parts of packaging away from children. There is a risk of suffocation from the plastic and other packaging materials. Disposing of packaging The packaging material used for your radio consists entirely of recyclable materials. Please sort the packaging appropriately and dispose of it as per local waste disposal regulations. -
Page 11: Directives & Standards
This radio is marked in accordance with the Waste Electrical and Electronic Equipment (WEEE) Directive 2002/96/EC. At the end of its useful life, this radio must not be disposed of with your normal household waste. It must be taken to a recycling collection point for electrical and electronic equipment. -
Page 12: Features Of The Radio
Features of the Radio • This digital DAB+ Radio uses a new digital format that delivers crystal-clear sound in CD quality. • The radio can receive the following frequencies: FM 87.5-108 MHz (analogue) and DAB 174.9-239.2 MHz (digital). • You can save 10 stations as favourites in each different mode (DAB and FM). -
Page 13: Preparing The Radio For Use
Preparing the Radio for Use Use the supplied mains adapter to connect the radio to the mains (230 V ~ / 50 Hz). > To power on the radio, first connect the mains adapter cable to the 5V DC jack (page 5 #15) on the radio and then plug the adapter into a 230 V ~ / 50 Hz wall socket. -
Page 14: Using Headphones
Using Headphones Hearing loss! Do not listen to the radio at high volume with headphones. Doing so can cause permanent hearing damage. Turn down the radio volume to the lowest volume before using headphones. When you connect headphones (not included), the radio speaker is muted. -
Page 15: Using The Radio For The First Time
Using the Radio for the First Time LISTEN TO DAB RADIO When using the radio for the first time or after restoring to factory default settings and switching Tune to DAB radio the radio on, the radio starts to scan for DAB When you enter the DAB mode for the first time, the radio player automatically radio stations automatically. -
Page 16: Switching Between Dab & Fm
Switching between DAB & FM > Press the Source (2) button to switch between DAB and FM radio. The new source you have selected is displayed each time you change mode. D A B M o d u s M o d u s DAB Mode What is DAB? DAB is a new digital format that delivers crystal-... - Page 17 Data compression Digital Radio exploits aspects of human hearing for data compression. The human ear does not detect sounds that are below a certain minimum volume. Data below the absolute threshold of hearing can therefore be filtered out. This is possible because the digital datastream also saves the relative volume of each unit of information to other units.
-
Page 18: Automatic Scan
Audio Stream Audio Streams in Digital Radio are continuous datastreams that contain MPEG 1 Audio Layer 2 Frames and therefore represent acoustic information. They are used to broadcast normal radio programmes, which you can listen to on the receiver side. Digital Radio uses the MUSICAM format with two MPEG-compliant PADs for additional information. -
Page 19: Manual Scan
> Press Enter (9) to start scanning. Once the scan has finished, the last radio station you were listening to is played again automatically. Manual Scan Use the manual scan to scan for a specific channel/frequency for stations. > Press Menu (11) to open the menu. >... -
Page 20: Selecting A Radio Station
Selecting a Radio Station > Press Tuning up/down (10) until the radio station you are looking for is displayed. > Press Enter (9) to switch to the selected radio station. Saving a Station as Favourite > To save a station as a favourite, press and hold Preset (8) until the following is displayed. -
Page 21: Dynamic Range Compression (Drc)
Dynamic Range Compression (DRC) The compression rate flattens dynamic variations and the associated variations in volume. > Open the menu by pressing the Menu (11) button. > Press Tuning up/down (10) until you have reached DRC. > Press Enter (9). >... -
Page 22: Information About The Selected Station
Information about the Selected Station > Press Info (4) repeatedly to access the following information about the selected station. • Title of the track being played • Artist of the track being played • Presenter of the current programme • Title of the current programme •... -
Page 23: Fm Mode
FM Mode Automatic Tuning > Press the Scan (3) button to scan automatically for the next station and play the station. Please see also the configuration under Scan Settings. Depending on the configuration and reception quality at your location, some stations may be missed or may have poor quality sound. -
Page 24: Saving A Station As Favourite
Saving a Station as Favourite > To save a station as a favourite, press and hold Preset (8) until the following is displayed. Stereo P r o g r . s p e i c h e r n < 2 : ( L e e r ) >... -
Page 25: Scan Settings
• Current time • Current date Scan Settings > Press Menu (11) to open the menu. > Press Tuning up/down (10) until you have reached Scan Settings. < S u c h l a u f E i n s t >... - Page 26 > Press Enter (9). A u d i o - E i n s t e l l < S t e r e o M o n o > > Press Tuning up/down (10) to choose whether audio should only be Mono (Mono only) or, if available, in stereo as well (Stereo or Mono).
-
Page 27: Display Backlight
Display Backlight > Open the menu by pressing the Menu (11) button. > Press Tuning up/down (10) until you have reached System. < S y s t e m > > Press Enter (9). > Press Tuning up/down (10) until you have reached Display Backlight. -
Page 28: Factory Default Settings
> Use Tuning up/down (10) to choose whether the display should be constantly illuminated (ON) or select a time from 10s to 180s after which the display will automatically be dimmed. > Exit by pressing Menu (11). Factory Default Settings >... -
Page 29: Software Version
When reset to factory default settings, the radio restarts and then automatically runs the setup for the first time the radio is used. Software Version > Open the menu by pressing the Menu (11) button. > Press Tuning up/down (10) until you have reached System. -
Page 30: Technical Data
Technical Data Reception range: DAB/DAB+ 174.928 – 239.200MHz 5A - 13F FM (VHF) 87.5-108MHz Audio power: 2x1Wrms Mains adapter - Input: 100-240 V AC, 50-60Hz - Output: 5 V DC / 1000 mA Batteries 4x1.5V Dimensions: 220mm x 129mm x 58mm Weight 0.43kg... - Page 32 Subject to change for amendments and printing errors. Version 05/14 Duplication and reproduction only with the publisher's approval. TechniSat and DigitRadio 250 are registered trademarks of TechniSat Digital GmbH PO Box 560 D-54541 Daun, Germany www.technisat.de This product is quality-tested and has a statutory warranty of 24 months from the date of purchase.
Need help?
Do you have a question about the DigitRadio 250 and is the answer not in the manual?
Questions and answers