Table of Contents
Advertisement
Advertisement
Table of Contents

Related Manuals for Paramount Fitness MP 3.5


Summary of Contents for Paramount Fitness MP 3.5
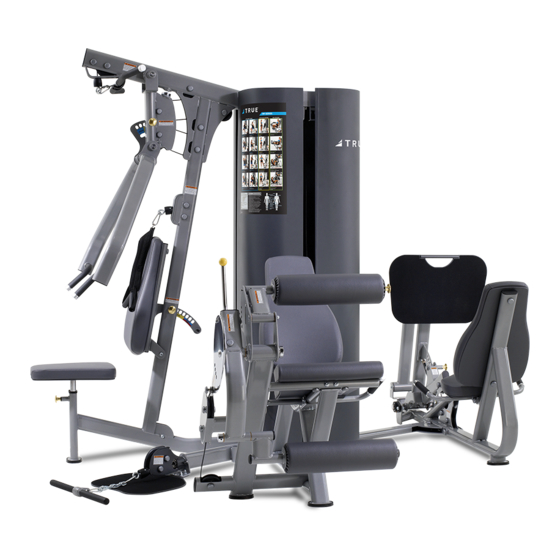
- Page 1 MP 3.5 - MP 4.0 L RESS SSEMBLY ANUAL P-3-4 063015...
- Page 2 1-800-721-2121 or 1-323-721-2121 Office hours are Monday-Friday, 7:30 am - 4:30 pm PST Or email us at nasales@paramountfitness.com Thank You for your patronage. Paramount Fitness Corporation 6450 East Bandini Blvd. Los Angeles, CA 90040 WARNING SERIOUS INJURIES TO USERS, BYSTANDERS OR INSTALLERS CAN OCCUR IF THE INSTRUCTIONS AND WARNINGS CONTAINED IN THIS MANUAL ARE NOT FOLLOWED.
-
Page 3: Table Of Contents
ABLE ONTENTS ....................AFETY ............ENERAL ARE AND AINTENANCE ..................REPARATION ............... RESS ARTON ONTENTS & A NSTALLATION SSEMBLY LP S 1: I ........NSTALL THE RESS ABLE LP S 2: A ......SSEMBLE ONNECTION IECE LP S 3: A .......... -
Page 4: Safety
AFETY ACILITY AND AFETY RECAUTIONS 1. Review and understand all of the warning labels affixed to this machine and on the facility safety sign. 2. Be certain that the machine operation is understood before it is used. Refer to the instructional Procedure Label affixed to the machine. - Page 5 AFETY 12d. This equipment is designed for standard olympic size weight plates with a 50mm bore (1.9”). 12e. Do not exceed the maximum weight capacity of the machine. Maximum plate size is 45 lbs. (25 kg.). 13. On Selectorized and Cable equipped machines: 13a.
- Page 6 AFETY AINTENANCE AFETY RECAUTIONS 1. Refer to Maintenance Schedule label on the machine as well as this manual for when to perform maintenance. 2. Check the function of your machine DAILY by verifying the following: • Inspect cables and end fittings for any signs of wear. Replace if worn, frayed or damaged with original Paramount replacement components.
- Page 7 13. Be sure all hardware is tight before using the machine. Retain these instructions for future reference. If you have any questions, do not hesitate to contact your Paramount dealer or Paramount Fitness Corp. at (800)721-2121 or nasales@paramountfitness.com.
-
Page 8: Preparation
REPARATION EQUIRED OOLS Ratchet Wrench and Sockets: 1/2” , 9/16”, 6” ratchet extension Wrenches: 1/2” , 9/16” , 7/8” and 15/16” (or an adjustable crescent wrench). Rubber mallet. Allen wrenches: (included with the machine) 3 mm, 5 mm, 6 mm, 8 mm, Hardware Measurement Guide: BHCS - BUTTON HEAD CAP SCREW SHCS - SOCKET HEAD CAP SCREW... -
Page 9: Leg Press Carton Contents
RESS ARTON ONTENTS (Carton: MPLPCTN) - Page 10 MP3/4 L RESS ARTON ONTENTS (Carton: MPLPKIT) Tagged for use only on MP3.5 or MP4.0 weight stack. Included in this box: -All Hardware for MP3.5 and MP4.0 Leg Press. -Assembly Manual for MP3.5 and MP4.0 Leg Press. -Weight Stack Labels...
- Page 11 STOP! This manual is for the installation of the Leg Press station on the MP3.5 or MP4.0 only. Once you have finished this Leg Press installation, please resume assembly in the MP3.0-MP3.5- MP4.0 Assembly Manual on page 46. Note: Be sure to check which weight stack is assigned to each station.
-
Page 12: Lp Step 1: Install Thel
LP S 1: I NSTALL THE RESS ABLE 1. Shown on this page is the general routing of the Leg press cable (P13-0216). The following pages show sections in greater detail. 2. This cable routing is identical for both configurations of the MP3.5. - Page 13 LP S 1: I NSTALL THE RESS ABLE 3/16” CABLE...
-
Page 14: Lp Step 2: Assembleb
LP S 2: A SSEMBLE ONNECTION IECE 1. Route the Leg Press cable through the Base Connection Assy as shown. P06-0880 2. Loosely assemble ALL hardware shown in this step. 3. After aligning all component edges and surfaces, tighten the hardware. Be Sure to Tighten This Bolt. -
Page 15: Lp Step 3: Assemble Lp
LP S 3: A SSEMBLE PRIGHT 1. The leg press can be mounted to two different locations on the mainframe when the cable column is not used. See pictures below. 2. Route the Leg Press cable through the opening in the Upright frame as shown 3. -
Page 16: Lp Step 4: Assemble The
LP S 4: A SSEMBLE THE RESS ABLE 1. Assemble the Pulleys, Hardware, and Cable as shown. 3/16” CABLE 2. Install the pulleys and associated hardware as you go along. 3. Be sure the cable and pulleys can move freely after installation. Top of Upright Frame To Weight... - Page 17 LP S 5: A SSEMBLE THE LATE 1. Assemble the foot plate as shown. 2. Loosely assemble ALL hardware shown in this step. 3. After aligning all component edges and surfaces, tighten the hardware.
- Page 18 LP S 6: A SSEMBLE THE ANDLES 1. Loosely assemble All hardware shown in this step. 2. Do not tighten the hardware until the next step. IMPORTANT ! Do Not Tighten Hardware Until Next Step.
- Page 19 LP S 7: A SSEMBLE THE 1. Loosely assemble ALL hardware shown in this step. 2. After aligning all the components, tighten ALL the hardware. Make sure to also tighten ALL the hardware from the previous step. IMPORTANT ! Make sure to tighten ALL the hardware, including the hardware from the previous step.
-
Page 20: Lp Step 8: Install Thew
LP S 8: I NSTALL THE EIGHT TACK 1. Be sure to assemble the shroud holders, washers and bumpers before adding weights. 1” (25mm) Make sure sleeve is inserted in the first hole of the selector bar before pinning weight plate. Pin (1) weight plate to be used as a counter weight. -
Page 21: Procedure Label
ROCEDURE ABEL This is the Procedure Label required for the MP 2.0 and MP 2.5. If this label is missing or becomes damaged, Paramount will replace it free of charge. -
Page 22: Warning Labels
ARNING ABELS Warning Labels The following are the Warning labels required for the MP 3.5 and MP 4.0. If any of these labels are missing or become damaged, Paramount will replace them free of charge. Note: these labels are not to scale. - Page 23 ERVICE O W T O B T A I N E R V I C E For warranty service, contact an Authorized Paramount Dealer or a Paramount Customer Service representative at 1-800-721-2121 or 1-323-721-2121. Or by E-mail at nasales@paramountfitness.com. Before you call, please have the following information ready.
- Page 24 CORPORATE OFFICER OF PARAMOUNT. THIS LIMITED WARRANTY GIVES YOU SPECIFIC LEGAL RIGHTS, AND YOU MAY ALSO HAVE OTHER RIGHTS, WHICH MAY VARY, FROM STATE TO STATE. CONTACT PARAMOUNT FITNESS CORP., 6450 E. BANDINI BLVD., LOS ANGELES, CALIFORNIA 90040-3185, FOR A LIST OF AUTHORIZED DEALERS OR BEFORE RETURNING ANY DEFECTIVE EQUIPMENT.
Need help?
Do you have a question about the MP 3.5 and is the answer not in the manual?
Questions and answers