Table of Contents
Advertisement
Quick Links
Operating manual
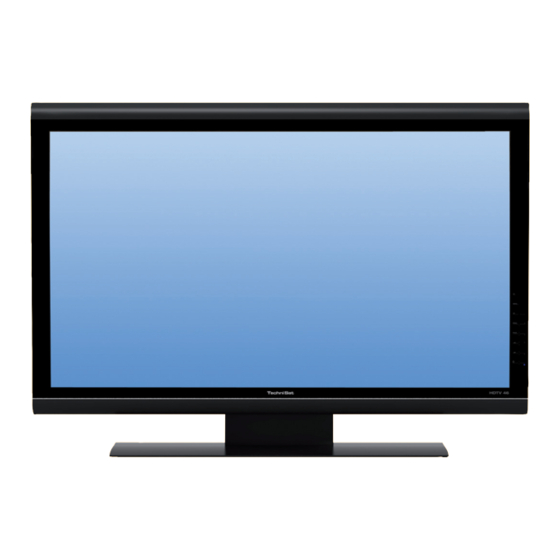
HDTV 32 Plus / HDTV 40
HDTV 40 Plus / HDTV 46
TFT-LCD TV set with integrated hard disk and integrated Twin-HD Multi
reception tuner. With CONAX card reader and two PCMCIA interfaces for
the inclusion of CI modules. To receive both free and encoded
(e.g. VIACCESS, CONAX, IRDETO, SECA etc.) SD and HD programs.
Integrated
video recorder
1
PVR
Advertisement
Table of Contents

Related Manuals for TechniSat HDTV 32 Plus


Summary of Contents for TechniSat HDTV 32 Plus
- Page 1 Operating manual HDTV 32 Plus / HDTV 40 HDTV 40 Plus / HDTV 46 TFT-LCD TV set with integrated hard disk and integrated Twin-HD Multi reception tuner. With CONAX card reader and two PCMCIA interfaces for the inclusion of CI modules. To receive both free and encoded (e.g.
-
Page 2: Illustrations
1 Illustrations Device connections 10 HDMI Socket 3 20 Audio output digital Common Interface Slot 1 11 HDMI Socket 2 Common Interface Slot 2 (SPDIF optical) 12 HDMI Socket 1 21 Audio output digital Card reader 13 Microphone input (Golden chip of the (SPDIF optical) 22 DC 12 V output Conax Smartcard facing... - Page 3 Remote control option: By switching the remote control option, this remote control unit can be used to control two Technisat receivers and one Technisat television set with the same coding. While the button is pressed, the currently set remote control code is indicated by flashing of the relevant LED.
- Page 4 Device buttons HDTV 46 Device buttons HDTV 32/40 8 2 3 4 Power switch On/Standby Program +/– Menu Volume +/– IR receiver...
-
Page 5: Table Of Contents
Contents Illustrations ........2 Table of contents (tentative) . - Page 6 Selecting a program..........29 6.2.1 Using the program up/down keys .
- Page 7 6.13.7.2.1 Hard disks (PVR-) timer..........42 6.13.7.2.2 Change station-, wake-up and VCR timer.
- Page 8 6.18.5.4 Deleting playlists ..........58 6.18.6 Stop/End image display .
- Page 9 7.3.5 Hard disk maintenance ..........75 7.3.5.1 Verification of the hard disk .
- Page 10 8.2.11 Extended settings ..........86 8.2.11.1 Loudspeaker type .
- Page 11 Antenna settings (DVB-S) ......... .99 8.5.1 Multi-tenna .
-
Page 12: System Configuration
8.8.3.1 Selecting program list ..........117 8.8.3.2 Selecting programs . - Page 13 Software update via USB interface ....140 Technical data ........141 Technical terms.
-
Page 14: Please Read This First
HDTV 32, HDTV 40 or HDTV 46 PVR should be made. The retrieval of data does not come under the scope of maintenance and repair work. TechniSat accepts no liability for any loss or damage of data during repair. -
Page 15: Transport
The device includes a permanently integrated hard disk. No provision is made for any modification not authorized by TechniSat and if this is performed, this will mean that TechniSat can no longer pledge that the device con- tinues to conform to the legal requirements (e.g. -
Page 16: Operation
During storms, extended periods of non-use or absence, the mains plug and all antenna plugs should be disconnected. Overvoltage may damage the device. In the event of any device defect, odor or smoke developing, significant malfunctions, damage to the power cord or casing, as well as when any liquid infiltrates, immedi- ately unplug from the mains and notify the service department. -
Page 17: Maintenance And Cleaning
3.3.7 Maintenance and cleaning The casing should only be wiped using a slightly dampened dry cloth. Do not use any cleaner spray or aggressive chemical cleaning agent for the casing, to avoid damaging the top quality surface. Use a dry cloth or the LCD panel cleaning set to clean the screeen when the device is switched off. -
Page 18: Wall-Mounting
3.5 Wall-mounting With the aid of a suitable wall attachment, e.g Technisat HD-Mount 32 (Art.No.: 2020/2732) for HDTV 32 Plus respectively TechniSat HD-Mount 40 (Art.No.: 2020/2740) for HDTV 40, HDTV 40 Plus and HDTV 46 you can mount your device on a wall that is suited for the pur- pose. -
Page 19: Removable Loudspeakers
0046/1505 black art. no. 0046/1516 The wireless loudspeaker system is also usable with the HDTV 32 Plus, the HDTV 40, the HDTV 40 Plus and other devices of consumer electronics. Further information is available in the manual of the wireless Loudspeaker system. -
Page 20: Connections
4 Connections a Connection of the cable junctions (digital and/or analog) or the DVB-T antenna with the antenna input of the TV set. b Connection/s of the satellite antenna with the LNB input 1/LNB input 2. (Please note: For operation with an antenna signal, the LNB must always be connected to LNB input 1.) c SCART connection of the TV set to a video recorder. -
Page 21: Antenna/Cable Connection (Analog And Digital)
The references mentioned below, i.e. a b c etc. refer to the illustration on page 20. To gain access to the side sockets of the device you must firstly remove the cover. To do so, push both the engagement hooks lightly upwards and pull away the >... -
Page 22: Dvd Player
4.3 DVD player Either connect your DVD player via: - an HDMI connecting cable with an HDMI connection or via - an DVI/HDMI connecting cable with an HDMI connection and additionally via an audio connecting cable with an Audio input (VGA/DVI) or digital audio input (SPDIF electric). -
Page 23: Spdif Input
You can integrate HDTV into your existing network via the network socket. This will allow you, with the help of the TechniSat Mediaport, to copy PVR recordings, MP3 and JPG files onto your PC as well as the integrated hard disk. -
Page 24: Mains Power Connection
Please note that due to the many graphics cards available it is impossible to rule out poten- tial compatibility problems between the graphics card used and the HDTV which means that e.g. certain resolutions cited in the technical data may be either unusable or only usable to a limited extent. -
Page 25: Initial Installation
5 Initial installation When you have read through the safety instructions and have connected the HDTV as described in Chapter 4, switch on the unit as described in Chapter 6. When switching on the device for the first time the starting window of the installation assist- ant AutoInstall will automatically appear. - Page 26 Antenna signals (DVB-S) Here, select the number of DVB-S antenna connections you have made to the TV set. (If the source is DVB-S, as described in the “Selection of the received signals” sec- tion, and deactivated, instead of this page, the installation assistant goes directly to the page “Antenna settings (DVB-T)”.) Use the right/left arrow keys to mark whether you have connected one or two >...
-
Page 27: Channel Search
Channel search To carry out a station search, use the up/down arrow keys to mark the field All > stations, when you wish to freely look for both receivable and encoded programs, or All uncoded stations, when you wish to only find free view programs. By pressing the green function key Start, the station search commences. -
Page 28: Operation
6 Operation 6.1 Switching the TV set on and off 6.1.1 Switching on when plugged into the mains Switch on the TV set by pressing the power switch on. > The TV set now goes through an initialization process, during which it cannot be operated. -
Page 29: Selecting A Program
Note that the device should only be completely switched off when in Standby mode. This helps avoid any loss of data and possible damage to files or the hard disk. The device memorizes the last switching status, whether “On” or “Off”, which was activated with the remote control or the device buttons. -
Page 30: Selecting A List
by pressing the OK button, you leave the Navigator and the marked program shown > on the same screen. 6.2.3.2 Selecting a list Your HDTV is equipped with several program lists, designed to make it easier for you to find a program. You can select your List of favorites or display the list of programs in alphabetical order or sorted according to their genres. -
Page 31: Return To The Last Program Selected
6.2.6 Return to the last program selected Pressing the Back key on the remote control will take you back to the last program > previously selected. > Pressing the button again will revert to the previously set program. 6.2.7 TV/Radio switching Switch to radio operation using the TV/Radio button. -
Page 32: Audio Playback From External Sources
6.3.1 Audio playback from external sources With this device, it is also possible to play back the audio signal of all external sources via the device loudspeaker and the audio outputs of the HDTV, without the HDTV screen having to be switched on. The provision here is, however, that the source, for which the playback of sound is desired, as described in Point 10.2 is recorded in the radio list of favorites. -
Page 33: Additional Program Information
6.4.3 Additional program information As soon as broadcast, you can receive further program information on the programs cur- rently running. By pressing the Info button twice, the infowindow expands and further information > on the program currently being shown appears. Extended info text can be scrolled line by line up/down using the arrow keys or >... -
Page 34: Receiving Encoded Programs
6.5 Receiving encoded programs Your device is equipped with an integrated CONAX encoding system as well as a “Common Interface” for the recording of two CI modules. These will allow you to receive encoded pro- grams. To do so, you must first either insert a CONAX smart card into the integrated card reader or insert a CI module with a valid Smartcard into the slot intended for that purpose: Insert the CONAX Smartcard into the card slot of the integrated card reader. -
Page 35: Selecting Start Time
6.5.3 Selecting start time On certain channels, you have the chance to select certain films with different start times. This means these films can be started at your desired time all around the clock. If a program is available via optional channels this will be indicated in the screen selection via the infobox. -
Page 36: Selection Of Another Language/Sound Option
6.7 Selection of another language/sound option If a broadcast is transmitted in multiple languages or with several sound channels, this will be indicated in a sound Selection notice above the infobox. You may then proceed as follows to select a different language or a different sound channel: Press the key Language Select. -
Page 37: Subtitles
6.8 Subtitles When switching to a broadcast which is transmitted with subtitles, the subtitle symbol appears in the infobox If you have not activated the Subtitles function (Point 8.2.10), subtitles can be manually activated as follows: Press the Option button several times if necessary. >... -
Page 38: Showing Video Text And Tv Images At The Same Time
screen becomes active. The already memorized subpages are illustrated using the subpage figure. Using the right/left arrow keys, select the desired subpage or enter the desired > subpage in four digits using the Numeric keyboard. To quit the desired illustration of the subpages, press OK. >... -
Page 39: Pip-/Pap Function
6.11 PiP-/PaP function Your TV possesses a PiP function, as well as the PaP function. Please pay attention to the following points: In PiP-/PaP operation, the only selectable broadcasts and external sources are those located in at least one list of favorites. Devices with only one tuner can only illustrate one program ond one external source simultaneously. -
Page 40: Freeze Frame
6.12 Freeze frame Press the Freeze frame key, and the TV picture will be frozen, and displayed as a > still picture. During this process, the sound will be played back as normal. > Pressing this button multiple times will unfreeze the image and normal TV playback will then continue. -
Page 41: Now (Table With Current Program Contents)
6.13.4 Now (table with current program contents) First the “Now” EPG table will be displayed showing the programs currently being broad- cast. The bar to the right of the program name indicates the elapsed time of the current pro- gram. The program currently selected is marked. The EPG functions (Point 6.13.7) are available to you. -
Page 42: Epg Functions
By pressing or pressing and holding the green function key the respective dis- > played time in the green field moves forward one page. The individual days of the week are displayed along the bottom of the screen. If information relating to the following days is available, the appropriate fields will be marked. -
Page 43: Change Station-, Wake-Up And Vcr Timer
Press the Record button, to program a hard disk timer for the marked broad- > cast (see Point 7.1.2). 6.13.7.2.2 Change station-, wake-up and VCR timer Press the Option button once, to program station change timer (see Point > 7.1.2). By pressing the Option button multiple times, the timer type can be changed to a >... -
Page 44: Overview Based On Program Type/Genre
Use the arrow keys to move the marker to the desired program or time. > The EPG functions (Point 6.13.7) become available. The individual days of the week are displayed along the bottom of the screen. If information relating to the following days is available, the appropriate fields will be marked. To obtain a preview for a specific day, either press the numeric key corresponding >... -
Page 45: Manually Entering The Search Term
Open the source selection by pressing the OK button. > Press the blue function key EPG Menu to open a selection window. > Use the up/down arrow keys to mark the search Line. > When you confirm with the OK button, the menu of the EPG search is opened. >... - Page 46 Yellow function key: The keyboard switches between upper/lower case as well as symbols. Red function key: The last line of the search term is deleted. Green function key: The search term entered is transferred and the search com- mences. Blue function key: You quit the search term entry without confirming and return to the search screen.
-
Page 47: Access Timer Overview
3. Program change timer If your HDTV is in normal operating mode, it will switch to the programmed program slot at the time selected. Unlike when setting with the hard disk or video recorder timer, the device remains fully usable, is not switched on at the start of the program and will not be switched off afterward either. -
Page 48: Program List
Program list Use the arrow keys to mark the upper line of the menu. > Press the OK key. > Use the up/down arrow keys to choose within the now-open pop-up window the > desired list (TV, Radio or external) and confirm with OK. Provided the lists TV lists 2, TV lists 3, Radio lists 2 or Radio lists 3 are included as programs, see Point 10, the relevant lists will also be available for selection. -
Page 49: Changing Timer Programming
Use the arrow keys up/down to select the desired function. > Press OK to accept the setting. > Accepting data into memory When you have completed the programming, press the green function key > Accept, to transfer the data to memory. 6.14.1.2 Changing timer programming To change an existing timer setting, access the timer overview as described in >... -
Page 50: Hard Disk Timer
6.14.2.4 Hard disk timer If the timer starts when in standby mode, the screen is switched on by pressing the On/Standby button. The subsequent properties of the device depend on whether one or two hard disk timers are running. Due to the hard disk timer, certain buttons on the remote control (e.g. -
Page 51: Interrupting A Video Recorder Timer
6.14.3 Interrupting the timer operation When interrupting a timer, you must specify whether the hard disk or video recorder time will be interrupted. 6.14.3.1 Interrupting a video recorder timer If the device started the timer on Standby operation, the screen must first be switched on by pressing the On/Standby button. -
Page 52: Function Selection
Press the red function key Back. > If you wish to accept the changes, use the arrow keys left/right to click on the > field Yes, and confirm by pressing OK. 6.14.5 Exit timer management Press the Back key to return to the Main Menu. >... -
Page 53: Track Information
first, from which you wish to play the MP3 files and confirm with OK. Use the up/down arrow keys to now mark either the folder or the playlists, which > contain the desired MP3 files. > By confirming with OK, the marked folder/playlist will be opened. Use the up/down arrow keys to select from the list of JPG files, which you would >... -
Page 54: Mp3 Playback Modes
6.17.5 MP3 playback modes In addition to the regular playback mode, the following additional functions are available: Random play of all titles of the folder selected Repeat all titles Repeating a title The various playback modes can be accessed using the Option button. >... -
Page 55: Playing Back Playlists
The entries must not include “\”. Since the majority of programs used to create playl- ists, however, do contain these in the entries, you must check these using a word- processing program. If “\” is present, then this must be replaced by “/”. (e.g. by using the search and replace function of the wordprocessing program) The playlists must be stored in the format “pls”... -
Page 56: Viewing Pictures
6.18 Viewing pictures Your TV set is equipped to display files in JPG format that are available either stored on the internal hard drive or from a device connected to the USB socket, as described in Point 7.2.2.4. The USB device should be formatted using the file system FAT 32. Consult Point 7.3.2 on how to copy files from a USB device onto the hard drive. -
Page 57: Pause
Use the up/down arrow keys as applicable to now mark the folder or playlist, > which contains the desired JPG files, and confirm with OK. Use the up/down arrow keys to select from the list of JPG files for those you >... -
Page 58: Playing Back Playlists
Use the up/down arrow keys to select from the list of JPG files, which you would > like to play on the playback list Press the green function key PLS +, to add the JPG file to the playback list >... -
Page 59: Hard Disk Operation
(e.g. Video or DVD recorders). The recording capac- ity depends on the data volume of the materials broadcast and also on the size of the hard disk. Any modification unauthorized by TechniSat is prohibited and will lead to all warranty being void. -
Page 60: Immediate Recording
7.1.1 Immediate recording 7.1.1.1 Starting recording manually Option 1: > Switch on the program/source, of which you would like to make a recording. Press the Record button in order to record the program in question. While the > recording is proceeding, the program is still shown on the screen. At the start of the recording, a note will be indicated to you at the top right of the screen as well as in the Infobox. -
Page 61: Ending Recording Automatically
7.1.1.3 Ending recording automatically Option 1: Press the On / Standby button. > Now a query appears which should indicate the running recording. Use the up/down arrow keys to mark the line containing the desired action and > confirm with OK. The TV set now records the actual program completely or up to the selected time period and subsequently reverts to standby mode (Standby), the screen is then switched off directly after the selection. -
Page 62: Timeshift Function
7.1.3 Timeshift function The timeshift function can be used to facilitate playback and recording being implemented at the same time. This allows time-delayed TV viewing. This means you can watch the beginning of the recording and thus skip precorded sections (e.g. commercial breaks). At the same time, the live signal of the broadcast is still being recorded. -
Page 63: Setting Markers While Recording
7.1.4 Setting markers while recording By pressing the Record button during a current recording, a window with the avail- > able functions will be opened. Use the arrow keys up/down to mark the line Set mark confirm by pressing > A marker will now be set at the current position. -
Page 64: Fast Forward And Rewind
7.2.3 Fast forward and rewind To access a specific part of a recording, your PVR possesses fast forward and rewind func- tions. During playback press the fast forward or rewind button. The indication Forward > uu or Rewind tt appears. The recording will now be spooled at 4 times the normal speed in the chosen direc- tion. -
Page 65: Slow Motion
7.2.4.2 Slow motion By pressing the right arrow key once, the recording will be played back in slow > motion and the indication “Iu” will be displayed. 7.2.4.3 Single image stepping Press the arrow key up or down to display the next frame in a forward direction >... -
Page 66: Manage Hard Disk
7.3 Manage hard disk Access the Main menu by pressing the Menu button. > Use the up/down arrow keys to mark the hard disk line. > Confirm by pressing OK. > The manage hard menu Program will be displayed. Use the arrow keys up/down to move the marker within the menu, and to >... -
Page 67: Jumping To The Preferred Portion Of The Recording
7.3.1.3.1 Jumping to the preferred portion of the recording Using the Forward, Rewind, Pause/play and Jog-shuttle buttons > (see Points 7.2.2 - 7.2.4) you can access preferred portions of your recordings. 7.3.1.3.2 Functions By pressing the green function key Menu you can open a window with the func- >... -
Page 68: Deleting Portions
Arrow keys: The marked portion moves. The marked letters will be included in the names and placed behind them. Yellow function key: The keyboard switches between upper/lower case as well as symbols. Red function key: The last letter of the name is deleted. Blue function key: You quit the input name process without making any change and return to the record processing menu. -
Page 69: Splitting A Recording
Now use the arrow keys up/down to set the Marker indicating the beginning > of the section to be copied. The section to be copied will now be indicated in red on the progress indicator as well as in the overview of existing markers. Now press the green function key menu and use the up/down arrow keys to >... -
Page 70: Enlarge Video
By pressing the OK button, the virtual keyboard is superimposed, which which you > may, as described in the Renaming marks section, enter new names. 7.3.1.3.11 Enlarge video To faciliate finding the desired portion of a recording, you can increase the size of the video picture of the recording. -
Page 71: Copying
Press the OK key to go to the selection mode. The recording will be marked with a > cross on the left side. Using the arrow keys, the subsequent or previous files/playlists can also be > marked.> > After you have proceed to mark the desired files in this way, proceed as described in Points 7.3.2.1 and 7.3.2.3, to copy or delete the recordings. -
Page 72: Moving
7.3.2.2 Moving The moving function will move the marked files/playlists or the marked folder from the source medium (e.g. a USB device) to the target medium (e.g. the hard disk). The moved files/playlist or the moved folder is subsequently located only on the target medium. Mark the Files, Playlists or Folders, as described under Individually mark- >... -
Page 73: Copying Recordings
7.3.3 Copying recordings This function allows you to export recordings from the internal hard drive to an external USB device, e.g. another hard drive. Call up the menu Manage hard drive as described in Point 7.3. > Use the up/down arrow keys to mark the line Copying recordings. >... -
Page 74: Exporting
7.3.3.1 Exporting The Export function creates a copy of the marked file on the USB device. The original file remains intact. Mark, as described under Individual marking, Marking in blocks or Selec- > tive marking the recording/s, which you wish to delete from the hard disk or the USB device. -
Page 75: Hard Disk Information
7.3.4 Hard disk information Access the Hard disk menu, as described in Point 7.3 and mark the point Hard > disk information. By pressing the OK button, a window appears with information about the integrated > hard disk. 7.3.5 Hard disk maintenance Access the Hard disk menu, as described in Point 7.3 and mark the point Hard >... -
Page 76: Quitting Hard Disk Management
7.3.6 Quitting hard disk management > Return by pressing the Back button to the previous menu level. Press the TV/Radio key to return to normal operation. >... -
Page 77: Settings
8 Settings With the help of the OSD menu, all the device settings can be made using only a few but- tons on the remote control. This means e.g. you can adjust image, sound and basic settings on the HDTV or those in the electric EPG journal, the child protection function and other special functions. -
Page 78: Manually Adjusting Image Values
8.1.3 Manually adjusting image values 8.1.3.1 Light control Here choose whether the adjustment of the background light should be done automatically based on the brightness of the surroundings (Auto 1 or Auto 2) of the image content (Dynamic) or whether this should be processed manually. Use the up/down arrow keys to mark the line Light control. -
Page 79: Brilliance
8.1.3.7 Brilliance Using the brilliance setting, you can select between three different characteristic curves for the control of the LCD panel. Through these three curves, various different brilliance set- tings of the image can be made. In order to select which brilliance level suits you best for an existing image, since the differences between the settings are best perceived in this way. -
Page 80: Format Recognition
8.1.3.9 Format recognition (not with VGA) With this setting, you can decide in which way the automatic recognition function of 16:9 broadcasts should be implemented. Generall speaking, the image source will indicate whether the broadcast is transmitted in a 4:3 or 16:9 format. In the Signalling setting, the playback of the program based on the relevant image format can subsequently be correctly implemented. -
Page 81: Extended Settings
8.1.3.10 Extended settings In addition to the means of image adjustment already explained, you can find further meth- ods of adjustment in the sub-menu further settings. Use the arrow keys up/down to mark the line Further settings. > Open the Further settings by confirming with OK. >... -
Page 82: Color Space
8.1.3.10.5 Color space (only for HDMI) For the three HDMI inputs, you can also select the color space option, to adjust the way in which the playback is shown on screen. Using the up/down arrow keys, mark the line Color space. >... -
Page 83: Sound Settings
8.2 Sound settings In the sound settings menu, you can adjust the tone of the loudspeaker/audio outputs and the headphone connection. Likewise, you can adjust the volume when the TV is switched on and select the preferred audio and subtitle language. In addition, you can select the loud- speaker system used and the loudspeaker controls for the audio outputs, the microphone as well as the relay switching function for external amplifiers and also make subwoofer settings. -
Page 84: Dolby Digital
volume, when switching to another channel or input. In addition, the volume of commercials, which tend to be shown at a higher volume, can be reduced within a short time. Mark the line Autom. volume limiting using the up/down arrow keys. >... -
Page 85: Balance
8.2.9.4 Balance Using the up/down arrow keys, mark the line Balance. > Use the right/left arrow keys to adjust the Balance. > 8.2.9.5 Audio mode Mark the line Audio mode using the up/down arrow keys. > Use the right/left arrow keys to set the headphone audio mode to stereo, or >... -
Page 86: Subtitle Language 1
8.2.10.3 Subtitle language 1 Here, set the preferred language for subtitles. After the setting, the subtitles will, if sent, be immediately displayed at the bottom edge of the screen. With the setting set to None, you can switch off the automatic showing, and then when desired, manually adjust this as described in Point 6.8. -
Page 87: Loudspeaker Broadcast Channel
8.2.11.2 Loudspeaker broadcast channel This Point is only available, when the loudspeaker type, as described in Point 8.2.11.1, has been set to remote. Use the arrow keys up/down to mark the Input loudspeaker channel. > Use the right/left arrow keys to set a loudspeaker transmission channel from >... -
Page 88: External Amplifier
8.2.11.6 External amplifier Use the up/down arrow keys to mark the line External amplifier. > Using the right/left arrow keys, switch the Loudspeaker relay system on or off. > When this function is activated the sound is muted, a relay connected to socket 22 (see Point 1 Figures) is switched on. -
Page 89: Basic Settings
8.3 Basic settings In the basic settings you can select the country in which the device will be operated, manu- ally select the time difference relative to GMT or the station from which the date and time should be read. Likewise, you can also select the source via which the autostart-/auto stop function should be implemented as well as switching the same on or off. -
Page 90: Quick Start
Use the up/down arrow keys to mark the line Date/time. > Open the program list by pressing the OK button. > Using the arrow keys, select the program, based on which the synchronization > should follow and confirm your selection with OK. 8.3.4 Quick start If the quick start function is activated, your HDTV will start more swiftly from Standby mode. -
Page 91: S/Pdif-Video Source
Use the up/down arrow keys, you can mark the line Copying AV. > Use the right/left arrow keys to set the desired copy direction or Deactivate > the function. 8.3.9 S/PDIF-video source This point allows you to determine to which analog external input the S/PDIF input (Socket 19 in Point 1) should be assigned. -
Page 92: Special Functions
8.4 Special functions To set the special functions described in the following section, proceed as follows: Press the Menu key to display the Main menu. > Use the up/down arrow keys to mark the line Settings and confirm with OK. >... -
Page 93: Quit Osd Settings
Off: Off: The picture will be switched off when in radio and/or MP3 playback mode as in Point 8.4.1.3 after the set display time and also remains switched off after a pro- gram/track change. Auto: The picture will be switched off when in radio and/or MP3 playback mode as in Point 8.4.1.3 after the set display time and for a program or track change, it will be displayed for likewise the set display time. -
Page 94: Switching Off Hard Disk
8.4.2.2 Switching off hard disk Use the up/down arrow keys to mark the line Switching off hard disk. > By pressing the OK button, a window opens with the various switch-off times. > Use the up/down arrow keys to select the desired switch-off time (5s, 1 min, >... -
Page 95: Media Playback Settings
8.4.3 Media playback settings Within this submenu, you can select the start directory of the media playback of music and that of images. After access to the media playback, the media playback of music or images commences in the selected directory. Use the up/down arrow keys to mark the entry Media playback. -
Page 96: Network Settings
Alternatively > To revert directly to normal operation, without retaining the changes, press the Menu button. 8.4.4 Network settings In the Network settings menu, you can select the DHCP setting as well as entering the IP address and subnet mask. Use the up/down arrow keys to mark the line Network settings. -
Page 97: Quit Network Settings
8.4.4.4 Quit network settings To quit the Network settings menu, the following options are available: > Press the green function key to confirm. The changes made are now stored and you can return to the Special functions menu. Alternatively Press the Back button. >... -
Page 98: Video Text Mode
8.4.5.3 Video text mode Many program-makers send video text in various video text modes. Generally speaking, level 1.5 is usually transmitted. In addition, various program-makers support the more graph- ically demanding HiText Level 2.5. Use the up/down arrow keys to mark the line Video text mode. >... -
Page 99: Antenna Settings (Dvb-S)
8.5 Antenna settings (DVB-S) Access the Main menu by pressing the Menu button. > Use the up/down arrow keys to mark the line Settings. > After confirming with OK, the settings menu appears. > Using the up/down arrow keys, mark the line Antenna settings (DVB-S). >... -
Page 100: Setting The Switching Matrix
Record a program and play back another program from the same receiving area or a favourite hard disk recording. Record two programs at the same time, even when they are being received by differ- ent receivers. Record two different programs (even from different receiving areas) at the same time and play back a prerecorded program. -
Page 101: Additional Lnc Settings/Lnc Properties
Process this menu in this way until its details match those of your receiving unit. For any switching criteria not required select the setting No Satellite. Please note, as specified previously, when you remove a satellite or replace one satellite with another, which is present for the programs in TV and/or radio lists, a query box opens, asking whether this program should be deleted. -
Page 102: Satcr Lnb
LOF high Using the arrow keys, mark the Entry LOF high. > Enter the LOF of the high band of your LNB using the Numeric keyboard. > Transition LOF Low/High In addition, as well as LOF low and LOF high, you must also enter the frequency, at which the LNB of LOF low changes to LOF high. -
Page 103: Test Transponder
Note that for Channel 1 and Channel 2 separate frequencies must be set. 8.5.5.4 Test transponder For the various satellites test transponders are already pre-programmed so that with the request for the LNB properties on the lower edge of the screen, the signal level as well as the signal quality for both antenna inputs is displayed. -
Page 104: East And West Limits
ing the satellite unit due to obstacbles (e.g. chimney, house wall etc.). Confirm the note with the OK button. > Subsequently switch to the Configuration column using the right arrow key. > By confirming with the OK button, the menu for Setting the motor antenna >... -
Page 105: Setting The Western Limit
8.5.6.1.3 Setting the Western limit To enter the Western limit first use the arrow keys to mark the field Save. > Now use the arrow key left to turn the dish to the maximum possible, or the max- > imum desired West position. To do so, press and hold the button for as long as it takes, until the desired position is reached. -
Page 106: Geographic Latitude
8.5.6.2.3 Geographic latitude After the entry of the longitude the marking jumps automatically into the left field of the geo- graphic latitude N or S. In this field use the OK key to indicate whether the value entered refers to a north- >... -
Page 107: Selecting A Pre-Programmed Satellite Position
8.5.6.3.1 Selecting a pre-programmed satellite position To accept a satellite position in your satellite list, use the arrow keys to mark the > field Sat new. by pressing the OK button, a list appears with the existing available satellite posi- >... -
Page 108: Positioning Antenna Manually
8.5.6.3.3 Positioning antenna manually To direct the antenna to the desired satellite or to determine whether you can receive the desired satellite at the desired position, a test transponder is available for each satellite. It is only by displaying the signal strength and quality via the test transponder that enables the exact positioning of the dish antenna. -
Page 109: Current Satellite List
For satellite positions not yet fixed > If it has not yet been possible to ascertain the orbital position then the following query will appear. To save the satellite position, use the arrow keys left/right to mark the field Yes >... -
Page 110: Manually Start Automatic Rotation Process
8.5.6.6 Manually start automatic rotation process In order to rotate the antenna to a selected satellite position, your TV set includes the func- tion Turn to Sat. Press the yellow function key Turn to sat to turn the antenna to the satellite posi- >... -
Page 111: Antenna Settings (Dvb-T)
8.6 Antenna settings (DVB-T) To enable optimal positioning of the DVB-T antenna, your TV set includes a signal strength indicator of the entire channel spectrum. Press the Menu key to display the Main menu. > Now choose the menu option Settings by selecting the same using the up/down >... -
Page 112: Programming The Electronic Program Guide
8.7 Programming the electronic program guide Your device is capable of receiving data channels with additional EPG files. This gives you a preview of EPG data up to a week in advance. To receive the data channel in question, this must be made available within the receiving area by the network operator. -
Page 113: Selecting Tv Broadcaster / Radio Broadcaster
8.7.4 Selecting TV broadcaster / Radio broadcaster You have the chance to record the desired program in the EPG electronic program guide, as described in this Point or also in Point 10.5, or to cancel. Mark the line Selecting TV broadcaster or radio broadcaster using the >... -
Page 114: Quit Broadcaster Selection
8.7.4.3 Quit broadcaster selection Press the key Back to return to the Programm guide menu. > 8.7.5 Start category The electronic program guide includes the following types of portrayal: Overview This form of presentation provides a quick overview of all programs included in the electron- ic program guide. -
Page 115: Quitting Programming Of The Electronic Program Guide
8.7.8 Quitting programming of the electronic program guide To quit the Program guide menu, the following choices are available: Press the green function key Confirm. > The changes made are not stored and you return to the menu Settings. Alternatively Press the Back button. -
Page 116: Parental Control
8.8 Parental control Your TV set is equipped with a parental control function. This allows you to protect impor- tant functions (e.g. calling up the main menu) from unauthorised access. In addition, pro- grammes and hard disk recordings that you have blocked can, in future, only be selected by first entering a four-digit PIN code (unit PIN). -
Page 117: Selecting Tv Broadcaster / Radio Broadcaster
8.8.3 Selecting TV broadcaster / Radio broadcaster You may mark a desired program for child protection or remove the child protection marking, as described in this Point or also in Point 10.6. Mark the line Selecting TV broadcaster or Radio broadcaster using the >... -
Page 118: Quit Broadcaster Selection
8.8.3.3 Quit broadcaster selection Press the key Back to return to the Child protection menu. > 8.8.4 Quit child protection menu To quit the Child protection menu, the following choices are available: Press the green function key to Confirm. > The changes made are not stored and you return to the menu Settings. -
Page 119: Station Search
9 Station search To receive all available or new programmes, there are various options for performing a pro- gramme scan. 1. Automatic scan Choose this search option, to search the entire receiving area of the TV for programs. 2. Extended Scan Choose this search option, to search only one receiving area (FM Radio, Analog CT, DVB- S, DVB-C or DVB-T) for programs. -
Page 120: Starting Automatic Search
9.1.1 Starting automatic search To start the search process, press the green function key Search. > The duration of the search depends on the selected receiving areas. Please also note any messages displayed on screen. 9.1.2 During the automatic search Already during the search process, detail of the search process can be seen on ths screen. -
Page 121: Extended Scan
9.2 Extended Scan To restrict the search for programs to one receiving area, choose the Expanded search option. Access the Broadcaster search menu, as described in Point 9. > Mark the entry Expanded search using the up/down arrow keys. > The Expanded search menu is opened by confirming with OK. -
Page 122: Dvb-S (Expanded Search For Digital Satellite Programs)
9.2.3 DVB-S (Expanded search for digital satellite programs) Satellite Use the up/down arrow keys to mark the line Satellite. > By pressing the OK button a window opens with the configured satellites, see Point > 8.5. Use the up/down arrow keys to select the entry All satellites, to search >... -
Page 123: Dvb-T (Expanded Search For Digital Antenna Programs)
New symbol rates Under this line, you can see a row of symbol rates. Only these symbol rates are taken into account during a search operation. Use the up/down arrow keys to mark the line Symbol rates. > Open the input by pressing the OK button. >... -
Page 124: Starting Expanded Search
quency. Using the right/left arrow keys, select the channel in which you wish to start the > search or enter the desired frequency using the Numeric keyboard. Scan mode Use the arrow keys up/down to mark the line Search mode. >... -
Page 125: Manual Scan
Manual sorting TV/ manual sorting radio Here, you can access the Manage TV lists or radio lists menu directly. Process these lists as described in Point 10 of the instruction manual. Back The newly found programs are included in the overall list. Use the up/down arrow keys to select the desired method and confirm with OK. -
Page 126: Analog Ct (Manual Search For An Analog Tv Program)
Program name Use the up/down arrow keys to mark the line Program name. > To alter the program name, press the OK button. > Now use the virtual keyboard to enter the desired names. In the process, the > buttons of the remote control are configured to the following functions: Arrow keys: The marked portion moves. -
Page 127: Fine Tuning
To set the desired broadcaster, you can select between the channel and the frequency input. Press the yellow function key Channel or Frequency, in order to switch > between the channel and frequency input. Use the up/down arrow keys to mark the line Channel or Frequency. >... -
Page 128: Dvb-S (Manual Search For Digital Satellite Programs)
strength with which the broadcaster is transmitting at the set frequency. In addition, the devi- ation of the set frequency from the broadcast frequency of the program is also displayed. Storing To store the settings, press the green function key to Confirm. >... -
Page 129: Dvb-T (Manual Search For Digital Antenna Programs)
Scan mode Use the arrow keys up/down to mark the line Search mode. > right/left arrow keys to decide whether you wish to only receive freely avail- > able programs (Free broadcasters) or also encoded programs (All broadcast- ers). > Subsequently proceed with Point 9.3.7. -
Page 130: Pid Search (Dvb-S/Dvb-C/Dvb-T)
Scan mode Use the arrow keys up/down to mark the line Search mode. > Use the right/left arrow keys to decide whether you wish to only receive freely > available programs (Free broadcasters) or also encoded programs (All broad- casters). >... -
Page 131: Quit Broadcaster Search
The programs found are sorted by a pre-programmed list into the main list of favorites. The order of the programs is determined by the audio language selected in Point 8.2.10.1 and by the country selected in Point 8.3.1. Automatic addition The newly found programs are unsorted automatically and added to the end of the main list of favorites. -
Page 132: Program Management
10 Program management This chapter describes how you can edit your lists of favourite programs based on your wishes. This function is also required to sort new found programs into the program list after a program scan has been performed. In this regard you should know the following: Your TV set is equipped with two programme lists, the Favourites list and the Total list. -
Page 133: Adding Programs To The Favourites List
Use the arrow keys up/down to select the desired programme list from (e.g. > Languages.) Confirm by pressing OK. > An additional selection window will now be displayed. Now use the arrow keys up/down to specify the selection criterion according to >... -
Page 134: Deleting Programs
10.3 Deleting programs 10.3.1 Removing (deleting) from the Favourites list To remove programs from the list of favorites, access the program management menu as described in Point 10.1 and select the relevant Favourites list. Using the arrow keys and/or the Numeric keyboard, mark a program, which >... -
Page 135: Sorting Programs
10.4 Sorting programs To sort the order of programmes in a Favourites list according to your preferences, call up the programme list manager as described in Point 10.1. Using the arrow keys and/or the Numeric keyboard mark the program which >... -
Page 136: Parental Control
> To record or delete multiple programs at the same time, mark them as described in Point 10.2 (Marking in blocks). After you have marked the desired program in this way, press the yellow function > Program guide. button 10.6 Parental control You may mark desired programs for child protection or remove the child protection marking, as described in this Point or also in Point 8.8.3. -
Page 137: System Configuration
11 System configuration With this menu option, you can view specific device data, such as the actual software ver- sion on the TV and in the DVB module. In addition, the MAC address of the device as well as the last EPG updating is also shown. Press the Menu key to display the Main menu. -
Page 138: Service Settings
12 Service settings You can revert to the original default settings pre-programmed at the factory at any stage. In addition, if you find that the program list is outdated because of changes made by the program providers, you may delete the program list completely, and then perform a new pro- gram scan. -
Page 139: Operating Language (Menu Language)
13 Operating language (Menu language) This menu item gives you the opportunity to set the menu language according to your per- sonal preference. To change the operating language, proceed as follows: Press the Menu key to display the Main menu. >... -
Page 140: Software Update Via Usb Interface
You can update the software of the device via the USB interface. To enable the software update via the USB interface, you must first download the current software from the Techni- sat homepage (www.technisat.de). To enable updating of the TV set via the USB interface, you require an appropriately config- ured USB Flash Stick. -
Page 141: Technical Data
16 Technical data LCD panel Diagonal 82 cm (HDTV 32) 102 cm (HDTV 40) 117 cm (HDTV 46) Panel type 16:9 TFT LCD Resolution 1920 × 1080 Brightness 500 cd/m Contrast ratio 2000:1 Reaction time 8 ms Angle of view 178°... - Page 142 Program memory 5000 (Overall list) / up to 2000 favorites for TV and radio Others Child protection PaP (Image in image) PaP (Image and image) PaT (Image and Text) JPG playback MP3 playback Video text Top text Megatext (1000 pages) HiText Level 2.5 yes (switchable on/off) Sockets HDMI 1 / HDMI 2 / HDMI 3...
- Page 143 Input level L/R 0.5 V r.m.s. (nominal) Audio input impedance > 40 kOhm Socket - Component input Input signal level Y: 1.0 Vss/75 Ohm Pr: 0.7 Vss/75 Ohm Pb: 0.7 Vss/75 Ohm Socket - S-Video input (Hosiden) (Hosiden) Input signal level Y: 1Vss/75 Ohm C: 0.3Vss/75 Ohm Audio R/L...
- Page 144 Socket - Digital audio output SP/DIF Electrical output Cinch SP/DIF Optical output Toslink Socket- Digital audio input SP/DIF Electrical input Cinch Socket- Headphone jack Type 3.5 mm jack (stereo) Socket- Microphone jack Type 3.5 mm jack (stereo) Socket- DC jack (12V relay) Type DC jack Power supply...
- Page 145 Roll-off Factor 35 % LNC power supply: LNB Current 2 × 400 mA max Short-circuit proof LNC voltage vertical < 14 V no load, > 11.5 V at 400 mA LNC voltage horizontal < 20 V no load, > 17.2 V at 400 mA LNC switched off in standby mode 22 kHz modulation 22 kHz...
-
Page 146: Common Interface
Audio Mode Dolby Digital (AC3), Stereo, Dual (main/sub) Sampling frequencies 32 kHz, 44.1 kHz, 48 kHz Common Interface Type 2 Common Interface Plug for CI module Power consumption max. 0.3 A / 5 V Card reader Type 1 slot card reader for integrated Conax system EPG files Automatic updating EPG Preview... - Page 147 General HDTV 32 Plus Weight in kg: approx. 27,0 Dimensions (W × H × D) in cm: 81,0 × 70,0 × 20.0 (With rest foot) 81,0 × 63,0 × 11,5 (Without rest foot) HDTV 40 Weight in kg: approx. 33,0 Dimensions (W ×...
-
Page 148: Technical Terms
17 Technical terms Antenna cable / Coaxial cable Connecting cable between the antenna and the antenna input of the TV set, for the trans- mission of received signals as well as for supplying the power of an active DVB-T antenna. External installation Connecting cable between the modulator of the satellite receiver and the antenna input of the television set, used as an alternative if no SCART socket is available. - Page 149 In TechniSat devices, this program guide is designated with SFI or EPG and includes further additional functions.
- Page 150 ISIPRO The ISIPRO function is a TechniSat in-house service, through which the program list of your TV set can be automatically kept up to date. To achieve this, a current programme list is broadcast at regular intervals via satellite (ASTRA 19.2° East), and can be downloaded by your TV set.
- Page 151 (sound) and video (image) signals (AV). SFI/EPG See-TV Info or SFI plus is a TechniSat in-house expansion of the electronic program guide EPG. Here, the broadcast information is editorially prepared and can be loaded by your TV set at any time.
-
Page 152: Software Update
Internal clock relay of the device. After a previously specified time (max. 120 minutes), the device switches itself to Standby mode. Software update: Digital television is a new medium, providing not only improved sound and picture qual- ity, but also the option of providing interactive services. These new services are constantly being developed and improved by providers. - Page 153 makes transmission possible, and allows the TV set to process the signal. 1. IF = intermediate frequency...
- Page 154 18 Trouble-shooting guide Problem Possible cause Solution No reception of programs DVB-S-/DVB-T antenna mis- Check antenna previously received aligned or defective Active DVB-T antenna Connect power cord or receives no supply voltage switch on power supply (see Point 8.6) Programs are transmitted Perform scan (see Point 9) from another transponder/ channel...
- Page 155 Problem Possible cause Solution No picture, no sound, LED Short circuit in LNC connec- Switch off unit, repair short lights up tion circuit, switch unit on again Defective or missing cable Check all cable connections connection (see Point 4) Defective LNC Replace LNC False external unit set in the Correct setting (see Point...
- Page 156 Problem Possible cause Solution Var. programs are not dis- Wrong program list selected Select other program list played in the program list (see Point 6.2.3.2) Programs such as DSF and Interference from cordless Increase the distance Tele 5 are partially distorted “DECT telephones”...
- Page 157 Problem Possible cause Solution The Infobox is only shown The display time of the Set the desired display for a very short time after infobox is incorrectly set time the program change or it (see Point 8.4.1.3) takes a very long time to disappear The device cannot be con- Defective data stream-->unit...
Need help?
Do you have a question about the HDTV 32 Plus and is the answer not in the manual?
Questions and answers