Table of Contents
Advertisement
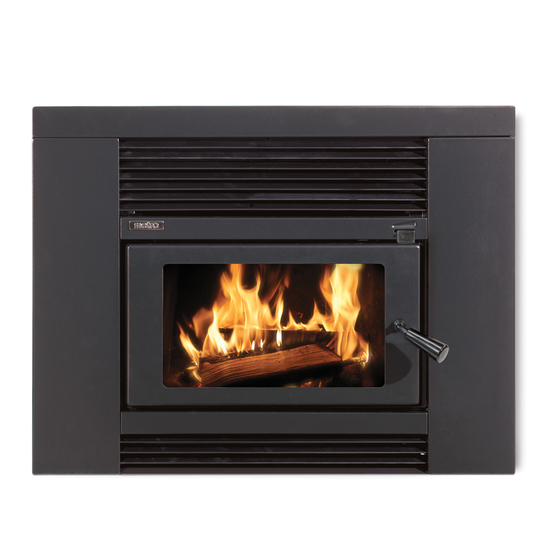
Wood Fire Installation & Owner's Operation Manual
LTD Insert Models
• LTD Trend Insert Fascia VE
Installation Important information ..........2
Assembling your Metro.........................2-3
Floor Protector Installation.......................6
Wetback and flue installation ..............6-7
Operation Important information ...........8
Optional wetbacks ..................................9
Getting to know your Metro ..................10
Operating your Metro.......................10-11
Cleaning and maintenance ...........11-12
Troubleshooting .....................................13
Metro warranty.......................................14
Pioneer wood fire accessories ..............15
PO Box 11, Inglewood 4347, New Zealand
Ph (06) 756 6520 • Fax (06) 756 6540
info@metrofires.co.nz • www.metrofires.co.nz
Advertisement
Table of Contents

Related Manuals for metrofires LTD Insert


Summary of Contents for metrofires LTD Insert
-
Page 1: Table Of Contents
Wood Fire Installation & Owner’s Operation Manual LTD Insert Models • LTD Trend Insert Fascia VE Installation Important information ..2 Getting to know your Metro ....10 Assembling your Metro......2-3 Operating your Metro.......10-11 Floor Protector Installation.......6 Cleaning and maintenance ...11-12 Wetback and flue installation ....6-7 Troubleshooting ........13... -
Page 2: Installation Important Information
WARNING! CAUTION! Important Information Important Information • WE HIGHLY RECOMMEND YOU READ THIS ENTIRE • Mixing of appliance or flue-system components MANUAL AS INCORRECT OPERATION, MISUSE AND/OR from different sources or modifying the dimensional LACK OF MAINTENANCE WILL VOID THE WARRANTY specification or components may result in hazardous conditions. - Page 3 Assembling the fascia Trend fascia’s are supplied partly assembled, and require the • Reposition the ashlip into its final position as illustrated in ashlip and bottom louvre to be fitted as illustrated in Diagrams Diagram 2A taking particular attention to ensure: 2 and 2A below.
- Page 4 A “spacer” washer has been pre-fitted and taped to assembling: - the top door hinge pin on the left hand side of the LTD Insert Firebox firebox (Refer Inset A, Diagram 1) remove this tape. • Take the boxed door you previously removed from the This model has a two piece top baffle which locates onto six lugs provided on the side walls of the firebox’s upper...
- Page 5 Pre-Installation Prior to installing your Metro fireplace insert into a fireplace The base of the fireplace cavity on which the Metro cavity, it is important that certain clearances and other fireplace insert will rest must be level. If it is not, it should be requirements are complied with as detailed below :- levelled using mortar.
-
Page 6: Floor Protector Installation
Diagram 4 Chart Wetbacks The Metro LTD Insert can be fitted with either of Pioneer’s 3kW 3. Using a hole saw or snips, prepare the cabinet for the or 4kW wetback option. Only Pioneer’s cast jacket wetback connection pipes. Note, these holes should be a neat... - Page 7 Installation Position the Metro LTD Insert which is still attached to its 6. With the flue pipe in position and sealed with a high wooden pallet directly in front of the fireplace cavity with the temperature fire cement into the flue stub, drill through the rear of the insert facing the fireplace opening.
-
Page 8: Operation Important Information
WARNING! CAUTION! Important Information Important Information • WE HIGHLY RECOMMEND YOU READ THIS ENTIRE • This appliance should be maintained & operated at all MANUAL AS INCORRECT OPERATION, MISUSE AND/OR times in accordance with this instruction manual LACK OF MAINTENANCE WILL VOID THE WARRANTY •... -
Page 9: Where To Install A Metro In Your Home
Where to install a Metro wood fire in your home Wood fires are usually installed in the main living area, which is gutters etc are directly above your preferred site. If you the section of the home that is usually kept the warmest, being have a two storey dwelling you need to consider the the area in the home most frequently occupied. -
Page 10: Getting To Know Your Metro
90° to the appliance, it than this pre-set low allows. will fall closed. This is a safety feature that ensures the door LTD Insert air control Safety off provision cannot fall open if it is not latched securely. For the door to remain open, you must open it fully. -
Page 11: Cleaning And Maintenance
Cleaning and maintenance for your Metro wood fire The Metro Trend Insert fascia is coated in vitreous enamel. This is • If the ash is not disposed of immediately, be careful where a permanent coating designed to last the life of the appliance. you store it, as the ash can retain heat for many days and As vitreous enamel is glass, if a solid or heavy object is dropped become a fire hazard. - Page 12 Type of promet required / Type of steel baffle(s) required Water heating options Clean air model LTD Small 500-1700 LTD Insert Front 500-2850 ECO/LTD Insert Rear (steel only) LTD 3kW Wetback 450-0100 or 500-2300 LTD 4kW Wetback 450-0150 • LTD Insert...
-
Page 13: Troubleshooting
Troubleshooting your Metro wood fire If your Metro is installed correctly, your fuel is dry and you Air control setting: operate your fire correctly, you will find it to be a pleasure to Ensure the air control setting is on high before opening the door use. -
Page 14: Metro Warranty
Warranty details for your Metro wood fire Metro wood fires are manufactured in New Zealand, using • It is critical that the fire not be operated with over worn, faulty the highest quality of materials, workmanship and the latest or missing door seals. Door seals will harden over time and manufacturing techniques, which is why we offer a full 10 year become over-worn (3-4 year’s) this will cause air to leak into firebox warranty and 1 year parts warranty for peace of mind. -
Page 15: Pioneer Wood Fire Accessories
See your Metro retailer to obtain a copy, or visit www.metrofires.co.nz metrofires.co.nz Visit the Metro website: www.metrofires.co.nz to view Metro’s ‘video demos’ showing the latest in wood fire technology energy saving options. You can view the entire Metro product range,...
Need help?
Do you have a question about the LTD Insert and is the answer not in the manual?
Questions and answers