Advertisement
Quick Links
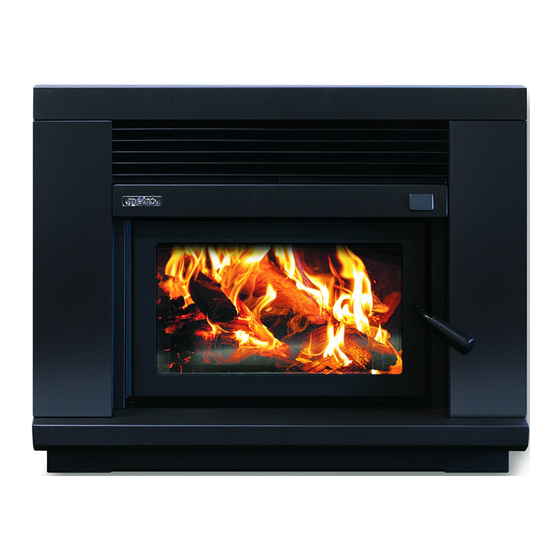
Wood Fire Installation & Owner's Operation Manual
F
B
D
C
Ultra Insert Wood Fire
Important information ..................................... 2
Pre-installation requirements .......................... 2
Installing your Metro ....................................... 3
Firebox parts and components ....................... 5
Ultra Insert flue kit installation ........................ 6
Chimney vent requirements ............................ 8
Floor protector requirements .......................... 9
G
Getting to know your Metro ........................... 10
Replacement parts & accessories ................. 11
Operating your Metro ................................... 11
Cleaning and maintenance .......................... 13
Troubleshooting ........................................... 14
Metro warranty ............................................. 15
19 Oropuriri Road // New Plymouth 4312
info@metrofires.co.nz // www.metrofires.co.nz
Advertisement

Related Manuals for metrofires Ultra Insert


Summary of Contents for metrofires Ultra Insert
-
Page 1: Table Of Contents
Installing your Metro ........3 Operating your Metro ........11 Firebox parts and components ....... 5 Cleaning and maintenance ......13 Ultra Insert flue kit installation ......6 Troubleshooting ........... 14 Chimney vent requirements ......8 Metro warranty ..........15 Floor protector requirements ...... - Page 2 The Ultra Insert fascia is coated in metallic black high temperature paint • This Ultra Insert MUST only be installed with the Metro Ultra Insert flue kit finish. Take care during assembly and when lifting and fitting the fascia •...
- Page 3 Installation of the Ultra Insert firebox Ultra Insert firebox installation Once the Metro is fully installed it is best to wait 24 hours for the flue seal cement to dry. Alternatively, it is recommended you burn a couple of sheets...
- Page 4 Installation of the Ultra Insert fascia Rotate the door handle fully anti-clockwise before placement of the WARNING! fascia. The inner fascia slips snugly into the cabinet with the Top Rail Important Information of the fascia resting onto the Top Panel of the cabinet.
- Page 5 Firebox parts and components - Fan unit • The fan is a permanent fixture and can only be replaced by a suitably WARNING! registered electrician. Important Information • The fan must always be connected to a 230VAC power supply when the •...
-
Page 6: Important Information
(G) with a pre-fitted stainless steel flue liner. This section of lined flue must be fitted as close as possible to the Ultra Insert firebox. If possible connect directly to the Ultra Insert flue spigot, but if it is necessary to use a telescopic offset, then the section of lined flue must fit directly above this component. -
Page 7: Ultra Insert Flue Kit Installation
Ultra Insert Flue Kit Installation Instructions 4. If an offset is required, an adjustable telescopic type is recommended. 8. Assemble the ECO Cowl as follows; Measure the amount of offset required and adjust the telescopic offset Take the stainless steel weather butterfly (A) so the angled sections are to suit, after smearing an adequate amount of Pioneer fire cement onto facing up. -
Page 8: Chimney Vent Requirements
If a grilled vent cover is used, please ensure the minimum vent area is maintained through the grille itself. Ultra Insert Wood re It is the responsibility of the installer to ensure that the requirements of... -
Page 9: Floor Protector Requirements
Metro fireplace inserts are designed to be installed directly onto a masonry base. An insulated floor protector is required to project in front of the Metro Ultra Insert and must extend a minimum of 200mm to each side of the door opening making the minimum floor protector width 825mm. - Page 10 • It is critical that the fire is operated with the fan switched on. 4. Your Ultra Insert must only be installed with a Metro Ultra Insert Flue kit. 5. Coal must not be used as a fuel. Please note, the above 4 points require regular inspection/maintenance...
-
Page 11: Operating Your Metro
‘low to high’. • Less ash buildup The Metro Ultra Insert is the world’s first conventional insert fire that meets • Less emission into the environment the specification of ECAN’s Ultra Low Emission standards and discharges •... - Page 12 Operating your Metro wood fire - continued The Metro Ultra Insert is the world’s first conventional Insert wood fire that meets the specification of ECan’s Ultra Low Emission standards and discharges incredibly low emission particulate even during the ignition light up phase.
-
Page 13: Cleaning And Maintenance
‘over fire’. Your Metro retailer stocks replacement woven fibreglass door and glass seals, Your Metro Ultra Insert has a special flue incorporating a lower liner which is which need replacing when they become hard and over worn. -
Page 14: Troubleshooting
Troubleshooting your Metro wood fire Downdraft/Turbulence blockage If your Metro is installed correctly, your fuel is dry and you operate your fire correctly, you will find it to be a pleasure to use. Metro’s many years of If you have checked all of the previous factors and the fire is still smoking experience within the wood heating industry has shown that dissatisfaction into the room, it’s possible there may be a down draft issue. -
Page 15: Metro Warranty
Important Information which is why we offer a full 5 year firebox warranty and a 1 year parts warranty on the Ultra Insert for your peace of mind. Note: The following 3 points require regular inspection/maintenance (every time the ash bed is cleaned out, generally 3-5 times a season) Metro Warranty and if not maintained will void the firebox warranty.
Need help?
Do you have a question about the Ultra Insert and is the answer not in the manual?
Questions and answers