Table of Contents
Advertisement
Quick Links
Wood Fire Installation & Owner's Operation Manual
Insert Wood Fires
Important information ..................................... 2
Assembling your Metro fire ............................. 2
Floor protector ............................................... 5
Installing your Metro ....................................... 6
Wetback installation ....................................... 7
Important operation information ..................... 9
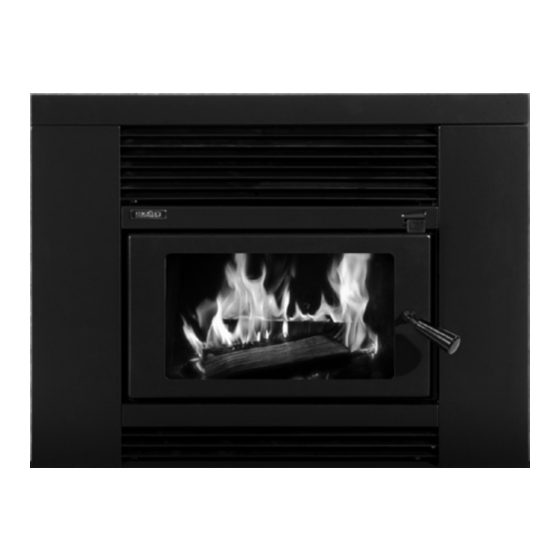
Getting to know your Metro fire ..................... 10
Operating your Metro fire .............................. 10
Cleaning and maintenance .......................... 11
Troubleshooting ........................................... 13
Metro Fires warranty .................................... 14
Replacement parts ...................................... 15
19 Oropuriri Road // New Plymouth 4312
info@metrofires.co.nz // www.metrofires.co.nz
Advertisement
Table of Contents

Subscribe to Our Youtube Channel
Related Manuals for metrofires Trend Insert Series


Summary of Contents for metrofires Trend Insert Series
-
Page 1: Table Of Contents
Cleaning and maintenance ......11 Installing your Metro ........6 Troubleshooting ........... 13 Wetback installation ........7 Metro Fires warranty ........14 Important operation information ..... 9 Replacement parts ........15 19 Oropuriri Road // New Plymouth 4312 info@metrofires.co.nz // www.metrofires.co.nz... -
Page 2: Important Information
WARNING! CAUTION! Important Information Important Information • WE HIGHLY RECOMMEND YOU READ THIS ENTIRE • Correct installation is critical to the safe operation and performance of this wood fire. MANUAL AS INCORRECT OPERATION, MISUSE AND/OR LACK OF MAINTENANCE WILL VOID THE WARRANTY •... - Page 3 Assembling your Metro fire Metro Insert firebox Diagram 1 - ECO Insert Firebox • Remove from within the firebox the plastic bag containing the bolt kit, two firebricks wrapped in a cardboard wrapper Spacer Washer Cabinet Top and then the top baffle assembly Hinge Pin Air Control Knob •...
- Page 4 Assembling your Metro fire Diagram 2 - Firebox brick and baffle locations ECO Insert Firebox Smart Insert & LTD Smart Insert Firebox Front baffle Rear baffle Front baffle Rear baffle Wetback Brick support lugs Side brick Wetback Brick support lugs Side brick connections connections...
-
Page 5: Floor Protector
Floor protector requirements Floor protector requirements Smart Insert Metro fireplace inserts are designed to be installed directly onto a concrete The ECO Smart Insert requires an insulating floor protector with base. The floor protector is required to project in front of the Metro and recommended construction of tiles on 26mm thick eterpan or alternative must extend a minimum of 200mm to each side of the door opening insulating material of equivalent insulation properties. -
Page 6: Installing Your Metro
Installation Position the Metro Insert firebox which is still attached to its wooden pallet 9. Using a suitably rated high temperature insulation, pack any gap that directly in front of the fireplace cavity with the rear of the insert facing the exists between the sides and top of the fireplace insert cabinet and fireplace opening. -
Page 7: Wetback Installation
Wetback installation Pioneer’s 3kW and 4kW wetback options are fitted internally to either side WARNING! of the ECO Insert firebox and LTD Insert firebox. Important Information To fit the 3kW or 4kW wetback proceed as follows • DO NOT connect to an unvented hot water system 1. - Page 8 Wetback installation Wetback installation for the Smart Insert & LTD Smart Insert 6. Remove the water heater from it’s box, which also contains a tube of fire cement. You will note a 6mm bolt and washer is fitted to one of the The Smart Insert water heater comes fully assembled and is designed to be casting ribs, remove this.
-
Page 9: Important Operation Information
WARNING! CAUTION! Important Information Important Information WE HIGHLY RECOMMEND YOU READ THIS ENTIRE • This appliance should be maintained & operated at all times in • accordance with this instruction manual MANUAL AS INCORRECT OPERATION, MISUSE AND/OR LACK OF MAINTENANCE WILL VOID THE WARRANTY •... -
Page 10: Getting To Know Your Metro Fire
Getting to know your Metro fire There is a single air control making your Metro fire easy to adjust. The air control moves from left to right, which is ‘low to high’. Slide this control knob gently from right to left until you reach a stop. This is a pre-set ‘low’ position. Your Metro must not be operated at a lower burn rate than this setting. -
Page 11: Cleaning And Maintenance
Cleaning and maintenance for your Metro fire WARNING! CAUTION! Important Information Important Information WE HIGHLY RECOMMEND YOU READ THIS ENTIRE • DO NOT operate this appliance with cracked door glass. • SECTION AS LACK OF MAINTENANCE AND SERVICING • DO NOT operate the fire with over worn, faulty or missing door PARTS AS REQUIRED MAY VOID THE WARRANTY seals. - Page 12 Cleaning and maintenance for your Metro fire - continued Ash removal Flue systems Over a period of time ash will build up in the base of the Metro’s firebox Should be checked annually, particularly the bottom end of the lower flue and require removal.
-
Page 13: Troubleshooting
Troubleshooting your Metro fire Downdraft/Turbulence blockage If your Metro is installed correctly, your fuel is dry and you operate your fire correctly, you will find it to be a pleasure to use. Metro’s many years of If you have checked all of the previous factors and the fire is still smoking experience within the wood heating industry has shown that dissatisfaction into the room, it’s possible there may be a down draft issue. -
Page 14: Metro Fires Warranty
Warranty details for your Metro fire Metro wood fires are manufactured in New Zealand, using the highest CAUTION! quality of materials, workmanship and the latest manufacturing techniques, Important Information which is why we offer a full 10 year firebox warranty and a 1 year parts warranty for your peace of mind. -
Page 15: Replacement Parts
Parts guide for your Metro – Promet, baffles and wetback options Your Metro wood fire must be regularly maintained and we recommended Hairline cracks in the promet extension are not uncommon and will have it is also serviced annually. If a wood fire is not regularly maintained and no adverse effect on the operation and performance of your Metro wood serviced, the life span will be reduced. - Page 16 Pioneer heating accessories Pioneer/Metro Fires offer a wide range of heating accessories designed to For further details talk to your Metro agency or visit www.metrofires.co.nz complement your Metro wood fire. The range includes ECO flue systems, floor protectors, wetbacks, heat transfer systems, baffles, bricks and more.
Need help?
Do you have a question about the Trend Insert Series and is the answer not in the manual?
Questions and answers