Table of Contents
Advertisement
Available languages
Available languages
Advertisement
Chapters
Table of Contents

Subscribe to Our Youtube Channel
Related Manuals for Rointe K series


Summary of Contents for Rointe K series
- Page 1 INSTRUCTIONS MANUAL MOUNTING, INSTALLATION, STARTING AND OPERATION MANUAL DE INSTRUCCIONES MONTAJE, INSTALACIÓN, PUESTA EN MARCHA Y FUNCIONAMIENTO BEDIENUNGSANLEITUNG MONTAGE, ANBRINGUNG, INBETRIEBNAHME UND FUNKTIONSWEISE MANUAL DE INSTRUÇÕES MONTAGEM, INSTALAÇÃO, LIGAÇÃO E FUNCIONAMENTO...
- Page 2 ENGLISH ......................3 Thank you very much for choosing the low consumption K SERIES digital electric radiators with an exclusive electronic time and temperature programmer, made with maximum quality components especially for you. The low consumption K SERIES digital electric radiators have passed the strictest quality controls to satisfy the most rigorous safety and energy efficiency requirements.
-
Page 3: Table Of Contents
ENGLISH TABLE OF CONTENTS 1. DESCRIPTION OF THE “K SERIES ” RADIATOR ..............4 1.1. Front panel parts ....................... 4 1.2. Switching On & Off (stand-by) ................... 5 1.3. Setting the day and time ....................6 1.4. Blocking the control panel ....................6 1.5. -
Page 4: Description Of The "K Series " Radiator
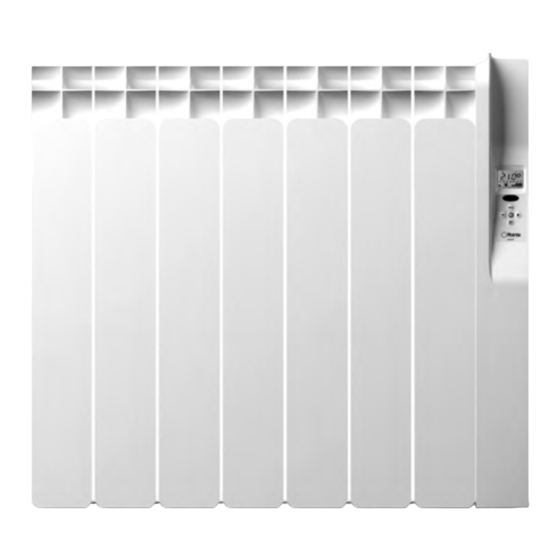
1. DESCRIPTION OF THE “K SERIES ” RADIATOR 1.1. Front panel parts TFT DISPLAY CONTROL PANEL... -
Page 5: Switching On & Off (Stand-By)
The screen will automatically go into sleep mode if no button is pushed for 10 seconds. By pushing the button again the radiator will go into standby mode with the word “Standby” appearing followed by the Rointe logo. -
Page 6: Setting The Day And Time
1.3. Setting the day and time By pressing the button for 3 seconds, we can access the time and date adjust feature to adjust the time and date of our radiator. Pressing the button , flashes up the hours, minutes and days of the week according to the number of times it is pressed. -
Page 7: Open Window Function
2. Press and we can select using the ECO temperature (15ºC to 19.5ºC). The symbol and the temperature will flash. 3. After pressing the button once again, the numbers of the week will start flashing and show as SEL1, SEL2, SEL3…. We can go forwards and backwards using the button . -
Page 8: Installation & Mounting
2.1. Mounting The K SERIES radiator works by means of natural air convection (Figure 1). In order to achieve optimal functioning and an even distribution of heat, the lower part of the radiator, once mounted on the wall, must be at least 10 to 12 cm from the floor, and 30 cm at the most. -
Page 9: Fixing The Supports
As for the sides and above, a minimum distance of between 10-12 cm must be left from any wall or brickwork in order for it to function correctly (Figure 2). 2.2. Fixing the supports Inside the packaging you will find a fixing kit and in the base of the radiator you will find a security support. -
Page 10: Maintenance & Cleaning
This radiator heater is filled with the exact amount of special oil that does not need any maintenance. Any repairs requiring the opening of the oil tank must only be done by ROINTE or its after-sales service, who should also be notified should an oil leak be noticed. -
Page 11: Guarantee
5. GUARANTEE 5.1. If your ROINTE radiator needs to be sent to the guarantee service, send it to the dealer / installer where it was purchased. In the event of any problems, you can contact ROINTE on its TECHNICAL ASSISTANCE HELPLINE 0845 604 5987 or e-mail us at rointe@rointe.co.uk... - Page 12 5.3.2.6. In the event of there being no national legislation applicable, this guarantee shall be the buyer’s sole protection. ROINTE, its offices, dealers and installers shall not be held liable for any type of damages, whether fortuitous or accidental, arising from the failure to observe any of the regulations related with this product.
- Page 13 ESPAÑOL ÍNDICE DE CONTENIDOS 1. DESCRIPCIÓN DEL RADIADOR “SERIE K” ...................14 1.1. Partes del panel frontal ....................14 1.2. Encendido y apagado (stand-by) ..................15 1.3. Ajustar día y hora ......................16 1.4. Bloqueo de teclado ......................16 1.5. Selección de temperatura ....................16 1.6.
-
Page 14: Descripción Del Radiador "Serie K
1. DESCRIPCIÓN DEL RADIADOR “SERIE K” 1.1. Partes del panel frontal DISPLAY TFT TECLADO... -
Page 15: Encendido Y Apagado (Stand-By)
Pasados 10 segundos sin pulsar ninguna tecla, la iluminación de la pantalla pasará al modo reposo de forma automática. Si estando encendido se pulsa de nuevo la tecla , el radiador pasará al modo “Stand By”, apareciendo la palabra “STAND BY” seguido del logotipo de ROINTE. -
Page 16: Ajustar Día Y Hora
1.3. Ajustar día y hora Pulsando 3 segundos, accedemos al ajuste hora y día desde el propio radiador. Pulsando , parpadea hora, minutos y día de la semana en función del número de pulsaciones. Con las teclas modificamos los valores. Para salir del ajuste hora y día, esperar 30 segundos o pulsar después de elegir día. -
Page 17: Función "Ventana Abierta
1. Seleccionar la temperatura CONFORT (20ºC a 30ºC), mediante las teclas mientras parpadea el icono y dicha temperatura. 2. Una pulsación corta sobre y podremos seleccionar mediante la temperatura ECO (15ºC a 19,5ºC) mientras parpadea el icono y la temperatura. 3. -
Page 18: Función Iluminación De Pantalla
1.9. Función iluminación de pantalla Se puede modificar la iluminación de la pantalla pulsando la tecla durante 3 segundos estando el producto en modo manual. Al activar este modo, se visualizará la siguiente pantalla: Con las teclas podemos disminuir o aumentar la luminosidad de la pantalla del modo ON. -
Page 19: Colocación Y Montaje
COLOCACIÓN Y MONTAJE El radiador nunca debe ser colocado justo por debajo de una toma de corriente.En las salas de baño, el radiador nunca debe ser instalado de tal forma que los interruptores y otros dispositivos de control puedan ser tocados por una persona que se encuentre en la bañera o ducha. 2.1. -
Page 20: Mantenimiento Y Limpieza
• Retirar la plantilla de montaje y realizar los agujeros en la pared. • Colocar los soportes superiores en la pared mediante los tacos y los tornillos. • Comprobar la correcta posición del soporte inferior. • Colgar el radiador de los soportes superiores. • ... -
Page 21: Precauciones De Instalación Y Seguridad (Normativa Une-En 60335)
Las reparaciones que necesitan la apertura del depósito de aceite no deberán efectuarse más que por ROINTE o su servicio posventa. Las reglamentaciones concernientes a la eliminación del aceite después de que el aparato calefactor sea desechado deben ser respetadas. -
Page 22: Garantía
5.1. Si debe enviar su radiador ROINTE al servicio de garantía, remítalo al distribuidor / instalador donde lo adquirió. En el caso de que le surjan dificultades, ROINTE pone a su disposición el TELÉFONO DE ASISTENCIA TÉCNICA 902 158 049 o el correo electrónico sat@rointe.com... - Page 23 5.3.2.3. Accidentes imprevistos que se escapan del control de ROINTE como rayos, incendios, riadas, desórdenes públicos, etc. 5.3.2.4. Las reparaciones o sustituciones que contempla esta garantía no permiten la extensión ni nuevo comienzo del periodo de la garantía. Las reparaciones o sustituciones que contemplan esta garantía se cumplirán con unidades reacondicionadas funcionalmente equivalentes.
- Page 25 DEUTSCH INHALTSVERZEICHNIS 1. BESCHREIBUNG DES HEIZKÖRPERS “SERIE K” ..............26 1.1. Elemente der Vorderansicht .................... 26 1.2. Ein- und ausschalten (stand-by) ..................27 1.3. Zeit- und Datumseinstellung ..................28 1.4. Tastaturblockierung ......................28 1.5. Temperaturauswahl ......................28 1.6. Manueller / automatischer Betrieb ................28 1.7.
-
Page 26: Beschreibung Des Heizkörpers "Serie K
1. BESCHREIBUNG DES HEIZKÖRPERS “SERIE K” 1.1. Elemente der Vorderansicht TFT-DISPLAY TASTATUR... -
Page 27: Ein- Und Ausschalten (Stand-By)
Splash-Image nach TFT Display: Nach 10 Sekunden ohne drücken einer beliebigen Taste wird die Displaybeleuchtung in den Standby mode automatisch gehen.Drücken der Taste wieder Kühler geht, erscheint das Wort “STAND BY” vom Logo von ROINTE gefolgt. -
Page 28: Zeit- Und Datumseinstellung
1.3. Zeit- und Datumseinstellung Durch drei-sekündiges Drücken der Taste greifen Sie am Heizkörper selbst auf die Zeit- und Datumseinstellung zu. Nach Drücken von , blinkt, je nach Anzahl der Betätigung, entweder die Angabe zu Stunde, Minute oder Wochentag. Mittels der Tasten verändern Sie die entsprechenden Werte. -
Page 29: Offene Fenster Funktion
Durch drei-sekündiges Drücken der Taste greifen Sie vom Heizkörper selbst aus auf die Programmierung zu: 1. Wählen Sie den Temperaturbereich KOMFORT (20ºC bis 30ºC) mittels der Tasten während das Symbol und die Temperaturanzeige blinken. 2. Nach einmaligem kurzen Drücken von können Sie mittels Temperaturbereich SPAR (15ºC bis 19.5ºC) auswählen, während das Symbol die Temperaturanzeige blinken. -
Page 30: Beleuchtung Des Displays Funktion
Der Modus wird für 2 Stunden aktiv sein. Während dieser Zeit gedrückt, wird schaltet die Heizung ab. Durch erneutes Drücken, wird das System ohne die aktive “Fenster offen”-Funktion wieder einschalten. Wenn keine Taste gedrückt wird, innerhalb von 2 Stunden, am Ende dieser Periode der Heizkörper zurück automatisch in seinen vorherigen Zustand. -
Page 31: Aufstellung Und Montage
2. AUFSTELLUNG UND MONTAGE Der Heizkörper darf unter keinen Umständen genau unter einem Stromanschluß aufgestellt werden. Im Bad darf der Heizkörper unter keinen Umständen so angebracht werden, daß seine Schalter und andere Steuervorrichtungen von einer in der Badewanne oder Dusche befindlichen Person betätigt werden können. -
Page 32: Wartung Und Reinigung
• Bringen Sie die oberen Halterungen mit Hilfe der Dübel und Schrauben an der Wand an. • Überprüfen Sie die korrekte Positionierung die untere Halterung. • Platzieren Sie den Heizkörper auf den oberen Halterungen. • Schrauben Sie die untere Halterung an der Wand 81 mm 243 mm 406 mm... -
Page 33: Vorsichtsmaßregeln Zur Installation
Dieser Heizkörper ist mit einer präzise bemessenen Menge an Spezialöl befüllt, welches keiner Wartung bedarf. Reparaturen, die das Öffnen des Ölbehälters erforderlich machen, dürfen nur durch ROINTE oder seinen Kundendienst ausgeführt werden, der auch im Falle eines Austritts des im Heizkörper befindlichen Öls kontaktiert werden sollte. -
Page 34: Garantie
(Vertreiber/Installateur). Bei jeglichen Schwierigkeiten können sie über die HOTLINE +34 902 158 049 oder per E-Mail sat@rointe.com von ROINTE technische Hilfe anfordern. 5.2. ROINTE garantiert Ihnen, dass dieses Produkt beim ersten Kauf und für die nachfolgenden 120 Monate (Aluminium und Dichtungen) bzw. 24 Monate (elektrische und elektronische Komponenten) keinerlei Material-, Konstruktions- oder Fabrikationsdefekte aufweist. - Page 35 5.3.2.2. Reparaturen und Öffnen des Heizkörpers mittels nicht authorisierten Personals. 5.3.2.3. Unvorhersehbare Ereignisse, die sich der Kontrolle von ROINTE entziehen, z. B. Blitzschlag, Brand, Hochwasser, grober Unfug, etc. 5.3.2.4. Reparatur oder Ersatz im Rahmen dieser Garantie umfassen nicht den neuerlichen Beginn der Garantiezeit.
- Page 37 PORTUGUÊS ÍNDICE DOS CONTEÚDOS 1. DESCRIÇÃO DO RADIADOR “SÉRIE K” .................. 38 1.1. Painel frontal ........................38 1.2. Ligar e desligar (stand-by) ....................39 1.3. Ajuste de relógio: hora e dia .................... 40 1.4. Bloqueio do teclado ......................40 1.5. Selecção da temperatura ....................40 1.6.
-
Page 38: Descrição Do Radiador "Série K
1. DESCRIÇÃO DO RADIADOR “SÉRIE K” 1.1. Painel frontal VISOR TFT TECLADO... -
Page 39: Ligar E Desligar (Stand-By)
TFT: Passados 10 segundos sem pulsar ninhuma tecla, a luz do ecrã passará ao modo descanso de forma automática.Pulsando de novo a tecla radiador se apagará, aparecendo a palabra “stand by” á continuação o logotipo da ROINTE. -
Page 40: Ajuste De Relógio: Hora E Dia
1.3. Ajuste de relógio: hora e dia Pressionando durante 3 segundos acedemos ao ajuste de hora e dia desde o próprio radiador. Pressionando piscarão hora, minutos e dia da semana, de acordo com o número de toques realizado. Utilize as teclas para modificar os valores. -
Page 41: Função "Janela Aberta
1. Selecione a temperatura CONFORT (20ºC a 30ºC) através das teclas enquanto pisca o logo e dita temperatura. 2. Com um toque cur to sobre é possível selecionar a temperatura ECO (15ºC a 19.5ºC) através das teclas enquanto pisca o logo e dita temperatura. -
Page 42: Função Iluminação Do Ecrã
1.9. Função Iluminação do ecrã É possivel modificar a iluminação do ecrã pulsando a tecla durante 3 segundos.Estando o readiador em modo manual. Ao activar este modo, se verá a seguin te imagen: Com as teclas aumentar ou disminuir a iluminação do ecrã em ON.Para modificar a iluminação do modo “Stand-by”, pulsaremos a tecla e o quadro delimitador marcará... -
Page 43: Colocação E Montagem
2. COLOCAÇÃO E MONTAGEM O radiador nunca deve ser colocado justamente debaixo de uma tomada eléctrica.Nas casas de banho, o radiador nunca deve ser instalado de tal forma a que os interruptores e outros dispositivos de controlo possam estar ao alcance de uma pessoa que se encontre na banheira ou no duche. -
Page 44: Manutenção E Limpeza
• Posicionar o radiador sobre os suportes superiores. • Parafuse o suporte inferior na parede. 81 mm 243 mm 406 mm 81 mm 162 mm Solo Solo Solo KN0330RAD KN0550RAD KN0770RAD 568 mm 730 mm 893 mm 243 mm 324 mm 406 mm Solo Solo... -
Page 45: Precauções De Segurança
As reparações que necessitam da abertura do depósito de óleo só deverão ser efectuadas pela ROINTE ou pelo seu serviço de pós-venda. As regulamentações respeitantes à eliminação do óleo após o depósito de aquecimento ser despejado devem ser respeitadas. -
Page 46: Garantia
à correta eliminação de seu aparelho. 5. GARANTIA 5.1. Se tiver de enviar o seu radiador ROINTE para o serviço de garantia, envie-o para o distribuidor / instalador onde o adquiriu. No caso de surgirem problemas, a ROINTE põe à sua disposição o TELÉFONE DE ASSISTÊNCIA TÉCNICA +34 902 158 049 ou o correio electrónico sat@rointe.com... - Page 47 5.3.2.3. Os acidentes imprevistos que saem fora do controlo da ROINTE como trovoadas, incêndios, cheias, agitação pública, etc. 5.3.2.4. As reparações ou substituições que contemplam esta garantia não permitem a extensão nem um novo começo ido período da garantia. As reparações ou substituições que contemplam esta garantia cumprir-se-ão com as unidades readaptadas funcionalmente equivalentes.
- Page 48 ROINTE UK ROINTE HEAD OFFICE Catalyst House Pol. Ind. Vicente Antolinos 720 Centennial Court, Centennial Park C/ E, Parcela 43 Elstree, Herts, WD6 3SY 30140 Santomera, Murcia, España CUSTOMER SERVICE T. +34 900 103 061 T. 0845 604 5987 F. +34 968 277 125 FAX NUMBER Servicio Técnico: +34 902 130 134...
Need help?
Do you have a question about the K series and is the answer not in the manual?
Questions and answers