Table of Contents
Advertisement
Quick Links
Room Air Conditioners
Z Series Inverter Range Split Type
DC Inverter
Register your air conditioner
Model information can be found on the CE
label.
Please register your product online at
www.ecoair.org. For your future
convenience, record the model information
below.
____________________________________
MODEL NUMBER
____________________________________
SERIAL NUMBER
____________________________________
PURCHASE DATE
Advertisement
Table of Contents

Subscribe to Our Youtube Channel
Related Manuals for Ecoair ECO950SD


Summary of Contents for Ecoair ECO950SD
- Page 1 Z Series Inverter Range Split Type DC Inverter Register your air conditioner Model information can be found on the CE label. Please register your product online at www.ecoair.org. For your future convenience, record the model information below. ____________________________________ MODEL NUMBER ____________________________________...
- Page 2 What’s in the box 1 x Z Series Indoor Unit 1 x Z Series Outdoor Unit 1 x Remote Control 1 x Drain Hose 1 x User Manual 1 x Hole Cover Plate 1 x Drain Joint 4 x Wall Plugs and Screws. 1 set of Copper Pipes This appliance can be used by minors from 8 years and above and persons with reduced physical, sensory or mental capabilities or lack of experience and knowledge if they have been given supervision...
-
Page 3: Table Of Contents
Content Operation and maintenance BS Plug Wiring ......................Safety Precautions ....................Notices for use......................Name of parts ......................Operation Remote Control ..................Emergency operation..................... Clean and care ...................... troubleshooting....................... Installation service Notices for installation ................... Installation dimension diagram ................Installation of indoor unit ..................Installation of outdoor unit.................. -
Page 4: Bs Plug Wiring
BS Plug Wiring Wiring Instructions: Should it be necessary to change the plug please note the wires in the mains lead are coloured in accordance with the following code: BLUE - NEUTRAL BROWN – LIVE GREEN AND YELLOW - EARTH As the colours of the wires in the mains lead of this appliance may not correspond with the coloured markings identifying the terminals in your plug, proceed as follows:... -
Page 5: Safety Precautions
Safety Precautions Please read the following notices before operation WARNING If there's abnormal pheno- Do not operate the air cond- Do not cut off or damage the menon(like smell of burning), itioner with wet hands. power cord or signal control please cut off the power imm- wire. - Page 6 Safety Precautions Earth: The ground Be sure to pull out the power Select the most appropriate tem- plug when not using the air co- be connected! perature. nditioner for a long time. Keep room cool- er than outside about 5 degree. If not, please ask the qualified person- nel to install.
- Page 7 Safety Precautions Do not cut off or damage the power cords or To change the airflow direction, adjust the vertical control cords. If they are damaged, please air flow direction by using the remote controller contact qualified service or adjust horizontal air flow direction manually. Vertical Louver Horizontal Louver Do not insert your hands or objects into...
-
Page 8: Notices For Use
Notices for use Working principle and special functions for Cooling Principle: Air conditioner absorbs heat in the room and discharges the heat through the outdoor that indoor ambient temperature decreased, its cooling capacity will increase or decrease by outdoor ambient temperature. Anti-freezing function: If the unit is running in COOL mode and in low tem on the heat exchanger, when indoor heat exchanger temperature decreased below 0... -
Page 9: Working Temperature Range
Notices for use Anti-cool wind function: In "Heat" mode, under the following three kinds of state, if indoor heat exchanger doesn't arrive at certain temp, indoor fan will not act, in order to prevent cool wind blowing(within 2 mins): 1. Heating starts. 2.After Auto Defrost finished. 3.Heating under the low temperature. Working temperature range Indoor sideDB/WB( Outdoor sideDB/WB(... -
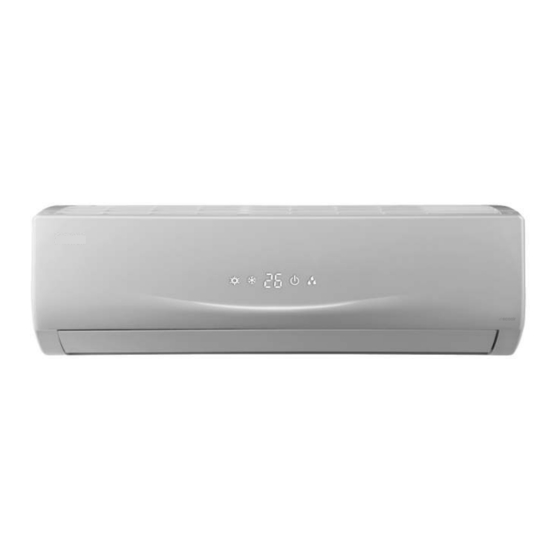
Page 10: Name Of Parts
Name of Parts Indoor unit Air in Air out The icons displayed: H O U R ONOFF Cool Power cord Heat Power Remote controller Set temp. Front panel Filter Horizontal louver Outdoor unit Wall pipe Air in Binding tape Connection wires Drain hose Drain connecter Air out... -
Page 11: Operation Remote Control
Operation of Remote Controller ON/OFF Press it to start or stop operation. Press it to decrease temperature setting. : Press it to increase temperature setting. MODE Press it to select operation mode (AUTO/COOL/DRY/FAN/HEAT). : H O U R Press it to set fan speed. ONOFF SWING Press it set swing angle. -
Page 12: Digital Display
Operation of Remote Controller 18 19 20 21 MODE icon: Up & down swing icon: is displayed when pressing If MODE button is pressed, current operation mode icon down button. the up & down swing Press this button again to clear the (AUTO), ( COOL), display... - Page 13 Operation of Remote Controller FAN SPEED display: HEALTH icon: Press FAN button to select the is displayed when pressing the desired fan speed setting(AUTO- HEALTH button.Press this button Low-Med-High).Your selection will (optional) be displayed in the LCD windows, except the AUTO fan speed. X-FAN icon: I FEEL icon: is displayed when pressing the...
- Page 14 Operation of Remote Controller Remote Controller Description ON/OFF : Press this button to turn on the unit .Press this button again to turn off the unit. Press this button to decrease set temperature. Holding it down above 2 seconds rapidly decreases set temperature.
- Page 15 Operation of Remote Controller SLEEP : Press this button to go into the SLEEP operation mode. Press it again to cancel this function. This function is available in COOL , HEAT (Only for models with heating function) or DRY mode to maintain the most comfortable temperature for you. TEMP: Pressing TEMP button, (set temperature),...
- Page 16 Operation of Remote Controller Combination of "+" and "-" buttons: About lock Press "+ " and "- " buttons simultaneously to lock or unlock the keypad. If the remote controller is locked, is displayed. In this case, pressing any button, blinks three times.
-
Page 17: Emergency Operation
Emergency Operation Emergency Operation When the remote controller is lost or damaged, please use the manual switch on the main unit. In that case, the unit will operate in AUTO mode and the temperature setting or fan speed can not be changed. The manual switch can be operated as below: Manual switch Turn on the unit: Press AUTO/STOP button to... -
Page 18: Clean And Care
2 year. Contact your dealer or EcoAir. Reinstall the air filter Reinstall the filters along the direction of arrowhead. Close the panel. - Page 19 Clean and care Check before use Be sure that nothing obstructs the air outlet and intake vents. Check that connected. Check the batteries of air conditioner Check that whether the installation of the outdoor unit . If damaged, please contact the dealer. Maintain after use Turn main power off.
-
Page 20: Troubleshooting
Troubleshooting CAUTION Don't attempt to repair the air conditioner by yourself, it can cause an electric shock or fire. Please check the following items before asking for repair, it can save your time and money. Phenomenon Troubleshooting Not operate immediately when the air Once the air conditioner is stopped, it will conditioner is restarted. - Page 21 Troubleshooting Phenomenon Troubleshooting Has the power been shut down? The unit can not run. Is power plug loosed? Is the circuit protection device tripped off or not? Is voltage higher or lower? (Tested by quali ed air conditioning engineer) Breaking off Is the TIMER correctly used? Is Temp.
- Page 22 Troubleshooting Phenomenon Troubleshooting In HEAT mode, when the temperature of indoor Indoor unit cannot deliver air. heat exchanger is very low, that will stop deliver air in order to prevent cool air. (Within 2min) In HEAT mode, when the outdoor temperature is low or high humidity, frost outdoor heat exchanger, that the automatically defrost, indoor unit stop...
-
Page 23: Notices For Installation
Notices for installation Important Notices The unit installation work must be done by air conditioning engineer according to the local rules and this manual. To avoid malfunction and warranty, installations must be carried out by qualified air conditioning engineers. When removing the unit to the other place, please firstly contact with the authorized or qualified air conditioning engineer. - Page 24 Notices for installation Safety Requirements For Electric Appliances 1. The power supply should be used the rated voltage and AC exclusive circuit, the power cable diameter should be satisfied. 2. Don't drag the power cable emphatically. It should be reliably earthed, and it should be connected to the special earth device, the installation work should be operated by the in order 4.
-
Page 25: Installation Dimension Diagram
Installation dimension diagram Installation dimension diagram Space to the ceiling Above Space to the wall Above Above Space to the wall Above Air outlet side Above Space to the oor The dimensions of the space necessary for correct installation of the appliance including the minimum permissible distances to adjacent structures Space to the obstruction Air inlet side... -
Page 26: Installation Of Indoor Unit
Installation of Indoor Unit Installation of Mounting Plate 1. Mounting plate should be installed horizontally. As the water tray's outlet for the indoor unit is two-way type, during installation, the indoor unit should slightly slant to water tray's outlet for smooth drainage of condenser water. -
Page 27: Installation Of Indoor Unit
Installation of Indoor Unit Connecting Indoor and Outdoor Electric Wires 1.Open the front panel. 2.Remove the wiring cover as shown in Fig 6. 3.Make the power connection cord pass through the hole at the back of indoor unit. 4.Reinstall the cord anchorageand wiring cover. 5.Reinstall the front panel. - Page 28 Installation of Indoor Unit Installation of Indoor Unit External connection Gas side pipe The piping can be output from right, right rear, left electric wire Liquid side piping or left rear. When routing the piping and wiring from the left Tailing 2 Gas side piping or right side of indoor unit, cut off the tailings...
-
Page 29: Installation Of Outdoor Unit
Installation of Outdoor Unit Electric wiring Disassemble the handle on the outdoor unit right side plate. Take off wire clamp. Connect and fix power connect Handle cord (for cooling and heating unit,connect and fix power connect cord and signal control wire)to terminal of line bank. -
Page 30: Check After Installation And Test Operation
Check after installation and test operation Check after installation Items to be checked Possible malfunction Has it been fixed firmly? The unit may drop, shake or emit noise. It may cause insufficient cooling(heating) Have you done the refrigerant leakage test? capacity It may cause condensation and dripping. - Page 31 SERVICE AND WARRANTY ONE (1) YEAR LIMITED WARRANTY Save This Warranty Information Eco Air guarantees this product free from defects in materials and workmanship for a period of one (1) year from the date of purchase. Coverage is valid only with proof of purchase. Faults arising from a faulty installation is specifically excluded.
Need help?
Do you have a question about the ECO950SD and is the answer not in the manual?
Questions and answers