Table of Contents
Advertisement
Advertisement
Table of Contents

Related Manuals for First Degree Fitness Neptune Challenge AR


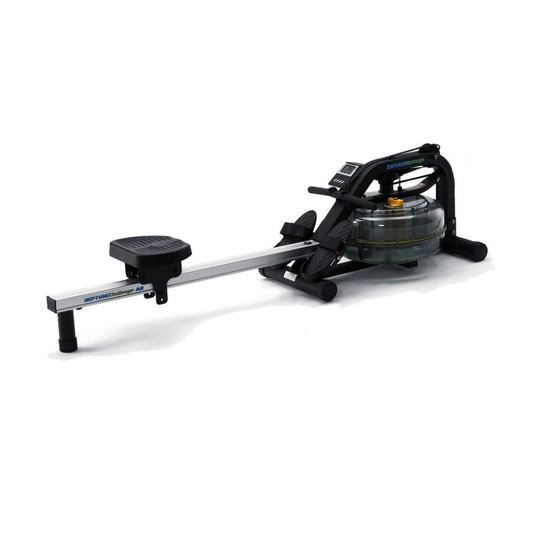
Summary of Contents for First Degree Fitness Neptune Challenge AR
- Page 1 Owners Manual...
- Page 2 Training with the Rower 1. As with any piece of fitness equipment, consult a physician before be- ginning your Rower exercise program. 2. Follow instructions provided in this manual for correct foot position and basic rowing techniques 3. For more detailed rowing techniques, please refer to our international website at www.firstdegreefitness.com CAUTION...
-
Page 3: Table Of Contents
Contents Rower Box Contents Assembly Instructions Fine Tuning the Rower Adjustable Resistance (AR) Tank Note on Filling the AR Tank Tank Filling and Water Treatment Removing/Changing Tank Water Rower Computer How to Row? How Often? Detaching the Rower Belt Retching the Rower Belt Removing the Bungee Shock Cord Replacing the Bungee Shock Cord Troubleshooting... -
Page 4: Rower Box Contents
Rower Box Contents... - Page 5 Item Description Item Description Main Frame Footstrap (2) Rower Seat Rear Leg (1) Seat Rail (boxed separately) 75x50 Rubber End Cap (1) M10x180mm Bolt (1) M10x25 Rear Leg Bolt (1) M10 Plastic Dome Washer (1) Rear Rubber Bumpstop (1) M10 Nylock Nut (2) M6x10mm Bumpstop Screws (2) 11x21x2T Washer (2) Seat Rail Internal Support Bracket (1)
-
Page 6: Assembly Instructions
Assembly Instructions Install Rower Seat[2] onto Seat Rail[3], with widest part of seat rearward. CAUTION Installing the Seat incorrectly will result in lack of data pickup during rowing. Underside of Turn Seat Rail over, and install the Rear Beveled Seat Rail Rubber Bumpstop[20] using 2x edge M6x10mm screws[21] with beveled... - Page 7 Install the Seat Rail onto the Mainframe. Attach Sensor Lead from Seat Rail to the Mainframe, then align the front Seat Rail holes with Mainframe and install, using 1x M10x95mm Bolt[8], 2x M10 Springs Washer [9] and 1xM10 Nylock Nut[6]. Sensor Lead Install the M10x180mm[4] Vertical Frame Tensioning Bolt with the Plastic...
-
Page 8: Fine Tuning The Rower
Fine Tuning the Rower: The Rower is designed to function as a pre-stressed frame . Using the Mid Leg as your guide- line, tighten the Vertical Frame Tensioning Bolt until the Mid Leg rises approximately 3-5mm off the floor. The Mid Leg should just touch the ground during a rowing stroke. 3-5mm off the floor is ideal Adjust Vertical Frame Tensioning Bolt here using the Allen Key here:... -
Page 9: Adjustable Resistance (Ar) Tank
Adjustable Resistance (AR) Tank The Adjustable Resistance (AR) Tank, developed and patented by First Degree Fitness, offers a true multi-level experience. Water is moved between the "storage" and "active" chambers of the AR Tank. Your new Rowing Ergometer can adapt - at the turn of a dial - to the resistance preferred by each user in the home environment. -
Page 10: Note On Filling The Ar Tank
Note on Filling the AR Tank Important: Please Read Before Filling Tank: Caution: When filling the AR tank, the adjuster handle must be set to the “MAX” position as shown to allow accurate fill levels. Using any other setting other than “MAX” will result in inaccurate fill levels and in extreme cases could cause leakage to occur during use or when stored in the standing position. -
Page 11: Tank Filling And Water Treatment
Tank Filling and Water Treatment Tank Filling and Water Treatment Pro- cedures Note: 17 liters of water is required for Siphon maximum filling. Fill tank with adjuster handle set to “MAX” Tank plug only. 1. Remove Rubber Fill Plug from the top of the tank. 2. -
Page 12: Removing/Changing Tank Water
Removing/Changing Tank Water: Set Adjuster handle to “MIN” Row a minimum of ten complete strokes before commencing tank draining. Remove tank plug, insert rigid end of siphon into tank and begin draining. NOTE: Approximately 40% of tank water will remain. It is not possible to completely drain the A/R tank without disassem- bly. -
Page 13: Rower Computer
Rower Computer Options: Install the batteries, and the LCD panel will display with an audible buzz Mode: Allows access to various settings: Set: Press when digits are flashing to set values upward. Can be applied for all settings with the exception of “Total Count” and “SPM”. Once values are set, press “Enter”... -
Page 14: How To Row
How to Row? 1. Begin the stroke comfortably forward and push strongly back with your legs while keeping your arms and back straight. 2. Begin to pull your arms back as they pass over your knees and continue the stroke through to completion rocking slightly back over your pelvis. 3. -
Page 15: Detaching The Rower Belt
Detaching the Rower Belt 1.To detach belt, simply pull beyond the range of the normal rowing stroke until the belt detaches from the Belt Bungee Pulley. Tip: You’ll hear the Velcro separating just before the belt detaches. 2.Cut plastic tie holding bungee at the Bungee Attachment Point, pull the Bungee Shock Cord Cord through all three pulleys and... -
Page 16: Removing The Bungee Shock Cord
4.Rethread the Bungee Shock Cord (on opposite side of the Idle Wheel) back Bungee Pulley through the Bungee Pulleys and tie off at the Attachment Point. Bungee Shock Cord Hint If Bungee Shock Cords previous tension seemed correct (a good way to judge is if the Rower Han- dle can make it to the furthest point forward on the top of the Mainframe under bungee tension alone) then simply tie off at previous position. -
Page 17: Replacing The Bungee Shock Cord
Replacing the Bungee Shock Cord Reinstall the Shock Cord through the Upper Frame, along the opposite side of Idle Wheel, through the Mid Frame and Lower Bungee Pulleys and then tie off with plastic tie wrap to correct tension. Replace Frame Plug Pull Bungee through until seated securely... -
Page 18: Troubleshooting
Troubleshooting Fault Probable Cause Solution Water changes color Rower is in direct sunlight Change rower location to reduce or becomes cloudy. or has not had water direct exposure to sunlight. Add treatment. water treatment or change tank water as directed in the water treatment section of this manu- al.Consider using distilled water to refill tank. - Page 19 Metal Frame – 5 Year Limited Warranty First Degree Fitness will repair or replace the metal Main Frame of the Rower should it fail due to any defect in materi- als or workmanship within 5 years of the original purchase. Warranty does not apply to frame coating.
Need help?
Do you have a question about the Neptune Challenge AR and is the answer not in the manual?
Questions and answers