
Related Manuals for Duplo DC-535


Summary of Contents for Duplo DC-535
- Page 1 DC-535 Cutter Ver.1 WARNING For the safe usage of the machine, correct operation and periodic maintenance are essential. Read this manual before using the machine. ¡Store in a manner that permits use anytime.
- Page 2 Introduction Thank you for purchasing the DC-535 Cutter. This product is the result of our many years of experience in the field of office equipment. Be sure to read this manual before using the machine. In order to use the machine safely and efficiently, read this manual thoroughly, and make sure that you understand all of the instructions that it gives, so that you operate the machine correctly.
-
Page 3: Table Of Contents
TABLE OF CONTENTS Safety instructions ......3 1.Names and functions of each part....7 Feed side . -
Page 4: Safety Instructions
Safety instructions ¡Be sure to follow these instructions. They are extremely important for safety. WARNING To avoid electric shock: ¡Always pull the power supply plug out of its outlet before removing jammed paper. Do not insert or remove the plug with wet hands. ¡Do not use supply voltage other than the specified voltage. - Page 5 Safety instructions CAUTION ¡Do not connect the cutter to a power outlet Installation location that is also used for equipment that generates noise, such as large-size office ¡Install the machine in a level place. equipment or refrigerators. General operation instructions ¡Do not install the machine in a place subject ¡...
- Page 6 Safety instructions DLocations of warning stickers The locations of the machine's warning stickers are shown below. To ensure safe work, read the stickers and heed their instructions. Keep the stickers clean at all times. If they become damaged or peel off, replace them with new ones.
- Page 7 Safety instructions Part No. Name Q'ty L8-T1080 Warning Sticker 1 L8-T1070 Warning Sticker 2 L8-T1100 Warning Sticker 3 - 6 -...
-
Page 8: Names And Functions Of Each Part
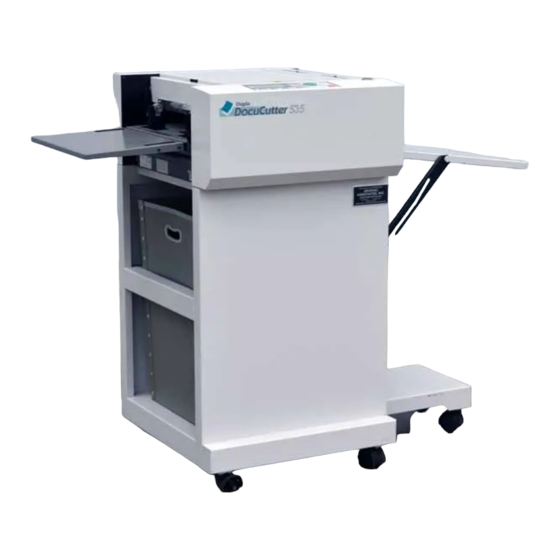
1. Names and functions of each part Feed side Name Function Front safety cover Open this cover to adjust the paper thickness or to remove jammed paper. Operation panel See "Names and functions of the operation panel" on p. 9. Paper tray Load the paper into these trays. -
Page 9: Ejection Side
1. Names and functions of each part Ejection side Name Function Rear safety cover Open this cover to adjust the margin slitters or to remove jammed paper. Ejection tray Receives ejected paper. Ejection stopper Stops the leading edge of ejected paper sheets. Ejection guides Laterally positions the ejected paper. -
Page 10: Names And Function Of The Operation Panel
2. Names and function of the operation panel Display unit Name Function Liquid crystal Display Displays various messages. COVER indicator Lights when a safety cover is open. JAM indicator Lights when a paper jam occurs. PAPER indicator Lights when there is no paper in the paper tray. READY TO RUN In the RUN mode, lights to indicate the machine is ready to run. -
Page 11: Procedures For Using The Machine
3. Procedures for using the machine Setting the ejection tray in place Strut Lift the ejection tray upward. Hook the slots in the tray's struts onto the pins on both sides of the machine body. Make sure that the tray is securely set in place. - Page 12 3. Procedures for using the machine Loading the paper Paper guides Lift up the paper tray's lock lever, to unlock the paper Paper size marks guides. Align the paper guides with the marks for the size of paper to be loaded. Lock lever 3.
- Page 13 3. Procedures for using the machine 6. Fit the paper stopper to the paper tray, so that it rests Paper stopper against the trailing edge of the paper. 7. Fit the No. 1 paper retainer into the gap between the stopper's prongs, so that it holds down the paper.
- Page 14 3. Procedures for using the machine 2. Turn the adjuster knob to adjust the separator plate's Thumb screw position to match the paper thickness. Adjuster knob The separator plate's standard position is the fully- emerged position. ¥ For thin paper: Turn the adjuster knob in the "L" direction to make the separator plate emerge.
- Page 15 3. Procedures for using the machine Adjusting the margin slitter 1. Place 1 sheet of the paper to be used against the scale on Align Paper the safety cover, and align the center of the paper with Scale the scale's central line. 2.
-
Page 16: Basic Operation
4. Basic operation About modes and mode displays The DocuCutter has 4 modes. After completing the "Procedures for using the machine" (p.10), turn on the power, select a registration number (in the Select mode), and perform test cutting. Then use the RUN mode to run the machine. - Page 17 4. Basic operation For registering / deleting cutting dimensions [Freesize mode] [ F r e e s i z e I n p u t ] qSetting of registration number (No. 00 - (Registration) N o . 4 4 > N o .
-
Page 18: Turning On The Power
4. Basic operation Turning on the power 1. Press the [ ] side of the power switch, to turn the power on. When the power is turned on, the screen that was displayed when the power was last turned off appears on the LCD panel. -
Page 19: Performing Test Operation To Check The Cutting Dimensions
4. Basic operation 3. Press the SET button. "#" will be displayed, and then the S e l e c t RUN mode display will appear. The machine is now ready N o . 0 1 : 3 : T 3 0 7 . -
Page 20: Registering Cutting Dimensions
5. Registering cutting dimensions Overview Pre-register cutting dimensions, and call them up as ¡Brackets( )indicate the case with 3 pieces required by selecting registration numbers. Numbers 0 through 98 are available for registering Leading edge cut (CUT No.1)dimension cutting dimensions. IMPORTANT Middle cut ¥... - Page 21 5. Registering cutting dimensions 8. Use the "3" and "4" keys to select the middle cut (CUT Example : inputting 100mm for CUT No.2 No. 2) dimension. L e n g t h ? 1 0 5 . 0 2 : 1 0 0 . 0 mm 9.
-
Page 22: Other Functions
6. Other functions Deleting registered data 1. Press the MODE button as many times as needed to [ F r e e s i z e I n p u t ] select "Freesize Input". N o . 4 4 > N o . -
Page 23: Suggestions
7. Suggestions Messages displayed on LCD when a jam occurs When a paper jam occurs, the buzzer sounds and a message is displayed on the LCD panel. When this happens, take the corrective action given below. Message Cause and corrective action Page Shut Cover !! Cause: Safety cover (front or rear) is open. -
Page 24: Corrective Action For Paper Jams
7. Suggestions Corrective action for paper jams Removing jammed paper from the feed unit WARNING ¥ If you will have to put your hands near moving parts to remove the jammed paper, first remove the power cord plug from the outlet. 1. -
Page 25: Removing Jammed Paper From The Cutter
7. Suggestions Removing jammed paper from the cutter or ejection unit WARNING ¥ If you will have to put your hands near moving parts to remove the jammed paper, first remove the power cord plug from the outlet. ¥ The cutter unit and slitter unit contain hazardous cutting edges inside them. -
Page 26: Specifications And Accessories
8. Specifications and accessories Specification Model name DC-535 Cutter Minimum: 6" (width) 5 6" (length) Paper size Maximum: 12.6" (width) 5 18" (length) Minimum: 6" (width) 5 4" (length) (postcard size) Cut paper size Maximum: 11" (width) 5 17" (length) - Page 27 DUPLO SEIKO CORPORATION 353 KOUDAI KOKAWA-CHO NAGA-GUN WAKAYAMA-KEN JAPAN L8-Y1030 1998. 12 Printed in Japan...
Need help?
Do you have a question about the DC-535 and is the answer not in the manual?
Questions and answers