Table of Contents
Advertisement
Advertisement
Table of Contents

Related Manuals for Duplo DC-618


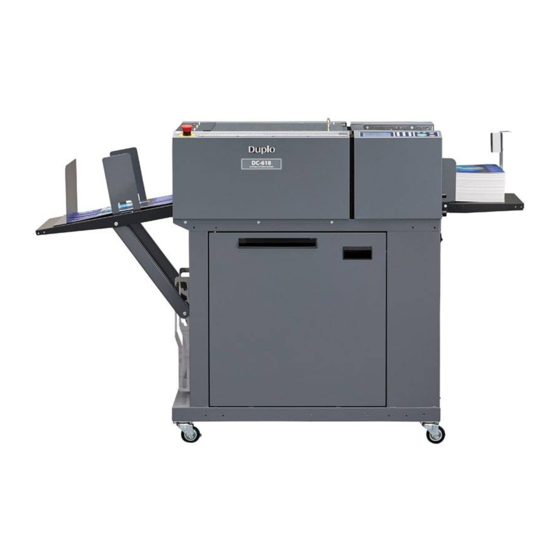
Summary of Contents for Duplo DC-618
- Page 1 INSTRUCTION MANUAL DC-618 Cross Tool Module CPM-08...
-
Page 3: Introduction
Introduction Thank you for your purchase of the DC-618 Cross Tool Module. To ensure safe and effi cient long-term use of this product, read and thoroughly understand this manual before using the product. After using this manual, be sure to keep it in a handy place for reference. - Page 4 Notes on Safety (Please Read and Observe) Safety Precautions Various symbols and pictures are used in this manual and on the labels affi xed to the machine. These symbols and pictures provide warnings and instructions to prevent danger to you or other personnel, and to prevent damage to offi...
- Page 5 ● Caution for Cleaning CAUTION ● Before cleaning the machine, turn off the power switch and unplug the power cord. → If the machine is activated accidentally, it may cause injury. ● Do not use fl ammable sprays or solvents inside or near the machine. →...
-
Page 6: Table Of Contents
Chapter 1 ............ Parts Names and Their Functions ................Appearance ............... Inside of the DC-618 ....... How to Remove and Install the CPM (Cross Tool Module) ........Removing the CPM (Cross Tool Module) ........Installing the CPM (Cross Tool Module) ............ - Page 7 Troubleshooting Chapter 5 ..............If a Message Appears ............ If a Document Jam Has Occurred ........... J05 CHECK MARGIN/SLOT2 Daily Maintenance Chapter 6 ..............Daily Maintenance Specifi cations Chapter 7 ................Specifi cations...
- Page 8 MEMO...
- Page 9 ............Parts Names and Their Functions ................Appearance ..............Inside of the DC-618 ......How to Remove and Install the CPM (Cross Tool Module) ..........Removing the CPM (Cross Tool Module) ..........
-
Page 10: Parts Names And Their Functions
(→P.7) Color label Install the CPM (Cross Tool Module) in a slot of the DC-618, to which the color label affi xed is the same as this on the CPM (Cross Tool Module). - Page 11 Parts Names and Their Functions RTU (Rotary Tool Unit) Adjustment knob Rotary tool Hand knob Lower tool...
-
Page 12: Inside Of The
Parts Names and Their Functions Inside of the DC-618 Name Function The suction fan sucks up documents one by one and the Belt suction unit feed belt feeds each of them. Double feed detection Detects a double feed with the ultrasonic sensor. -
Page 13: How To Remove And Install The Cpm (Cross Tool Module)
How to Remove and Install the CPM (Cross Tool Module) Removing the CPM (Cross Tool Module) Open the top cover. Top cover Disconnect the connector of the CPM (Cross Tool Module). Connector Loosen the two fi xing screws on the CPM (Cross Fixing screw Tool Module). -
Page 14: Installing The Cpm (Cross Tool Module)
How to Remove and Install the CPM (Cross Tool Module) Installing the CPM (Cross Tool Module) REFERENCE You can install the CPM (Cross Toll Module) in slot 2 only. Grasp the handles and install the CPM (Cross Tool Fixing screw Module) in slot 2. -
Page 15: How To Replace A Rotary Tool
How to Replace a Rotary Tool Removing a Rotary Tool from the Rotary Tool Unit The CPM (Cross Tool Module) processes documents with the following two types of rotary tools attached to the rotary tool unit. Select a proper rotary tool and attach it to the rotary tool unit. Micro perforation tool: Perforation tool: A tool having narrower cutting... - Page 16 How to Replace a Rotary Tool Turn the hand knob counterclockwise to remove it. REFERENCE Hand knob Do not lose the hand knob. Remove the rotary tool. Rotary tool IMPORTANT ● Do not hold the cutting edge when reattaching the rotary tool. ●...
-
Page 17: Attaching A Rotary Tool To The Rotary Tool Unit
How to Replace a Rotary Tool Attaching a Rotary Tool to the Rotary Tool Unit Turn the adjustment knob counterclockwise until it stops. The rotary tool rises up to the upper limit position. Adjustment knob Attach the rotary tool in the direction of the arrow. IMPORTANT ●... -
Page 18: Adjusting The Depth Of A Rotary Tool
How to Replace a Rotary Tool Adjusting the Depth of a Rotary Tool Refer to the followings to adjust the depth of the two types of the rotary tools (the perforation tool and the micro perforation tool). Turn the adjustment knob counterclockwise until it stops, where the rotary tool is raised to the uppermost position (0 degrees in the fi... - Page 19 Chapter Programming a JOB on the Control Panel This chapter describes how to program a JOB on the control panel of the DC-618..............Before Programming a JOB ................ Standby Screen ..................JOB Entry ......... Setting for the CPM (Cross Tool Module) ...................
-
Page 20: Before Programming A Job
Before Programming a JOB This section describes the functions which are related to the CPM (Cross Tool Module). For other settings, refer to Chapter 2 Programming a JOB - Before Programming a JOB in the DC-618 Instruction Manual. Standby Screen ● Touching the details icon displays the details of the JOB selected. - Page 21 Before Programming a JOB Touching CPM displays the processing positions of the CPM (Cross Tool Module) for the selected JOB. Touching the icon displays the continuity of the processing positions on the next page. Touching the icon displays the setting for the CPM Doc Weight.
-
Page 22: Job Entry
Direct (Advanced Mode) Direct (Simple Mode) Before programming a JOB, set either mode with Basic Mode in Environment. (See→ Chapter 3 Basic Operations in the DC-618 Instruction Manual.) Hints for entering a JOB: ● Touching SET goes on to the next step. -
Page 23: Setting For The Cpm (Cross Tool Module)
JOB Entry Setting for the CPM (Cross Tool Module) ● You can program up to six sets (X1-X6) of the processing positions of the CPM (Cross Tool Module) for each of a document feed stop position. You can program up to four patterns with diff... -
Page 24: Wizard
Wizard This section describes the functions which are related to the CPM (Cross Tool Module). For other settings, refer to Chapter 2 Programming a JOB - Wizard in the DC-618 Instruction Manual. Make sure that the standby screen is displayed on the touch panel and then touch Enter JOB. - Page 25 JOB Entry CPM Pattern 1_X Enter values for X1 to X6 (sets of processing positions in the X direction (widthwise)) of Pattern 1. ● X1 1. Touch the value for 1. Enter the distance between the right edge of the document and the On position (processing start position of the CPM (Cross Tool Module)) with the NUMERIC keys.
- Page 26 JOB Entry CPM Doc Weight Touch the CPM Doc Weight icon. Select a document weight. Touching switches the display between Standard, Light, and Heavy. Click SET to save the settings and return to the previous screen. CPM_Y Touching the icon displays the entry screen for CPM_Y/Pattern.
- Page 27 Touch SET to save the settings and return to the previous screen. Referring to Chapter 2 Programming a JOB - steps in Wizard in the DC-618 Instruction Manual, make settings for the following items. • Layout • Layout - Layout • Gutter •...
-
Page 28: Direct - Advanced Mode
Make sure that the standby screen is displayed on the touch panel, and then touch Enter JOB. Referring to Chapter 2 Programming a JOB - steps in Direct - Advanced Mode in the DC-618 Instruction Manual, make settings for the following items. - Page 29 JOB Entry Referring to Chapter 2 Programming a JOB - steps in Direct - Advanced Mode in the DC-618 Instruction Manual, make settings for the following items. • Modules3 /Select Tool • Document Size • REG Mark • Slit • Cut •...
- Page 30 JOB Entry ● X3 (Set 3) to X6 (Set 6) Enter values for processing positions in similar ways to steps REFERENCE ● You can set up to six sets of On/Off positions for each pattern. ● The maximum width in the X direction that the CPM (Cross Tool Module) can process is 305.0 mm.
- Page 31 Standard, Light, and Heavy. Touch SET. The function setting screen appears. Referring to Chapter 2 Programming a JOB - steps in Wizard in the DC-618 Instruction Manual, make settings for the following items. • Settings-1 to 4 • Entry...
-
Page 32: Direct - Simple Mode
Direct - Simple Mode This section describes the functions which are related to the CPM (Cross Tool Module). For other settings, refer to Chapter 2 Programming a JOB - Direct - Simple Mode in the DC-618 Instruction Manual. Make sure that the standby screen is displayed on the touch panel, and then touch Enter JOB. - Page 33 SlitD with the NUMERIC keys and touch SET. 5. Touch SET again. Referring to Chapter 2 Programming a JOB - steps in Direct - Advanced Mode in the DC-618 Instruction Manual, make settings for the following items. • Cut •...
- Page 34 JOB Entry ● X2 (Set 2) to X6 (Set 6) Enter values for processing positions in a similar way to step REFERENCE ● You can set up to six sets of On and Off positions for each pattern. ● The maximum width in the X direction that the CPM (Cross Tool Module) can process is 305.0 Even if the document width is set as 305.1 mm or longer, you cannot set processing positions of...
- Page 35 JOB Entry CPM Pattern 2_Y Set processing positions oin the Y direction (lengthwise). ● Y1 to Y* Enter values for processing positions in similar ways to step REFERENCE ● You can set up to 20 processing positions with patterns of CPM Patterns 1_X to CPM Patterns 4_X in the Y direction ●...
- Page 36 JOB Entry The function setting screen appears. Referring to Chapter 2 Programming a JOB - steps in Wizard in the DC-618 Instruction Manual, make settings for the following items. • Settings-1 to 4 Tool Setup The tool type selected for the CPM (Cross Tool Module) appears.
-
Page 37: Error Messages
JOB Entry Error Messages ● When a JOB is being programmed in Wizard: Message Status and Solution The number of cross perforations exceed Status: Processing positions of 21 or more are programmed in the Y direction for the whole the specifi cations. document. -
Page 39: Chapter 3 Basic Operations
Chapter Basic Operations This chapter describes function settings for the CPM (Cross Tool Module)........Processing Documents by Retrieving a Saved JOB ..................Process ..................Adjust .................. Environment... -
Page 40: Processing Documents By Retrieving A Saved Job
This section describes the functions which are related to the CPM (Cross Tool Module). For other settings, refer to Chapter 3 Basic operations - Processing Document by Retrieving a Saved JOB in the DC-618 Instruction Manual. Make sure that the standby screen is displayed on the touch panel and then touch Retrieve JOB. - Page 41 For other settings, refer to Chapter 3 Basic Operations - Processing Documents by Retrieving a Saved JOB in the DC-618 Instruction Manual. • JOB name • Category • Document Size • REG Mark •...
-
Page 42: Process
Process This section describes the functions which are related to the CPM (Cross Tool Module). For other settings, refer to Chapter 3 Basic operations - Process in the DC-618 Instruction Manual. Select Tool This sets a tool for the CPM (Cross Tool Module) installed in slot 2. - Page 43 Process Touch CPM. CPM Doc Weight Touch to select the document weight out of Standard, Light, and Heavy. Touch SET.
-
Page 44: Adjust
Adjust This section describes the functions which are related to the CPM (Cross Tool Module). For other settings, refer to Chapter 3 Basic Operations - Adjust in the DC-618 Instruction Manual. This adjusts processing positions of the CPM (Cross Tool Module). -
Page 45: Environment
The module programmed here appears as the fi rst option to select on the Select Tool screen in the Advanced Mode of the Direct Mode when you newly program a JOB. A module which is not programmed by a service person when the DC-618 is installed is not displayed. - Page 46 Environment Touch the icon to select a rotary tool for CPM out of Perf (perforation) and Micro (micro perforation). Touch SET. It saves the settings currently programmed and returns to the standby screen.
- Page 47 Chapter Programming a JOB on a Computer The DC-618 can save up to 250 JOBs. JOB contents can be programmed either via computer or on the control panel. This chapter describes how to setup a JOB from your computer through the PC Controller.
-
Page 48: Pc Controller Setting
Make default settings for the PC Controller. The other functions are Setting for a service person use only to set the DC-618, etc. Backs up a JOB saved in the DC-618. Restores backed-up data of a Tool JOB in the DC-618. - Page 49 Displays the NUMERIC keys, with which you can enter numerical NUMERIC key values instead of using a keyboard. Select this to control function limit of the control panel on the DC-618. Clear this to control function limit of the PC Controller. Connect...
- Page 50 PC Controller Setting ● Settings for processing with the CPM (Cross Tool Module) • You can program up to six sets (X1-X6) of the processing of the CPM (Cross Tool Module) for each of a document feed stop position. You can program up to four patterns with diff erent positions of X1 to X6.
-
Page 51: Wizard
PC Controller Setting The DC-618 can save up to 250 JOBs. This section describes the procedure for programming a JOB in the Wizard mode with a preview of the JOB and in the Direct mode on which you directly enter each value, which are related to the CPM (Cross Tool Module). - Page 52 PC Controller Setting Name Function Modules Displays modules installed in slot 2 and slot 3. Next Switches the Wizard screen to the Direct screen. Exit Finishes a JOB programming and returns to the main screen. Document preview Displays a preview of the whole part of a fi nished product. Displays a JOB setting that cannot be processed with an error or error/warning a warning mark.
- Page 53 PC Controller Setting Click Create a new job and then Wizard on the main screen. Select Unit Select a unit of values to enter out of mm or inch. If you select inch, values entered in inches are converted to ones in mm and displayed. REFERENCE •...
- Page 54 PC Controller Setting 3. Select a module from the Slot 3 box. Slitter module RTM (Rotary Tool Module) JOB number Select a JOB number from the JOB No. box. REFERENCE You can set a JOB number of 1 to 250. JOB name Enter a JOB name.
- Page 55 PC Controller Setting Document size Select the document size from the Document size box. REFERENCE Select Manual entry when processing custom-size documents. Enter the width and the length of the document. Layout Finished size Enter the width and the length of the fi nished product. Number of cards Enter the number of the fi...
- Page 56 PC Controller Setting Gutter Make settings for Lead trim (the lead margin cut), Side trim R (the right margin slit), Gutter slits, and Gutter cuts. 1. Enter values in each box. REFERENCE If you have selected Center in step 9, you cannot manually enter values for Lead trim (the lead margin cut) or Side trim R (the right margin slit).
- Page 57 PC Controller Setting Non standard positions: Add: Adds a crease to a designated position. The added crease position is displayed on the list below. * A crease position is set according to a fi nished product size. Edit: Enables you to change a selected crease position on the list.
- Page 58 Click Apply. • Lengthwise Perforates a document lengthwise. This is available when RTM (Rotary Tool Module) is available. For the details, see Chapter 4 Programming a JOB on a Computer - Wizard in the DC-618 RTM Instruction Manual.
- Page 59 This is available only when RTM (Rotary Tool Module) is available. For the details, see Chapter 4 Programming a JOB on a Computer - Wizard in the DC-618 RTM Instruction Manual. • Crosswise even Perforates a document crosswise evenly. This is available only when both of RTM (Rotary Tool Module) and CPM (Cross Tool Module) are available.
- Page 60 PC Controller Setting 2. Click the Tool type box and select a rotary tool out of Perf. (perforation tool), Micro (micro perforation tool), and Score (score tool). Click Apply. • L angle Perforates a document in a L-shape so that a card is made at a corner.
- Page 61 PC Controller Setting • T shape Perforates a document widthwise and then lengthwise to divide it into two or three pieces. This is available only when both of RTM (Rotary Tool Module) and CPM (Cross Tool Module) are available. 1. Click the Layout box and select at which position the document is processed out of Top and Bottom.
- Page 62 PC Controller Setting 2. Enter a value of the widthwise distance between the right side edge of the document and the processing start position of the rotary tool for A and a value of into how many pieces the document is divided for C. 3.
- Page 63 PC Controller Setting 2. Y position (lengthwise) Click the Position box and select a lengthwise processing position of the rotary tool out of Manual, 1/2, 1/3, 2/3, 1/4, 2/4, and 3/4. 3. If you have selected Manual in step 2, enter a value for Position under Y position with the NUMERIC keys or by clicking + or -.
- Page 64 PC Controller Setting 7. If you have selected Manual in step 6, enter a value for Stop Position (widthwise) of the rotary tool with the NUMERIC keys or by clicking + or -. Then click Add. 8. The CPM doc weight screen appears. Select a document weight out of Standard, Light, and Heavy.
- Page 65 PC Controller Setting REG mark This senses a REG mark and then reads the image drift and compensates it. Click the REG mark tab. When using this function, select On for the REG mark box. Side mark: Enter the distance from the right edge of the document to the side mark in the Side mark box.
- Page 66 Select air level from 0 to 3 by clicking + or -. REFERENCE Set the air level higher if the DC-618 does not feed a document. Set the air level lower if a double feed occurs.
- Page 67 PC Controller Setting Slitter guide This enables you to use the slitters as document guides to stabilize the document conveyance if you do not use them to process a JOB. Select On or Off . REFERENCE It is recommended that you select On when processing light weight documents.
- Page 68 Select Auto (automatic) or Off . Auto: Performs dummy cut for the trail margin one time. REFERENCE • Dummy cut: The DC-618 performs cutting operation without a document to be cut at the position where the document is fed Last cut...
- Page 69 Direct (P.62). Clicking Back returns to the Wizard screen. For the procedure for saving the JOB in the DC-618, see ● Saving a JOB in the DC-618 (P.70) For the procedure for saving the JOB on a computer, see ● Saving a JOB on a computer...
-
Page 70: Direct
Displays the Function screen on which to make function settings Function for a JOB. Save this JOB in Saves a programmed JOB or a JOB saved on a computer to the DC-618. DC-618 Save JOB fi le Saves a programmed JOB on a computer. Exit... - Page 71 PC Controller Setting Click Create a new job and then Direct on the main screen. The Direct screen appears. The value limit appears on the lower right side of the screen. Refer to it when programming a JOB. REFERENCE Clicking the icon displays the NUMERIC keys, with which you can enter numerical values instead of using a keyboard.
- Page 72 REFERENCE For the settings for the RTM (Rotary Tool Module), see Chapter 4 Programming a JOB on a Computer - Wizard in the DC-618 RTM Instruction Manual. JOB No. Enter a JOB number in the JOB No. box with the NUMERIC keys.
- Page 73 PC Controller Setting Category Select a category in which to save the JOB from the Category box. REFERENCE You can set up to 20 categories. Document size (Standard size) Select the document size from the Document size box. REFERENCE To process custom-size documents, select Manual entry and enter the length and the width of the document in the two boxes on the right.
- Page 74 PC Controller Setting REG mark type Select and click Standard or Bold mark width. (This is available only when you have entered values for Side mark and Lead mark in steps 10 and 11.) Select On if you use the REG mark reading function. (This is available only when you have made settings in steps 10 to 12.) Slit...
- Page 75 PC Controller Setting Crease Click each Crease box and enter the distance from the lead edge of the document to the crease position with the NUMERIC keys. Press the Enter key to set the value. You can set up to 20 creases. Entering 0 fi...
- Page 76 PC Controller Setting 3. In similar ways, enter values for X2 to X6 (Pattern 1 in the X direction) (up to six sets). Enter 0 to make settings with less than six sets. CPM Pattern 2 X1 1. Enter a value for the On position (processing start position) of X1 (Pattern 2 in the X direction).
- Page 77 PC Controller Setting CPM (Y) / Pattern (n) 1. Enter the distance from the lead edge of the document to Y1 (Pattern 1 in the Y direction). 2. Select a pattern of Y1 from X1 to X4 programmed in steps 18 to 21. Enter a value of 1 to 4.
- Page 78 REFERENCE To save the JOB temporarily, select the Temporary JOB check box. If the DC-618 is turned OFF or another JOB is selected, the JOB temporarily saved is deleted. REFERENCE If you save a JOB while the DC-618 is operating, the message as shown on the right appears.
- Page 79 If you try to overwrite a locked JOB, the message as shown on the right appears. Click OK. ● Saving a JOB on a computer See Chapter 5 PC Controller Setting - Programming a JOB - of the DC-618 PC Controller Instruction Manual.
-
Page 80: Retrieving And Processing A Saved Job
Retrieving and Processing a Saved JOB This section describes the procedure for retrieving a JOB saved in the DC-618 or on a computer and processing it. Name Function Jobs saved in PC Opens a JOB saved on a computer. Job detail viewer Displays a list of JOB fi... -
Page 81: Setting Default Values For A Job
Setting Default Values for a JOB Set default values for a JOB. This section describes the functions which is related to the CPM (Cross Tool Module). Name Function Make default settings for the PC Controller. The other functions Setting are for a service person use only. Environment Set default values for a JOB. - Page 82 Setting Default Values for a JOB Click the Option module tab. To set CPM (Cross Tool Module), which is used frequently, as default, select CPM (Cross Tool Module) from the Slot 2 box under Default setting. Select a tool from the Tool left box . Click OK when the setting is completed.
-
Page 83: Function Setting
Function Setting This section describes the procedure for displaying the Function settings screen on the main screen to check or change function settings for a JOB, which is related to the CPM (Cross Tool Module). Click Function settings on the main screen. The Function settings screen appears. -
Page 84: Adjust
Function Setting 2. The Change tool setting screen appears. 3. Select a tool for Slot 2 from the Tool right box. Click OK when the setting is completed. Clicking Cancel returns to the previous screen without changing the settings. Click the CPM doc weight box and select the document weight out of Standard, Light, and Heavy. - Page 85 For setting the On positions and the Off positions of the RTM (rotary Tool Module), see Chapter 4 Programming a JOB on a Computer - Function Settings - Process in the DC-618 RTM Instruction Manual. When the setting is completed, click OK.
- Page 86 MEMO...
- Page 87 Chapter Troubleshooting This chapter describes what to do when an error has occurred and how to deal with document jams or error messages................ If a Message Appears ............If a Document Jam Has Occurred ............J05 CHECK MARGIN/SLOT2...
- Page 88 If a Message Appears If an error has occurred, fi gures and messages appear on the touch panel. Confi rmation messages may also appear. In such cases, follow the procedure below to clear the error. ● Display on the touch panel An arrow points at the position where the error is occurring in the fi...
- Page 89 Press the JOG (forward) key to eject the document. Press the STOP key to clear the error. The DC-618 is reset and the error message is cleared. If you cannot remove the jammed document in the procedure above, follow the procedure below.
- Page 90 If a Document Jam Has Occurred If a Document Jam Has Occurred Open the top cover. Top cover Loosen the two fi xing screws on the margin slitter Fixing screw module in slot 1. Margin slitter module Fixing screw Grasp the handles on the margin slitter module. Remove the margin slitter module by lifting it upward.
- Page 91 If a Document Jam Has Occurred Close the top cover. Top cover ● When removing a document from the slot 2 section Turn the DC-618 OFF. Open the top cover. Top cover Disconnect the connector of the CPM (Cross Tool Module) in slot 2.
- Page 92 If a Document Jam Has Occurred If a Document Jam Has Occurred Install the CPM (Cross Tool Module) in slot 2. Fixing screw Handles Make sure that the pins on the both sides are securely fi tted in the module. Secure the two fi xing Fixing screw screws.
- Page 93 Chapter Daily Maintenance This chapter describes daily maintenance of the product................Daily Maintenance...
- Page 94 Daily Maintenance Clean the product periodically to maintain its performance. WARNING ● Before cleaning, be sure to turn the power OFF, wait until the machine cools off and unplug the power cord. Otherwise, fi re or electric shock may occur. ●...
- Page 95 Chapter Specifi cations This chapter lists the specifi cations.................. Specifi cations...
- Page 96 Uncoated, Coated, Laminated (lamination thickness: 10 micrometer Paper type or less), UV coated Slot 2 Module slot * When using CPM-08 on Slot2, OMK-13 is required on DC-618 Tool in 1 module Automatic Position setup * Image shift compensation by reading REG mark is possible.
- Page 97 455 (W) × 95 (D) × 205 (H) mm When packed 780 (W) × 180 (D) × 380 (H) mm Weight 7.0 kg Gross 11.6 kg ● Other specifi cations comply with the specifi cations on DC-618. ● The specifi cations are subject to change without prior notice.
- Page 98 MEMO...
- Page 100 4-1-6 Oyama, Chuo-ku, Sagamihara-shi, Kanagawa 252-5280, Japan TEL: +81-42-775-3602 FAX: +81-42-775-3606 E-mail: info@duplo.com Z1-Y1190 2020.06...
Need help?
Do you have a question about the DC-618 and is the answer not in the manual?
Questions and answers