Table of Contents
Advertisement
Quick Links
Peerless
INSTALLER, THESE INSTRUCTIONS TO BE AFFIXED ADJACENT TO THE BOILER.
®
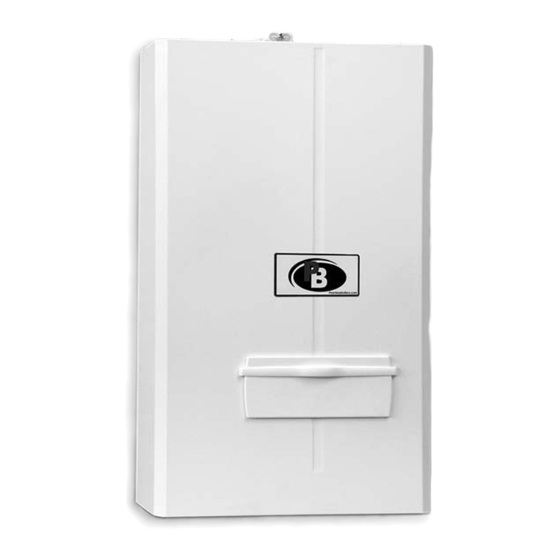
Combi 160
Gas
Boiler
As an ENERGY STAR
®
Partner, PB Heat, LLC has determined that
this product meets the ENERGY STAR guidelines for energy efficiency.
I n s t a l l a t i o n ,
O p e r a t i o n &
M a i n t e n a n c e
M a n u a l
™
WARNING!!!
This manual must
be used by a
qualified heating
installer/service
technician. Read all
instructions,
including this
manual, before
installing. Perform
steps in the order
given. Failure to
comply could result
in severe personal
injury, death, or
substantial property
damage.
Save this manual for
future reference.
Advertisement
Table of Contents

Related Manuals for PB Heat Peerless Combi 160


Summary of Contents for PB Heat Peerless Combi 160
- Page 1 As an ENERGY STAR ® Partner, PB Heat, LLC has determined that this product meets the ENERGY STAR guidelines for energy efficiency. I n s t a l l a t i o n , O p e r a t i o n &...
-
Page 2: Safety Instructions
SAFETY INSTRUCTIONS WARNING: If the information in these AVERTISSMENT: Assurez vous de bien instructions is not followed exactly, a fi re suivre les instructions données dans or explosion may result causing property cette notice pour réduire au minimum damage, personal injury or death. le risque d’incendie ou d’explosion ou pour éviter tout dommage matériel, toute blessure ou la mort... - Page 3 SAFETY INSTRUCTIONS...
- Page 4 SAFETY INSTRUCTIONS WARNING!!! These instructions must be read In the event of a breakdown and/or malfunction prior to installation. If the information in these of the boiler, turn off the unit and do not make any instructions is not followed exactly, a fi re or attempt to repair it.
- Page 5 SAFETY INSTRUCTIONS Local approval: of the fl ue system and the condensate connection to the public sewer system may be required. Local approval: The local building regulations stipulating the installation rules at the time of installation should be followed. ...
-
Page 6: Table Of Contents
TABLE OF CONTENTS SAFETY INSTRUCTIONS ..............................2 TABLE OF CONTENTS ..............................6 1 - INSTALLATION - CODE REQUIREMENTS ......................10 1.1 - National installation legislation ........................... 10 1.2 - Commonwealth of Massachusetts Installation Requirements ................10 2 - GENERAL INFORMATION ............................12 2.1 - Key to symbols used ............................ - Page 7 TABLE OF CONTENTS 8.6 - Air inlet pipe materials ............................39 8.6.1 - Sealing of Type “B” double-wall or galvanized air inlet pipe material ............ 39 8.6.2 - Sealing of PVC, CPVC or ABS air inlet pipe ..................39 8.7 - PVC/CPVC vent piping materials ........................40 8.7.1 - Installing PVC/CPVC vent and air piping ....................
- Page 8 TABLE OF CONTENTS 11.2 - General warnings concerning gas supply ......................66 11.3 - Confi rming the boiler’s gas type ........................66 11.4 - Gas type conversion ............................66 11.5 - Start-up ................................66 11.6 - Ignition control testing ............................67 11.7 - Gas supply pressure checking and adjustment ....................
- Page 9 TABLE OF CONTENTS 13.12 - Overrides ................................ 92 13.12.1 - Auto-purging ............................92 13.12.2 - Fan ..............................92 13.12.3 - Minimum and maximum output ......................92 13.12.4 - Checking the fl ame current ....................... 92 13.13 - Water and fl ue temperature sensor ........................ 93 13.14 - Outdoor temperature sensor (optional) ......................
-
Page 10: Installation - Code Requirements
1 - INSTALLATION - CODE REQUIREMENTS 1.1 - National 1.2- Commonwealth a. In the event that the side wall horizontally vented gas fueled installation of Massachusetts equipment is installed in a crawl space or an attic, the hard wired legislation Installation carbon monoxide detector with alarm and battery back-up may... - Page 11 1 - INSTALLATION - CODE REQUIREMENTS (b) Exemptions (e) A copy of all installation The following equipment is exempt instructions for all Product from 248 CMR 5.08(2)(a) 1 through Approved side wall horizontally vented gas fueled equipment, all 1. The equipment listed in Chapter venting instructions, all parts lists 10 entitled “Equipment Not for venting instructions, and/ or...
-
Page 12: General Information
2 - GENERAL INFORMATION 2.1 - Key to symbols used WARNING!!! Failure to follow these indications can causing an explosion, extensive property damage, severe personal injury or death! CAUTION!!! Electrical caution! Risk of electric shock: failure to observe this warning may compromise the smooth running of the appliance or cause serious damage to individuals, animals or... -
Page 13: Main Components
3 - MAIN COMPONENTS 1 - Automatic air vent 2 - Air intake and fl ue gas discharge fi tting (venting system) 3 - U7 fl ue gas temp. sensor and fl ue safety switch 4 - Expansion tank 13 - Heating return connection 5 - Inlet air plenum 14 - Power Control Board 6 - Air/gas mixer device... - Page 14 3 - MAIN COMPONENTS 22 - Combustion analysis tap 38 - ASME Safety relief valve 23 - U1 supply temperature sensor 39 - U8 return temperature sensor 24 - Burner window 40 - By-pass pipe 25 - Air/gas manifold 41 - Condensation discharge pipe 26 - U6 high temperature limit sensor 42 - Secondary heat exchanger for domestic hot water production 27 - Flue gas back fl...
-
Page 15: Function Overview
4 - FUNCTION OVERVIEW Key to fi gure 2: 1 = boiler 2 = automatic air vent 3 = air intake 4 = fl ue gases discharge 5 = sealed combustion chamber 6 = expansion tank 7 = burner 8 = fan 9 = gas valve 10 = condensate discharge trap 11 = circulator pump... -
Page 16: Intended Use And Functions Of The Boiler
4 - FUNCTION OVERVIEW 4.1 - Intended use The PC160 ™ can be connected 4.2 - Setting of the to an indirect storage tank for the and functions of boiler production of domestic hot water, section 7.1. Section 16 details the setting changes the boiler that should be made to best match the ™... -
Page 17: Effi Ciency Up To 98
4 - FUNCTION OVERVIEW 4.3 - Effi ciency up to 98% When the outdoor reset is activated (see section 12.10) and an outside sensor is connected, this boiler is designed to always work at the maximum effi ciency. It will automatically change the supply temperature in relation with the outdoor temperature (Outdoor reset). -
Page 18: Characteristic Curves Of Heating System's Residual Head
4 - FUNCTION OVERVIEW 4.4 - Characteristic curves of heating system’s residual head ™ The PC160 boiler is fi tted with a Grundfos circulator pump. The head available to supply fl ow through the heating system at the boiler connections is shown in graph form in fi... -
Page 19: Installation - Mounting & Gas And Water Connections
5 - INSTALLATION - Mounting & gas and water connections 5.1 - Clearances for installation and servicing Figure 6 shows the clearances required for installation and servicing. NOTE: Service clearances are not mandatory, but are recommended to ensure ease of service should it be required. -
Page 20: Choosing The Installation Location
5 - INSTALLATION - Mounting & gas and water connections 5.3 - Choosing the installation location WARNING!!! Do not store any fl ammable materials or liquids in the immediate vicinity of the boiler. A fi re or explosion can result, causing severe personal injury, death or substantial property damage. -
Page 21: Mounting The Boiler
5 - INSTALLATION - Mounting & gas and water connections 5.4 - Mounting the boiler Refer to fi gure 8: 1. place the cardboard template, provided with the boiler, against the wall; 2. ensure that the template is plumb and the screw holes line up with the wall studs;... -
Page 22: Condensate Disposal
5 - INSTALLATION - Mounting & gas and water connections 5.6 - Condensate 5.7 - Near boiler a. The space heating piping will branch off to fl ow the space disposal heating piping heat transfer medium through a single wall heat exchanger coil components inside the indirect water heater. -
Page 23: Relief Valve
5 - INSTALLATION - Mounting & gas and water connections 5.8 - Relief valve 5.9 - Supply and CAUTION!!! Before Each boiler is equipped with a safety return piping connecting the boiler to the heating relief valve set at 30 psi (2 bar) which system the heating system must must be piped in accordance with be thoroughly fl... -
Page 24: Converting A Combi Boiler Into A Heating Only Boiler
5 - INSTALLATION - Mounting & gas and water connections 5.12 - Domestic hot CAUTION!!! This boiler CAUTION!!! To protect the and cold water can supply heating water at a fl oor panel against over heating temperature up to 190°F (88°C). you must to install a safety device If the heating system is built with that shut-off the boiler before... -
Page 25: Propane Gas
5 - INSTALLATION - Mounting & gas and water connections 5.14- Propane gas The boiler comes from the factory Before installation a thorough ready to be piped to the gas supply. internal cleaning of the gas supply The National Fuel Gas Code, ANSI line should be performed. -
Page 26: Convert The Boiler From Natural Gas To Propane Gas Or Vice Versa
5 - INSTALLATION - Mounting & gas and water connections 5.16- Convert the Installing: 13 - Checking gas supply pressure in order to make the gas change following Section 12.7. The Gas boiler from Natural please follow the instructions below: supply pressure must be between 1 - turn off power to the boiler;... - Page 27 5 - INSTALLATION - Mounting & gas and water connections WARNING!!! If the combustion levels are not within the range given in Table 3 for the fi ring rate, shut the boiler down and contact your distributor or the boiler manufacturer (see reference in the last cover page).
-
Page 28: Suggested Piping And Wiring Connections
5 - INSTALLATION - Mounting & gas and water connections 5.17 - Suggested piping and wiring connections Figure 16 shows the suggested piping and wiring connection for the PC160 ™ All component listed below, except the fl ue terminal must be fi eld supplied. 1 = ball valve 2 = drain valve 3 = Manual gas shut-off valve... -
Page 29: Installation - Electrical Connections
6 - INSTALLATION - Electrical connections 6.1 - Electrical connections: overview WARNING!!! Label all wires prior to disconnection when servicing controls. Wiring errors can cause improper and dangerous operation! ATTENTION!!! Au moment de l’entretien des commandes, étiquetez tous les fi ls avant de les débrancher. -
Page 30: Connecting The Power Supply Cable
6 - INSTALLATION - Electrical connections Indirect water heater sensor (optional) Outdoor sensor (optional) Room thermostat 120Vac Line domestic hot water Neutral 120Vac Line central heating 120Vac LINE (HOT) External three way NEUTRAL valve for indirect water GROUND heater (Optional) Figure 18 - Electrical connections 6.2 - Connecting ... -
Page 31: Installing The Outdoor Temperature Sensor (Optional)
6 - INSTALLATION - Electrical connections NOTICE! the maximum room 1. remove the boiler casing according thermostat cable length permitted to the instructions given in section 2. then press and release the is 65 ft (20 m). For longer lengths, 13.2 and open the junction box per button several times until the up to 300ft (100 m) a shielded... -
Page 32: Installation - Indirect Storage Tank Connections
7 - INSTALLATION - Indirect storage tank connections 7.1 - Connecting the boiler to an indirect storage tank This boiler, can be connected to an indirect storage tank as follows (the water and electrical connections must be made per fi gure 20): To make the electrical connections, follow the steps below while refering also to fi... -
Page 33: Indirect Water Heater Priority Selection
7 - INSTALLATION - Indirect storage tank connections 7.2 - Indirect water heater priority selection The boiler is factory set for DHW priority. This means that the boiler will stay in DHW mode until the capacity of the indirect water heater reaches temperature. -
Page 34: Installation - Vent & Combustion Air
8 - INSTALLATION - Vent & combustion air 8.1 - Removing (e) Test for spillage at the draft hood (c) Dans la mesure du possible, relief opening after 5 minutes of fermer toutes les portes et les of a boiler from a main burner operation. -
Page 35: Venting Systems
8 - INSTALLATION - Vent & combustion air 8.2 - Venting Due to the high effi ciency of the boiler it may discharge what looks WARNING!!! DO NOT mix systems like white smoke especially when components from different systems. the outside air temperature is cold. - Page 36 8 - INSTALLATION - Vent & combustion air Figure 22 - Side wall two Figure 23 - Vertical two Figure 24 - Side wall air pipes (Direct venting). pipes (Direct venting). intake, vertical vent (Direct venting). Figure 27 - Side wall one Figure 25 - Vertical Figure 26 -...
-
Page 37: Design Of The Venting System
8 - INSTALLATION - Vent & combustion air 8.3 - Design of the - Plastic manufacturing plants - Furniture refi nishing areas and WARNING!!! Contaminated venting system establishments combustion air will damage the boiler, - Remodeling areas This boiler can be fi tted with a very resulting in possible severe personal - Garages with workshops long venting system. - Page 38 8 - INSTALLATION - Vent & combustion air TABLE 4 Vent pipe materials and fi ttings must comply with the following standards Standard for Standard for Item Material installation in USA installation in Canada PVC Schedule 40, 80 ANSI/ASTM D1785 CPVC schedule 40/80 ANSI/ASTM F441 Vent pipe and...
-
Page 39: Air Inlet Pipe Materials
8 - INSTALLATION - Vent & combustion air 8.6 - Air inlet pipe 8.6.1 - Sealing of Type 8.6.2 - Sealing of PVC, “B” double-wall or CPVC or ABS air inlet materials galvanized air inlet pipe pipe The PVC, CPVC, or ABS air inlet pipe material WARNING!!! The air inlet should be cleaned and sealed with the... -
Page 40: Pvc/Cpvc Vent Piping Materials
8 - INSTALLATION - Vent & combustion air 8.7 - PVC/CPVC NOTICE All vent pipes must be glued, e. While primer is still wet, apply properly supported, and the exhaust an even coat of approved vent piping must be pitched a minimum of a 1/4 cement to the pipe equal to the inch per foot back to the boiler (to depth of the fi... - Page 41 8 - INSTALLATION - Vent & combustion air 4. use the precedent clamp “D” to 7. use the precedent clamp “F” to Vent connection (see Figure mechanically secure the adapter mechanically secure the pipe to 29 Item “B”). “E” to the adapter “A”. To do this the adapter “E”.
-
Page 42: Flue Terminal Location In Compliance With Can/Csa B149
8 - INSTALLATION - Vent & combustion air 8.8 - Flue terminal location in compliance with CAN/CSA B149 Vent Termination Minimum Clearances A = 12” clearances above grade, veranda, porch, deck or balcony B = 12” clearances to window or door that may be opened D = 18”... -
Page 43: Single Pipe Vent (Not Sealed Combustion)
8 - INSTALLATION - Vent & combustion air Two Permanent Openings Method. 8.9 - Single pipe Two permanent openings, one WARNING!!! Boiler must be commencing within 12 in. (300 mm) vent (not sealed clear and free from combustible of the top and one commencing within materials, gasoline and other combustion) 12 in. -
Page 44: Determine Location
8 - INSTALLATION - Vent & combustion air 8.9.2 - Determine location e. Do not locate the terminations 5. Maintain clearances as shown where wind eddies could in Figure 45 (get references to Locate the vent termination using the affect performance or cause “Mechanical draft vent terminal”... -
Page 45: Sidewall Termination - Two Pipes
8 - INSTALLATION - Vent & combustion air 8.10 - Sidewall 8.10.2 - Determine location termination - Two Locate the vent/air terminations using pipes the following guidelines: 1. The total length of piping for vent 8.10.1 - Vent/air or air must not exceed the limits termination given in the Section 8.3. - Page 46 8 - INSTALLATION - Vent & combustion air 3. The air piping must terminate in a down-turned elbow as shown in Figures 31 and 32. This arrangement avoids recirculation of fl ue products into the combustion air stream. 4. The vent piping must terminate in an elbow pointed outward or away from the air inlet, as shown in Figures 31 and 32.
-
Page 47: Prepare Wall Penetrations
8 - INSTALLATION - Vent & combustion air 8.10.3 - Prepare wall penetrations 1. Air pipe penetration: a. Cut a hole for the air pipe. Size the air pipe hole as close as desired to the air pipe outside diameter. 2. -
Page 48: Sidewall Termination - Concentric Vent
8 - INSTALLATION - Vent & combustion air 8.11 - Sidewall termination – Concentric vent 8.11.1 - Description and usage The termination kit must terminate outside the structure and must be installed as shown in Figure 35. The required concentric termination kit as well as combustion air and vent pipe materials are listed in Tables 4 and 5. -
Page 49: Multiventing Sidewall Terminations
8 - INSTALLATION - Vent & combustion air 8.11.3 - Multiventing sidewall terminations CAUTION!!! DO NOT use fi eld- When two or more direct vent supplied couplings to extend pipes. appliances are vented near each Airfl ow restriction will occur and may other, each appliance must be cause intermittent operation. -
Page 50: Vertical Termination - Two Pipes
8 - INSTALLATION - Vent & combustion air 8.12 - Vertical 8.12.1 - Determine 8.12.2 - Prepare roof location penetrations termination - Two Locate the vent/air terminations using 1. Air pipe penetration: cut a hole for pipes the following guidelines: the air pipe. -
Page 51: Multiple Vent/Air Terminations
8 - INSTALLATION - Vent & combustion air 8.12.4 - Multiple vent/air Air intake Air intake Vent Vent terminations 1. When terminating multiple boilers, vertically from terminate each vent/air connection vent outlet to as shown in Figures 38 and 39. any air inlet WARNING!!! Terminate all vent pipes at the same height and... -
Page 52: Vertical Termination - Concentric Vent
8 - INSTALLATION - Vent & combustion air 8.13 - Vertical 8.13.3 - Vertical 4. Cut one (1) hole 6 inch diameter into the structure to install the termination installation termination – termination kit. 1. Determine the best location for the 5. -
Page 53: Multiventing Vertical Terminations
8 - INSTALLATION - Vent & combustion air 8.13.4 - Multiventing vertical terminations When two (2) or more direct vent appliances are vented near each other, each appliance must be individually vented (see Figure 41). WARNING!!! NEVER common vent or breach vent this appliance to avoid possibility of severe personal injury, death, or substantial property damage. -
Page 54: Alternate Vertical Concentric Venting
8 - INSTALLATION - Vent & combustion air 8.13.5 - Alternate vertical concentric venting This appliance may be installed with a concentric vent arrangement where the vent pipe is routed through an existing unused venting system; or by using the existing unused venting system as a chase for vent and combustion air routing. -
Page 55: Existing Vent As A Chase
8 - INSTALLATION - Vent & combustion air 8.14 - Existing vent as a chase Follow all existing termination and clearance requirements of section 8.12. The maximum allowable equivalent vent and air intake lengths for this venting arrangement are to be determined from Section 8.3. -
Page 56: Installation - Split Venting System
9 - INSTALLATION - Split venting system 9.1 - Split system (polypropylene) or AL29-4C (UL 1738/UL C 636) system The boiler is not supplied with the fi ttings needed for separate vent and combustion air systems. A special kit must be ordered to connect the boiler to separate vent and combustion air systems. - Page 57 9 - INSTALLATION - Split venting system Horizontal vent systems should be as short and straight as possible. The vent system must be both gas tight and watertight. All seams and joints must be joined and sealed in accordance with the vent system manufacturer’s instructions.
-
Page 58: Split System Components
9 - INSTALLATION - Split venting system 9.2 - Split system components Some of the most commonly used components for installing the Split polypropylene vent and combustion air systems are listed below: 54301 - No. 1 - Split adaptor 80/80 PP 54344 - No. -
Page 59: Split System Components
9 - INSTALLATION - Split venting system 9.3 - Split system components Some of the most commonly used components for installing the Split stainless steel vent and combustion air systems are listed below: Heatfab Saf T Vent Part Pro Tech FasNSeal Z FLex Terminal Type Number... -
Page 60: Split System: Installation Examples
9 - INSTALLATION - Split venting system 9.4 - Split system: 2. the second example shows the vent system run through a vertical wall. installation Condensation is collected inside the boiler itself. The horizontal examples section of the vent system must be pitched 1/4 in/ft (21 mm/m) towards Some installation examples can be the boiler. -
Page 61: Installation - Coaxial Venting System
10 - INSTALLATION - Coaxial venting system 10.1 - Coaxial system The boiler is not supplied with the fi tting needed for connecting a coaxial vent/combustion air system. A special kit must be ordered to connect the boiler with the Coaxial polypropylene vent. -
Page 62: Coaxial System Components
10 - INSTALLATION - Coaxial venting system 10.2 - Coaxial system components The following coaxial polypropylene vent and combustion air system components are available, on request, for installing the Coaxial system 54303 - No. 1 - In line 90° PP coaxial M/F elbow 54304 - No. -
Page 63: Coaxial System Components
10 - INSTALLATION - Coaxial venting system 10.3 - Coaxial system components Some of the most commonly used components for installing the coaxial stainless steel vent and combustion air system are listed below. Heatfab Saf T Vent Pro Tech FasNSeal Z FLex Terminal Type Part Number... -
Page 64: Coaxial System: Installation Examples
10 - INSTALLATION - Coaxial venting system 10.4 - Coaxial system: installation examples When a coaxial vent and combustion air system is installed, fi gure 53, whether vertical or horizontal, it must be sloped 1/4 in/ft, (21 mm/m) towards the boiler. CAUTION!!! Maintain the distances given in fi... -
Page 65: Operating
11 - OPERATING 11.1 - Operating 11.1.2 - Filling the 11.1.3 - Filling the heating condensate trap system Before starting the boiler, the following must be done. The condensate trap is positioned inside the boiler as shown in fi gure 1, WARNING!!! Never use non- 11.1.1 - User instructions item “46”. -
Page 66: Filling The Domestic Hot Water Heat Exchanger
11 - OPERATING 11.1.4 - Filling the WARNING!!! Conversion of the That the vent and combustion boiler to use another type of gas air terminals are free from any domestic hot water heat must be carried out by a qualifi ed blockages. -
Page 67: Ignition Control Testing
11 - OPERATING 11.6 - Ignition 5. open the manual gas shut off valve, fi gure 16, item “3”; control testing 6. check that the gas supply pressure does not exceed the “maximum After placing the boiler in operation, gas supply pressure” as stated in the ignition control’s safety shutoff section 14;... -
Page 68: Check The Combustion Air Pressure
11 - OPERATING 11.8 - Check the combustion air pressure The boiler has a factory-set air/gas ratio. The pressure of the gas at the burner is indirectly controlled by the blower. The combustion air pressure must be checked as follows while refering to fi gures 58 and 59: 1. -
Page 69: Checking And Adjusting Co2 Levels
11 - OPERATING 11.9 - Checking 7. wait 2 to 3 minutes for the CO2 to 3. press the keys stabilize; and adjusting CO2 for more than 10 seconds, the 8. insert the probe of a calibrated combustion analyzer into port “B” levels display will show a blinking and take a fl... -
Page 70: Adjusting The Heating Capacity
11 - OPERATING 11.10 - Adjusting 11.11 - Domestic 11.12 - Cold start the heating hot water fl ow rate boiler The boiler has a “cold start” mode. capacity adjustment Any time the room thermostat opens, This boiler has been engineered The volume of domestic hot water (no call for heat) the burner stops with an “intelligent”... -
Page 71: Use
12 - USE 1 - Display of the parameters 2 - Display of the paramenters value. 3 - Light indicates the burner state: Light-on = Burner ON; Blinking = Burner OFF. 4 - Light indicating DHW service: Light-on = DHW service ON; Light-off = DHW service OFF. 5 - Light indicates the decimal. -
Page 72: Start-Up Procedure
12 - USE 12.5 - Summer 12.4 - Start-up mode procedure To disable the heating functions for a prolonged period, leaving only the 1. Open the manual shutoff gas valve; domestic hot water function, switch 2. switch on electric power to the OFF the heating temperature, until boiler;... -
Page 73: Adjusting The Domestic Hot Water Temperature
12 - USE 12.7 - Adjusting the 12.10.1 - Outdoor reset applications domestic hot water CAUTION!!! If the boiler is Outdoor reset is a sophisticated installed in a low temperature system temperature way to maximize comfort and boiler follow the settings specifi ed in effi... -
Page 74: Outdoor Reset Adjustment Precautions
12 - USE 12.10.2 - Outdoor reset “Calculated temperature” is lower than = “Reaction” of the calculated the “Minimum heating temperature”, adjustment precautions temperature with respect to the parameter , the heating service outdoor temperature input. The When making adjustments to change switches off. - Page 75 12 - USE OA = Slope of the line Ob = Minimum heating temperature Oc = Maximum heating temperature br = “Fix point” of the angle fulcrum of the line Outside temperature (°C) b = parallel shift of the line (adjusted by the heating knob, item “7”...
-
Page 76: Boiler Switch Settings
12 - USE 12.11 - Boiler switch settings CAUTION!!! Improper setting of these switches could The control board shown in fi gure cause the boiler to malfunction 1, item “14”, and fi gure 21, contains resulting in improper system a series of switches that allow the performance. -
Page 77: Users' Menu
12 - USE 12.16 - “Users’ NOTE: If no key is pressed for use the keys, to more than 60 seconds, the control menu” change the value of the selected automatically exits the “Users’ parameter. menu”. Any parameter change not When entering the “Users’... -
Page 78: Installer's Menu
12 - USE 12.17 - “Installer’s NOTE: If no key is pressed for press the button down for 12 more than 60 seconds, the control menu” automatically exits the “Installers’ seconds until the parameter menu”. Any parameter change not is displayed;... - Page 79 12 - USE Continued PARAMETER DESCRIPTION INFORMATION ON DISPLAY ITEM “2” OF Figure 62 Can be changed: 00 = thermostatic adjustment (see section 12.8); Heating service functioning mode 01 = outdoor reset (see section 12.10); 02 = outdoor reset with room compensation (see section 12.10.6); Can be changed from 1 to 10 (active only with outdoor reset).
-
Page 80: Diagnostics
12 - USE 12.18 - Diagnostics During the normal operation of the boiler, the display “1” and “2” of fi gure 62, continually shows the operating status of the boiler as shown below (see also section 16): PARAMETER PARAMETER REFERENCE DISPLAY READ OUT (ITEM “2”, Figure 62) DISPLAY (ITEM “1”, Figure 62) -
Page 81: Diagnostics: "L" Lock-Outs
12 - USE 12.18.1 - Diagnostics: “L” lock-outs Lock-out “L” Checks to make Solutions description Code Check: a-If the gas supply pressure is incorrect, it must be adjusted to No fl ame detected after a-correct gas supply pressure (see the correct pressure; three ignition attempts. - Page 82 12 - USE 12.18.1 - Diagnostics: “L” lock-outs (continued) Lock-out “L” Solutions Controls description Code Program error Replace the power control board Flame sensed for 10 Call technical service seconds, after the closure of the gas valve Flame sensed before Call technical service opening of the gas valve.
-
Page 83: Diagnostics: "E" Blocking Errors
12 - USE 12.18.2 - Diagnostics: “E” blocking errors Blocking “E” Checks to make Solutions description Code If the sensor resistance does not correspond, it must be U1 boiler temperature Check that the electrical resistance of replaced; sensor circuit interrupted. the sensor corresponds with the graph in if the electrical circuit is damaged, it must be repaired;... - Page 84 12 - USE 12.18.2 - Diagnostics: “E” blocking errors (continued) Blocking “E” Checks to make Solutions description Code If the sensor resistance does not correspond, it must be U8 return temperature Check that the electrical resistance of replaced; sensor short-circuited the sensor corresponds with the graph in if the electrical circuit is damaged, it must be repaired;...
-
Page 85: Maintenance
13 - MAINTENANCE 13.1 - General WARNING!!! Servicing, inspection and adjustment must be done by precaution a trained technician in accordance CAUTION!!! Before with all applicable local and performing any maintenance national codes. Improper servicing operations, shut the boiler off, WARNING!!! Never store or adjustment could damage the close the manual gas shut-off... -
Page 86: Removing The Casing
13 - MAINTENANCE 13.2 - Removing the casing In order to remove the casing, follow the steps below while refering to fi gure 65: 1. remove screws “A”; 2. raise latch “C”; 3. remove the front cover; 4. press the two plastic springs, item “L”, down;... -
Page 87: Cleaning The Burner And Primary Heat Exchanger, Fl Ue Gas Side
13 - MAINTENANCE 13.3 - Cleaning the 7. remove the entire fan - burner WARNING!!! while performing assembly, detail “A” in fi gure 66; the next step, carefully wash burner and primary 8. use a cylindrical brush with plastic only the inside of the combustion bristles to clean the inside of the chamber “H”... -
Page 88: Correct Positioning Of The Ignition And Fl Ame Detection Electrodes
13 - MAINTENANCE 13.4 - Correct positioning of the ignition and fl ame detection electrodes For the boiler to work properly the electrodes must be positioned as shown in fi gure 67: the distance between the ignition electrodes “A” and “B”, must be between 0.08 in (2 mm), and 0.10 in (2.5 mm);... -
Page 89: Condensate Trap Cleaning
13 - MAINTENANCE 13.6 - Condensate trap cleaning The condensate trap must be cleaned every year. Follow the steps below to properly clean the condensate trap and its associated components while refering to fi gure 68: 1. run the fan as described in section 13.12.2, to minimize the amount of liquid present in the trap, item “A”;... -
Page 90: Circulator Pump Motor Replacement
13 - MAINTENANCE 13.7 - Circulator pump motor replacement To replace the circulator pump follow the steps below while, refering to fi gure 69: 1. follow the steps in section 13.10 to isolate and drain the water from the boiler; 2. -
Page 91: 3-Way Valve Removal
13 - MAINTENANCE 13.9 - 3-way valve removal The 3-way valve, details “M” and “Q” in fi gures 70 and 71, directs hot water produced by the primary heat exchanger to the heating circuit or to the secondary heat exchanger for the production of D.H.W. -
Page 92: Draining The Heating Side Of The Boiler
13 - MAINTENANCE 13.10 - Draining the 2. close the valve in the water main supplying the DHW system; 3. press the key until the heating side of the display shows: 3. open all the hot and cold faucets in the building;... -
Page 93: Water And Fl Ue Temperature Sensor
13 - MAINTENANCE 13.13 - Water and fl ue temperature sensor The boiler has a number of sensors that measure temperature. The electrical resistance between the sensor wires must correspond with the values shown in fi gure 72. The temperature sensors are: U1; U2, U3, U6, U7 and U8. -
Page 94: Functional Wiring Diagram
13 - MAINTENANCE 13.15 - Functional wiring WARNING!!! Label all wires prior to disconnection when servicing controls. Wiring errors can cause diagram improper and dangerous operation! Verify proper operation after servicing Failure to comply with this warning can cause extensive property damage, severe personal injury or death! LEGEND: ALA - Alarm output... - Page 95 13 - MAINTENANCE ATTENTION!!! Au moment de l’entretien des commandes, étiquetez tous les fi ls avant de les débrancher. Des erreurs de câblage peuvent entraîner un fonctionnement inadéquat et dangereux. S’assurer que l’appareil fonctionne adéquatement une fois l’entretien est terminé.
-
Page 96: Multiwire Wiring Diagram
13 - MAINTENANCE 13.16 - Multiwire wiring diagram WARNING!!! Label all wires prior to disconnection when servicing controls. Wiring errors can cause improper and dangerous operation! Verify proper operation after servicing Failure to comply with this warning can cause extensive property damage, severe personal injury or death! ATTENTION!!! Au moment de l’entretien des commandes, étiquetez tous les fi... - Page 97 13 - MAINTENANCE...
-
Page 98: Technical Data
14 - TECHNICAL DATA MODEL PC-160-C Country of destination USA and Canada Type of boiler Direct Vent boiler Category of discharge chimney CSA certifi cate N° 2045300 (114696) Maximum Heat input Btu/hr 160,000 Minimum heat input Btu/hr 30,000 Annual Fuel Utilization Effi ciency (AFUE) 91.1 Maximum Heat output (160°F/140°F) Btu/hr... -
Page 99: Spare Parts
15 - SPARE PARTS Stock Stock Part No. Description Part No. Description Code Code 60504206 CABLE UL IGNITOR CONN 90° L155 62630136 SIPHON 60802005 NUT ZINC COATED 6MA 60801100 SCREW SELFTAPPING 2.9 X 6.5 CROSS HEAD 60320001 SILICONE PIPE D 4 X 8 60806020 SPRING 28,7 61405036 TEE FOR DRY WATER CONDENSATION 23 54331 62113041 PRESSURE SWITCH ON 4,5 INWC... - Page 100 15 - SPARE PARTS Stock Part No. Description Code 60408261 DIAPHRAGM COSMOMIX 9 HOLES D.10 60702056 O-RING 165 NBR 3,53 X 61,91 69 54322 61901029 FAN 45 KW USA 61405174 BACK FLUE-GASES PREVENTER 60702051 O-RING 3825 SIL 2,62 X 209,22 61404109 COVER MANIFOLD AIR ALUMINUM 60801080 SCREW SELFTAPPING 4 X 10 TC S-TT UNI-8112 60801111 SELFTAPPING BOLT 6.3 X 38...
- Page 101 15 - SPARE PARTS Stock Part No. Description Code 111 54318 61203015 3 WAY VALVE MOTOR 120V 112 54313 61202024 PLUG PISTON BODY OT. 60808002 SPRING FORCK 3V 114 54316 61202027 UPPER PISTON 61408005 HYDRONIC SUPPLY GROUP. 62113034 HEATING PRESSURE SWITCH 60704003 GASKET COPPER 1/4P 60801134 SCREW 5 X 18 ZINC TC-ES-INC UNI5931...
-
Page 102: Read Out Flow Chart
16 - READ OUT FLOW CHART... - Page 103 16 - READ OUT FLOW CHART...
- Page 104 16 - READ OUT FLOW CHART To enter this menu you must: 1. turn the main electrical supply Off; 2. move the switch n° 7 (see fi gure CAUTION!!! Changing 21, item “D”) to the ON position; these parameters could cause the 3.
- Page 105 NOTES...
- Page 106 NOTES...
- Page 107 TO T H E O W N E R : This boiler should be inspected annually by a Qualified Service Agency. PB HEAT, LLC 131 S. CHURCH STREET • BALLY, PA 19503 WEB-1 (3/15) PC8000 R2 (1/14-1M) ©2014 PB Heat, LLC. All rights reserved. Printed in U.S.A.
Need help?
Do you have a question about the Peerless Combi 160 and is the answer not in the manual?
Questions and answers