Table of Contents
Advertisement
Advertisement
Table of Contents

Subscribe to Our Youtube Channel
Summary of Contents for Free The Tone Arc-53m
- Page 1 OWNERʼS MANUAL Ver 1.0 Software Ver1.00...
-
Page 2: Handling Precautions
Thank you for choosing a Free The Tone product. In order to take full advantage of the features and performance it provides, please read this owner’s manual thoroughly, and keep it in a safe place for future reference. Handling Precautions •... -
Page 3: Table Of Contents
6 Edit Menu ..........................7 ARC-53M’s Bank Presets & MIDI Program Change Numbers ..............8 Connection Examples ........................ -
Page 4: Signal Block Diagram
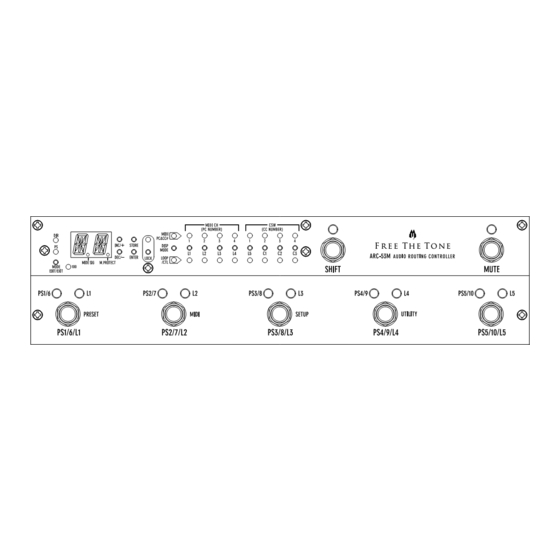
MODE switch not lit, pressing the PS/L switch recalls presets numbered PS1–PS5. Used to switch the operation modes of the ARC-53M. In PS (Preset) If you press the SHIFT switch and its LED is illuminated, pressing the mode the PS indicator illuminates and pressing a PS/L switch recalls PS/L switch recalls presets numbered PS6–PS10. -
Page 5: Control Panel
CONTROL PANEL Display DISP MODE (Display Mode) switch The numeral shown in the tens place is the bank number and the Used to change operating modes of the LED displays or Select numeral shown in the ones place is the number of the preset currently Switches. -
Page 6: Rear Panel
HTS-IN terminal can be selected by using a stereo plug. Input terminal to the ARC-53M. The signal fed to this input goes • Stereo plug’s Tip: Normally open terminal, i.e. there is no connection through the ARC-53M’s HTS circuit and the optimized signal that between the tip and ground when C3 is OFF. -
Page 7: Basic Operation
4-3 How to Edit Presets Presets in the ARC-53M can be edited very easily with the control panel only. To store a setting, press the STORE switch. Your changes are not saved if you recall another preset without pressing the STORE switch. -
Page 8: Edit Mode
4-4 Edit Mode Detailed setups of the ARC-53M are done in Edit mode. Holding down the MODE switch for three seconds puts the ARC-53M in Edit mode and the display shows “MN” (menu). Press one of the PS/L switches to select the desired menu item. The following menu items are assigned... -
Page 9: How To Use Separate Loop
HOW TO USE SEPARATE LOOP 1) To use as an effect loop If the four loops (L1–L4) are not enough for your application, the separate loop can be used as an additional effect loop. Connect your signal to the Input (IN-5) jack and connect the Send (S-5) jack to your effector’s input. Connect the effector’s output to the Return (R-5) jack, then the Output (OUT-5) jack to the downstream device. -
Page 10: Edit Menu
EDIT MENU Detailed setup of the ARC-53M is done in Edit mode. The following tables explain configurations available in Edit mode and how to set them. To keep this manual simple and easy to understand, some descriptions for setup procedures are simplified. To enter Edit mode, hold down the MODE (EDIT/EXIT) switch for three seconds. - Page 11 MIDI (PS2/7/L2 footswitch) Select Switch Menu How to Set MIDI Rx [RC] [RC] on ENTER [OM] flashes Set ENTER This item is used to set the MIDI receive channel. Parameter: CH1 [C1] to CH16 [C16], OMNI [OM], OFF [OF] (default: OMNI [OM]) CSW CC# [CC] [CC] on ...
- Page 12 Parameter: 1 = standard, 2 = bright (default: 1) parameter to “2” (bright). PGM DUMP/LOAD [DP] This item is used to transfer the data saved in one ARC-53M to another ARC-53M or vice versa. This item is used to delete the contents of the specified preset.
-
Page 13: Arc-53M's Bank Presets & Midi Program Change Numbers
ARC-53MʼS BANK PRESETS & MIDI PROGRAM CHANGE NUMBERS MIDI program change numbers received at MIDI IN terminal... -
Page 14: Connection Examples
CONNECTION EXAMPLES Example 1 Basic configuration to use one amplifier with four effectors connected in series. C1/C2 Control To AMP Control (Channel Switching) Example 2 Connection that retains the DELAY sound unmuted when the MUTE switch is pressed. Example 3 Connecting a high impedance signal directly to an effector such as a FUZZ pedal, etc. -
Page 15: Specifications
• Dimensions (W x H x D): 330 x 60.5 x 92.5 mm, 12.99 x 2.38 x 3.64 inches (incl. protuberances such as footswitches, jacks, etc.) • Weight (excl. AC adapter): approx. 1.1 kg (38.8 oz) • Accessories: Owner’s Manual, AC Adapter for ARC-53M Specifications and appearance subject to change without notice.


Need help?
Do you have a question about the Arc-53m and is the answer not in the manual?
Questions and answers