
Subscribe to Our Youtube Channel
Related Manuals for Angelcare AC401-A


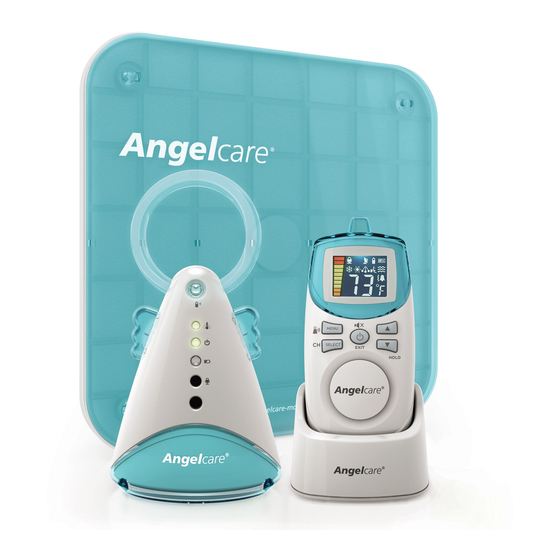
Summary of Contents for Angelcare AC401-A
- Page 1 FOR YOUR PEACE OF MIND OWNER’S MANUAL MOVEMENT & SOUND MONITOR Model AC401-A...
-
Page 2: Table Of Contents
Keep small parts away from children when assembling. We, at Angelcare , stand behind all of our products. ® If you are not completely satisfied or have any questions, United States and Canada: please contact us at: angelcare@cdecinc.ca Other countries: please contact your local distributor. -
Page 3: Warnings
WARNINGS 1. THIS PRODUCT CANNOT REPL ACE CAUTION RESPONSIBLE ADULT SUPERVISION. This product is designed to aid in the monitoring RISK OF ELECTRIC SHOCK of your child. When using the monitor, you DO NOT OPEN must still provide the supervision necessary DO NOT EXPOSE TO RAIN OR MOISTURE for the continued safety of your child. - Page 4 Dispose exhausted batteries properly. DO from the product. NOT recharge non-rechargeable batteries. Rechargeable batteries are ONLY to be 15.10 Accessories - Only use attachments/ charged under adult supervision. Keep all accessories specified by the manufacturer. batteries away from children. DO NOT place this product on an unstable cart, stand, tripod, bracket or table.
- Page 5 Pad measuring at least 13” x 13” (33 x 33 cm) and 1/4 inch (6 mm) thick. Only use 15.19 Power Lines - An outside antenna your Angelcare ® monitor in a stationary system should NOT be located in the...
- Page 6 17.2 NOTE: This equipment has been tested 16.10 DO NOT attempt to rejuvenate the and found to comply with Part 15 of the batteries provided with or identified for FCC Rules and the Industry Canada licence- use with this product by heating them. exempt RSS standard(s).
-
Page 7: Ac401-A Setup Requirements
Screwdriver Batteries Sensor Pad surface area or in the case of for Nursery Unit the AC401-A-2PU-2SP of two Sensor Pads. IMPORTANT BABY’S ROOM: Place the crib near a supporting wall and far from air currents. Install the Nursery Unit on a flat, stable surface facing the crib at a distance of at least 3 feet (0.9 meter). -
Page 8: Step 1 - Charging The Parent Unit (15 Hours)
STEP 1 - CHARGING THE PARENT UNIT IMPORTANT Never use regular alkaline batteries in the Parent Unit; they may explode. 1) Remove the battery door and insert the Rechargeable Batteries (included). 2) Connect the AC Adapter to the Parent Unit and into an electrical outlet. 3) Charge the unit for 15 continuous hours (prior to first use). - Page 9 HOW TO CHARGE THE BATTERIES IN THE PARENT UNIT: Leave the Parent Unit in the Charging Cradle to fully charge the unit. Although the batteries at 1/2 capacity works normally, we recommend that you fully recharge them. empty 1/2 full full PARENT UNIT: A) LCD Screen...
-
Page 10: Step 2 - Installing The Sensor Pad
STEP 2 - INSTALLING THE SENSOR PAD Cord covers 1, 2, 3, 4: Position on floor Cord cover 4: Contains double sided tape to securely install beneath crib leg Cord cover 5: Position vertically between mattress support and floor Cord cover 6: Sensor Pad with pre-installed cord covers Place under the mattress... - Page 11 2.2 SELECT THE CRIB LEG YOU WILL BE USING TO SECURE THE CORD COVERS RECOMMENDED 1) Use the crib leg by the wall closest to the Nursery Unit (Fig 1). In cases where the Nursery Unit is across the room, use the leg closest to the Nursery Unit to position the covered wire (Fig 2).
- Page 12 3” 6) Place the 6 cord cover approximately 3 in. (8 cm) from the edge of the mattress support. 7) Snap together the remaining cord covers that will run along the floor. 8) Remove any cord slack to make sure CLIC! no parts of the cord are loose.
-
Page 13: Step 3 - Setting Up The Nursery Unit
STEP 3 - SETTING UP THE NURSERY UNIT 1) Remove the battery door and insert 4 AAA Alkaline Batteries (not included). 2) Place the Nursery Unit at a minimum of 3 feet (0.9 m) away from the crib. 3) Connect the AC Adapter to the Nursery Unit and into an electrical outlet. -
Page 14: Step 4 - Turning On Your Monitor
STEP 4 - TURNING ON YOUR MONITOR 1) Press the Parent Unit ON/OFF button for 2 seconds. 2) Slide ON the Nursery Unit Power ON/OFF button. NOTE: The screen of the Parent Unit will show the channel of transmission (C1 to C8) and after 5 seconds the room temperature and function icons. - Page 15 IMPORTANT ICONS SOUND TRANSMISSION (VOX): Detection mode icons: Indicates the VOX is activated Indicates selected dectection mode: Nursery Unit: Movement Only Appears when options are being set for the Nusery Unit Sound Only Out-of-Range: Indicates the lost of connection “TIC”, Sound & Movement between the Parent Unit and Nursery Unit.
-
Page 16: Step 5 - Testing And Getting To Know Your Monitor
STEP 5 - TESTING AND GETTING TO KNOW YOUR MONITOR The Angelcare monitor can be used with the pre-program factory settings ® or you can also customise your settings to your preference. All changes and IMPORTANT adjustments made in the main MENU and... - Page 17 5.3 - CHANGING THE MOVEMENT AND SOUND MONITORING FUNCTIONS TO SET DETECTION MODE: 1) Press the MENU button once and the flashing icons will appear. 2) Use the UP and DOWN Arrows to select your preferred detection mode. 3) Press the SELECT button to confirm your choice.
- Page 18 TO STOP THE ALARM Place your hand Press back on the any key mattress. to put on Hold (see Step 5.8) Shut the Nursery Unit OFF TO ADJUST SENSOR PAD SENSITIVITY LEVEL: Turn the Nursery Unit sensitivity dial from less sensitive (0) to very sensitive (5).
- Page 19 OUT-OF-RANGE ALARM The Out-of-Range will flash • Alarm activates when your two units are not communicating. when changing the channel • The Parent Unit will emit a double beep every 8 seconds. or if the unit is reconnecting. • Out of Range Icon will flash on the screen. IMPORTANT If the Out-of-Range function is activated and you turn the Nursery Unit OFF the Out-of-Range Alarm will sound and/or vibrate (depending on the alarm mode chosen).
- Page 20 TO ADJUST SOUND SENSITIVITY (VOX): The sensitivity of the microphone is adjustable and has 4 levels (the most sensitive is level 4). This means that sound will only transmit based on the level that you set. 1) Press MENU button 4 times. Sensitivity Level icon will appear.
- Page 21 Unit even if they were activated before pressing the MENU or SUB-MENU mode. 5.8 - HOLD Allows you to put your Angelcare monitor on HOLD. 1) Press and hold the Down Volume arrow for 2 seconds. The Hold Icon will appear on the screen.
- Page 22 5.9 - TEMPERATURE TO ACTIVATE TEMPERATURE ALARM: 1) Press MENU button 6 times. The Temperature Indicator (Low and High) will appear. 2) Using the arrows, to turn the function ON or OFF. 3) Press SELECT button to confirm your choice. TO SET TEMPERATURE RANGE: 1) Press the MENU button 6 times.
- Page 23 YOU ARE NOW READY TO USE YOUR MONITOR The Angelcare monitor can be used with the pre-program factory settings ® or you can also customise your settings to your preference. DEFAULT SETTINGS Detection Mode: Sound, Movement & Tic are ON...
-
Page 24: Step 6 - Activating And Deactivating Additional Functions
STEP 6 – ACTIVATING AND DEACTIVATING ADDITIONAL FUNCTIONS The Angelcare ® monitor can be used with the pre-program factory settings or you can also customise your settings to your preference. IMPORTANT When in MENU or SUB-MENU mode NO In order to activate any... -
Page 25: Troubleshooting
TROUBLESHOOTING TAKING CARE OF YOUR RECHARGEABLE BATTERIES • Ensure that you fully charge your batteries for 15 hours before their first use. • To maintain maximum battery life it is recommended that you fully discharge your batteries periodically. Battery performance can be diminished by leaving the batteries constantly charging. - Page 26 If you are not completely satisfied or have any questions: United States and Canada: please contact us at: angelcare@cdecinc.ca Other countries: please contact your local distributor. We may have a simple solution to your problem.
-
Page 27: Limited Warranty
® ® sound monitor (model AC401-A) is free from any material and workmanship defects, for a period of one (1) year (rechargeable batteries not included) from the date of the original purchase. If this monitoring system fails to function properly when used as directed under... -
Page 28: Technical Specifications
Caution: To reduce the risk of electric America/Ecuador/Oceania. shock, do not expose this product to rain or moisture. Hereby, Angelcare Monitors Inc, declares this baby monitor is in compliance with the Danger of explosion if batteries are essential requirements and other relevant incorrectly replaced. -
Page 29: Français
POUR VOTRE TRANQUILLITÉ D’ESPRIT MANUEL DE L’UTILISATEUR MONITEUR DE MOUVEMENTS ET DE SONS Modèle AC401-A... -
Page 30: Español
, nous endossons fièrement tous nos produits. ® Si vous n’êtes pas complètement satisfait, ou si vous avez des questions : États-Unis et Canada : prière d’envoyer un courriel à : angelcare@cdecinc.ca. Autres pays : prière de communiquer avec votre distributeur local. -
Page 31: Avertissements
AVERTISSEMENT 1. CE PRODUIT NE REMPLACE PAS LA ATTENTION S U P E RV I S I O N R E S P O N S A B L E D ’ U N ADU LTE . Ce produit est conçu pour RISQUE DE CHOC ÉLECTRIQUE. - Page 32 respectant la polarité. NE court-circuitez 15.8 Sources de chaleur – N’installez PAS PAS les bornes d’alimentation. Utilisez l’une ou l’autre unité près d’une source de UNIQUEMENT les piles recommandées ou chaleur, telle qu’un radiateur, une bouche des piles équivalentes (en tension et en d’air chaud, une cuisinière, un téléviseur taille), ainsi que le bon adaptateur.
- Page 33 0.9 m [3 pieds]). base du lit et le détecteur de mouvements. N ’u ti l i s e z JA M A I S Le moniteur Angelcare ne doit servir ® l e (s) d é te c te u r (s)
- Page 34 16. INSTRUCTIONS IMPORTANTES DE SÉCURITÉ RELATIVES À L’UTILISATION DES PILES 16.1 Utilisez UNIQUEMENT des piles du 16.9 NE rechargez PAS les piles fournies type et de la taille précisés dans le manuel ou identifiées pour utilisation avec ce de l’utilisateur. Il y a risque d’explosion si produit qui ne sont pas destinées à...
- Page 35 AVERTISSEMENT (Amérique du Nord seulement) 17.1 Toute modification non autorisée par le 17.4 Cet appareil se conforme au chapitre 15 fabricant peut annuler le droit de l’utilisateur de la réglementation de la FCC, ainsi qu’aux de faire fonctionner cet appareil. normes RSS exemptes de licence d’Industrie Canada.
-
Page 36: Instructions D'installation Ac401-A
AC401-A-2PU-2SP) 2 adaptateurs CA (AC401-A) 4 piles AAA rechargeables (AC401-A) ou 3 adaptateurs CA ou 8 piles AAA rechargeables (AC401-A-2PU et AC401-A-2PU-2SP) pour l’unité des parents (AC401-A-2PU et Unité du nourrisson AC401-A-2PU-2SP) ÉLÉMENTS NÉCESSAIRES (NON INCLUS) : VOUS DEVEZ PRÉPARER :... -
Page 37: Étape 1 - Charge De L'unité Des Parents (15 Heures)
ÉTAPE 1 - CHARGE DE L’UNITÉ DES PARENTS IMPORTANT N’utilisez jamais de piles alcalines ordinaires dans l’unité des parents : elles pourraient exploser. 1) Enlevez le couvercle du compartiment à piles et insérez les piles rechargeables (incluses). 2) Branchez l’adaptateur CA à l’unité des parents et dans une prise de courant. - Page 38 COMMENT CHARGER LES PILES RECHARGEABLES DANS L’UNITÉ DES PARENTS : Pour charger complètement l’unité des parents, laissez-la dans le chargeur. Bien que les piles fonctionnent normalement à 1/2 de leur capacité, nous recommandons de les charger au maximum. Vide 1/2 plein Plein UNITÉ...
-
Page 39: Étape 2 - Installation Du Détecteur De Mouvements
ÉTAPE 2 - INSTALLATION DU DÉTECTEUR DE MOUVEMENTS Baguettes de protection du fil 1, 2, 3, 4 : Positionnez sur le plancher Baguette de protection du fil 4 : Contient du ruban adhésif à double face afin de fixer solidement sous le pied du lit. - Page 40 2.2 SÉLECTIONNEZ LE PIED DU LIT SOUS LEQUEL VOUS FIXEREZ LES BAGUETTES DE PROTECTION DU FIL EN PLACE RECOMMANDÉ Utilisez le pied du lit près du mur le plus rapproché de l’unité du nourrisson (voir Figure 1). Dans les cas où l’unité du nourrisson se trouve de l’autre côté...
- Page 41 6) Placez la sixième baguette de 8 cm protection du fil à environ 8 cm (3 po) du rebord du support du matelas. 7) Emboîtez ensemble les baguettes de protection du fil restantes qui courront le long du plancher. 8) Éliminez tout jeu ou flottement sur toute partie du fil.
-
Page 42: Étape 3 - Installation De L'unité Du Nourrisson
ÉTAPE 3 - INSTALLATION DE L’UNITÉ DU NOURRISSON 1) Enlevez le couvercle du compartiment à piles et insérez 4 piles alcalines AAA (non incluses). 2) Placez l’unité du nourrisson à une distance minimale de 0.9 m (3 pi) du lit. 3) Branchez l’adaptateur CA à... -
Page 43: Étape 4 - Mise En Marche Du Moniteur
ÉTAPE 4 - MISE EN MARCHE DU MONITEUR 1) Appuyez sur le bouton MARCHE-ARRÊT (ON/OFF) de l’unité des parents pendant 2 secondes. 2) Glissez le bouton MARCHE-ARRÊT (ON/OFF) de l’unité du nourrisson à la position de mise sous tension (ON). NOTE: L’écran de l’unité... - Page 44 ICÔNES IMPORTANTES Mode de communication vocale Icônes des modes détection : (VOX) : Indique le mode détection sélectionné : Indique que le mode VOX est activé. Mouvements uniquement Unité du nourrisson : S’affiche lorsque l’utilisateur Sons uniquement sélectionne des options pour l’unité...
-
Page 45: Étape 5 - Test Et Familiarisation Avec Le Moniteur
ÉTAPE 5 - TEST ET FAMILIARISATION AVEC LE MONITEUR Vous pouvez utiliser le moniteur Angelcare avec les réglages préprogrammés en usine ® ou encore les modifier selon vos préférences. Tous les changements et IMPORTANT réglages apportés dans le menu principal et les En mode MENU ou SOUS-MENU, sous-menus ne sont activés... - Page 46 5.3 - CHANGEMENT DES FONCTIONS DE DÉTECTION DE MOUVEMENTS ET DE SONS POUR ACTIVER LE MODE DÉTECTION : 1) Appuyez une fois sur le bouton MENU et les icônes clignotantes s’afficheront. 2) Utilisez les flèches HAUT et BAS pour choisir votre mode de détection préféré. 3) Appuyez sur le bouton SELECT pour confirmer votre choix.
- Page 47 POUR ARRÊTER L’ALARME Replacez votre main sur le Appuyez sur matelas. n’importe quelle touche pour mettre Éteignez l’unité le moniteur du nourrisson. en Pause (voir l’Étape 5.8). POUR RÉGLER LE NIVEAU DE SENSIBILITÉ DU DÉTECTEUR DE MOUVEMENTS : Tournez le bouton rotatif de sensibilité de l’unité...
- Page 48 ALARME HORS DE PORTÉE L’icône Hors de portée clignote également • L’alarme se déclenche lorsque vos deux unités ne communiquent pas entre elles. lorsque l’utilisateur • L’unité des parents émet un double signal sonore toutes les 8 secondes. change de canal ou •...
- Page 49 POUR RÉGLER LE NIVEAU DE SENSIBILITÉ SONORE (VOX) : Vous pouvez régler la sensibilité du microphone en choisissant l’un des quatre niveaux (le plus sensible étant le niveau 4). Cela signifie que l’unité transmet le son seulement d’après le niveau que vous réglez. 1) Appuyez sur le bouton MENU 4 fois.
- Page 50 20 secondes. mode MENU ou SOUS-MENU. 5.8 - PAUSE (HOLD) en PAUSE. Permet de mettre le moniteur Angelcare ® 1) Appuyez sur le bouton de réduction du volume (flèche vers le bas) pendant 2 secondes.
- Page 51 5.9 - RÉGLAGE DE LA TEMPÉRATURE POUR ACTIVER L’ALARME DE TEMPÉRATURE : 1) Appuyez sur le bouton MENU six fois. Le témoin de température (élevée et basse) s’affiche. 2) À l’aide des flèches HAUT et BAS, activez (ON) ou désactivez (OFF) la fonction.
- Page 52 VOUS ÊTES MAINTENANT PRÊT À UTILISER VOTRE MONITEUR Vous pouvez utiliser le moniteur Angelcare avec les réglages préprogrammés en usine ou ® encore les modifier selon vos préférences. RÉGLAGES PAR DÉFAUT Mode détection : Sons, mouvements et TIC sont activés Unité...
-
Page 53: Fonctions Supplémentaires
ÉTAPE 6 - ACTIVATION ET DÉSACTIVATION DE FONCTIONS SUPPLÉMENTAIRES Vous pouvez utiliser le moniteur Angelcare ® avec les réglages préprogrammés en usine ou encore les modifier selon vos préférences. IMPORTANT Afin d’activer tout En mode MENU ou SOUS-MENU, l’unité des changement apporté... -
Page 54: Résolution De Problèmes
RÉSOLUTION DE PROBLÈMES SOIN DE VOS PILES RECHARGEABLES • Assurez-vous de charger vos piles au maximum pendant 15 heures avant d’utiliser l’unité pour la première fois. • Pour optimiser la durée de vie des piles, nous vous recommandons de décharger les piles complètement sur une base périodique. - Page 55 FAUSSES ALARMES • Éteignez l’unité du nourrisson. • Vérifiez le raccordement du détecteur de mouvements à l’unité du nourrisson. Débranchez et rebranchez le fil. • Assurez-vous qu’il n’y a aucune literie entre le matelas et le détecteur de mouvements. • Si le lit est muni d’une base à lattes ou à ressorts, placez une planche rigide mesurant au moins 33 cm x 33 cm (13”...
-
Page 56: Garantie Limitée
Le produit doit s’accompagner d’une preuve d’achat, c’est-à-dire une facture ou tout autre reçu de vente prouvant que le moniteur est toujours sous garantie. Les coûts de réparation ou de remplacement du produit ainsi que sa réexpédition seront aux frais d’Angelcare ®... -
Page 57: Fiche Technique
Veuillez le rapporter à un point de collecte spécialisé en appareils électriques et électroniques (demandez des détails à vos autorités locales). CONFORMITÉ ERP AFRIQUE DU SUD-BRÉSIL-ÉQUATEUR-UNION EUROPÉENNE Utilisez seulement une source d’alimentation de marque Angelcare - numéro de modèle T07505V001. ® ALLEMAGNE Utilisez seulement une source d’alimentation de marque Angelcare... - Page 58 www.angelcarebaby.com...
Need help?
Do you have a question about the AC401-A and is the answer not in the manual?
Questions and answers