Table of Contents
Advertisement
Quick Links
Advertisement
Table of Contents

Related Manuals for Pioneer X-HM82-S


Summary of Contents for Pioneer X-HM82-S
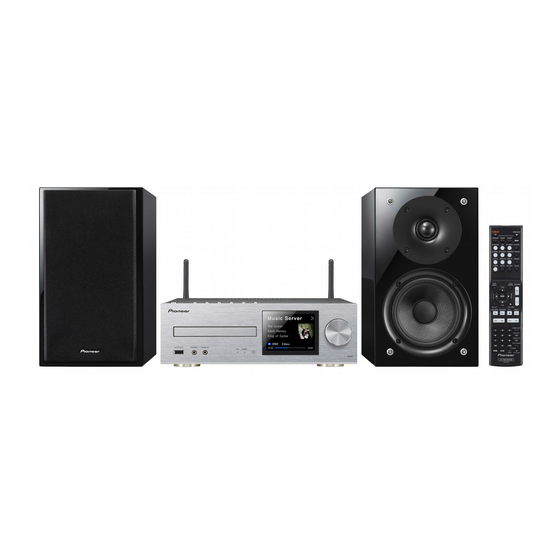
- Page 1 X-HM82 -S/-K X-HM72 -S/-K NETWORK CD RECEIVER SYSTEM X-HM82D X-HM72D -S/-K XC-HM82 -S/-K NETWORK CD RECEIVER XC-HM82D http://www.pioneer.co.uk (or http://www.pioneer.eu). Discover the benefits of registering your product online at Operating Instructions...
- Page 2 Check the power cord once in a while. When you find it VENTILATION CAUTION og/eller via annet jordtilkoplet utstyr – og er tilkoplet et damaged, ask your nearest PIONEER authorized service When installing this unit, make sure to leave space around kabel-TV nett, kan forårsake brannfare. For å unngå dette center or your dealer for a replacement.
- Page 3 In this event, increase the distance between the antenna input connector and this unit (including products supported by this unit). • Pioneer is not responsible for any malfunction of the compatible Pioneer product due to communication error/malfunctions associated with your network connection and/or your connected equipment.
-
Page 4: Table Of Contents
Using Pioneer ControlApp ......50 Remote control operation......17 Pairing with the unit (Initial registration) . -
Page 5: About This Product
Before you start CAUTION About this product Checking what’s in the box • Incorrect use of batteries may result in such hazards as Please check that you’ve received the following supplied X-HM82, X-HM82D, X-HM72 or X-HM72D leakage and bursting. Observe the following precautions: accessories: X-HM82, X-HM82D, X-HM72 or X-HM72D Network CD Never use new and old batteries together. -
Page 6: Controls And Displays
Controls and displays AUDIO IN jack Input source Top panel/Front panel Use to connect an auxiliary component using a stereo mini- Mute jack cable (page 14). Displayed during the mute operation (page 14). ON indicator Sleep timer When turning on the receiver, this indicator flashes slowly for When the sleep timer is set, the remaining time until power off thirty seconds or more. -
Page 7: Remote Control
Controls and displays TIMER – Use for setting the clock, as well as for setting DAB SCAN – Use to scan for DAB radio station (page 27). Remote control and checking the timers (page 12). (X-HM72D, X-HM82D and XC-HM82D only) SLEEP –... -
Page 8: Connecting Your Equipment
Connecting your equipment CAUTION • Be sure to turn off the power and unplug the power cord from the power outlet whenever making or changing connections. • Connect the power cord after all the connections between devices have been completed. /100) Right Left... -
Page 9: Antenna Connection
Connecting your equipment Applying non skid pads (X-HM82 and X-HM82D only) Antenna connection Speaker connection The use of non skid pads is recommended depending on the installation location. Apply the pads to the four corners of the • The provided speaker wire with the red tube is for the plus Supplied FM wire antenna (X-HM82, XC-HM82 and X- side of the speaker which will be on the bottom. -
Page 10: Using Other Subwoofer
Connecting your equipment Listening to analog audio Using other subwoofer Connecting to the network through the LAN Connect to the TV using an audio cable. interface or WLAN antenna You can connect a subwoofer with an amplifier to the SUBWOOFER PREOUT socket. To audio By connecting this receiver to the network via the LAN AUDIO... -
Page 11: Connecting To Auxiliary Component
Connecting your equipment Connecting using LAN cable Connecting to auxiliary component Modem Connect the front panel AUDIO IN mini-plug jack to your auxiliary playback component. Internet This method can be used to play music on this receiver from iPod/iPhone/iPad that do not support use of the terminal on the front panel of this receiver. -
Page 12: Getting Started
Before setting timer: The first time you use the clock, you are taken to the clock • After the Pioneer logo is displayed, the screen will go dark. • Check that the clock is set to the correct time (Setting the adjust mode. -
Page 13: Sleep Operation
Getting started Note Press STANDBY/ON button to turn the power on. General control • If you select USB function for the wake-up timer, check Press and hold TIMER button for more than two there is the playable file in the root folder. Input function seconds. -
Page 14: Listening To Auxiliary Component
Getting started (X-HM82, XC-HM82 and X-HM72 only) Start playback of the auxiliary component. Sound Controls Music iPod/USB BT Audio Server Headphones P.Bass control • Do not turn the volume on to full at switch on and listen to When the P.BASS button on the remote is pressed, the P.Bass music at moderate levels. -
Page 15: Ipod/Iphone/Ipad Playback
Connect the unit to an iPod/iPhone/iPad with the iPod/ • Installing software versions other than indicated on the supported iPhone/iPad cable. website of Pioneer to your iPod/iPhone/iPad may result in incompatibility with this receiver. The iPod/iPhone/iPad playable on this receiver are shown below. •... -
Page 16: Playing Your Ipod/Iphone/Ipad
iPod/iPhone/iPad playback When using iPad Important Make sure to place the iPad in a horizontal direction on the • If this receiver cannot play your iPod/iPhone/iPad, perform stand. the following troubleshooting checks: Check whether the iPod/iPhone/iPad is supported by this receiver (page 15). -
Page 17: Music Playback Using Bluetooth® Wireless Technology
Bluetooth SIG, Inc. and any use of Cell phone Press the BT AUDIO. such marks by PIONEER CORPORATION is under license. The unit switches to BT Audio and “Waiting device” will be Other trademarks and trade names are those of their displayed. -
Page 18: Listen To Music On The Unit From A Bluetooth Capable Device
Music playback using Bluetooth® wireless technology • Connected Select ‘Option Setting’ from Initial Setup menu. Radio wave caution This unit uses a 2.4 GHz radio wave frequency, which is a band BT Audio Select ‘Power Off Setting’ from Option Setting menu. used by other wireless systems (see list below). - Page 19 Music playback using Bluetooth® wireless technology Scope of operation Precautions regarding connections to products Use of this unit is limited to home use. (Transmission supported by this unit distances may be reduced depending on communication • Complete connections for all devices supported by this environment).
-
Page 20: Disc Playback
Disc playback This receiver can play back a standard CD, CD-R/RW in the Press to close the disc tray. Advanced CD or MP3/WMA disc playback CD format and CD-R/RW with MP3 or WMA files, but cannot record on them. Some audio CD-R and CD-RW discs may not Press /... - Page 21 Disc playback B. For example, to choose 130 To cancel repeat play: Programmed play (CD) Press REPEAT repeatedly until “Repeat Off” appears and Press the “+100” button. You can choose up to 32 selections for playback in the order “ ”...
-
Page 22: Mp3/Wma Folder Mode (Only For Mp3/Wma Files)
Disc playback To cancel the programmed play mode: Example: How to set folder number if MP3/WMA format files Procedure to playback MP3/WMA disc with folder are recorded as below figure. During programmed stop mode, press button. Press PLAY mode on MODE button to select the basic play mode, and all the ROOT folder is set as folder 1. - Page 23 Disc playback Press FOLDER +/– to select desired playback folder. (Folder mode on) Playback will start. 0:04 FOLDER F006 T007 Folder number First track number in the folder • In case of playback with the folder mode on, press FOLDER +/–, and the folder can be selected even though it is in playback/pause mode.
-
Page 24: Usb Playback
USB storage device. For details, see Connecting USB storage devices on page 10. iPod/USB Pioneer does not guarantee that any file recorded on a USB storage device will play or that power will be supplied to a USB Song 1 storage device. -
Page 25: Using The Tuner
Using the tuner • Stations are stored in stereo. When the station is stored in Improving FM sound Listening to the radio broadcasts the FM MONO mode, it shows as when Tuned Stereo If the indicators don’t light when The following steps show you how to tune in to FM and AM recalled. -
Page 26: Using The Radio Data System (Rds)
13 8 Using the tuner • Program Service Name (PS) – The name of the radio Using the Radio Data System (RDS) iPod station. VOLUME MENU CONTROL STANDBY/ON • Program Type (PTY) – This indicates the kind of OPEN/CLOSE program currently being broadcast. An introduction to RDS DIMMER TIMER... -
Page 27: Listening To The Dab (X-Hm72D, X-Hm82D And Xc-Hm82D Only)
13 8 Using the tuner Using the auto scan function manually Listening to the DAB (X-HM72D, X-HM82D and Selecting DAB XC-HM82D only) Using DAB for the very first time DIG IN AUDIO IN LINE 1/2 TREBLE DAB (Digital Audio Broadcasting) is a digital transmission The very first time you use DAB, press the DAB SCAN button system where audio signals are converted to digital signals for to run the Auto Scan. - Page 28 13 8 Using the tuner Multiplex Name Displaying DAB radio information Displays the name of the current multiplex. Select DAB. See Selecting DAB on page 27 for more on this. BBC Station Press the RDS DISP button repeatedly to display Bitrate information about the selected DAB station.
-
Page 29: Network Quick Setup Guide
Listen to music from files saved to a computer or NAS. Connection method 1 (page 30) Use the Pioneer ControlApp to operate the receiver. Wireless connection (page 40) If you already have a wireless connection environment set up. - Page 30 Network quick setup guide Connection method 1 | Connect a LAN cable Press the NET SERVICE button, and select Internet Radio. Confirm that the cabled LAN operation mark is displayed. Connect the receiver and the router using a LAN cable. Internet Radio Internet Modem...
- Page 31 Network quick setup guide Note Connection method 2 | Copy the wireless settings Select Network Setting Network Configuration • If “Empty” is displayed, there is a possibility that the router Wireless iOS Device and then press ENTER. from your iPhone/iPod touch/iPad is not connected to the internet.
- Page 32 Network quick setup guide • Network Setting • PBC (Push Button Configuration) Connection method 3 | Use WPS (Wi-Fi Protected Setup™) to connect Press the STANDBY/ON button. Initial Setup Select WPS Method Do not connect a LAN cable to this receiver. Network Setting PBC (Push Button Configuration) Option Setting...
- Page 33 Network quick setup guide Connection method 4 | Have the receiver Press the ENTER button. Press the NET SERVICE button, and select Internet Radio. automatically detect the wireless LAN router and Confirm that the Wi-Fi operation mark has changed to perform settings Press WPS Button on Internet Radio...
- Page 34 Network quick setup guide • Network Setting • Wireless Note • If you are using your wireless LAN under its initial settings, you can check the router name and password from the label on the router. Initial Setup Network Configuration •...
- Page 35 Network quick setup guide Note Select “Don’t Use Proxy Server.” (“Don’t Use Proxy The receiver will automatically restart. Confirm that the Server” should be selected at all times) Wi-Fi operation mark has changed to • If a mark is displayed, there is a possibility that the password is incorrect.
- Page 36 Confirm that categories are displayed. Internet Radio Internet Radio Top Menu 2.1 A PHONES AUDIO IN TIMER The Beatles - Here Genres Pioneer Radio.com Countries Computer Podcasts By Genre 256kbps Podcasts By Location [+Favorite]: Press the STANDBY/ON button. Add to Favorites The power to the receiver will be turned on.
- Page 37 Network quick setup guide Using an iPhone, iPod touch or iPad Start iTunes, click the AirPlay mark, and then select this Set the iPhone, iPod touch or iPad to music playback receiver. mode. Connect an iPhone, iPod touch or iPad (iOS version 4.3.3 or higher) to the same router as this receiver.
- Page 38 Network quick setup guide Listen to music on a computer or NAS Tap (touch) AirPlay. Select a track and play it. Swipe (slide) and hide display of the Control Center. (network attached storage). Playback will begin through this receiver. Press the STANDBY/ON button. The power to the receiver will be turned on.
- Page 39 Network quick setup guide Using a NAS that supports DLNA • Network and internet From the product name’s dropdown list, select “Permitted” and then press “OK”. Change NAS settings to allow access to NAS. Refer to the user manual of your NAS for more details. Using a computer with Windows Media Player 12 installed 82 *****...
-
Page 40: The Receiver
Connection image Note Wired/Wireless • Album name / artist name and artwork may not be displayed, depending on file format. 2.1 A PHONES AUDIO IN TIMER Note Wireless • For details of how to use the Pioneer ControlApp, refer to: http://pioneer.jp/support/soft/iapp_controlapp/en.html... -
Page 41: Playback With Network Features
Playback with NETWORK features Network setting If a broadband router (with built-in DHCP server function) is connected to this unit, you can simply turn on the DHCP server function without having to set up the network manually. Before you set up the network, consult with your ISP or the network manager for the required settings. It is advised that you also refer to the operation manual supplied with your network component. Any changes made to a router without the DHCP server function must be reflected to unit network settings. -
Page 42: A: Wired Setting
Playback with NETWORK features <Manual setting> <Proxy Server setting> A: Wired setting Then use /// or numeric buttons to adjust the Then Enter Proxy Host Name and the port number of Make sure that the LAN cable connections has completed numbers, then press ENTER. -
Page 43: C: Connection Settings Using An Ios Device (With Ios 7.1 Or Later)
Playback with NETWORK features • Select Wi-Fi. C: Connection settings using an iOS device Check that the Wi-Fi mark is displayed on the iPhone, iPod touch or iPad screen. (with iOS 7.1 or later) If it is not displayed, turn Wi-Fi on, and then connect the You can apply iPod/iPhone/iPad (iOS device with iOS ver 7.1 iPhone, iPod touch or iPad to the wireless LAN router. -
Page 44: D: Wps Connection Setting
Playback with NETWORK features • Select Next. • Select Done. D: WPS connection setting WPS is abbreviation of Wi-Fi Protected Setup. A standard established by the Wi-Fi Alliance industry group for a function allowing settings related to interconnection of WPS compatible wireless LAN devices and encryption to be made with simple operations. -
Page 45: E: Wireless Setting
Playback with NETWORK features Follow the instructions shown in Connecting using PIN Use / to select the available wireless network you E: Wireless Setting code configuration on the right. want to connect to. Press NET SERVICE SETUP. Connecting using PIN Input The Initial Setup screen is shown on the display. -
Page 46: F: Connecting To A Router Without Wps-Pbc Function
SSID is displayed as Pioneer Setup:xxxxxx. “xxxxxx” is the Select DHCP to be Off and press ENTER in step 7. If your lower three bytes of the MAC address. -
Page 47: Friendly Name
Check the access code required for registration on this The information of the station you last selected is receiver, use this access code to access the special Pioneer displayed on the display. Internet radio site and register the desired broadcast stations in your favorites. -
Page 48: About The Spotify Audio Stream Playback Function
The access code required for registration on the special smartphone or other mobile digital device. CAUTION Pioneer Internet radio site is displayed. Make a memo of this address. • Even if you are away from home, if you start Spotify audio... -
Page 49: Introduction
There are cases where the time elapsed may not be When this receiver is selected as a DMR and DMS playback is indicated on the Pioneer website. AirPlay may not be correctly displayed. begun, the receiver’s input automatically switches to DMR. -
Page 50: Using Airplay To Enjoy Music
Using Pioneer ControlApp Use / to select the file you want to play, then press If using Pioneer ControlApp for the first time, follow these Operating AirPlay from an iPod/iPhone/iPad ENTER. procedures to start the application. -
Page 51: Additional Information
(page 9). track. listed below, ask your nearest Pioneer authorized service The Bluetooth wireless technology device cannot be Is the receiver located near excessive vibrations? center or your dealer to carry out repair work. - Page 52 Additional information Audio playback is undesirably stopped or disturbed. Cannot access to the network using WPS. Audio files were not recorded in a format playable on this You may be using a USB 1.0 compatible device. We ...
- Page 53 The broadcasts from an Internet Radio station are stopped or *1) Set the “XXX” in “192.168.1.XXX” to a number between 2 an application such as Pioneer ControlApp, the volume can interrupted. Some Internet radio stations on the list of Internet and 248 that is not assigned to other devices.
-
Page 54: Setting Quick Start Mode
Download the latest firmware at Pioneer website. the Pioneer website onto your computer, the file will be in ZIP The Initial Setup screen is shown on the display. format. Unzip the ZIP file before saving it on the USB storage Be sure this receiver and your computer are connected device. -
Page 55: Resetting This Receiver
Additional information Note Browse the latest firmware on your computer (a) and Resetting this receiver • Confirm the receiver’s IP address as follows: then press Upload (b). Use this procedure to reset all receiver settings to the factory 1. Press NET SERVICE SETUP. The confirmation screen is displayed. -
Page 56: Handling Discs
Additional information • Places exposed to vibrations About specially shaped discs Handling discs • Places in which there is much dust or cigarette smoke Specially shaped discs (heart-shaped, hexagonal, etc.) cannot • Places exposed to soot, steam or heat (kitchens, etc.) be played on this receiver. -
Page 57: Authorizing This Receiver
• Even when encoded in a compatible format, some files may Pioneer is not responsible for any malfunction of the player not play correctly. and/or the Music Server features due to communication error/malfunctions associated with your network connection •... -
Page 58: About Playable Music File Formats
Additional information FLAC Categ Exten About playable music file formats Stream sion FLAC Decoder The USB and Music Server function of this receiver supports Copyright c 2000, 2001, 2002, 2003, 2004, 2005, 2006, 2007, .wav LPCM Sampling USB/Music the following music file formats. 2008, 2009 Josh Coalson frequency Server... -
Page 59: About Ipod/Iphone/Ipad
Additional information c Uncompressed FLAC files are not supported. Pioneer does Categ Exten Categ Exten not guarantee playback. Stream Stream sion sion .m4a Apple Sampling .aiff AIFF Sampling Apple USB/Music AIFF USB/Music About iPod/iPhone/iPad .mp4 Lossless frequency .aif frequency Lossless... -
Page 60: About Aptx
Additional information App Store is a service mark of Apple Inc. Miscellaneous Specifications Power source ....AC 220 V to 230 V, 50 Hz Power consumption Amplifier section About aptX... - Page 61 Additional information Accessories Remote control ........1 AAA size IEC R03 dry cell batteries.
- Page 62 Português: Slovenščina: Declaration of Conformity with regard to the R&TTE Directive 1999/5/EC Pioneer declara que este [*] está Pioneer izjavlja, da je ta [*] v skladu z conforme com os requisitos essenciais bistvenimi zahtevami in ostalimi Manufacturer: EU Representative’s: e outras disposições da Directiva relevantnimi določili direktive...
- Page 63 253 Alexandra Road, #04-01, Singapore 159936 TEL: 65-6472-7555 PIONEER ELECTRONICS AUSTRALIA PTY. LTD. 5 Arco Lane, Heatherton, Victoria, 3202, Australia, TEL: (03) 9586-6300 PIONEER ELECTRONICS DE MEXICO S.A. DE C.V. Blvd.Manuel Avila Camacho 138 10 piso Col.Lomas de Chapultepec, Mexico, D.F. 11000 TEL: 55-9178-4270 K002_B3_En...
Need help?
Do you have a question about the X-HM82-S and is the answer not in the manual?
Questions and answers