Honda UMK425E Owner's Manual
Hide thumbs
Also See for UMK425E:
- Owner's manual (128 pages) ,
- Owner's manual (88 pages) ,
- Owner's manual (58 pages)
Table of Contents
Advertisement
POWER EQUIPMENT
Honda Europe Power Equipment S.A.
Honda France Manufacturing S.A.S.
Pôle 45 - Rue des Châtaigniers
Pôle 45 - Rue des Châtaigniers
45140 ORMES - FRANCE
45140 ORMES - FRANCE
BRUSH CUTTERS
DEBROUSSAILLEUSES
MOTORSENSEN
OWNER'S MANUAL
MANUEL D'UTILISATEUR
BETRIEBSANLEITUNG
* 00X3C VJ 5 F14*
UMK425E
UMK435E
D GB F
71501081/1
Advertisement
Table of Contents

Related Manuals for Honda UMK425E


Summary of Contents for Honda UMK425E
- Page 1 UMK425E UMK435E OWNER’S MANUAL MANUEL D’UTILISATEUR BETRIEBSANLEITUNG D GB F Honda Europe Power Equipment S.A. Honda France Manufacturing S.A.S. Pôle 45 - Rue des Châtaigniers Pôle 45 - Rue des Châtaigniers 45140 ORMES - FRANCE 45140 ORMES - FRANCE * 00X3C VJ 5 F14*...
-
Page 2: Table Of Contents
TECHNISCHE DATEN ............62 ADRESSEN DERWICHTIGSTEN Honda-HAUPTHÄNDLER ......65... - Page 3 MAJOR Honda DISTRIBUTOR ADDRESSES ........
- Page 4 SPÉCIFICATIONS TECHNIQUES ..........64 ADRESSES DES PRINCIPAUX CONCESSIONNAIRES Honda ......65...
-
Page 5: Zur Beachtung
F GB ZUR BEACHTUNG / NOTE / NOTE ............ -
Page 6: Sicherheitshinweise
SICHERHEITSHINWEISE Bei falschem Einsatz oder mangelnder Wartung können zahlreiche Teile der Maschine gefährlich werden. Alle Abschnitte der vorliegenden Anleitung, denen eines der folgenden Worte vorangestellt ist, sind mit besonderer Aufmerksamkeit zu beachten. Warnung vor Gefahr schwerer oder selbst tödlicher Verletzungen bei Nichtbeachtung der Anweisungen. - Page 7 SICHERHEITSHINWEISE B5. Vor jeglicher Verwendung der Motorsense immer eine allgemeine Überprüfung des Geräts durchführen, insbesondere sind Aussehen und Abnutzungszustand der Mähwerkzeuge, des Mähwerks, der Schutzabdeckungen und der feste Sitz aller Befestigungsschrauben zu beachten. Immer sicherstellen, dass der Gashebel und der Stop-Schalter richtig arbeiten. B6.
-
Page 8: Safety Instructions
SAFETY INSTRUCTIONS All the parts of your machine are potentially hazardous if it is used incorrectly or if it is not properly maintained. Special attention should be paid to sections preceded by the following words. Warns against a risk of serious bodily injury or fatal accident if instructions are not complied with. - Page 9 D2. Do not use the machine with damaged or worn parts. Parts must be replaced, not repaired. Use genuine Honda parts. The cutting attachments must always be marked with the manufacturer's brand, the reference and the maximum operating speed.
-
Page 10: Consignes De Sécurité
CONSIGNES DE SÉCURITÉ Toute pièce de la machine peut représenter une source potentielle de danger en cas d'utilisation incorrecte ou de mauvais entretien. Il convient de prêter une grande attention aux rubriques qui sont précédées des mots suivants. Mise en garde contre un risque de blessures corporelles graves ou même de mort, en cas de non-observation des instructions. - Page 11 CONSIGNES DE SÉCURITÉ B5. Avant chaque utilisation, toujours procéder à une vérification générale et en particulier de l'aspect des outils, ensemble de coupe, carters de protection et des boulons de fixation, pour s'assurer qu'ils ne sont ni usés ni endommagés ni desserrés. Toujours vérifier le bon fonctionnement de la gâchette de commande des gaz et du bouton d'arrêt "STOP''.
-
Page 12: Einführung
Beispiel / Example / Exemple UMK435E Lieber Kunde ! Wir danken Ihnen für das Vertrauen, das Sie uns durch den Kauf einer Honda-Motorsense erwiesen haben. Diese Anleitung soll Ihnen helfen, sich mit Ihrem neuen Gerät vertraut zu machen, dieses optimal einzusetzen und die erforderlichen Wartungsarbeiten durchzuführen. -
Page 13: Foreword
Dear Honda user, You have bought a Honda brushcutter and we thank you for the confidence you have shown in us. The aim of this manual is to help you become familiar with your new machine so that you can use it safely and keep it properly maintained. -
Page 14: Allgemeine Beschreibung
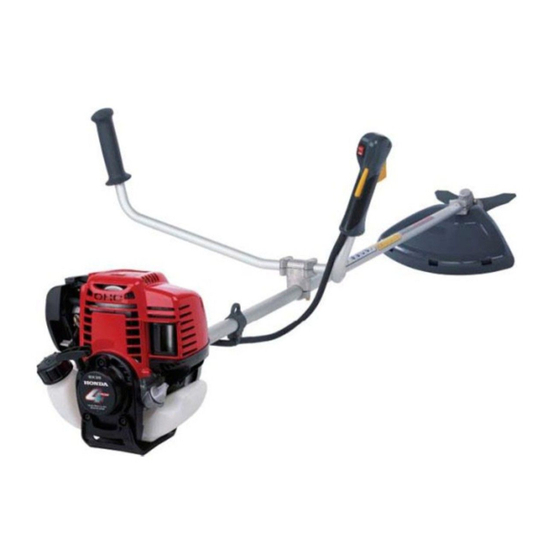
ALLGEMEINE BESCHREIBUNG [14] [13] [10] [19] [16] [18] [15] [20] [17] [12] [10] [11] [21] TEILE DES GERÄTS [1] Motor [A] Sicherheits-Warnung: Drehzahl des Mähwerkzeugs [2] Zündkerze [B] Sicherheits-Warnung: Allgemeine Anweisungen [3] Startergriff [C] Sicherheits-Warnung: Zulässige Mähwerkzeuge [4] Luftfilter [D] Typenschild [5] Kraftstofftank [6] Gaszug [7] Kupplungsgehäuse... -
Page 15: General Description
GENERAL DESCRIPTION IDENTIFICATION OF COMPONENTS [1] Engine [A] Safety warning: Cutting attachment rotation speed [2] Spark plug [B] Safety warning: general instructions [3] Recoil starter [C] Safety warning: authorized cutting attachments [4] Air filter [D] Identification plate [5] Fuel tank [6] Throttle cable [7] Clutch housing [8] Control grip... -
Page 16: Geräte-Kennzeichnung
Gefahren in Form von Symbolbildern dargestellt sind, deren Bedeutung nachstehend gegeben ist. Diese Aufkleber werden als Bestandteile des Geräts betrachtet. Löst sich ein solches Etikett ab oder wird unleserlich, so ist mit der zuständigen Honda-Vertretung in Verbindung zu treten, um es zu ersetzen. Wir empfehlen auch, die Sicherheitsanweisungen aufmerksam durchzulesen... -
Page 17: Identification Of Machine
GENERAL DESCRIPTION IDENTIFICATION OF MACHINE [1] Guaranteed sound power level [5] Conformance mark in accordance Directive 2000/14/EC with modified Directive EEC/89/392 [2] Model - Type [6] Name and address of manufacturer [3] Year of manufacture [7] Weight in kg [4] Serial number SAFETY STICKERS Your brushcutter must be used with care. -
Page 18: Montage
MONTAGE GRIFFE Der Lenkergriff [1] (Typ U) oder der Bügelgriff [2] (Typen L) müssen auf dem Antriebsrohr montiert werden [3]. Die Montage erfolgt mittels der Werkzeuge, die in der mit dem Gerät gelieferten Werkzeugtasche enthalten sind. Der Werkzeugsatz besteht aus: [4] Zündkerzenschlüssel / Torx-Schlüssel [5] Sechskantschlüssel A4 B8 C11 D3... -
Page 19: Fitting
FITTING GRIPS AND HANDLES The bike type handle [1] (U type) or the loop handle [2] (L types) must be installed on the transmission tube [3]. Fitting is to be performed using the tools in the kit supplied with the appliance. This kit comprises: [4] Spark plug wrench / Torx wrench [5] Hexagonal wrench... -
Page 20: Integralschutz
Honda-Kreissägenblatts [10] (Option) muss immer Standardschutz [2] und [1] durch eine als Zubehör erhältliche angepasste Honda- Schutzvorrichtung [9] ersetzt werden. Der Kreissägenblatt-Schutz wird auf gleiche Weise wie der Standardschutz montiert. MONTAGE DES MÄHWERKS VORSICHT: • Darauf achten, den Zwischenring [6] und [7] richtig einzusetzen. Dessen hohle Seite muss zum Getriebe [5] zeigen. -
Page 21: Complete Guard
Utiliser les 2 trous les plus éloignés du boîtier de transmission [5]. (UMK435E UEET) Dans le cadre de l’utilisation de la lame de scie circulaire Honda [10] (en option), toujours remplacer le protecteur standard [2] et [1] par le protecteur Honda adapté [9], disponible en accessoire. - Page 22 KREISSÄGENBLATT (AUSSTATTUNGSOPTION) Dieses Zubehör darf nur auf den Modellen UMK435E UEET, und auch dann nur nach Einbau der geeigneten Honda-Schutzvorrichtung [9] montiert werden. Unabhängig von der Anzahl der Zähne einer Zahn-Scheibe (3 oder 4) erfolgt die Montage auf gleiche Weise.
- Page 23 CIRCULAR SAW BLADE (OPTIONAL ACCESSORY) Use of this accessory is restricted to the UMK435E UEET models only, and it must be fitted together with the special Honda protector [9]. Assemble in the same way as the 3- and 4-tooth blades.
-
Page 24: Montage Und Einstellung Des Tragegeschirrs
MONTAGE MONTAGE UND EINSTELLUNG DES TRAGEGESCHIRRS Für eine sichere und komfortable Verwendung des Geräts ist es wichtig, die Träger des Tragegeschirrs so einzustellen, dass dieses angenehm sitzt und die Motorsense richtig ausgeglichen in Arbeitsposition zu liegen kommt. Die Geräte werden mit einem doppelten Tragegeschirr [1] geliefert. Das Tragegeschirr anlegen und mittels des Schnellverschlusses [2] schließen. -
Page 25: Fitting And Adjusting The Harness
FITTING FITTING AND ADJUSTING THE HARNESS For operator safety and comfort, it is important to adjust the harness straps so they can be worn comfortably and so that the machine is properly balanced in the working position. Machines are supplied with a double harness [1]. Put on the harness and fasten it with the quick fastener [2]. -
Page 26: Vorbereitung Und Überprüfung Vor Dem Einsatz
VORBEREITUNG UND ÜBERPRÜFUNG VOR DEM EINSATZ AUSGLEICH DES GERÄTS Die Motorsense wie gezeigt einhängen [1]. Nachdem sich das Gerät in Position befindet, muss unbedingt sein Ausgleich eingestellt werden. Bei dieser Überprüfung muss das Gerät mit seinem Mähwerkzeug versehen und der Kraftstofftank halb gefüllt sein. -
Page 27: Preliminary Preparation And Checks
PRELIMINARY PREPARATION AND CHECKS BALANCING THE MACHINE Attach the brush cutter as illustrated [1]. Once the machine is in place, it is essential to check that it is correctly balanced. This check must be performed with the cutting attachment fitted on the appliance and with the fuel tank half-full. Adjust the length of the harness so that the cutting attachment is parallel to, and in contact with, the ground. -
Page 28: Füllen Des Kraftstofftanks
In Benzinbehältern kann sich je nach Außentemperatur ein Überdruck einstellen. Den Verschluss vorsichtig öffnen, um jegliches Ausspritzen von Benzin zu vermeiden. Benzinbehälter an einem kühlen Ort nicht zu lange aufbewahren und nie in der Sonne stehen lassen. UMK425E UMK435E Tank-Fassungsvermögen... -
Page 29: Filling The Fuel Tank
The pressure inside fuel tanks may increase when the ambient temperature rises. The cap should be removed with care to avoid any splashing of fuel. Fuel should be stored in a cool place, for short periods of time, and must never be left in direct sunlight. UMK425E UMK435E Tank capacity 0.55 l... -
Page 30: Füllen Des Ölbehälters
Öleinfüllhalses erreichen [1]. 3. Bei zu niedrigem Ölstand mit der empfohlenen Ölsorte bis zum oberen Rand der Einfüllhalses nachfüllen. Honda-4-Takt-Öl oder ein gleichwertiges Motoröl erster Qualität verwenden, welches den Normen der amerikanischen Automobilhersteller für die Einsatzklassen SG und SF entspricht. -
Page 31: Filling The Oil Tank
2. Remove the oil filler cap and check the oil level: oil must be level with the top of the oil tank neck [1]. 3. If the level is too low, top up with the recommended oil to the top of the oil filler neck. Use Honda... -
Page 32: Starten Und Abstellen Des Motors
STARTEN UND ABSTELLEN DES MOTORS KALTSTART Der Motor wird als "kalt" betrachtet, wenn er während der zehn, dem Starten vorangehenden Minuten nicht länger als 5 Minuten in Betrieb war. Zum Starten folgendermaßen vorgehen 1. Den Stop-Schalter [1] auf Position schieben "I". 2. -
Page 33: Starting And Stopping The Engine
STARTING AND STOPPING THE ENGINE COLD START The machine is considered to be "cold" if the engine has not been running for more than 5 minutes in the 10 minutes before starting up. Start the engine as follows : 1. Place the Start/Stop button [1] in the Start position "I". 2. -
Page 34: Warmstart
STARTEN UND ABSTELLEN DES MOTOR WARMSTART Der Motor wird als "warm" betrachtet, wenn er während der zehn, dem Starten vorangehenden Minuten länger als 5 Minuten in Betrieb war. Der warme Motor wird auf gleiche Weise wie ein kalter Motor gestartet, nur ist hierbei die Verwendung des Starters [1] nicht erforderlich (der Hebel muss in niedriger Position verbleiben). -
Page 35: Hot Start
STARTING AND STOPPING THE ENGINE HOT START The machine is considered to be "hot" if the engine has been running for more than 5 minutes in the 10 minutes before starting up. The hot start procedure is the same as the cold start procedure except that the choke [1] is not needed. -
Page 36: Gebrauch
GEBRAUCH ARBEITSPOSITION Nach dem Starten des Motors ist das Gerät wie zuvor im Kapitel "Vorbereitung" beschrieben am Tragegeschirr einzuhaken. Sicherheitsanwei ungen durchlesen SICHERHEIT Bei der Handhabung des Geräts darauf achten, dass das Mähwerkzeug nirgends anstößt, und das Gerät vom Körper fernhalten. Das Gerät nicht benutzen ohne es zuvor im Tragegeschirr einzuhaken. -
Page 37: Operation
OPERATION OPERATING POSITION Once the machine has been started, attach it to the harness as Read the already described in the section on preparation. safety instructions SAFETY When handling the machine, take care to avoid striking any objects with the cutting attachment and keep the cutting attachment away from your body. - Page 38 GEBRAUCH Austausch des Fadens 1. Zum Öffnen des Kopfes auf die auf seinen Seiten befindlichen Zungen [1] drücken. 2. Die Spule herausnehmen und die Nylonfadenreste entfernen. B8 C11 SICHERHEIT 3. 5,5 m Faden von Durchmesser 2,7 mm vorbereiten und in der Mitte in zwei Fäden falten.
-
Page 39: Operation
OPERATION Replacing the line 1. Press the lugs [1] located on either side of the head to open it. 2. Extract the reel and remove the rest of the nylon line. 3. Prepare 5.5 metres of 2.7 mm diameter line and fold it in half, lengthwise. B8 C11 SAFETY 4. - Page 40 GEBRAUCH Sicherheitsanwei ungen durchlesen SICHERHEIT Beim erneuten Starten des Motors und des Geräts wird jegliche Überlänge des Fadens automatisch von dem unter dem Schutz gelegenen Messer abgeschnitten. Mähen Der Nylonfaden ermöglicht einen sauberen Schnitt des Grases und beschädigt nicht die Rinde angrenzender Bäume.
- Page 41 OPERATION Read the safety instructions SAFETY When the engine is started and the cutting attachment starts rotating, the excess line will automatically be cut by the line cutter located on the guard. Cutting The nylon line cuts grass cleanly without damaging tree bark and avoiding the violent impacts that would occur between a rigid cutting attachment and hard surfaces.
- Page 42 In allen Fällen muss darauf geachtet werden, dass das Werkzeug richtig ausgewuchtet bleibt. Sollten Sie nicht über die richtigen Werkzeuge verfügen oder über die Auswuchtung Ihres Mähwerkzeugs im Zweifel sein, so bitten wir Sie mit Ihrer zugelassenen Honda-Vertretung in D2 D3 C13 Verbindung zu treten.
- Page 43 In all cases, the cutting attachment must be kept correctly balanced. If you do not have the required tools or if you think your cutting attachment may not be properly balanced, contact your authorized Honda dealer. D2 D3 C13 SAFETY...
- Page 44 GEBRAUCH 30 mm 30° 30° 30° 30° Das Werkzeug zum Schärfen abmontieren. Überprüfen, ob es gerissen, verzogen oder verbogen ist, in welchem Falle es durch ein neues Werkzeug zu ersetzen ist. Die Scheiben mit drei oder vier Zähnen können beidseitig verwendet werden. Ist eine Seite abgenutzt, so ist das Werkzeug umzudrehen, um die Schneiden auf der anderen Seite zu benutzen.
- Page 45 It is important to keep their profile regular and to avoid incipient fractures. All the teeth must be sharpened in the same way. NOTE: If the machine vibrates abnormally after sharpening, this indicates that the blade is unbalanced. In this case, contact your authorized dealer Honda to have it checked. CAUTION: •...
- Page 46 Es ist sehr wichtig, immer das richtige Zahnprofil und die richtigen Winkel (Freiwinkel, Schnittwinkel und Schränkung) beizubehalten. Ist eine stärkere Nachbearbeitung erforderlich, so ist mit der nächsten Honda-Vertretung in Verbindung zu treten, welche über ein spezielles Elektrogerät zum regelmäßigen Schärfen solcher...
- Page 47 Some blade sectors must not be used as they will cause the tool to rebound owing to the direction of rotation. Tools fitted on Honda brushcutters rotate counterclockwise. It NEVER cut with the right half of the blade. The part to be used is represented by the grey area.
-
Page 48: Wartung
EINSTELLUNG DES VERGASERS Methode Den Motor starten und bis zur Betriebstemperatur laufen lassen. Dann die Leerlauf-Einstellschraube [1] entsprechend der gewünschten Einstellung nach rechts oder nach links drehen. UMK425E UMK435E Leerlauf 3100 ± 200 U/min. HINWEIS: Bei Leerlauf darf das Mähwerkzeug nicht drehen. -
Page 49: Maintenance
ADJUSTING THE CARBURETTOR Procedure Start the engine and let it warm up to normal operating temperature. Then turn the idle screw [1] to the right or left to obtain the correct setting. UMK425E UMK435E Idle speed 3100 ± 200 rpm NOTE: When the engine is idling, the cutting attachment must not rotate. -
Page 50: Motorölwechsel
SCHMIERUNG DES GETRIEBES 1. Die Schraube [9] auf dem Getriebe losschrauben. 2. Den Ansatz der Tube des Lithiumseifen-Spezialfetts (bei der Honda-Verkaufsstelle erhältlich) in die Öffnung einführen und mit Fett füllen. Dabei das Schneidwerkzeug drehen, um das Fett gut zu verteilen, bis es aus der Schraubenbohrung [8] austritt. -
Page 51: Engine Oil Change
1. Remove the bolt [9] from the transmission head. 2. Insert the nozzle of the tube of special lithium grease (available from your Honda dealer) and fill with grease while turning the cutting attachment so that the grease is properly distributed. -
Page 52: Wartungszeitplan
Intervalle durchzuführen. (1) In staubiger Umgebung öfter reinigen. (2) Diese Arbeiten sollten bei der nächsten zugelassenen Honda-Verkaufsstelle durchgeführt werden, außer für den Fall, dass der Besitzer über die geeigneten Werkzeuge und die zur Durchführung solcher Arbeiten erforderliche technische Ausbildung verfügt. Auf die Honda-... -
Page 53: Maintenance Schedule
* Frequency: Maintenance to be performed at the intervals specified in service hours or periods of time, whichever is shorter. (1) Clean more often in dusty environments. (2) These operations should be performed by an authorized Honda dealer, unless the owner has the appropriate tools and technical know-how required. Refer to the Honda workshop manual. -
Page 54: Calendrier D'entretien
(1) Nettoyer plus fréquemment en milieu poussiéreux. (2) Ces travaux devraient être effectués par votre revendeur agréé Honda, à moins que le propriétaire ait des outils appropriés et l'instruction technique requise pour ce travail. Se référer... -
Page 55: Fehlersuche
FEHLERSUCHE Vorfall Mögliche Ursache Seite Der Motor startet nicht. 1. Der Tank ist leer. 2. Der Stop-Schalter befindet sich auf Position Stop. 3. Das Zündkerzenstecker schlecht oder nicht angeschlossen. 4. Die Zündkerze durchgebrannt oder Elektrodenabstand ist falsch 5. Der Motor ist "abgesoffen". Die Zündkerze entfernen, mit einem Lappen trocknen und wieder einbauen. -
Page 56: Troubleshooting
TROUBLESHOOTING Problem Probable cause Page Engine does not start. 1. No fuel. 2. Start/Stop button is in Stop position. 3. Spark plug cap incorrectly attached or disconnected. 4. Faulty spark plug or incorrect gap. 5. Engine flooded. Remove spark plug, dry it with a cloth and reinstall it. -
Page 57: Dépistage Des Pannes
DÉPISTAGE DES PANNES Incident Cause probable Page Le moteur ne démarre pas. 1. Il n'y a pas d'essence. 2. Le bouton marche/arrêt est en position arrêt . 3. Le capuchon de la bougie d'allumage est mal fixé ou débranché. 4. La bougie d'allumage est défectueuse ou l'écartement des électrodes est incorrect. -
Page 58: Transport Und Lagerung
TRANSPORT UND LAGERUNG TRANSPORT Zum Transport der Motorsense muss unbedingt der Motor abgestellt und der Transportschutz über dem Mähwerkzeug angebracht werden. Das Gerät zum Transport in ausgeglichener Weise am Antriebsrohr halten. Soll die Motorsense in einem Fahrzeug transportiert werden, so ist sicherzustellen, dass sie richtig gehalten wird und sich nicht bewegen kann. -
Page 59: Transport And Storage
TRANSPORT AND STORAGE TRANSPORT When transporting or carrying your brush cutter, the engine must always be stopped and the transport guard must be installed on the cutting attachment. When carrying your brush cutter, hold it by the transmission tube in a balanced position.If it is to be transported in a vehicle, make sure that it is properly secured so it cannot move. -
Page 60: Zubehör
ZUBEHÖR UMK425E LEET UMK435E UMK425E UEET UMK435E Mit dem Gerät wird verschiedenes Zubehör geliefert oder ist, je nach Modell, als Option verfügbar. In Tabelle sind die an den einzelnen Modelle montierbaren Ausstattungen zusammengestellt: [1] Mähen und Reinigen [2] Dornige Hecken und Gestrüpp [3] Große Grasflächen... -
Page 61: Accessories
ACCESSORIES Various accessories are supplied with the machine or are available as options, depending on the model. The accessories that can be fitted on the various models are indicated in the table: [1] Mowing and clearing [2] Thorny hedges and brush [3] Large areas of grass [4] Tall dry grass [5] Knotty brush and bushes (optional for types UMK435E UEET) -
Page 62: Technische Daten
TECHNISCHE DATEN UMK425E UMK435E MODELLEN LEET UEET LEET UEET Typenbezeichung HADF HAFF 1 770 x 1 770 x 1 790 x 1 790 x Abmessungen L x B x H mm 368 x 305 670 x 488 368 x 305... -
Page 63: Technical Specifications
TECHNICAL SPECIFICATIONS UMK425E UMK435E MODELS LEET UEET LEET UEET Description code HADF HAFF 1 770 x 1 770 x 1 790 x 1 790 x Dimensions L x W x h 368 x 305 670 x 488 368 x 305... -
Page 64: Spécifications Techniques
SPÉCIFICATIONS TECHNIQUES UMK425E UMK435E MODÈLES LEET UEET LEET UEET Code de description HADF HAFF 1 770 x 1 770 x 1 790 x 1 790 x Dimensions L x l x h 368 x 305 670 x 488 368 x 305... -
Page 65: Adressen Derwichtigsten Honda-Haupthändler
Wenn Sie weitere Fragen haben, wenden Sie sich bitte unter der folgenden Adresse/ Telefonnummer an das Honda-Kundenbetreuungszentrum : For further information, please contact Honda Customer Information Centre at the following address or telephone number : Pour toute information complémentaire, veuillez prendre contact avec le Service Relations Consommateurs Honda à... - Page 66 Tel. / Fax. : +90 216 389 59 60 http://yp.anadolumotor.com.tr PORTUGAL SLOVAKIA REPUBLIC UKRAINE Honda Portugal, S.A. Honda Slovakia, spol. s r.o. Honda Ukraine Llc Abrunheira Prievozská 6 - 821 09 Bratislava 42/44 Shovkovychna st. 2714-506 Sintra Slovak Republic 01601 Kyiv Tel.
Need help?
Do you have a question about the UMK425E and is the answer not in the manual?
Questions and answers