Table of Contents
Advertisement
Quick Links
Advertisement
Table of Contents

Related Manuals for moon Evolution 850P


Summary of Contents for moon Evolution 850P
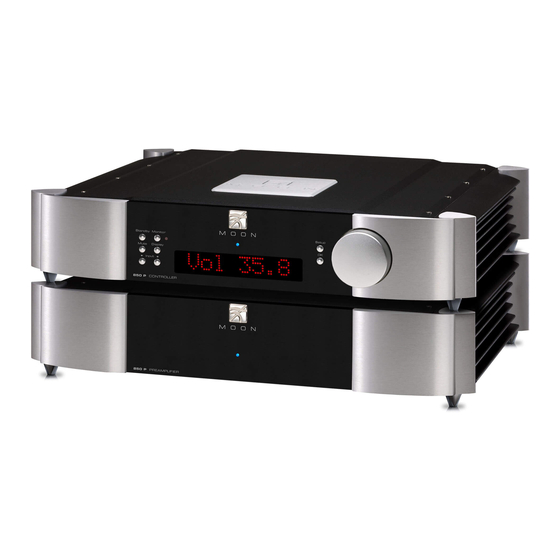
- Page 1 Owner’s Manual Evolution Series 850P Reference Dual-Mono Preamplifier...
-
Page 3: Important Safety Instructions
850P Reference Dual-Mono Preamplifier Important Safety Instructions Read these instructions. Keep these instructions. Heed all warnings. Follow all instructions. Do not use this apparatus near water. Clean only with a dry cloth. Do not block ventilation openings. Install in accordance with the manufacturer’s instructions. - Page 4 To prevent shock hazard, all three connections must ALWAYS be used. Connect the MOON 850P only to an AC source of the proper voltage; Both the shipping box and rear panel serial number label will indicate the correct voltage. Use of any other voltage will likely damage the unit and void the warranty AC extension cords are NOT recommended for use with this product.
-
Page 5: Table Of Contents
850P Reference Dual-Mono Preamplifier Table of Contents Introduction ............. 6 Unpacking............7 Installation & Placement ........7 Connecting the 850P Preamplifier & Controller ..8 Front Panel Controls ........9 Software Setup ..........11 Rear Panel Connections ........16 SimLink™ ............17 Operating the 850P ........17... -
Page 6: Introduction
400 hours of listening. This is the result of a “break- Your MOON 850P dual-mono preamplifier incorporates many significant design features to achieve its “world- class” level of performance. This is an abbreviated list of the more important features: 2-chassis design with one chassis (Controller) housing 530 individual volume steps in 1dB and 0.1dB... -
Page 7: Unpacking
850P from any potential damage during packaging, storing it in a safe, dry place in case transit. Please write the serial number of your new MOON 850P in the space provided below for future reference. Serial No.: ________________ Installation & Placement The MOON 850P dual-mono preamplifier is very power supply / controller are height adjustable;... -
Page 8: Connecting The 850P Preamplifier & Controller
850P Reference Dual-Mono Preamplifier Connecting the 850P Preamplifier & Controller Figure 1: Connecting the MOON 850P Preamplifier (bottom) and 850P Controller (top) There are three (3) connections that must be made for possible future use with other components. Do between the MOON 850P Preamplifier’s chassis not attempt to modify the lengths these cables –... -
Page 9: Front Panel Controls
850P Reference Dual-Mono Preamplifier 850P, this inner rear panel will move slightly – This result, a dual-layered rear panel is required to is normal. accommodate this suspension, with the outer layer These rear panel layers are completely affixed to the 850P’s chassis and the inner layer –... - Page 10 The “Input ” and “Input ” buttons allow you to choose which input source you wish to listen to. The The MOON 850P preamplifier provides a range of MOON 850P dual-mono preamplifier has a total of five-hundred and thirty (530)
-
Page 11: Software Setup
850P Reference Dual-Mono Preamplifier Software Setup The MOON 850P preamplifier includes powerful diagram for a snapshot of the entire Setup menu software that allows you to configure it to meet your layout. specific needs. For each of the seven (7) inputs,... - Page 12 When activated, the next input to configure, (ii) exit from the Setup volume control of the 850P is bypassed and the procedure by pressing the “Setup” button three volume level is adjusted using the component times or (iii) continue with the Setup procedure connected to the input.
- Page 13 However, haven’t previous section, you already assigned the “MiND” assigned the “MiND” label to one of the 850P’s label to one of this preamplifier’s inputs, then there’s inputs, the following example shows how to nothing required to do here – The corresponding...
- Page 14 “TRIG 1” press the “Setup” button and “TRIG 1” will appear in the display. From this If you want to control the MOON 850P using a with a universal remote control, you can disable the wired aftermarket infrared remote control receiver IR sensor located on the front panel as follows: 1.
- Page 15 “SYS11”, “SYS14”, “SYS15”, and “SYS19”. Reset the MOON 850P software settings back to their factory defaults: 1. You may either continue were we left off in the 4. Press “OK” and “SURE ? N” will appear in the previous example by turning the volume control display.
-
Page 16: Rear Panel Connections
XLR inputs/outputs, the rear panel. The 850P has two (2) pairs each of as well as the three input connections from the balanced outputs and single-ended outputs. -
Page 17: Simlink
850P is “POWER” to the ‘1’ (on) position to place your 850P now powered up and ready for use. in to standby mode. Next, briefly press the push On and Off Sequence To avoid having any annoying noises (ie. -
Page 18: Remote Control Operation
To operate the 850P with this remote control, you must first press the AMP button located on the second row from the top. - Page 19 “Default Mode”, press and hold the “CD” button for confirmation. three (3) seconds. The backlight will illuminate once, very briefly for confirmation. Remote operation with multiple MOON components Figure 6: Remote Operation with SimLink™ and 12V Trigger ____________________________________________________________________________________...
-
Page 20: Balanced Operation
12V trigger input on the 870A. When you launch Figure 7: Remote Operation with 12V Trigger In figure 7 we have a 850P Preamplifier and a pair trigger input on the bottom 880M (also using a 1/8” mini- When you turn on the 850P via remote jack cable). -
Page 21: Specifications
Pin 1 ......Ground Pin 2 ......Positive Pin 3 ......Negative NOTE: If you require the RS-232 codes for your MOON 850P please contact Simaudio directly by email (service@simaudio.com) or toll-free telephone (877-980-2400). Fuse Replacement: For the 120V version use a 0.4A slow blow (5 x 20mm size).
Need help?
Do you have a question about the Evolution 850P and is the answer not in the manual?
Questions and answers