
Related Manuals for Bertazzoni PM6030X


Summary of Contents for Bertazzoni PM6030X
- Page 1 INSTRUCTIONS FOR THE INSTALLATION, MAINTENANCE AND USE OF FIXED HOBS WITH GAS OR MIXED SUPPLY DIMENSIONS: (W) x (605 mm) (520 mm) Models PM6030X ‘A’ (TYPE PM6V) Models PM6040X ‘B’ (TYPE PM6V) 310733...
-
Page 2: Technical Manual For The Installer
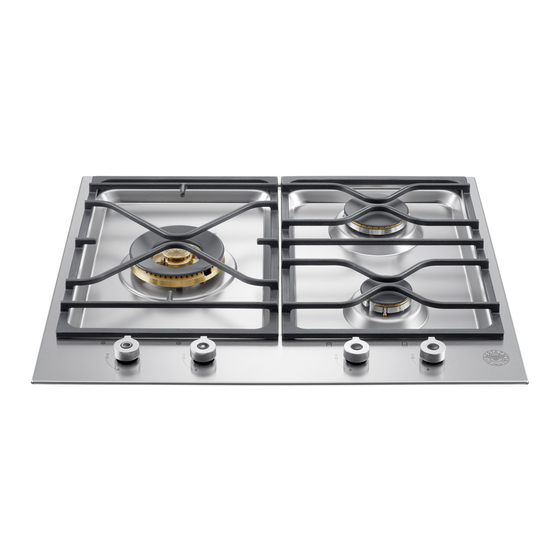
Read this instruction booklet before installing and using the appliance. The manufacturer will not be responsible for any damage to property or to persons caused by incorrect installation or improper use of the appliance. The manufacturer reserves the right to make changes to its products when considered necessary and useful, without affecting the essential safety and operating characteristics. - Page 3 DO NOT MODIFY THIS APPLIANCE. Descriptions DESCRIPTIVE CAPTION FOR HOB DESCRIPTION OF HOBS 1. Dual burner Model ‘A’ Fig. 11 2. Rapid burner Model ‘B’ Fig. 12 3. Medium burner 4. Small Burner 5. Dual in burner control knob 6. Dual out burner control knob 7.
- Page 4 B3 (*) B4 (*) (*) Note: -B1 is the min. clearance between the front edge of the appliance and the front edge of the cabinet. -B2 and B4 are the min. clearance between the left/right side edge of the appliance and the side wall (if present).
- Page 5 CONNECTING THE APPLIANCE TO THE GAS SUPPLY Before connecting the appliance to the gas supply you first need to remove the plastic protective plug for the gas supply which is inserted under pressure in the gas inlet connection. To remove the plug simply unscrew it.
- Page 6 CAUTION: save the orifices removed from the appliance for future use Regulation of burners Regulation of the "MINIMUM" on the burners To regulate the minimum on the burners carry out the following procedure indicated below: 1) Turn on the burner and put the knob onto position MINIMUM ( small flame ). 2) Remove the knob ( Fig.
-
Page 7: Before Leaving
Conduct these checks for each burner individually and concurrently. When satisfied with the hotplate, please instruct the user on the correct method of operation. In case the appliance fails to operate correctly after all checks have been carried out, please call the Bertazzoni Service Centre. -
Page 8: Abnormal Operation
• Burners extinguished by cupboard doors. • Burners not igniting properly. • Gas valves, which are difficult to turn. In case the appliance fails to operate correctly, contact Bertazzoni. CLEANING THE APPLIANCE Never use abrasive cleaners Before cleaning the appliance it should be disconnected from the power supply. -
Page 9: Service & Maintenance Instructions
Cleaning the burner caps: Lift the burner caps from the burner heads and wash them in soapy water and dry thoroughly. Before replacement on the burner head ensure that the holes are not clogged. SERVICE & MAINTENANCE INSTRUCTIONS Service and maintenance only to be carried out by an authorised person Routine maintenance Have the condition and efficiency of the gas pipe and the pressure regulator (if installed) checked periodically. -
Page 10: After-Sales Technical Service And Spare Parts
Any subsequent necessary repairs or adjustments must be carried out with the greatest care and attention by authorised personnel. For this reason, we strongly advise you contact the Bertazzoni Service Center, specifying the nature of the problem, the model of the equipment and the serial number. - Page 11 Fig 1 Fig 2 Fig.3 Fig. 3A Fig. 3B...
- Page 12 Fig.4 Fig.5A Fig.5B Fig.6 Fig.7 Fig.8 Fig.9 Fig.10...
- Page 13 Fig.11 Fig.12 Fig.13 Fig.14 Fig.15...
- Page 14 Fig.16...
Need help?
Do you have a question about the PM6030X and is the answer not in the manual?
Questions and answers