Table of Contents
Advertisement
Quick Links
Uses only C
84647013_CntrNextLINK2_4_UG_EN_FpBp_v3.indd ofc1
84647013_CntrNextLINK2_4_UG_EN_FpBp_v3.indd ofc1
FC: 22.5mm BC: 14 mm
Footer: 7mm
1/3rd of the Cross clear
space has been applied.
7mm min.
DATE:
March 18, 2013
CLIENT:
Bayer HealthCare
Contour Next Link 2.4 mmol User Guide -
DESCRIPTION:
English
909866
SCHAWK JOB#:
6220 Parent BAN# 84584321
SKU#:
7.5" (H) x 6.5" (W)
DIMENSIONS:
10000012465 REV
PRINTER SPEC:
FONTS: Helvetica, Helvetica Neue, Zapf Dingbats, Skinny Mini, Mini Micra, Myriad Pro
COLORS:
Clinical Trial / Global Master Template No: M UG 0303 R0004 EU
Regional Master Template No: XXXX
NOTE: THIS COLOR PROOF INDICATES COLOR BREAK ONLY AND MAY NOT ACCURATELY REFLECT ACTUAL PRODUCTION COLOR.
RELEASE: V-3
Wireless Blood Glucose
Monitoring System
®
N
blood glucose test strips from Bayer
ONTOUR
EXT
USER GUIDE
18211 NE 68th Street, E120
Redmond, WA 98052
T: 425-881-5454
Cyan
Magenta
Yellow
INTERNAL: R-X
BAN#:84647013
Rev. 01/13
Contour Next Link 2.4 User Guide - UK,
Ireland
Alt#1 - 01/29/13 copy changes
Alt#2 - 03/08/13 copy changes
Alt#3 - 03/18/13 copy changes
Black
LANGUAGE(S):
ENGLISH
® ®
12:00
BG
5.2
mmol/L
Active Insulin 1.5 U
Bolus
Basal
3/18/13 7:54 AM
3/18/13 7:54 AM
Advertisement
Table of Contents

Subscribe to Our Youtube Channel
Related Manuals for Bayer HealthCare Contour Next Link 2.4


Summary of Contents for Bayer HealthCare Contour Next Link 2.4
- Page 1 Redmond, WA 98052 T: 425-881-5454 DATE: March 18, 2013 BAN#:84647013 Rev. 01/13 CLIENT: Bayer HealthCare Contour Next Link 2.4 User Guide - UK, Contour Next Link 2.4 mmol User Guide - Ireland DESCRIPTION: English Alt#1 - 01/29/13 copy changes 909866 SCHAWK JOB#:...
- Page 2 INTENDED USE • Always dispose of test strips and lancets as medical waste or as advised by your health care professional. All products that come in contact with human blood should be handled as if The C ® LINK 2.4 wireless blood glucose monitoring system from Bayer (meter, test ONTOUR capable of transmitting infectious diseases.
-
Page 3: Table Of Contents
Table of Contents If your blood sugar reading is over 33.3 mmol/L the next screen will tell you to retest. The о meter will beep twice. If results are still over 33.3 mmol/L, “Follow Medical Advice Immediately” is displayed. Your C ®... -
Page 4: Contour Next
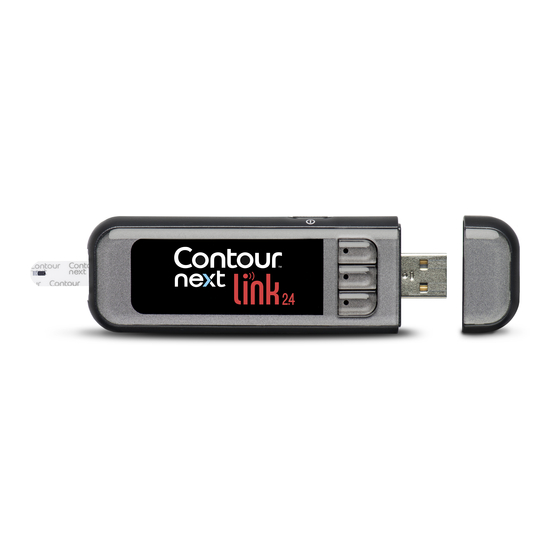
Getting Started The C ® LINK 2.4 Wireless Blood Glucose ONTOUR Monitoring System from Bayer Your C LINK 2.4 wireless blood glucose monitoring system from Bayer only ONTOUR works with C ® test strips from Bayer. ONTOUR Top Menu Button See page 4 Test Strip Port Display Screen Meter USB Plug... -
Page 5: Initial Setup
“Talks” to Your MiniMed 640G Insulin Pump Using the Selection/Scrolling Buttons L Button Your C ® LINK 2.4 meter can ONTOUR OK Button 12:00 automatically send your blood glucose result M Button or a bolus directly to your MiniMed insulin pump, if your meter and pump are linked. This Display mmol/L eliminates the need to manually enter a bolus... - Page 6 Set Language LANGUAGE English 3. Press the M button to see more language choices. Utilities Self Test 8. In the Utilities menu, use the down arrow to scroll to Deutsch When your language is highlighted, press OK. Carb Unit Device Options. Español Manage Settings Press Select button...
- Page 7 When the pump links to the meter, the SN on the meter screen will change to a different serial number. This number is the pump SN. 11. Read pump screen. Be sure other nearby Medtronic devices Auto Connect are NOT in search mode. Use the down arrow to scroll to Before using Auto the next page.
- Page 8 Meter Send Options High and Low Alerts 17. After the meter and pump are connected, you will need to set your Send Options. This The High and Low Alert feature tells you when your test result is above or below the settings controls how your meter sends blood glucose readings to your MiniMed insulin pump.
-
Page 9: Preparing The Lancing Device
Testing Target Ranges Next you are asked to accept your blood sugar Targets. Targets are your personal ranges for Getting Ready to Test your blood sugar results. With AutoLog OFF, you have a single Target range. With AutoLog Read your C ®... -
Page 10: Getting The Blood Drop - Fingertip Testing
2. Hold the test strip with the grey square end facing up. 3. Insert the lancet firmly into the lancing device until it 3. Insert the grey square end into the test strip port until comes to a full stop. This will set the device. You can also the meter beeps (if the Sound is set to ON). -
Page 11: Test Results
Apply More Blood Testing With AutoLog On STRIP UNDERFILLED AUTOLOG If the first blood drop is not enough, the meter will beep After you apply blood to the test strip, use the M to select twice and display “STRIP UNDERFILLED” and “APPLY MORE Fasting Fasting, Before Meal, After Meal or No Mark, and then press BLOOD NOW.”... -
Page 12: Alternative Site Testing (Ast) - Palm
Alternative Site Testing (AST) – Palm 4. Press the clear endcap firmly against the puncture site WARNING and then press the blue release button. • Ask your health care professional if Alternative Site Testing is right for you. • Do not calibrate your continuous glucose monitoring device from an AST result. •... - Page 13 AUTOLOG 9. If you have the AutoLog feature turned ON, the Fasting Fasting, Before AutoLog screen appears. Select Before Meal Meal, After Meal or No Mark by pressing the OK 4. While pressing the release button (a), pull the re-setting After Meal button when your selection is highlighted.
-
Page 14: Control Solution Testing
High and Low Blood Sugar Alert Screens Control Solution* Testing Your meter has been preset with a low blood sugar (hypoglycaemia) value of 3.9 mmol/L WARNING and a high blood sugar (hyperglycaemia) value of 13.9 mmol/L. These are the preset values, but can be customized by you and/or your health care professional. -
Page 15: Autolog (Marking Your Results)
Features 5. Shake the control solution bottle well before every use. Your C ® LINK 2.4 meter includes many testing features. ONTOUR 6. Remove bottle cap and use a tissue to wipe away any AutoLog (Marking Your Results) solution around the bottle tip before dispensing a drop. 7. - Page 16 Manual Bolus was sent. If Block Mode is ON at the pump, you are asked if you want to proceed with the bolus. Block Mode is a MiniMed pump setting that restricts access to critical pump settings. 7. A confirmation screen appears on both your meter and Please see your MiniMed insulin pump user guide for more detailed instructions.
-
Page 17: Test Reminders
Test Reminders Changing a Reminder Time 1. Press the L or M button to select the correct hours and minutes (in 15-minute A reminder for your next test can be set after testing OR from the Setup Menu (see page 43). increments). -
Page 18: Notes
Notes Using the Main Menu You may add notes to your test result that may help explain results. Your notes will be saved The Main Menu has 4 choices: Bolus, Logbook, Trends and Setup. To select one, press the L or M button to scroll to your desired selection. When your choice is highlighted, press OK. in the Logbook. -
Page 19: Trends (Averages And Summaries)
Trends (Averages and Summaries) 14 DAY RESULTS AVERAGE The Trends feature displays your averages and your results as they compare to your 6. Press the M button to go to the 14 Day Results screen. mmol Results: Results: Targets, over a period of time that you select. The options available are 7, 14, 30 and 90 day averages. - Page 20 PUMP OPTIONS 4. The Connect to Pump screens appear next. Press Yes No MiniMed Pump Connect Device 9. Place the meter and pump next to each other. Select Auto Manual Connect connected. Connect now? to connect to a MiniMed insulin pump now. Auto Connect Connect on your pump.
- Page 21 12. Check that the SN (serial number) on the pump screen matches the meter SN on the meter screen. If they match, scroll to Confirm on the pump. 12:49 Confi rm Device SN BGJ133333F found: SN: Press Select button BGJ133333F 16. Hold the back button on the pump until you see the home mmol/L screen.
- Page 22 Connecting to the Pump Using Manual Connect NOTE: Place your meter and your pump side by side before you begin. You need to 8. In the Device Options menu, scroll to Connect Device. Press alternate between both devices to complete the connection. Device Options Select button See page 33 for the Auto Connect steps.
- Page 23 If you have just connected to a pump for the first time, you will be returned to Initial Setup, Meter Send Options, Step 17 (page 10). 11. Place the meter and pump next to each other. Select Search Send Options controls how your meter sends your test results to your pump. You have New Device on your pump.
-
Page 24: Setup
Changing the Send Option Viewing or Disconnecting Your Pump Connection Your meter must be connected to your MiniMed insulin pump to view pump connection or NOTE: The meter must be connected to your MiniMed insulin pump to set or disconnect from pump. change Send Options. -
Page 25: Date And Time
REMINDER 4. To accept the preset time shown, select Start. To Date and Time Start Start COUNTDOWN change the time, select Change and you can change Setting the Date (When Not Connected to a Pump) Change Change the reminder time in 15-minute increments from You can set the date and time on your meter only when the meter is NOT connected to a mins Go Back... - Page 26 SETUP Sound Date 3. Press the M button to highlight Time. Press OK Turning the Sound On/Off Time: 11:30 to select. Sound is ON when you receive your meter. Some error messages and the Reminder bell will Sound override the Sound Off setting. 1.
- Page 27 AUTOLOG Blood Sugar Targets AutoLog is Off. 4. Press Turn On to activate AutoLog. Targets are your personal ranges for your blood sugar results. With AutoLog OFF, you have Accept Accept a single Target range. With AutoLog ON, you have Target ranges for Fasting, Before Meal Turn On Turn On and After Meal.
- Page 28 Changing Targets With AutoLog On Trends Range NOTE: Targets can only be set inside your selected Alert level(s). For additional The Trends feature displays your averages and your results as they compare to your information, please contact Bayer Diabetes Support. Contact information is on the Targets, over a period of time that you select.
-
Page 29: Transferring Data To Carelink
HIGH AND LOW ALERTS Technical Information and Care 4. Choose Accept to use the preset Alert levels (or the mmol/L Alert levels you chose during initial setup) for High and High: 13.9 Accept Accept Transferring Data to CareLink Personal Therapy Low Alerts. -
Page 30: Battery Status
Battery Status Rapid Charge Battery Status Displays If the battery is low when you plug in your meter, it will Rapid Charge for about 1 minute. You can run a blood sugar test as soon as Rapid Charge is complete and you have The battery status is displayed with a battery symbol on the Apply Blood screen and unplugged the meter. -
Page 31: Technical Information
Symptoms of High or Low Blood Sugar Technical Information You can better understand your test results by being aware of the symptoms of high or low Accuracy blood sugar. Some of the most common symptoms are: The C ® LINK 2.4 blood glucose monitoring system was tested in 100 capillary ONTOUR blood samples using 600 C ®... - Page 32 Customer Service Information Principles of the Procedure If you have a problem and none of the problem-solving messages on the meter help, contact The C ® LINK 2.4 blood glucose test is based on measurement of electrical ONTOUR Bayer Diabetes Support. Please see back cover for contact information. We have qualified current caused by the reaction of glucose with the reagents on the electrode of the strip.
- Page 33 Symbols Used System Specifications The following symbols are used throughout the product labeling for the C ® LINK 2.4 ONTOUR Test Sample: Capillary whole blood blood glucose monitoring system (meter packaging and labeling, and reagent and control solution Test Result: Referenced to plasma/serum glucose packaging and labeling).
-
Page 34: Caring For Your Meter
7. Longo D.L. et al. Harrison’s Principles of Internal Medicine, 18th Edition, 2011. http://www.accessmedicine.com 8. Data on file, Bayer HealthCare Diabetes Care. 9. Tietz Fundamentals of Clinical Chemistry, 5th Edition, Edited by Burtis CA and Ashwood ER, W. B. Saunders Co., Philadelphia, PA, 2001, p. 444. - Page 35 3. Bayer HealthCare reserves the right to make changes in design of this instrument without obligation to incorporate such changes into previously manufactured For warranty service: Purchaser must contact Bayer Diabetes Support for assistance instruments.
- Page 36 Index Targets ..............49 Accuracy ............. Customer Service Information ......Meal Markers/AutoLog ........Time ..............45 Alerts ..............Date ..............Memory/Logbook ..........Trends Range ............51 Battery ..............54 Format (Day.Month.Year) or Menu Button ............Sound On/Off ............High/Low Blood Sugar ......... 22 (Month/Day/Year) ..........
- Page 37 Distributed by: Bayer plc Diabetes Care Bayer House Strawberry Hill Newbury, Berks RG14 1JA UK Bayer Limited The Atrium Blackthorn Road Sandyford, Dublin 18 Ireland Bayer Diabetes Support is available from 8:30 am - 5:30 pm, Monday - Friday, on: 0845 600 6030 - UK 1 890 920 111 –...
Need help?
Do you have a question about the Contour Next Link 2.4 and is the answer not in the manual?
Questions and answers