Table of Contents
Advertisement
Available languages
Available languages
Advertisement
Chapters
Table of Contents

Related Manuals for Bayer HealthCare Elite XL


Summary of Contents for Bayer HealthCare Elite XL
- Page 1 USER GUIDE For use with Glucometer Elite ® Blood Glucose Meter...
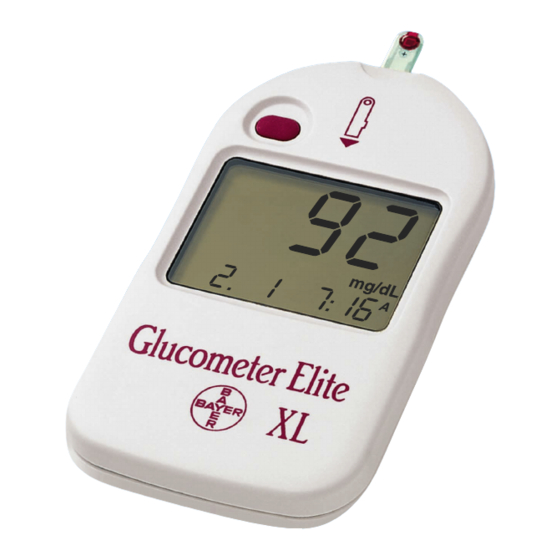
- Page 2 The Meter Test slot Test Strip Test Icon Meter Button Display ® Glucometer Elite...
- Page 3 The Glucometer Elite Care System is a blood glucose mon- itoring system for diabetes manage- ment in home or professional use. The system is based on electrode sensor technology. Convenient features of the system are: Automatic Strip-filling Action ® XL Diabetes •...
-
Page 4: Testing Materials
test end meter end Testing Materials • Glucometer Elite Test Strip – use for blood or control testing. Insert into Meter before drawing in blood or control sample. • Glucometer Elite Check Strip – use to check if the Meter is working properly before running a blood glucose test. -
Page 5: Frequently Asked Questions
Frequently Asked Questions What do I do first? If needed, install batteries and set the time – test the Meter electronics with a Check Strip – code the Meter to match Glucometer Elite Test Strips – and then run a control test to test the whole system before running a blood glucose test. -
Page 6: Important Information
Meter may not be valid for any other brand of Test Strips. The use of other Test Strips may cause erroneous results. Bayer Corporation does not warrant the use of the Glucometer Elite XL Blood Glucose Meter with any Test Strip other than Glucometer Elite Test Strips. -
Page 7: Table Of Contents
SECTION Set Up For Testing Install Batteries Set the Alarm, Time and Units Check Strip Test Code the Meter Control Test Testing Blood Glucose Test Important to Remember Test Result Management Stored Test Results Data Management Taking Care Meter and Test Strip Care Meter and Test Strip Problems Technical Support Information Service... -
Page 8: Install Batteries
Install batteries when the Meter is new if needed. Replace batteries when the Meter displays the battery symbol Install Batteries 1. Press firmly on “open” arrow and slide forward in the direc- tion of the arrow. The lid releases. 2. Place new batteries into the bat- tery compartment with the “+”... -
Page 9: Set The Alarm, Time And Units
Set the Alarm, Time and Units Some Meter options may need to be reset when the Meter is new and when batteries are changed. The options may be changed any time to fit your needs. How do I set the Meter? Hold the button for five seconds to place Meter in “set up”... -
Page 10: Check Strip Test
Check your Meter when new or any time after use, to make sure that electronics are working properly. Check Strip Test HOW: 1. Remove the Check Strip from the package (save the package). 2. Insert the Check Strip (“check” side up) fully into the Meter until you hear a beep. -
Page 11: Code The Meter
Code the Meter whenever a new box of Test Strips is opened.* This will match the Meter to the Test Strip reactivity. Code the Meter HOW: You will need the Code Strip found in the new box of strips. 1. Tear open the packet found in the new carton of Test Strips and remove the Code Strip (save the packet). -
Page 12: Control Test
A Control Test is run to find out if the whole system is working correctly (Test Strip and Meter) and to practice good technique before blood glucose testing. Control Test Prepare for the Test: 1. To open the Test Strip foil packet, carefully peel the foil back until the Test Strip is completely exposed (as shown). - Page 13 Take the Test: 5. Squeeze a small drop of Control Solution onto the inside of the foil packet you saved. 6. Touch and hold the TEST END of the Test Strip to the drop until the Meter beeps (the Control Solution has now been drawn into the Test Strip).
- Page 14 If you did not mark your control or want to delete the test result, do one of the follow- ing options before removing the strip. Remember, after marking or deleting, the test result will then not be a part of the blood glucose test average and will be stored in the memory and displayed with “CONT”...
-
Page 15: Blood Glucose Test
What does blood glucose monitor- ing do for me? Blood glucose levels change during the day due to medication, exercise, diet, insulins or hypoglycemics (oral agents) or possibly stress and illness. Blood glucose testing provides information that will help you understand the changes. This information can help you manage your diabetes to keep your blood sugar levels within your target range. - Page 16 Take the Test: You need a Meter and Test Strip. 1. After washing your hands with warm soapy water and drying thoroughly, open a foil packet and remove the Test Strip. 2. With the Meter off, hold the round end and insert the Test Strip fully into the Meter.
-
Page 17: Test Results
Test Results: After 29 seconds, your test result is displayed. Do not remove strip until results are displayed. Record the test result/date in your Clinilog Diary.* Remove the Test Strip. The Meter turns off and the test result is stored. *If you do not want to store the test result –... -
Page 18: Important To Remember
DON’T FORGET – when using the Meter: • Insert the Check Strip, Code Strip or Test Strip with a firm motion until it comes to a full stop. • The tab on the strip can no longer be seen if the Test Strip has been inserted fully into the Meter. - Page 19 DON’T FORGET – when using the Meter (cont.): • When the Meter memory is full and a new test result is entered, the oldest result is deleted (i.e., #1). • Teach another person how to use the system, so you will have someone to help if you ever need assistance.
-
Page 20: Stored Test Results
Stored Test Results How to recall test results: 1. Press the button to turn Meter on. After a full display and year, the cur- rent date and time are displayed. The 14-day average then appears with “MEM” (memory) and “A” (average) in the lower left corner. -
Page 21: Data Management
• Use Management Software. • Your Meter can transfer test results to a computer where results can be electronically summarized in a logbook report, graph, or chart. • To make use of this feature, you need special software and a connecting cable. •... -
Page 22: Meter And Test Strip Care
Meter and Test Strip Care • Wash hands and dry thoroughly before testing to keep the Meter and Test Strips free of oils and other contaminants. • Handle the Meter carefully to avoid damaging the electronics or causing other malfunctions. •... - Page 23 Warning: Potential Biohazard Healthcare professionals or persons using this system on multiple patients should be aware of the following and should follow the infection control procedure approved by their facility. All products or objects which come in contact with human blood, even after cleaning, should be handled as if capable of transmit- ting viral diseases.
-
Page 24: Meter And Test Strip Problems
Meter and Test Strip Problems See the possible solutions listed and if you need further assistance, contact Bayer Customer Service at: 1-800-348-8100 (24 hours a day) MESSAGE display display Display goes blank after Test, Code or Check Strip is inserted into the Meter. - Page 25 MESSAGE Meter fails to start countdown. Some display seg- ments do not appear. Battery display. CAUSE SOLUTION 1. Blood applied 1. Form a larger drop of blood wrong; see page 2. Test Strip 2. Insert Test Strip correctly inserted incorrectly. 3.
- Page 26 MESSAGE “Lo” display. CAUTION: Glucose levels below 50 mg/dL (2.8 mmol/L) may indicate a potentially serious medical condition. “Hı” display. CAUTION: Glucose levels above 250 mg/dL (13.9 mmol/L) may indicate a potentially serious medical condition. CAUSE SOLUTION 1. The blood glucose 1.
- Page 27 MESSAGE Blood glucose or Control Test results are inconsistent, or Control Test results are not within the specified range. IMPORTANT: To have accurate test results, sufficient sample to fill the reaction chamber is needed. The following drawings show how a Test Strip looks when filled and not filled. CAUSE SOLUTION 1.
-
Page 28: Service
If attempts to correct a problem fail, please call our Customer Service Department. We have trained special- ists to assist you. 1-800-348-8100 IMPORTANT: • Speak to a Customer Service Representative before returning your Meter for any reason. He/she will give you the information needed to get your problem handled correctly and efficiently. -
Page 29: Check List
Check List 1. The Meter serial number is: 2. The date and time the problem occurred was: 3. I tested with both the Check Strip and with the Glucometer Elite Yes____No____ • The Check Strip result was: • The Normal Control result was: 4. -
Page 30: Limitations Of The Procedure
4. METABOLITES: Reducing substances such as ascorbic acid and uric acid at normal blood concentrations do not signifi- cantly affect Glucometer Elite XL blood glucose test results. 5. HEMATOCRIT: At normal glucose levels, Glucometer Elite Test Strip results are not significantly affected by hematocrits in the range of 20% to 60%. -
Page 31: Specifications
Reaction Chamber Measuring Range: 20–600 mg/dL Measuring Time: 30 Seconds Calibration Curve: Selected by use of the Memory Feature: Stores last 120 test results Temperature Range: 50°–104° F (10°–40° C) Test Sample: Whole blood Test Result: Plasma/serum glucose Sample Volume: 2 L (1.1–33.3 mmol/L) Date: Year 2000 compliant Code Strip... -
Page 32: Supplies
When calling or writing for supplies be sure to include the number with the name of the replace- ment part or accessory item. REPLACEMENT PARTS Part Number* Item 40030030 99A38839 50184180 50062338 3437 These parts are available in the United States from: Bayer Corporation Customer Service Department... - Page 33 ACCESSORY ITEMS Product Code Number 3870 3871 3873 3911 3918 3942 3940 3926 3927 3416 6540 6546 6550 6554 6558 Glucofacts™ XL (English Only): 3434 3435 3436 *Cable included Accessory items may be obtained from Diabetes Care Center, retail drug chain or other home healthcare distributors.
-
Page 34: Warranty
Test Strips other than Glucometer Elite and therefore makes no warranty of the performance of the Glucometer Elite XL instrument when used with any Test Strips other than Glucometer Elite Test Strips or when the Glucometer Elite Test Strip is altered or modified in any manner. - Page 35 3. Bayer reserves the right to make changes in design of this instrument without obligation to incorpo- rate such changes into previously manufactured instruments. THIS WARRANTY IS EXPRESSLY MADE IN LIEU OF ANY AND ALL OTHER WARRANTIES EXPRESS OR IMPLIED (EITHER IN FACT OR BY OPERATION OF LAW) INCLUDING THE WARRANTIES OF MERCHANTABILITY AND FITNESS FOR USE WHICH ARE EXPRESSLY...
- Page 36 GUÍA PARA EL USUARIO Para ser utilizado con el Medidor de Glucosa en la ® Sangre Glucometer Elite...
- Page 37 Ranura para la Prueba El Medidor Ilustración de la Extremo Tira de para la Prueba Prueba Extremo para el Medidor Botón Pantalla Glucometer Elite ®...
- Page 38 El Sistema para el Cuidado de la Diabetes Glucometer Elite sistema de monitoreo de glucosa en la sangre para uso doméstico o profesional. Este sistema está basado en una tecnología de sensor de electrodos e incluye estas convenientes características: Acción Automática de Succión ®...
- Page 39 Extremo para Extremo para la Prueba el Medidor Materiales para la Prueba • Tiras de Prueba Glucometer Elite – Para hacer pruebas de sangre y de control. Inserte dentro del Medidor antes de tomar la muestra de sangre o de Solución de Control. •...
-
Page 40: Preguntas Comunes
Preguntas Comunes ¿Qué es lo primero que debo hacer? Ingrese la hora. Chequee los componentes electrónicos del Medidor con una Tira de Confirmación. Codifique el Medidor para que haga juego con las Tiras de Prueba Glucometer Elite. Proceda a hacer una Prueba de Control para chequear el sistema antes de hacer una prueba de glucosa en la sangre. - Page 41 Prueba. El uso de otras Tiras de Prueba puede proporcionarle resultados erróneos. La Corporación Bayer no garantiza el desempeño del Medidor de Glucosa Glucometer Elite XL cuando se utilice cualquier otro tipo de Tiras de Prueba que no sean las Tiras de Prueba Glucometer Elite.
- Page 42 SECCIÓN Como Preparar el Medidor para Hacer una Prueba Instalación de las Baterías Como Fijar la Alarma, la Hora y las Unidades Chequeo con la Tira de Confirmación Codificación del Medidor Prueba de Control Como Hacer una Prueba Prueba de Glucosa en la Sangre Nunca Olvide Como Manejar los Resultados Resultados Almacenados en la Memoria...
-
Page 43: Instalación De Las Baterías
Instale las baterías cuando el Medidor está nuevo, si es necesario. Reemplace las baterías cuando la pantalla del Medidor despliegue el símbolo de la batería Instalación de las Baterías 1. Usando el dedo pulgar, oprima fírmemente en la flecha para abrir el compartimiento que contiene las baterías. -
Page 44: Como Fijar La Alarma, La Hora Y Las Unidades
Como Fijar la Alarma, la Hora y las Unidades Algunas de las opciones del Medidor deberán volver a fijarse antes de usar el Medidor por primera vez y también cuando sea necesario cambiar las baterías. Estas opciones pueden cambiarse a cualquier hora, de la manera que mejor satisfaga sus necesidades: Como fijar el Medidor Oprima el botón durante cinco segundos. -
Page 45: Chequeo Con La Tira De Confirmación
Chequeo con la Tira de Confirmación Asegúrese de chequear su Medidor antes de usarlo por primera vez y en cualquier otra ocasión después de utilizarlo, para asegurarse de que los componentes electrónicos estén funcionando correctamente. CÓMO: 1. Saque la Tira de Confirmación del paquete. -
Page 46: Codificación Del Medidor
Codifique el Medidor cada vez que abra una nueva caja de Tiras de Prueba*. Esto hará que el Medidor concuerde con la reactividad de las Tiras de Prueba. Codificación del Medidor CÓMO: Usted necesitará la Tira de Codificación que se encuentra en la nueva caja de tiras. -
Page 47: Prueba De Control
La Prueba de Control debe realizarse para asegurarse de que todo el sistema esté funcionando correcta- mente (tanto la Tira de Prueba como el Medidor), y como práctica, para desarrollar una buena técnica antes de hacer la prueba de glucosa en la sangre. Prueba de Control Preparación para la Prueba: 1. - Page 48 Realizando la Prueba: 5. Exprima una pequeña gota de Solución de Control dentro del paquete de aluminio que guardó en un principio. 6. Toque con el EXTREMO PARA LA PRUEBA de la Tira de Prueba la gota de solución y manténgalo allí hasta que el Medidor haga “bip”.
- Page 49 Si usted no marcó la Prueba de Control o desea borrar el resultado, escoja una de las dos opciones a continuación antes de sacar la tira. Recuerde, después de marcar o borrar, el resultado de la prueba no será ENTONCES parte del promedio de pruebas de glucosa en la sangre, y será...
-
Page 50: Prueba De Glucosa En La Sangre
¿En qué me beneficia el monitoreo de mi glucosa en la sangre? Los niveles de glucosa en la sangre cambian durante el día debido a factores como medicamentos, ejercicio, dieta, insulina o hipoglicémicos (agentes orales) o posi- blemente debido al estrés o a enfermedad. La prueba de glucosa en la sangre le provee con la información nece- saria para entender dichos cambios. - Page 51 Realizando la Prueba: Usted necesitará un Medidor y una Tira de Prueba. 1. Luego de lavarse las manos con agua tibia y jabón, y de secárselas comple- tamente, abra el paquete de alu- minio y saque la Tira de Prueba. 2.
- Page 52 Resultados de la Prueba: Luego de 29 segundos, aparece el resul- tado de la prueba. Asegúrese de no sacar la Tira sino hasta que el resultado aparezca. Registre su resultado y la fecha en que se efectuó en su Diario Clinilog. Saque la Tira de Prueba.
-
Page 53: Nunca Olvide
• NUNCA OLVIDE – Cuando utilice el Medidor: • Introduzca la Tira de Confirmación, Tira de Codificación, o Tira de Prueba con un movimiento firme hasta que tope. • La lengüeta de la Tira no puede verse si la Tira de Prueba ha sido introducida completamente dentro del Medidor. - Page 54 NUNCA OLVIDE – Cuando utilice el Medidor (cont.): • Cuando la memoria del Medidor está llena y se ingresa un nuevo resultado, el resultado más antiguo será borrado. (Por ejemplo, el primer resultado almacenado). • Enséñele a otra persona como utilizar el sistema, de manera que esta persona pueda asistirle si usted necesitara ayuda.
-
Page 55: Resultados Almacenados En La Memoria
Resultados Almacenados en la Memoria Como Accesar los Resultados: 1. Oprima el botón para prender el Medidor. Aparece un despliegue de pantalla com- pleta. Luego aparecen el año, la fecha y hora. El promedio de 14 días aparece con el mensaje “MEM” (memoria) y “A” (promedio) en la esquina inferior izquierda de la pantalla. -
Page 56: Manejo De Información
• Utilice el Sistema de Manejo de Información de la Diabetes • Su Medidor puede transferir los resultados de sus pruebas a una computadora, donde dichos resultados pueden resumirse en forma de un reporte de diario, gráfica o diagrama. • Para poder utilizar esta opción, usted necesita un programa de computación y un cable de conexión especiales. -
Page 57: Cuidado Del Medidor Y De Lastiras De Prueba
Cuidado del Medidor y de lasTiras de Prueba • Lávese las manos y séqueselas comple- tamente antes de hacer la prueba para mantener el Medidor y las Tiras de Prueba libres de aceites y otros agentes contaminantes. • Maneje el Medidor con cuidado para evitar daños a los componentes elec- trónicos o causar alguna otra falla. - Page 58 Precaución: Posible Peligro para la Salud Los profesionales de salud u otras personas que utilicen este sistema en múltiples pacientes deben estar con- cientes de los peligros mencionados a continuación y deben seguir estrictamente los procedimientos de con- trol de infecciones aprobados por sus establecimientos. Todo producto u objeto que establece contacto con san- gre humana, aún después de ser limpiado, debe consid- erarse y tratarse como si fuese capaz de transmitir...
-
Page 59: Problemas Con El Medidor Y Lastiras De Prueba
Problemas con el Medidor y lasTiras de Prueba Revise la siguiente lista de posibles soluciones a problemas que puedan presentarse. Si necesitara ayuda adicional, llama al Departamento de Servicios para el Consumidor de Bayer, al 1-800-348-8100 (las 24 horas del día). MENSAJE aparece en la pantalla. - Page 60 MENSAJE El Medidor no inicia la cuenta regresiva. Ciertos segmentos de la pantalla no aparecen. Aparece en la pantalla. CAUSA SOLUCIÓN 1. La muestra de sangre 1. Exprima una gota grande de ha sido aplicada incorrectamente. (Refiérase a la Página 12). 2.
- Page 61 MENSAJE Aparece “Lo” en la pantalla. PRECAUCIÓN: Niveles de glucosa menores de 50 mg/dL (2.8 mmol/L) pueden ser indicativos de una condición médica seria. Aparece “Hı” en la pantalla. PRECAUCIÓN: Niveles de glucosa mayores de 250 mg/dL (13.9 mmol/L) pueden ser indica- tivos de una condi- ción médica seria.
- Page 62 MENSAJE Los resultados de la prueba de glucosa en la sangre o de Control son inconsistentes, o los de Control no caen dentro del rango establecido. IMPORTANTE: Para lograr obtener resultados correctos, se necesita de suficiente muestra para llenar la cámara de reacción. Las siguientes ilustraciones muestran como luce una Tira de Prueba cuando está...
-
Page 63: Servicio
Si todos sus esfuerzos para corregir el pro- blema no dan resultado, por favor llame a nuestro Departamento de Servicios para el Consumidor. Bayer cuenta con especialistas listos para asistirle. 1-800-348-8100 IMPORTANTE: • Asegúrese de consultar con un Representante de Servicios para el Consumidor antes de devolver el Medidor por cualquier razón. - Page 64 Lista de Chequeo 1. El Número de Serie del Medidor es: 2. La fecha y hora en que el problema occurió fue: 3. He chequeado el Medidor con ambas: La Tira de Confirmación y la Solución de Control Normal Glucometer Elite •...
-
Page 65: Limitaciones Del Procedimiento
El rango de referencia para pO arterial es de 80 a 110 mmHg (11.04 a 14.36 kPa). 3. USO NEONATAL: El sistema Glucometer Elite XL es el único sistema Glucometer Elite apto para uso neonatal. Está indicado para la moni- torización en el tratamiento de la hipoglucemia en neonatos. -
Page 66: Especificaciones
Muestra para la Prueba: Resultado de la Prueba: Duración de la Prueba: Curva de Calibración: Capacidad de la Memoria: Duración de las Baterías: Temperatura de Operación: Volumen de Muestra:en Cámara de Reacción: Rango de la Prueba: Fecha: Compensación Temperatura: Tipo de Batería: Rango de Humedad: Dimensiones:... -
Page 67: Suministros
Cuando llame o escriba para adquirir suministros, asegúrese de incluir el número con el nombre del repuesto o producto que necesita ordenar. ARTÍCULOS DE REPUESTO Número* 40030030 99A38839 50184180 50062338 3437 Para ordenar dichos artículos en los Estados Unidos escriba a: Corporación Bayer Customer Service Department Order Entry P. - Page 68 PRODUCTOS COMPLEMENTARIOS Número 3870 3871 3873 3911 3918 3942 3940 3926 3927 3416 6540 6546 6550 6554 6558 Programa de Computación (disponible únicamente en inglés): 3434 3435 3436 *Cable de conexión incluido Estos productos pueden obtenerse en Centros de Cuidado Diabético, farmacias u otros distribuidores de productos farmacéuticos.
-
Page 69: Garantía
IMPORTANTE: La Corporación Bayer (“Bayer”) no tiene conocimiento alguno sobre el desempeno del medidor de glu- cosa en la sangre Glucometer Elite cualquier otro tiras que no sean las Tiras de Prueba Glucometer Elite. Por lo tanto, Bayer no garantiza el desempneo do dicho medidor cuando se utilice con otras Tiras de Prueba Glucometer Elite o cuando la Tira de Prueba Glucometer Elite sea alterada o modifacada en forma alguna. - Page 70 SE BRINDA ESTA GARANTÍA EXPRESAMENTE EN LUGAR DE CUALQUIER O TODAS LAS OTRAS GARANTÍAS EXPRESAS O IMPLÍCITAS (YA SEA DE HECHO O POR CAUSA DE VIGENCIA DE UNA LEY) INCLUYENDO LAS GARANTÍAS ACERCA DE LA COMERCIABILIDAD Y CAPACIDAD DE LA UNIDAD PARA SU USO, LAS CUALES SE EXCLUYEN EN FORMA EXPRESA, Y ES LA ÚNICA GARANTÍA BRINDADA POR BAYER.
Need help?
Do you have a question about the Elite XL and is the answer not in the manual?
Questions and answers