Table of Contents
Advertisement
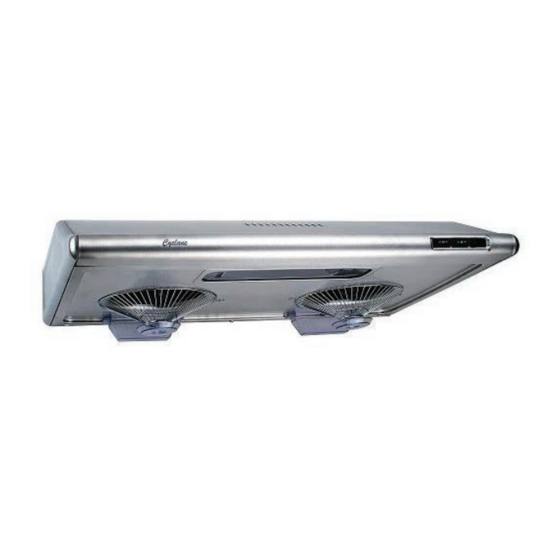
Self-Cleaning Range Hoods
Undermount Range Hoods
NA930C/R
CY1000C/R
CY2080R
CYS1000R
CY1011R
NA330R
CY3000R
Installation and Operation Instructions
Please read all instructions before installing and operating.
All wiring and installation must be in accordance with CEC, NEC and local electrical codes.
READ AND SAVE THESE INSTRUCTIONS
Advertisement
Table of Contents

Related Manuals for CyClone NA930C/R


Summary of Contents for CyClone NA930C/R
-
Page 1: Installation And Operation Instructions
Self-Cleaning Range Hoods Undermount Range Hoods NA930C/R CY1000C/R CY2080R CYS1000R CY1011R NA330R CY3000R Installation and Operation Instructions Please read all instructions before installing and operating. All wiring and installation must be in accordance with CEC, NEC and local electrical codes. - Page 2 Cyclone Undermount Installation - English...
-
Page 3: Important Safety Instructions
If the motor continually shuts Use HIGH setting on hood only when necessary. and restarts, contact the Cyclone service department. Don’t leave hood unattended when cooking. Ensure that the hood is mounted at the recommended To reduce the risk of use only metal ductwork. -
Page 4: Table Of Contents
Damage Inspection Ducting Mounting Heights and Clearance Wiring Installation Undermount Installation - Tools and Materials Required Undermount Installation - Parts Provided Undermount Hood Installation Undermount Hoods Specifications Troubleshooting Maintenance Control Panel Cyclone Range Hoods Limited Warranty Cyclone Undermount Installation - English... -
Page 5: Damage Inspection
Side Wall Cap with Gravity the use of any size ducting is less than 6”, the warranty is Damper automatically voided. • The venting duct must go horizontally or vertically up to the outside wall or the roof. If it is turned downward anywhere in the venting system, the warranty is automatically voided. Fasten all connections with sheet metal screws and tape all joints with certified aluminum foil tape or duct. Do not cut a joist or stud unless absolutely necessary. If a joist or stud must be cut then a supporting frame must be constructed. Before making cutouts make sure there is proper clearance within Side Wall Cap with the ceiling or wall for the exhaust vent. Gravity Damper Additional parts not provided. Cyclone Undermount Installation - English... -
Page 6: Mounting Heights And Clearance
Black: Power White: Neutral Grounding Instructions Green: Ground This appliance must be grounded. This appliance is equipped with a cord having a grounding wire or with a plug having grounding wire. The grounding wire must be grounded properly in the junction box or the plug must be plugged into an outlet that is properly installed and grounded. 1. Connect the power line ground wire to the green ground wire supplied with the hood. 2. Connect the black power wire to the black wire supplied with the hood. 3. Connect the white neutral wire to the white wire supplied with the hood. Cyclone Undermount Installation - English... -
Page 7: Undermount Installation - Tools And Materials Required
CYS1000R, CY1011R, CY3000R ONLY: NA330R ONLY: 1 × Oil Collector 2 × Halogen Lights 2 × LED Lights (120V, 20W) (12V, 20W) HARDWARE PACKAGE Rectangular Opening Models ONLY: 4 × Mounting Screws 6 × Damper Screws Cyclone Undermount Installation - English... -
Page 8: Undermount Hood Installation
Place the rectangular damper onto the top rectangular cutout and fasten with tapping screws. Important: Seal both the rear cover plate and damper with aluminum foil tape (preferred) or duct tape. Cover Plate 5. For round top venting configuration: no rear cover or damper required. Tapping Screws Cyclone Undermount Installation - English... - Page 9 Preparation for Vent and Exhaust Duct Connection 1. To connect a rectangular vent to a round exhaust duct (or vice 4. An exhaust duct needs to be cut if there is not an existing duct in versa), use a connecting duct and adapter. your home. Please consult/hire a professional to complete the 2. The round vent of a Cyclone Range Hood is 6” diameter. If work properly. In general, for rear venting, a rectangular hole the round exhaust duct is not 6” diameter, a connecting duct needs to be cut into the wall to fit the rectangular exhaust duct is necessary to accommodate the different size. If the exhaust extended to the outside wall. For top venting, a rectangular or duct is less than 6” diameter, the efficiency of your Cyclone a 6” round hole needs to be cut through the ceiling or the back...
-
Page 10: Undermount Hoods Specifications
SWITCH SWITCH SPEED LEVELS TIME DELAY OFF FILTERS BAFFLE NA930C - 6” ROUND TOP CY1000C - 6” ROUND TOP 3½” × 10” 3½” × 10” 3½” × 10” NA930R - 3½” × 10” CY1000R - 3½” × 10” RECTANGULAR RECTANGULAR RECTANGULAR DUCT RECTANGULAR TOP OR RECTANGULAR TOP OR TOP OR REAR TOP OR REAR REAR REAR 1550RPM 1550RPM 1550RPM 1050RPM 1550RPM MAX. FAN SPEED CY2080R - 1050RPM Cyclone Undermount Installation - English... - Page 11 Classic Collection Undermount - Model: NA930C 2” 6” 1 ¼” 2” Φ 6” 28 ⅛” Φ 6” 8 ⅞” 12” 2” 7 ⅜” 4 ⅜” 1 ¼” 29 ¾” BOTTOM ½” 6” 21 ½” SIDE FRONT Cyclone Undermount Installation - English...
-
Page 12: Specifications
SpecIfIcatIonS Classic Collection Undermount - Model: NA930R 2” 6” 1 ¼” 2” 3” 1 ⅝” ½” 28 ⅛” 10” 8 ⅞” 2” 3” 1 ⅝” 1 ¼” 29 ¾” BOTTOM 6” 21 ½” SIDE FRONT Cyclone Undermount Installation - English... - Page 13 2 ¼” 1 ¾” 1 ½” Φ 6” 27 ⅞” Φ 6” 8 ¾” 12” 2 ¼” 5 ½” 2 ½” 1 ½” 29 ¾” 29 ¾” BOTTOM ½” 4 ¾” 20 ¾” SIDE FRONT Cyclone Undermount Installation - English...
- Page 14 Classic Collection Undermount - Model: CY1000R/CY2080R 4 ¾” 2 ¼” 1 ¾” 1 ½” 3” 1 ⅝” ½” 27 ⅞” 10” 8 ¾” 2 ¼” 3” 1 ⅝” 1 ½” 29 ¾” BOTTOM 4 ¾” 20 ¾” SIDE FRONT Cyclone Undermount Installation - English...
- Page 15 1 ¾” 1 ½” 3” 1 ⅝” ½” 21 ½” or 27 ¾” 10” 8 ⅞” 2 ⅛” 3” 1 ¾” 1 ½” 23 ¾” or 29 ⅞” BOTTOM 4 ¾” 20 ¾” SIDE FRONT Cyclone Undermount Installation - English...
- Page 16 Classic Collection Undermount - Model: CY3000R 2 ¼” 7 ⅞” 1 ½” 1 ⅞” 3” 1 ⅝” ½” 28 ⅞” 10” 8 ¾” 2 ¼” 3” 1 ½” 1 ⅝” 29 ⅞” BOTTOM 8” 22” SIDE FRONT Cyclone Undermount Installation - English...
- Page 17 Classic Collection Undermount - Model: CY1011R 4 ¾” 2 ¼” 1 ¾” 1 ½” 3” 1 ⅝” ½” 27 ⅞” 10” 8 ¾” 2 ¼” 3” 1 ½” 1 ⅝” 29 ¾” BOTTOM 4 ¾” 20 ¾” SIDE FRONT Cyclone Undermount Installation - English...
- Page 18 Pro Collection Undermount - Model: NA330R 2 ½” 8” 1 ¾” 2” 3” 1 ⅝” 27 ½” or 33” 10” 9 ½” 2 ½” 3” 1 ¾” 1 ⅝” 29 ¾” or 35 ¾” BOTTOM 8” 22” SIDE FRONT Cyclone Undermount Installation - English...
-
Page 19: Troubleshooting
3. The control panel or motherboard is defective 3. Change the control panel or motherboard. (CY3000R/NA330R). The hood is not venting 1. The hood might be hanging too high from the 1. Adjust the distance between the cook top and out properly. cook top. the bottom of the hood within 28” - 36” above the range. 2. Blockage in the duct opening or ductwork. 2. Remove all the blocking from the duct work or duct opening. 3. Using the wrong size of ducting. 3. Use at least 6” duct work. Cyclone Undermount Installation - English... -
Page 20: Maintenance
To change bulbs for CYS1000R and CY3000R: Spray degreasing detergent and leave to soak if heavily soiled. Firmly press against the lightbulb and twist counter- clockwise until bulb is loosened Cyclone Undermount Installation - English... -
Page 21: Control Panel
Light speed Power Light Fan Controls To Set the Time The time will appear on the digital display panel. Simply press and hold the power button for about three seconds and use the LOW Model: CYS1000R button to set the hour and the HIGH button to set the minutes. The unit is controlled by rocker switches. The fan and light are each controlled by a rocker switch. The To Engage Time-Delay Off Functions: fan switch has three positions: HIGH, LOW and OFF. The light Simply press the power button while the machine is running, and switch has three positions for HIGH, LOW and OFF. use the LOW and HIGH power buttons to set the number of minutes you would like the fan to run before automatically shutting off. HIGH HIGH speed speed Fan Controls Light Cyclone Undermount Installation - English... -
Page 22: Cyclone Range Hoods Limited Warranty
CYCLONE RANGE HOODS LIMITED WARRANTY Cyclone Range Hoods Inc. (hereunder called Company”) provides a warranty that its products are free from defects in workmanship and materials for a period of two (2) years from the date of purchase. warranty includes in-home service (where applicable) for the year and workshop service for the second year.
Need help?
Do you have a question about the NA930C/R and is the answer not in the manual?
Questions and answers