CyClone NA-930/R Installation And Operating Instructions Manual
Self-cleaning range hoods
Hide thumbs
Also See for NA-930/R:
Table of Contents
Advertisement
Quick Links
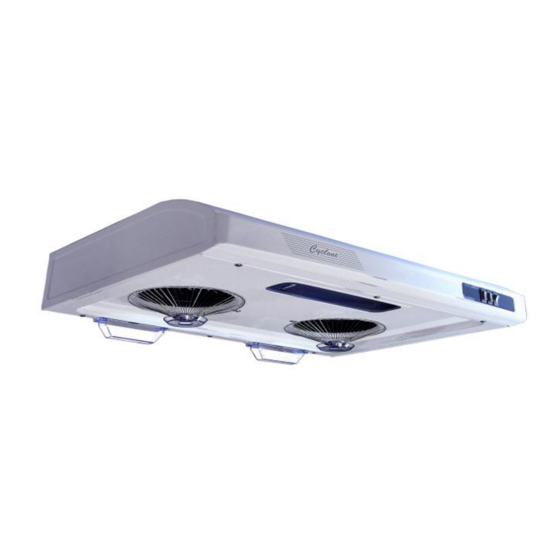
Self-Cleaning Range Hoods
Hottes Autonettoyantes
(Model/Modèle NA-930/R)
(Model/Modèle CY-1000/R)
(Model/Modèle CY-3000R)
Installation and Operating Instructions
Instructions d'installation et d'opération
Please read all instructions before installing and operating.
All wiring must be in accordance with national and local electrical codes.
Advertisement
Table of Contents

Related Manuals for CyClone NA-930/R


Summary of Contents for CyClone NA-930/R
- Page 1 Self-Cleaning Range Hoods Hottes Autonettoyantes (Model/Modèle NA-930/R) (Model/Modèle CY-1000/R) (Model/Modèle CY-3000R) Installation and Operating Instructions Instructions d’installation et d’opération Please read all instructions before installing and operating. All wiring must be in accordance with national and local electrical codes.
-
Page 2: Table Of Contents
TABLE OF CONTENTS Title Page(s) Safety Instructions Tools and Materials Preparation for installation Installation Procedures Providing Electrical Making the Electrical Connection Use and Care Operating Instructions Specifications Circuit Assembly Drawing for Twin Motor Range Hood Service Parts Cyclone Range Hood Limited Warranty... -
Page 3: Safety Instructions
READ AND SAVE ALL INSTRUCTIONS BEFORE INSTALLING OR OPERATING YOUR CYCLONE RANGE HOOD 1. Cyclone range hood is for general purpose ventilating use only. Do not use it to exhaust hazardous, explosive materials or vapors. 2. The safety mesh that covers the inlets to the fan must be cleaned periodically to prevent excess grease buildup. -
Page 4: Preparation For Installation
8. To connect a rectangular vent to a round exhaust duct (or vice versa), use connecting duct. 9. The round vent of Cyclone range hoods is 6” in diameter. If your round exhaust duct is not 6” in diameter, you will need a connecting duct to accommodate the different sizes. -
Page 5: Providing Electrical
tighten screws until wood filler strips are secured under cabinet. Center the hood in place beneath the cabinet and flush with the front of the cabinet. Mark the four keyhole mounting slots for the hood. Mark these onto the bottom of the cabinet;... -
Page 6: Operating Instructions
Operating Instructions: CY3000R High Power Timer/ 24Hr Clock Lighting To set the time: The time will appear on the digital display panel. Simply press and hold down the power button for three seconds or until the screen begins to flash, and use the “low” button to set the hour and the “high” button to set the minutes. To set the automatic timer: Simply press and hold down the power button while the machine is running. -
Page 7: Circuit Assembly Drawing For Twin Motor Range Hood
CIRCUIT ASSEMBLY DRAWING FOR TWIN MOTOR RANGE HOOD... -
Page 8: Service Parts
SERVICE PARTS DESCRIPTION Motor Cap / Chapeau de Moteur Motor Pad / Garniture de Moteur Motor (L, R) / Moteur (G. D) Machine body / Corps de machine Hex screw / Vis hexagonal Screw 4x10 / Vis 4x10 Vane / Palette Oil hose / Tuyau d’huile Middle support plate Plaque de support au milieu... -
Page 9: Cyclone Range Hood Limited Warranty
Warranty does not cover the costs of removal, installation and transportation of a defective product. The warranty on your Cyclone Range Hood begins on the date of original purchase. In order to register your purchase, please fill out both the customer and manufacturer copies of the Limited Warranty Registration card below.
Need help?
Do you have a question about the NA-930/R and is the answer not in the manual?
Questions and answers