Table of Contents
Advertisement
Quick Links
Advertisement
Table of Contents

Related Manuals for Conel LR77 v2


Summary of Contents for Conel LR77 v2
- Page 1 WWW.INFOPULSAS.LT info@infopulsas.lt CONFIGURATION MANUAL for v2 routers...
-
Page 2: Firmware Version
PPPoE configuration item is only available on the industrial router XR5i v2, used to set the PPPoE connection over Ethernet. Declared quality system ISO 9001 Conel s.r.o., Sokolska 71, 562 04 Usti nad Orlici, Czech Republic Manual issued in CZ, 12/15/2011... -
Page 3: Table Of Contents
CONTENTS Contents Configuration settings over web browser 1.1. Secured access to web configuration 1.2. Network status 1.3. DHCP status 1.4. GPRS/UMTS status 1.5. IPsec status 1.6. DynDNS status 1.7. System log 1.8. LAN configuration 1.9. VRRP configuration 1.10. GPRS configuration 1.10.1. - Page 4 PICTURE LIST Picture list Fig. 1: Web configuration Fig. 2: Network status Fig. 3: DHCP status Fig. 4: GPRS status Fig. 5: IPsec status Fig. 6: DynDNS status Fig. 7: System log Fig. 8: Example program syslogd start with the parameter -r Fig.
- Page 5 PICTURE LIST Fig. 50: Expansion port configuration Fig. 51: Example of expansion port configuration 1 Fig. 52: Example of expansion port configuration 2 Fig. 53: USB configuration Fig. 54: Example of USB port configuration 1 Fig. 55: Example of USB port configuration 2 Fig.
- Page 6 TABLE LIST Table list Table 1: Description of interface in network status Table 2: Description of information in network status Table 3: DHCP status description Table 4: Description of GSM information item Table 5: Description of period Table 6: Description of GSM statistic Table 7: Description of GSM traffic Table 8: Possibly DynDNS report Table 9: Configuration of network interface...
- Page 7 TABLE LIST Table 50: AT commands for work with SMS Table 51: Expansion PORT configuration 1 Table 52: Expansion PORT configuration 2 Table 53: CD signal description Table 54: DTR signal description Table 55: USB port configuration 1 Table 56: USB PORT configuration 2 Table 57: CD signal description Table 58: DTR signal description Table 59: Automatic update configuration...
-
Page 8: Configuration Settings Over Web Browser
CONFIGURATION 1. Configuration settings over web browser Attention! If the SIM card is not inserted in the router, then wireless transmissions will not work. The inserted SIM card must have activated GPRS. Insert the SIM card when the router is switched-off. Monitoring of the status, configuration and administration of the router can be performed by means of the web interface, which is available after insertion of IP address of the modem into the web browser. -
Page 9: Secured Access To Web Configuration
CONFIGURATION After green LED starts to blink it is possible to restore initial settings of the router by pressing button RST on front panel. If press button RST, configuration is restored to default and it is reboot (green LED will be on). 1.1. -
Page 10: Network Status
CONFIGURATION 1.2. Network status To view the system information about the router operation, select the Network menu item. The upper part of the window displays detailed information about active interfaces: Interface Description eth0 Networks interface ppp0 Interface (active connection to GPRS/EDGE) tun0 OpenVPN tunnel interface ipsec0... -
Page 11: Dhcp Status
CONFIGURATION Fig. 2: Network status 1.3. DHCP status Information on the activities of the DHCP server can be accessed by selecting the DHCP status. DHCP status informs about activities DHCP server. The DHCP server provides automatic configuration of devices connected to the network managed router. DHCP server assigns to each device's IP address, netmask, default gateway (IP address of router) and DNS server (IP address of router). -
Page 12: Gprs/Umts Status
CONFIGURATION 1.4. GPRS/UMTS status The industrial router XR5i v2 is not availability item GPRS/UMTS status. GPRS menu item contains actual information about GPRS/UMTS connections. Item Description PLMN Code of operator Cell The cell to which the router is connected Channel The channel on which the router communicates Level The signal quality of the selected cell... -
Page 13: Fig. 4: Gprs Status
CONFIGURATION The PPP Connection Log is in the bottom of window, where are information about the make-up of the PPP connection and problems in establishment. Fig. 4: GPRS status... -
Page 14: Ipsec Status
CONFIGURATION 1.5. IPsec status Information on actual IPsec tunnel state can be called up in option IPsec in the menu. After correct build the IPsec tunnel, status display IPsec SA established (highlighted in red) in IPsec status information. Other information is only internal character. Fig. -
Page 15: System Log
CONFIGURATION 1.7. System log In case of any problems with connection to GPRS it is possible to view the system log by pressing the System Log menu item. In the window, are displayed detailed reports from individual applications running in the router. By the help of button Save it is possible to save the system log to the computer. -
Page 16: Lan Configuration
CONFIGURATION 1.8. LAN configuration To enter the network configuration, select the LAN menu item. ETH network set in Primary LAN configuration, expansion PORT ETH set in Secondary LAN configuration. Item Description • DHCP Client disabled – The router does not allow automatic allocation IP address from a DHCP server in LAN network. -
Page 17: Fig. 9: Topology Of Example Lan Configuration 1
CONFIGURATION It is important not to overlap ranges of static allocated IP address with address allocated by the dynamic DHCP. Then risk collision of IP addresses and incorrect function of network. Example of the network interface with dynamic DHCP server: •... -
Page 18: Fig. 11: Topology Of Example Lan Configuration 2
CONFIGURATION Example of the network interface with dynamic and static DHCP server: • The range of allocated addresses from 192.168.1.2 to 192.168.1.4. • The address is allocated 10 minutes. • Client's with MAC address 01:23:45:67:89:ab has IP address 192.168.1.10. • Client's with MAC address 01:54:68:18:ba:7e has IP address 192.168.1.11. -
Page 19: Fig. 13: Topology Of Example Lan Configuration 3
CONFIGURATION Example of the network interface with default gateway and DNS server: • Default gateway IP address is 192.168.1.20 • DNS server IP address is 192.168.1.20 192.168.1.2 192.168.1.3 192.168.1.4 GSM/GPRS 192.168.1.1 192.168.1.20 Fig. 13: Topology of example LAN configuration 3 Fig. -
Page 20: Vrrp Configuration
CONFIGURATION 1.9. VRRP configuration To enter the VRRP configuration select the VRRP menu item. VRRP protocol (Virtual Router Redundancy Protocol) is a technique, by which it is possible to forward routing from main router to backup router in the case of the main router failure. If the Enable VRRP is checked, then it is possible to set the following parameters. -
Page 21: Fig. 15: Topology Of Example Vrrp Configuration
CONFIGURATION Example of the VRRP protocol: Main router Virtual server ID 5 Host priority 255 APN 1 192.168.1.2 192.168.1.1 10.0.1.3 APN 2 Backup router 192.168.1.3 Virtual server ID 5 Host priority 100 Fig. 15: Topology of example VRRP configuration Fig. 16: Example VRRP configuration – main router Fig. -
Page 22: Gprs Configuration
CONFIGURATION 1.10. GPRS configuration The industrial router XR5i v2 is not availability item GPRS Configuration. To enter the GPRS connection configuration select the GPRS menu item. GPRS connection 1.10.1. If the Create GPRS connection option is selected, the modem automatically tries to establish GPRS connection after switching-on. -
Page 23: Dns Address Configuration
CONFIGURATION If only one SIM card is plugged in the router, router switches between the APN. Router with two SIM cards switches between SIM cards. Correct PIN must be filled. For SIM cards with two APN’s there will be the same PIN for both APN`s. -
Page 24: Switch Between Sim Cards Configuration
CONFIGURATION If the parameter Switch to backup SIM card when data limit is exceeded (see next) or Send SMS when datalimit is exceeded (see SMS configuration) are not selected the data limit will not count. Switch between SIM cards configuration 1.10.5. -
Page 25: Dial-In Access Configuration
CONFIGURATION The following parameters define the time after which the router attempts to go back to the default SIM card or APN. Item Description Initial timeout The first attempt to switch back to the primary SIM card or APN shall be made for the time defined in the parameter Initial Timeout, range of this parameter is from 1 to 10000 minutes. -
Page 26: Fig. 18: Gprs Configuration
CONFIGURATION The changes in settings will apply after pressing the Apply button. Fig. 18: GPRS configuration... -
Page 27: Fig. 19: Example Of Gprs Configuration 1
CONFIGURATION Example of setting controls the PPP connection to the address 8.8.8.8 in the time interval of 60s for primary SIM card and to the address www.google.com in the time interval 80s for secondary SIM card. In the case of traffic on the PPP control pings are not sent, but the traffic on PPP is observed: Fig. -
Page 28: Pppoe Configuration
CONFIGURATION 1.11. PPPoE configuration PPPoE configuration item is available only on the industrial router XR5i v2. PPPoE for industrial router works in client mode. Router using connection to the PPPoE server or PPPoE bridge (for example ADSL modem). To enter the PPPoE configuration select the PPPoE menu item. If the Create PPPoE connection option is selected, the router tries to establish PPPoE connection after switching-on. -
Page 29: Firewall Configuration
CONFIGURATION 1.12. Firewall configuration By the help of a firewall it is possible to set IP addresses from which are possible to remotely access the router and internal network connected behind a router. The choice Allow remote access only from specified hosts is given for easier configuration of hosts. In this firewall configuration it is possible to set up to four remote accesses by the help of Source, Source IP Address, Protocol and Target Port. -
Page 30: Fig. 23: Topology Of Example Firewall Configuration
CONFIGURATION Example of the firewall configuration: The router has allowed the following access: • from address 171.92.5.45 using any protocol • from address 10.0.2.123 using TCP protocol on any ports • from address 142.2.26.54 using ICMP protocol TCP/1000 10.0.2.123 ICMP 171.92.5.45 142.2.26.54 Fig. -
Page 31: Nat Configuration
CONFIGURATION 1.13. NAT configuration To enter the Network Address Translation configuration, select the NAT menu item. NAT (Network address Translation / Port address Translation - PAT) is a method of adjusting the network traffic through the router default transcript and/or destination IP addresses often change the number of TCP/UDP port for walk-through IP packets. -
Page 32: Fig. 25: Topology Of Example Nat Configuration
CONFIGURATION Table 25: Remote access configuration Example of the configuration with one connection equipment on the router: 162.209.13.222 ppp0 10.0.0.1 eth0 192.168.1.1 IP 192.168.1.2 Default gateway 192.168.1.1 Fig. 25: Topology of example NAT configuration Fig. 26: Example NAT configuration 1 In these configurations it is important to have marked choice of Send all remaining incoming packets it default server, IP address in this case is the address of the device behind the router. -
Page 33: Fig. 27: Topology Of Example Nat Configuration
CONFIGURATION Example of the configuration with more connected equipment: SWITCH 162.209.13.222 10.0.0.1:81 ppp0 10.0.0.1 192.168.1.2:80 10.0.0.1:82 10.0.0.1:83 192.168.1.3:80 192.168.1.4:80 Fig. 27: Topology of example NAT configuration Fig. 28: Example of NAT configuration 2... -
Page 34: Openvpn Tunnel Configuration
CONFIGURATION In this configuration equipment wired behind the router defines the address Server IP Address. The router replies, while PING on address of SIM card. Access on web interface of the equipment behind the router is possible by the help of Port Forwarding, when behind IP address of SIM is indicating public port of equipment on which we want to come up. - Page 35 CONFIGURATION Remote Interface IP IP address of interface local side of tunnel. Address Ping Interval This parameter defines the time period after which router sends a message to opposite side of tunnel, for check the existence of the tunnel. Ping Timeout Ping Timeout waits on message from off-side tunnel.
-
Page 36: Fig. 30: Openvpn Tunnel Configuration
CONFIGURATION Extra Options By the help of parameter Extra Options it is possible to define additional parameters of the OpenVPN tunnel, for example DHCP options etc. Table 27: OpenVPN configuration The changes in settings will apply after pressing the Apply button. Fig. -
Page 37: Fig. 31: Topology Of Example Openvpn Configuration
CONFIGURATION Example of the OpenVPN tunnel configuration: 192.168.1.2 192.168.2.2 Router B ppp0 10.0.0.2 Router A 192.168.2.0 ppp0 10.0.0.1 tun 0 19.16.2.0 Switch 192.168.1.0 tun0 19.16.1.0 Switch 192.168.1.3 192.168.2.3 192.168.1.4 192.168.2.4 Default Gateway 192.168.2.1 Default Gateway 192.168.1.1 Fig. 31: Topology of example OpenVPN configuration OpenVPN tunnel configuration: Configuration Protocol... -
Page 38: Ipsec Tunnel Configuration
CONFIGURATION 1.15. IPSec tunnel configuration IPsec tunnel configuration can be called up by option IPsec item in the menu. IPsec tunnel allows protected (encrypted) connection of two networks LAN to the one which looks like one homogenous. In the IPsec Tunnels Configuration window are four rows, each row for one configured one IPSec tunnel. -
Page 39: Table 30: Ipsec Tunnel Configuration
CONFIGURATION Authenticate Mode Authentication is possible to set by parameter Authenticate mode, at choice are following possibilities: • Pre-shared key - shared key for both off-side tunnel. • X.509 Certificate - Pre-shared Key sharable key for both parties tunnel CA Certificate This certificate is necessary to insert Authentication mode x.509. -
Page 40: Fig. 33: Ipsec Tunnel Configuration
CONFIGURATION The changes in settings will apply after pressing the Apply button. Fig. 33: IPsec tunnel configuration... -
Page 41: Fig. 34: Topology Of Example Ipsec Configuration
CONFIGURATION Example of the IPSec Tunnel configuration: 192.168.1.2 192.168.2.2 Router B ppp0 10.0.0.2 Switch Router A 192.168.2.0 ppp0 10.0.0.1 192.168.1.0 Switch 192.168.1.3 192.168.2.3 192.168.1.4 192.168.2.4 Default Gateway 192.168.1.1 Default Gateway 192.168.2.1 Fig. 34: Topology of example IPsec configuration IPsec tunnel configuration: Configuration Remote IP Address 10.0.0.2... -
Page 42: Gre Tunnels Configuration
CONFIGURATION 1.16. GRE tunnels configuration To enter the GRE tunnels configuration, select the GRE menu item. The GRE tunnel is used for connection of two networks to one that appears as one homogenous. It is possible to configure up to four GRE tunnels. In the GRE Tunnels Configuration window are four rows, each row for one configured GRE tunnel. -
Page 43: Fig. 36: Gre Tunnel Configuration
CONFIGURATION Fig. 36: GRE tunnel configuration Example of the GRE Tunnel configuration: 192.168.1.2 192.168.2.2 Router B ppp0 10.0.0.2 Switch eth0 192.168.2.1 Router A ppp0 10.0.0.1 eth0 192.168.1.1 Switch 192.168.1.3 192.168.2.3 192.168.1.4 192.168.2.4 Default Gateway 192.168.1.1 Default Gateway 192.168.2.1 Fig. 37: Topology of GRE tunnel configuration GRE tunnel Configuration: Konfigurace Remote IP Address... -
Page 44: L2Tp Tunnel Configuration
CONFIGURATION 1.17. L2TP tunnel configuration To enter the L2TP tunnels configuration, select the L2TP menu item. L2TP tunnel allows protected connection by password of two networks LAN to the one which it looks like one homogenous. The tunnels are active after selecting Create L2TP tunnel. Item Description Mode... -
Page 45: Fig. 39: Topology Of Example L2Tp Tunnel Configuration
CONFIGURATION Example of the L2TP Tunnel configuration: 192.168.1.2 192.168.2.2 Router B ppp0 10.0.0.2 Router A 192.168.2.1 Switch ppp0 10.0.0.1 192.168.1.1 Switch 192.168.1.3 192.168.2.3 192.168.1.4 192.168.2.4 Default Gateway 192.168.1.1 Default Gateway 192.168.2.1 Fig. 39: Topology of example L2TP tunnel configuration Configuration of the L2TP tunnel: Konfigurace Mode L2TP Server... -
Page 46: Dyndns Client Configuration
If you want to use another DynDNS service than www.dyndns.org, then enter the update server service to this item. If this item is left blank, it uses the default server members.dyndns.org. Table 37: DynDNS configuration Example of the DynDNS client configuration with domain conel.dyndns.org: Fig. 40: Example of DynDNS configuration... -
Page 47: Ntp Client Configuration
CONFIGURATION 1.19. NTP client configuration NTP client Configuration can be called up by option NTP item in the menu. NTP (Network Time Protocol) allows set the exact time to the router from the servers, which provide the exact time on the network. By parameter Enable local NTP service router is set to a mode in which it operates as an NTP server for other devices in the LAN behind the router. -
Page 48: Snmp Configuration
CONFIGURATION 1.20. SNMP configuration To enter the SNMP Configuration it is possible with SNMP agent ver.1 configuration which sends information about the router, eventually about the status of the expansion port CNT or M-BUS. SNMP (Simple Network Management Protocol) provides status information about network elements such as routers or end computers. -
Page 49: Table 41: Object Identifier For Binary Input And Output
CONFIGURATION Every monitor value is uniquely identified by the help of number identifier OID - Object Identifier. For binary input and output the following range of OID is used: Description .1.3.6.1.4.1.30140.2.3.1.0 Binary input BIN0 (values 0,1) .1.3.6.1.4.1.30140.2.3.2.0 Binary output OUT0 (values 0,1) Table 41: Object identifier for binary input and output For the expansion port CNT the following range of OID is used: Description... -
Page 50: Fig. 42: Example Of Snmp Configuration
It is important to set the IP address of the SNMP agent (router) in field Remote SNMP agent. After enter the IP address is in a MIB tree part is possible show object identifier. The path to objects is: iso->org->dod->internet->private->enterprises->conel->protocols. The path to information about router is: iso->org->dod->internet->mgmt->mib-2->system... -
Page 51: Smtp Configuration
CONFIGURATION 1.21. SMTP configuration To enter the SMTP it is possible configure SMTP (Simple Mail Transfer Protocol) client, which is set by sending emails. Item Description SMTP Server IP or domain address of the mail server. Address Username Name to email account. Password Password to email account. -
Page 52: Sms Configuration
CONFIGURATION 1.22. SMS configuration The industrial router XR5i v2 is not availability item SMS Configuration. SMS Configuration can be called up by option SMS item in the menu. SMS configuration defines the options for sending SMS messages from the router at different defined events and states of the router. -
Page 53: Send Sms
CONFIGURATION It is possible to send controls SMS in the form: Description go online sim 1 Switch to SIM1 card go online sim 2 Switch to SIM2 card go online Switch router in online mode go offline PPP connection termination set out0=0 Set output I/O connector on 0 set out0=1... - Page 54 CONFIGURATION For the text mode for SMS writing is used command AT+CMGF=1. AT+CMGF=1 Enter The SMS message is created by the help of command AT+CMGS=<tel. number>. After Enter button is pressed is displayed mark >, behind this mark it is possible to write your own SMS message.
-
Page 55: Fig. 46: Example Of Sms Configuration 1
CONFIGURATION After powering up the router, at introduction of the telephone number comes SMS in the form Router (Unit ID) has been powered up.GSM signal strength –xx dBm. After PPP connect, at introduction of the telephone number comes SMS in the form: Router (Unit ID) has established PPP connection. -
Page 56: Fig. 47: Example Of Sms Configuration 2
CONFIGURATION Example of the router configuration for SMS sending via serial interface on the PORT1: Fig. 47: Example of SMS configuration 2... -
Page 57: Fig. 48: Example Of Sms Configuration 3
CONFIGURATION Example of the router configuration for controlling via SMS from every phone numbers: Fig. 48: Example of SMS configuration 3... -
Page 58: Fig. 49: Example Of Sms Configuration 4
CONFIGURATION Example of the router configuration for controlling via SMS from two phone numbers: Fig. 49: Example of SMS configuration 4... -
Page 59: Expansion Port Configuration
CONFIGURATION 1.23. Expansion port configuration Configuring of the expansion ports PORT1 and PORT2 can cause selecting Expansion Port 1 or Expansion Port 2. Item Description Baudrate Applied communication speed. Data Bits Number of data bits. Parity Control parity bit • none - Will be sent without parity. -
Page 60: Fig. 50: Expansion Port Configuration
CONFIGURATION When you select items Use DTR as control of TCP connection is activated function control TCP connection using signal DTR (CD on the router). Description server Description client Active The router allows establishing a TCP Router starts TCP connection. connection. -
Page 61: Fig. 51: Example Of Expansion Port Configuration 1
CONFIGURATION Example of external port configuration: ppp0 10.0.0.2 ppp0 10.0.0.1 RS232 192.168.1.1 192.168.1.100 Settings in application on PC: Settings in the router TCP connection on 10.0.0.2:2000 Mode: TCP server Server Address: - Default Gateway 192.168.1.1 TCP Port: 2000 Fig. 51: Example of expansion port configuration 1 ppp0 10.0.0.2 RS232 ppp0 10.0.0.1... -
Page 62: Usb Port Configuration
CONFIGURATION 1.24. USB port configuration The USB port configuration can be called up by airbrush option USB Port in menu. Configuration can be done, if we have USB/RS232 converter. Item Description Baudrate Applied communication speed. Data Bits Number of data bits. Parity Control parity bit •... -
Page 63: Fig. 53: Usb Configuration
CONFIGURATION When you select items Use DTR as control of TCP connection is activated function control TCP connection using signal DTR (CD on the router). Description server Description client Active The router allows establishing a TCP Router starts TCP connection. connection. -
Page 64: Fig. 54: Example Of Usb Port Configuration 1
CONFIGURATION Example of USB port configuration: Equipment ppp0 10.0.0.2 ppp0 10.0.0.1 USB/RS232 192.168.1.1 192.168.1.100 Settings in application on PC: Settings in the router TCP connection on 10.0.0.2:2000 Mode: TCP server Server Address: - Default Gateway 192.168.1.1 TCP Port: 2000 Fig. 54: Example of USB port configuration 1 Equipment ppp0 10.0.0.2 USB/RS232... -
Page 65: Startup Script
CONFIGURATION 1.25. Startup script In the window Startup Script it is possible to create own scripts which will be executed after all initial scripts. The changes in settings will apply after pressing the Apply button. Fig. 56: Startup script Change take effect after shut down and witch on router by the help of button Reboot in web administration or by SMS message. -
Page 66: Up/Down Script
CONFIGURATION 1.26. Up/Down script In the window Up/Down Script it is possible to create own scripts. In the item Up script is defined scripts, which begins after establishing a PPP/WAN connection. In the item Down Script is defines script, which begins after lost a PPP/WAN connection. The changes in settings will apply after pressing the Apply button. -
Page 67: Automatic Update Configuration
CONFIGURATION 1.27. Automatic update configuration In the window Automatic update it is possible to set automatic configuration update. This choice enables that router automatically downloads configuration and the newest firmware from the server itself. The configuration and firmware are stores on the server. -
Page 68: User Modules
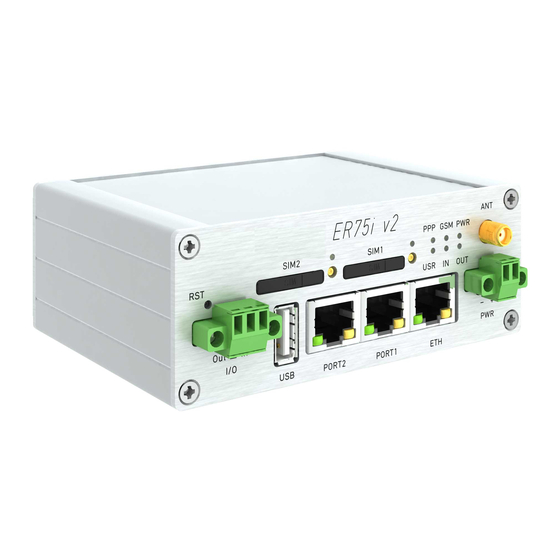
CONFIGURATION The following examples find if there is a new firmware or configuration each day at 1:00 in the morning. An example is given on the type of router ER75i v2. • Firmware: http://router.cz/er75i-v2.bin • Configuration file: http://router.cz/temelin.cfg Fig. 60: Example of automatic update 1 The following examples find if there is a new firmware or configuration each day at 1:00 in the morning. -
Page 69: Change Profile
CONFIGURATION 1.29. Change profile To open the dialog box for changing profile select the Change Profile menu item. Profile switch is making by press the button Apply. Change take effect after restarting router by the help of button Reboot in web administration or by SMS message. It is possible select the standard profile or up to three alternative profiles. -
Page 70: Set Real Time Clock
CONFIGURATION 1.31. Set real time clock One - shot inner clock of the router setting can be called up in option Set Real Time Clock item in the menu. Clocks are set according to the engaged NTP server after push- button operation Apply. -
Page 71: Send Sms
CONFIGURATION 1.34. Send SMS The industrial router XR5i v2 is not availability item Send SMS. Sending SMS messages is possible in menu Send SMS. The SMS message will be sent after entering the Phone number and text SMS (Message) and by pushing button Send. -
Page 72: Update Firmware
CONFIGURATION 1.37. Update firmware To view the information about the firmware version and instructions for its update select the Update Firmware menu item. New firmware is selected via Browse button and update the following pressing the Update button. Fig. 70: Update firmware After successful firmware updating the following statement is listed: There is information about updating of the FLASH memory. -
Page 73: Configuration Setting Over Telnet
CONFIGURATION Configuration setting over Telnet Attention! If the SIM card isn’t inserted in the router, it is impossible for the router to operate. The Included SIM card must be activated for GPRS transmissions. Monitoring of status, configuration and administration of the router can be performed by means of the Telnet interface.
Need help?
Do you have a question about the LR77 v2 and is the answer not in the manual?
Questions and answers