Table of Contents
Advertisement
Specifications
Wingspan. . ..................................106.in.(2692.5mm)
Wing.Area.........................1630.sq.in.(10.52.sq.dm)
Length. . ............................................68.in.(1727mm)
Weight. . ...................... .14.5–16.5.lb.(6.6.kg–7.5.kg)
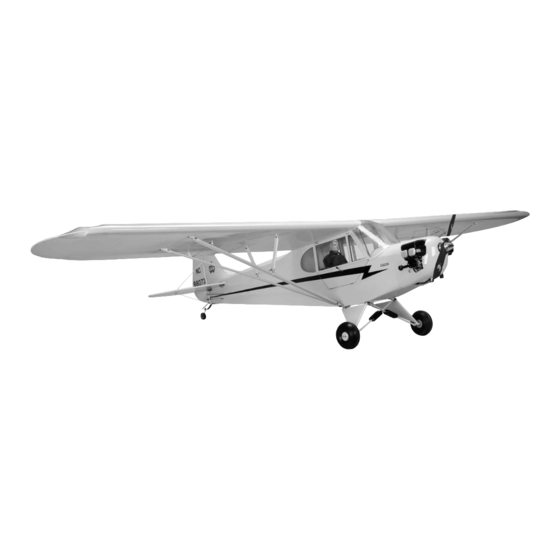
Piper J-3 Cub
Assembly mAnuAl
Engine. . ................................. . 1 .00–1.80.Four-Stroke
............................................. 1.00–1.60.Two-Stroke
....................................................20–26cc.Gasoline
Motor............................................. E-flite.Power.110
Advertisement
Table of Contents

Related Manuals for Hangar 9 Piper J-3 Cub


Summary of Contents for Hangar 9 Piper J-3 Cub
- Page 1 Piper J-3 Cub Assembly mAnuAl Specifications Wingspan........106.in.(2692.5mm) Engine........1 .00–1.80.Four-Stroke Wing.Area......1630.sq.in.(10.52.sq.dm) ..........1.00–1.60.Two-Stroke Length..........68.in.(1727mm) ............20–26cc.Gasoline Weight......14.5–16.5.lb.(6.6.kg–7.5.kg) Motor..........E-flite.Power.110...
-
Page 2: Table Of Contents
Table of Contents Using.the.Manual..............3 Required.Tools.and.Adhesives. -
Page 3: Using.the.manual
Using the Manual This.manual.is.divided.into.sections.to.help.make.assembly.easier.to.understand,.and.to.provide.breaks.between.each. major.section..In.addition,.check.boxes.have.been.placed.next.to.each.step.to.keep.track.of.each.step.completed..Steps. with.a.single.box.( ).are.performed.once,.while.steps.with.two.boxes.( ).indicate.that.the.step.will.require. repeating,.such.as.for.a.right.or.left.wing.panel,.two.servos,.etc..Remember.to.take.your.time.and.follow.the.directions. Required Tools and Adhesives Tools •.Rotary.tool.(Dremel). •.Hobby.scissors •.Pliers. •.Clamp •.T-pins. . •.Crimping.tool/vice.grips •.Solder. . •.String •.Solder.gun. •.1/4-inch.(6mm).foam •.Tape. •.Hobby.knife •.Phillips.screwdriver. •.Drill •.Felt-tipped.pen. •.Nut.driver:.1/4-inch •.Hex.wrench:.5/64-inch,.3/32-inch,.7/64-inch,.1/8-inch •.. D rill.bit:.1/16-inch.(1.5mm),.5/64-inch.(2mm),.5/32-inch.(4mm),.3/16-inch.(4.5mm) Adhesives •.Thin.CA.(PAAPT08). -
Page 4: Radio.and.power.systems.requirements
Radio and Power Systems Requirements •.4-channel.radio.system.(minimum).w/receiver. •.Large.Servo.Arms.(JRPA212).(3.pkgs) •.12-Inch.Servo.Lead.Extension.(JRPA098). •.JR.Charge.Jack.Switch.(JRPA004) •.18-inch.Servo.Lead.Extension.(JRPA099).(4). •.Choke.Rings.(JRPA029.(2) •.Y-harness.(Ailerons).(JSP98020).(Required.when.using.4-channel.radio) •.DS821.Digital.Sport.Hi-Torque.Servo.(JRPS821).(JSP20071).(6).or.equivalent The elevator installation will require: Two.servos.and.mixing.through.the.radio Two.servos.and.a.JR®.MatchBox™.(JPA0900).or.a.6".standard.reversing.Y-harness.(EXRA320) A.standard.rotation.servo.and.a.reverse.rotation.servo.and.a.standard.Y-harness Recommended JR ® , JR SPORT ™ and Spektrum ™ Systems •.XP9303. . •.XP7202 •.DX7. •.XP6102 •.XS600 Spektrum DX7 Recommended Setup–Gas/Glow •.Zenoah ®... -
Page 5: Warranty.period
Warranty Period Exclusive.Warranty-.Horizon.Hobby,.Inc.,.(Horizon).warranties.that.the.Products.purchased.(the."Product").will.be.free. from.defects.in.materials.and.workmanship.at.the.date.of.purchase.by.the.Purchaser. Limited Warranty (a).This.warranty.is.limited.to.the.original.Purchaser.("Purchaser").and.is.not.transferable..REPAIR.OR.REPLACEMENT. AS.PROVIDED.UNDER.THIS.WARRANTY.IS.THE.EXCLUSIVE.REMEDY.OF.THE.PURCHASER..This.warranty.covers.only. those.Products.purchased.from.an.authorized.Horizon.dealer..Third.party.transactions.are.not.covered.by.this.warranty.. Proof.of.purchase.is.required.for.warranty.claims..Further,.Horizon.reserves.the.right.to.change.or.modify.this.warranty. without.notice.and.disclaims.all.other.warranties,.express.or.implied.. (b).Limitations-.HORIZON.MAKES.NO.WARRANTY.OR.REPRESENTATION,.EXPRESS.OR.IMPLIED,.ABOUT.NON- INFRINGEMENT,.MERCHANTABILITY.OR.FITNESS.FOR.A.PARTICULAR.PURPOSE.OF.THE.PRODUCT..THE.. PURCHASER.ACKNOWLEDGES.THAT.THEY.ALONE.HAVE.DETERMINED.THAT.THE.PRODUCT.WILL.SUITABLY.MEET. THE.REQUIREMENTS.OF.THE.PURCHASER’S.INTENDED.USE.. (c).Purchaser.Remedy-.Horizon's.sole.obligation.hereunder.shall.be.that.Horizon.will,.at.its.option,.(i).repair.or.(ii). replace,.any.Product.determined.by.Horizon.to.be.defective..In.the.event.of.a.defect,.these.are.the.Purchaser's.exclusive. remedies..Horizon.reserves.the.right.to.inspect.any.and.all.equipment.involved.in.a.warranty.claim..Repair.or.replacement. decisions.are.at.the.sole.discretion.of.Horizon..This.warranty.does.not.cover.cosmetic.damage.or.damage.due.to.acts.of. God,.accident,.misuse,.abuse,.negligence,.commercial.use,.or.modification.of.or.to.any.part.of.the.Product..This.warranty. does.not.cover.damage.due.to.improper.installation,.operation,.maintenance,.or.attempted.repair.by.anyone.other.than. Horizon..Return.of.any.goods.by.Purchaser.must.be.approved.in.writing.by.Horizon.before.shipment. Damage Limits HORIZON.SHALL.NOT.BE.LIABLE.FOR.SPECIAL,.INDIRECT.OR.CONSEQUENTIAL.DAMAGES,.LOSS.OF.PROFITS.OR. PRODUCTION.OR.COMMERCIAL.LOSS.IN.ANY.WAY.CONNECTED.WITH.THE.PRODUCT,.WHETHER.SUCH.CLAIM. IS.BASED.IN.CONTRACT,.WARRANTY,.NEGLIGENCE,.OR.STRICT.LIABILITY..Further,.in.no.event.shall.the.liability.of. Horizon.exceed.the.individual.price.of.the.Product.on.which.liability.is.asserted..As.Horizon.has.no.control.over.use,. setup,.final.assembly,.modification.or.misuse,.no.liability.shall.be.assumed.nor.accepted.for.any.resulting.damage.or. injury..By.the.act.of.use,.setup.or.assembly,.the.user.accepts.all.resulting.liability. If.you.as.the.Purchaser.or.user.are.not.prepared.to.accept.the.liability.associated.with.the.use.of.this.Product,.you.are. advised.to.return.this.Product.immediately.in.new.and.unused.condition.to.the.place.of.purchase. Law:.These.Terms.are.governed.by.Illinois.law.(without.regard.to.conflict.of.law.principals). Safety Precautions This.is.a.sophisticated.hobby.Product.and.not.a.toy..It.must.be.operated.with.caution.and.common.sense.and.requires. some.basic.mechanical.ability..Failure.to.operate.this.Product.in.a.safe.and.responsible.manner.could.result.in.injury.. or.damage.to.the.Product.or.other.property..This.Product.is.not.intended.for.use.by.children.without.direct.adult. supervision..The.Product.manual.contains.instructions.for.safety,.operation.and.maintenance..It.is.essential.to.read.. and.follow.all.the.instructions.and.warnings.in.the.manual,.prior.to.assembly,.setup.or.use,.in.order.to.operate.correctly. and.avoid.damage.or.injury. -
Page 6: Questions,.Assistance,.And.repairs
Questions, Assistance, and Repairs Your.local.hobby.store.and/or.place.of.purchase.cannot.provide.warranty.support.or.repair..Once.assembly,.setup.or. use.of.the.Product.has.been.started,.you.must.contact.Horizon.directly..This.will.enable.Horizon.to.better.answer.your. questions.and.service.you.in.the.event.that.you.may.need.any.assistance..For.questions.or.assistance,.please.direct.your. email.to.productsupport@horizonhobby.com,.or.call.877.504.0233.toll.free.to.speak.to.a.service.technician. Inspection or Repairs If.this.Product.needs.to.be.inspected.or.repaired,.please.call.for.a.Return.Merchandise.Authorization.(RMA)..Pack.. the.Product.securely.using.a.shipping.carton..Please.note.that.original.boxes.may.be.included,.but.are.not.designed.. to.withstand.the.rigors.of.shipping.without.additional.protection..Ship.via.a.carrier.that.provides.tracking.and.insurance. for.lost.or.damaged.parcels,.as.Horizon is not responsible for merchandise until it arrives and is accepted at our facility..A.Service.Repair.Request.is.available.at.www.horizonhobby.com.on.the.“Support”.tab..If.you.do.not.. have.internet.access,.please.include.a.letter.with.your.complete.name,.street.address,.email.address.and.phone.number. where.you.can.be.reached.during.business.days,.your.RMA.number,.a.list.of.the.included.items,.method.of.payment.. for.any.non-warranty.expenses.and.a.brief.summary.of.the.problem..Your.original.sales.receipt.must.also.be.included.. for.warranty.consideration..Be.sure.your.name,.address,.and.RMA.number.are.clearly.written.on.the.outside.of.the. shipping.carton. Warranty Inspection and Repairs To receive warranty service, you must include your original sales receipt.verifying.the.proof-of-purchase. date..Provided.warranty.conditions.have.been.met,.your.Product.will.be.repaired.or.replaced.free.of.charge..Repair.or. -
Page 7: Safety,.Precautions,.And.warnings
Safety, Precautions, and Warnings This.model.is.controlled.by.a.radio.signal.that.is.subject.to.interference.from.many.sources.outside.your.control..This. interference.can.cause.momentary.loss.of.control.so.it.is.advisable.to.always.keep.a.safe.distance.in.all.directions.around. your.model,.as.this.margin.will.help.to.avoid.collisions.or.injury. •.Always.operate.your.model.in.an.open.area.away.from.cars,.traffic,.or.people. •.Avoid.operating.your.model.in.the.street.where.injury.or.damage.can.occur. •.Never.operate.the.model.into.the.street.or.populated.areas.for.any.reason. •.Never.operate.your.model.with.low.transmitter.batteries. •.. C arefully.follow.the.directions.and.warnings.for.this.and.any.optional.support.equipment.(chargers,.rechargeable. battery.packs,.etc.).that.you.use. •.Keep.all.chemicals,.small.parts.and.anything.electrical.out.of.the.reach.of.children. •.. M oisture.causes.damage.to.electronics..Avoid.water.exposure.to.all.equipment.not.specifically.designed.and.protected. for.this.purpose. Contents of Kit Replacement Parts Items Not Shown A.. HAN4551. 25%.J-3.Cub.Fuselage HAN1987. 25%.J-3.Cub.17oz.Tank B.. HAN4552. 25%.J-3.Cub.Left.Wing.w/Aileron HAN2033. Hangar.9.Engine.Mount C.. HAN4553. 25%.J-3.Cub.Right.Wing.w/Aileron HAN4557. -
Page 8: Hinging.the.control.surfaces
Hinging the Control Surfaces Required Parts .Step 3 •.Stabilizer.(2). •.Elevator.(2) Position.the.hinge.in.the.stabilizer..The.slot.in.the.hinge. •.Wing.(left.and.right). •.Rudder will.align.with.the.hole.drilled.in.the.stabilizer. •.Aileron.(left.and.right). •.Fuselage •.CA.hinge.(19) Required Tools and Adhesives •.Rotary.tool. •.T-pins •.Thin.CA •.Drill.bit:.1/16-inch.(1.5mm) .Step 1 Use.a.rotary.tool.and.1/16-inch.(1.5mm).drill.bit.to.drill.a. hole.in.the.center.of.each.of.the.three.hinge.slots.in.both. of.the.stabilizers. .Step 4 Slide.the.hinges.in.the.elevator..Position.the.stabilizer. - Page 9 Hinging the Control Surfaces .Step 5 .Step 7 Apply.thin.CA.to.the.top.and.bottom.of.each.of.the.three. Flex.the.elevator.up.and.down.a.number.of.times.to.break. hinges..Make.sure.to.saturate.each.hinge.so.there.is. in.the.hinges.. enough.CA.to.wick.into.the.hinge.and.bond.with.the. surrounding.wood. Note:.Do.not.use.CA.accelerator.on.the. hinges..The.CA.must.be.allowed.to.wick. fully.into.the.hinge.to.provide.the.best.bond. between.the.hinge.and.the.surrounding.wood. .Step 6 Allow.the.CA.plenty.of.time.to.cure..Once.cured,.pull.on. the.elevator.and.stabilizer.to.make.sure.the.hinges.are. fully.glued.into.position.
-
Page 10: Landing.gear.installation
Hinging the Control Surfaces .Step 8 .Step 9 Repeat.Steps.1.through.8,.and.using.five.hinges.per. Repeat.Steps.1.through.8,.and.using.three.hinges,.hinge. aileron,.hinge.the.ailerons.to.the.wing.panels. the.rudder.to.the.fin/fuselage. Landing Gear Installation Required Parts .Step 1 •.Fuselage. •.Wheel.assembly.(2) Locate.the.left.and.right.main.gear.struts.and.the.wing. •.Wheel.axle.(2). •.Cross.brace strut.tab..Attach.the.front.of.the.landing.gear.using.two.. 8-32.x.3/4-inch.socket.head.screws..The.rear.is.also. •.Wing.strut.tab.(2). •.4-40.locknut.(6) secured.to.the.fuselage.using.four.8-32.x.3/4-inch.socket. •.4-40.setscrew.(2) head.screws,.but.the.wing.strut.tabs.are.positioned. •.Assembled.shock.strut.(2) between.the.landing.gear.and.fuselage. •.Wheel.collar.w/setscrew.(2) •.Main.gear.strut.(right.and.left) •.4-40.x.1/2-inch.socket.head.screw.(2) •.4-40.x.5/8-inch.socket.head.screw.(4) •.8-32.x.3/4-inch.socket.head.screw.(8) •.#2.x.5/8-inch.sheet.metal.screw.(8) -
Page 11: Landing Gear Installation
Landing Gear Installation Note:.In.Step.2,.leave.the.screws. .Step 4 loose.in.the.gear.until.all.the.struts. Secure.the.wheel.collar.to.the.axle.by.tightening.. and.cross.brace.are.in.position. the.setscrew.onto.the.flat.of.the.axle.with.the.included.. hex.wrench. .Step 2 Use.two.4-40.x.5/8-inch.socket.head.screws.and.two.. 4-40.locknuts.to.attach.the.shock.struts.to.the.main. landing.gear.struts..The.cross.brace.also.uses.two.. 4-40.x.5/8-inch.socket.head.screws.and.4-40.locknuts.. to.attach.to.the.gear.near.the.fuselage..Last,.use.two.. 4-40.x.1/2-inch.socket.head.screws.and.two.4-40. locknuts.to.attach.the.shock.struts.to.the.cross.brace. Note:.Use.threadlock.on.the.setscrew.to. prevent.it.from.vibrating.loose.in.flight. .Step 5 Slide.the.rear.hub.into.the.wheel..The.rear.hub.is. identified.as.the.one.without.the.holes.going.through.the. hub.for.the.screws..Slide.the.longer.portion.of.the.axle. into.the.hub,.then.slide.the.front.hub.into.the.wheel. .Step 3 Locate.the.main.wheel.and.remove.the.front.and.rear.hubs. from.the.wheel. Note:.The.photo.does not.show. the.wheel.to.illustrate.how.the.wheel. - Page 12 Landing Gear Installation .Step 6 .Step 8 The.front.and.rear.hubs.will.key.together.when.. To.complete.the.wheel.installation,.snap.the.hub.cap.. installed.properly..Once.installed,.use.four.#2.x.5/8-inch. onto.the.wheel. sheet.metal.screws.to.secure.the.hubs.together..Check.. the.rotation.of.the.wheel.when.installing.the.screws... If.the.wheel.does.not.rotate,.loosen.the.screws.slightly. until.it.does. .Step 9 Repeat.Steps.3.through.8.to.install.the.remaining.wheel. .Step 7 Use.a.4-40.setscrew.to.secure.the.axle.to.the.main.landing. gear. Note:.Use.threadlock.on.the.setscrew.to. prevent.them.from.vibrating.loose.in.flight.
-
Page 13: Stabilizer.installation
Stabilizer Installation Required Parts .Step 2 •.Fuselage.assembly. •.Stabilizer/elevator.(2) Slide.the.stabilizer.into.the.slot.in.the.fuselage..Use.two.. •.6 -inch.(162mm).joiner. •.#6.washer.(4) 6-32.x.3/4-inch.socket.head.screws.and.two.#6.washers. to.secure.the.stabilizer. •.Tail.wheel.assembly. •.2-56.nut.(4) •.4-40.locknut.(3) •.Large.strut.support.bracket.(2) •.Small.strut.support.bracket.(2) •.#6.x.5/8-inch.sheet.metal.screws.(2) •.4-40.x.5/8-inch.socket.head.screw.(3) •.Support.rod.w/clevis,.10-inch.(254mm).(2) •.Support.rod.w/clevis,.9 -inch.(241mm).(2) •.6-32.x.3/4-inch.socket.head.screw.(4) Required Tools and Adhesives •.Threadlock •.Hex.wrench:.3/32-inch,.7/64-inch .Step 1 Note:.Leave.the.screws.loose.until. Slide.the.6 -inch.(162mm).joiner.into.the.forward.hole. instructed.to.tighten.them. in.the.stabilizer. ... -
Page 14: Stabilizer Installation
Stabilizer Installation .Step 4 .Step 6 Attach.the.tail.wheel.assembly.to.the.fuselage.using.two. Remove.the.clevis.from.each.of.the.support.rods..Use.a. #6.x.5/8-inch.sheet.metal.screws..The.forward.screw. hobby.knife.to.clean.the.paint.from.the.threads..Thread.a. goes.through.the.gear.and.into.the.fuselage,.while.the.rear. 2-56.nut.onto.the.threads,.then.replace.the.clevis. screw.goes.through.the.two.large.strut.support.brackets,. then.through.the.gear.and.into.the.fuselage. .Step 7 Use.a.4-40.x.5/8-inch.socket.head.screw.and.4-40. .Step 5 locknut.to.attach.the.support.rods.to.the.stabilizer..The. Attach.the.two.small.strut.support.brackets.to.the.fin.. longer.10-inch.(254mm).rod.attaches.to.the.top.of.the. using.a.4-40.x.5/8-inch.socket.head.screw.and.a.4-40. stabilizer,.while.the.shorter.9 -inch.(241mm).rod. locknut..There.will.be.a.bracket.on.the.right.and.left.of.. attaches.to.the.bottom.of.the.stabilizer. the.fin.when.complete. - Page 15 Stabilizer Installation .Step 8 Clip.the.clevis.to.the.strut.support.bracket..It.will.be. necessary.to.adjust.the.position.of.the.clevis.to.ensure. the.support.rods.are.not.causing.any.twists.between.the. fuselage,.stabilizer.and.fin..Tighten.the.nuts.against.the. clevises.once.all.adjustments.have.been.made. Note:.Use.threadlock.on.the.nuts.and.clevises. to.prevent.them.from.vibrating.loose.in.flight.
-
Page 16: Aileron.servo.installation
Aileron Servo Installation Required Parts .Step 2 •.4-40.metal.clevis.(4). •.4-40.nut.(4) Install.a.long.servo.arm.onto.the.aileron.servo..Remove. •.Wing.panel.(right.and.left) the.excess.arms.that.will.not.extend.out.from.the.wing.. Position.the.servo.so.the.arm.is.centered.in.the.opening. •.Servo.hatch.cover.(right.and.left) for.the.arm..Use.a.felt-tipped.pen.to.mark.the.location.of. •.2-56.x.1-inch.machine.screw.(6) the.servo.on.the.cover. •.4 -inch.(120mm).pushrod.(2) •.#2.x.1/2-inch.sheet.metal.screw.(8) •.Nylon.control.horn.w/backplate.(2) •.. 3 /4.x.11/16.x.7/16-inch.(19.x.17.x.11mm). servo.mounting.blocks.(4) •.Safety.fuel.tubing.(4) Required Tools and Adhesives •.Drill. •.30-minute.epoxy •.Servo.(2). •.Long.servo.arm •.String. •.Weight •.Phillips.screwdriver. •.Threadlock •.Felt-tipped.pen. -
Page 17: Aileron Servo Installation
Aileron Servo Installation .Step 4 .Step 7 Repeat.steps.1.through.3.to.prepare.the.remaining.cover. Use.string.or.a.commercially.available.connector.to.secure. while.the.epoxy.cures. a.18-inch.(457mm).servo.extension.to.the.servo.lead. .Step 5 Position.the.servo.between.the.block.and.with.a.small. space.between.the.servo.and.cover..Use.a.felt-tipped.pen. to.mark.the.locations.for.the.servo.mounting.screws.onto. the.blocks. .Step 8 Tie.a.weight.to.a.24-inch.(610mm).piece.of.string..Lower. the.weight.into.the.wing.and.pull.it.out.at.the.opening.for. the.servo.cover. .Step 6 Drill.the.marked.locations.using.a.drill.and.1/16-inch. (1.5mm).drill.bit..Use.the.hardware.provided.with.the. servo.to.secure.it.to.the.blocks. - Page 18 Aileron Servo Installation .Step 9 .Step 10 Tie.the.string.to.the.end.of.the.servo.extension.and.use.it. Position.the.servo.hatch.cover.and.secure.it.using.four. to.pull.the.extension.through.the.wing..Use.a.piece.of.tape. #2.x.1/2-inch.sheet.metal.screws..After.installing.the. to.keep.the.extension.from.falling.back.into.the.fuselage. screws,.remove.them.and.apply.a.few.drops.of.thin.CA.to. the.holes.to.harden.the.wood.to.prevent.the.screws.from. vibrating.loose. .Step 11 Assemble.the.aileron.pushrod.by.sliding.the.safety.. fuel.tubing.onto.two.metal.clevises..Thread.the.two. .metal.clevises.and.two.4-40.nuts.onto.a.4 -inch. (120mm).pushrod.
- Page 19 Aileron Servo Installation .Step 12 .Step 14 Attach.one.end.of.the.linkage.to.the.servo.horn..Remove. Secure.the.control.horn.to.the.aileron.using.three.2-56.x. the.backplate.from.a.nylon.control.horn.and.attach.the. 1-inch.machine.screws.and.the.control.horn.backplate. other.end.of.the.linkage.to.the.horn..Position.the.horn. on.the.aileron.with.the.holes.in.the.horn.aligned.with.the. hinge.line.of.the.aileron..Use.a.felt-tipped.pen.to.mark.the. location.for.the.three.control.horn.mounting.screws. Align holes with hinge line .Step 13 Use.a.5/64-inch.(2mm).drill.bit.to.drill.the.three.holes. Note:.Once.the.length.of.the.linkage. for.the.control.horn.screws..Apply.a.few.drops.of.thin.CA. has.been.adjusted,.use.threadlock.on. into.each.hole.to.harden.the.wood.to.aid.in.preventing.the. the.nuts.and.clevises.to.prevent.them. wood.from.being.crushed.when.the.horn.is.installed. from.vibrating.loose.in.flight. .Step 15 Repeat.Steps.5.through.14.to.install.the.remaining.aileron.
-
Page 20: Radio.installation
Radio Installation Required Parts .Step 2 •.Fuselage.assembly. •.4-40.nut.(4) Attach.the.ball.end.to.a.large.servo.horn..Use.side.cutters. •.Metal.clevis.(4). •.Rudder.cable to.remove.the.remaining.arm.from.the.horn. •.Rigging.couplers.(4). •.Cable.crimps.(4) •.2-56.nuts.(3). •.Rudder.spring.(2) •.Rudder.tiller.bracket. •.Radio.tray.cover •.Safety.fuel.tubing.(4) •.Rado.tray.cover •.2-56.x.5/8-inch.machine.screw.(9) •.Hook.and.loop.strap.(2) •.#2.x.5/8-inch.sheet.metal.screw.(4) •.33 -inch.(845mm).elevator.pushrod.(2) •.4-40.ball.end.w/hardware.(4) .Step 3 •.Control.horn.w/backplate.(4) Slide.the.pushrod.into.the.elevator.pushrod.tube.inside. the.fuselage..You.will.need.to.trim.the.covering.from.the. Required Tools and Adhesives pushrod.exit.using.a.hobby.knife. •.Drill. -
Page 21: Radio Installation
Radio Installation .Step 5 .Step 7 Remove.the.backplate.from.a.control.horn..Attach.the. Apply.a.few.drops.of.thin.CA.into.each.of.the.holes.to. clevis.to.the.horn.and.position.the.horn.on.the.elevator. harden.the.surrounding.wood. with.the.holes.in.the.horn.aligned.with.the.elevator.. hinge.line..The.horn.cenerline.will.be.1-inch.(25mm).. from.the.edge.of.the.stabilizer.to.avoid.interferrence. between.the.control.linkage.and.mounting.tabs..Use.a.. felt-tipped.pen.to.mark.the.positions.for.the.three.control. horn.mounting.screws. .Step 8 Attach.the.control.horn.to.the.elevator.using.three.. 2-56.x.5/8-inch.machine.screws.and.the.control.. horn.backplate. Align holes with hinge line .Step 6 Use.a.5/64-inch.(2mm).drill.to.drill.through.the.elevator. for.the.control.horn.mounting.screws. Note:.Once.the.length.of.the.linkage. has.been.adjusted;.use.threadlock.on. the.nuts.and.clevises.to.prevent.them. - Page 22 Radio Installation Note:.The.cable.will.be.installed.into.the. .Step 9 fuselage.from.the.tail.to.make.the.servo. Install.the.elevator.servo.into.the.fuselage..The.output.arm. end.of.the.cable.easier.to.install,.and. on.the.servo.faces.toward.the.rear.of.the.fuselage..Secure. to.keep.it.from.falling.into.the.fuselage. the.servo.horn.to.the.servo.using.the.hardware.provided. while.installing.the.ends.and.servo. with.the.servo. .Step 11 Locate.the.rudder.cable.and.insert.one.end.of.the.cable. into.the.fuselage..Make.sure.the.cable.does.not.get. tangled.around.any.of.the.formers.on.its.way.to.where.the. rudder.servo.will.be.installed. .Step 10 Repeat.Steps.1.through.9.to.install.the.remaining.. elevator.servo. Note:.Using.two.standard.rotation.servos. and.a.standard.Y-harness.for.the.elevator. servos.will.result.in.them.moving.in.opposite. directions.instead.of.the.same.direction.. There.are.three.options.available.that.will. result.in.the.elevators.operating.correctly. Option 1:.Use.two.standard.rotation.servos. if.your.radio.has.programmable.mixing.. You.will.need.to.use.two.separate.channels. and.use.your.radio.to.mix.them.together. electronically.for.this.option.to.work. Option 2:.Use.two.servos.and.a.JR ®...
- Page 23 Radio Installation .Step 12 .Step 15 Thread.a.rigging.coupler.into.one.of.the.4-40.ball.ends.. Install.the.rudder.servo.into.the.fuselage.and.attach.the. Slide.a.crimp.onto.the.cable,.then.pass.the.cable.through. servo.horn.to.the.servo.using.the.hardware.provided. the.rigging.coupler..The.cable.then.goes.back.through. with.the.servo..The.output.of.the.servo.faces.the.front.of. the.crimp..Use.a.crimping.tool.or.vice.grips.to.secure.the. the.fuselage..Note.that.the.cables.cross.once.inside.the. crimp.to.the.cable. fuselage:.The.cable.from.the.right.side.of.the.servo.exits. the.left.of.the.fuselage.and.vice.versa. .Step 13 .Step 16 Repeat.Steps.11.and.12.to.prepare.the.other.end.of.. the.cable. Place.light.tension.on.the.cable.and.align.it.so.it.is. centered.in.the.exit.opening..The.rudder.control.horn. .Step 14 centerline.should.be.7/8-inch.(22mm).from.the.bottom.of. Attach.the.ball.ends.to.the.servo.horn.using.the.hardware. the.rudder..Mark.the.rudder.where.the.cable.crosses.with.a. included.with.the.ball.ends. felt-tipped.pen.
- Page 24 Radio Installation .Step 17 .Step 18 The.rudder.uses.two.control.horns.mounted.on.either. Slide.a.piece.of.safety.tubing.on.a.metal.clevis..Thread.a. side..Position.one.horn.so.it.is.aligned.with.the.mark. 4-40.nut.and.metal.clevis.onto.a.rigging.coupler..Slide. made.in.the.previous.step..Mark.and.drill.the.holes.for.. a.crimp.onto.the.cable,.then.slide.the.cable.through.the. the.control.horn.screws,.then.mount.the.horns..The.three.. coupler..The.cable.will.then.go.back.through.the.crimp.. 2-56.x.5/8-inch.machine.screws.go.through.the.first. Prepare.both.ends.of.the.cable.and.attach.the.clevises.to. control.horn,.through.the.rudder,.through.the.second.horn. the.control.horns..Adjust.the.cable.so.there.is.light.tension. and.are.then.secured.using.three.2-56.nuts. on.the.cable,.then.secure.the.cable.using.the.crimp.and. crimping.pliers.or.vice.grips..Make.sure.to.install.that. safety.fuel.tubing.on.those.clevises. Note:.Once.the.length.of.the.cable. has.been.adjusted,.use.threadlock.on. the.nuts.and.clevises.to.prevent.them. from.vibrating.loose.in.flight. Align holes with hinge line .Step 19 Attach.the.rudder.tiller.bracket.to.the.rudder.using.two.. #2.x.5/8-inch.sheet.metal.screws..It.is.highly.suggested.to. remove.the.screws,.then.apply.a.few.drops.of.thin.CA.into. Note:.Use.threadlock.on.the.nuts.to.prevent.
- Page 25 Radio Installation .Step 20 .Step 23 Connect.the.rudder.tiller.bracket.to.the.tailwheel.steering. Install.a.choke.ring.(JRPA029).on.each.of.the.the.. arm.using.the.two.rudder.springs..You.will.need.to.bend. 18-inch.(457mm).aileron.extensions.that.are.plugged.. the.springs.to.attach.them.on.each.end.using.pliers. into.the.receiver..These.will.be.hidden.under.the.radio.. tray..This.is.strongly.recommended.due.to.all.the.metal. struts.on.the.Cub. .Step 21 Wrap.the.receiver.battery.and.receiver.in.1/4-inch.(6mm). foam..Attach.the.receiver.and.receiver.battery.to.the.radio. tray.using.hook.and.loop.straps. .Step 24 Plug.two.18-inch.(457mm).servo.extensions.into.. the.receiver.and.route.them.through.the.holes.in.the.. sides.of.the.fuselage.and.up.to.the.top.of.the.fuselage.. Slide.the.radio.tray.cover.into.position.so.it.locks.into. position.under.the.rear.cabin.wall..Use.two.#2.x.1/2-inch. sheet.metal.screws.to.secure.the.radio.tray.cover.inside. the.fuselage. .Step 22 Slide.the.radio.tray.into.the.fuselage.and.secure.its. position.using.two.#2.x.1/2-inch.sheet.metal.screws.
-
Page 26: Engine.installation.(Glow)
Engine Installation (Glow) Required Parts .Step 2 •.Fuselage.assembly. •.Firewall.template Remove.the.template.and.enlarge.the.holes.using.a.. •.Engine.mount.(2). •.#8.washer.(12) 3/16-inch.(4.5mm).drill.bit. •.8-32.locknut.(4). •.Throttle.pushrod •.Throttle.pushrod.tube. •.Metal.clevis.(2) •.Battery.cover. •.#4.washer.(4) •.8-32.blind.nut.(4) •.Cowl.screw.fuel.tubing.(4) •.4-40.x.1/2-inch.socket.head.screw.(4) •.#2.x.1/2-inch.sheet.metal.screw.(2) •.Threaded.rod,.1-inch.(25mm).(2) •.8-32.x.1 -inch.socket.head.screw.(4) •.8-32.x.1 -inch.socket.head.screw.(4) Required Tools and Adhesives •.Drill. •.Threadlock •.Clamp. •.Medium.CA .Step 3 •.Phillips.screwdriver Secure.the.engine.mounts.to.the.firewall.using.four.. - Page 27 Engine Installation (Glow) .Step 4 .Step 6 Position.the.engine.on.the.mount.so.the.drive.washer.is.6. Slide.the.throttle.pushrod.tube.into.the.hole.drilled.in. inches.(152mm).forward.of.the.firewall..Clamp.the.engine. the.firewall..The.tube.will.extend.forward.of.the.firewall. to.the.mount.and.transfer.the.locations.for.the.engine. slightly..Use.medium.CA.to.glue.the.tube.to.the.firewall. mounting.bolts.onto.the.engine.mounts. Note:.It.may.be.necessary.to.rotate. .Step 5 the.carburetor.to.align.with.the.throttle. pushrod.tube..Check.the.alignment.before. Drill.the.locations.for.the.engine.mounting.screws.using.a. attaching.the.engine.to.the.engine.mount. drill.and.5/32-inch.(4mm).drill.bit. .Step 7 Use.four.8-32.x.1 -inch.socket.head.screws,.four.. 8-32.locknuts.and.eight.#8.washers.to.secure.the.engine. to.the.mount.
- Page 28 Engine Installation (Glow) .Step 8 .Step 11 Thread.a.1-inch.(25mm).threaded.rod.into.each.end.of. Slide.the.fuel.tank.into.the.fuselage.with.the.stopper.facing. the.throttle.pushrod..Thread.a.metal.clevis.onto.one.of. toward.the.top.of.the.fuselage..Use.a.rubber.band.to.keep. the.threaded.rods.and.slide.the.pushrod.into.the.pushrod. the.fuel.tank.from.moving.rearward.in.the.fuselage. tube..Attach.the.clevis.to.the.arm.of.the.carburetor. .Step 12 .Step 9 Use.two.#2.x.1/2-inch.sheet.metal.screws.to.secure.the. Secure.the.throttle.servo.in.the.fuselage.using.the. battery.cover.in.position.behind.the.fuel.tank. hardware.provided.with.the.servo..Thread.a.clevis.onto.the. threaded.rod.and.attach.the.clevis.to.the.servo.arm. .Step 10 Check.the.operation.of.the.throttle.servo.to.make.sure. it.doesn't.bind.and.the.throttle.will.move.from.open.to. closed..Make.any.adjustment.at.this.time.to.the.throttle. linkage.as.necessary.
- Page 29 Engine Installation (Glow) .Step 13 .Step 14 Install.the.muffler.and.connect.the.fuel.lines.from.the.tank. Attach.the.cowling.using.four.4-40.x.1/2-inch.. to.the.engine. socket.head.screws,.four.pieces.of.cowl.screw.tubing.. and.four.#4.washers..Install.the.propeller.to.complete.. the.engine.installation. Note:.We.used.a.fuel.dot.and.T-fitting. on.our.model.so.the.cowl.won't.have. to.be.removed.to.fuel.the.engine. Note:.You.will.need.to.use.a.Muffler. Right.Angle.Adapter.(SAI120S140). when.installing.the.Saito.engines.
-
Page 30: Engine.installation.(Gas)
Engine Installation (Gas) Required Parts .Step 2 •.Fuselage.assembly. •.Firewall.template Remove.the.template.and.enlarge.the.holes.using.a.. •.Throttle.pushrod.tube. •.Metal.clevis.(2) 3/16-inch.(4.5mm).drill.bit. •.Battery.cover. •.#4.washer.(4) •.Cowl.screw.tubing.(4). •.Throttle.pushrod •.Fender.washer.(4) •.Ignition.switch.(JRPA004) •.10-32.x.5/8-inch.bolt.(4) •.4-40.x.1/2-inch.socket.head.screw.(4) •.#2.x.1/2-inch.sheet.metal.screw.(2) •.Threaded.rod,.1-inch.(25mm).(2) •.38mm.engine.stand-offs.(EVO3307) Required Tools and Adhesives •.Drill •.Clamp. •.Medium.CA •.Phillips.screwdriver. •.Threadlock .Step 3 •.Hex.wrench:.3/32-inch,.9/64-inch .Slide.the.throttle.pushrod.tube.into.the.hole.drilled.in. the.firewall..The.tube.will.extend.forward.of.the.firewall. •.. - Page 31 Engine Installation (Gas) .Step 7 Slide.gas.compatible.fuel.lines.back.onto.the.brass.. tubes..Use.fine.wire.to.secure.the.fuel.lines..The.wire.. is.placed.behind.the.solder.applied.in.the.previous.step.. to.keep.the.tubes.in.place. .Step 5 Secure.the.throttle.servo.in.the.fuselage.using.the. hardware.provided.with.the.servo..Thread.a.clevis.onto.the. threaded.rod.and.attach.the.clevis.to.the.servo.arm. .Step 8 Carefully.insert.the.stopper.assembly.into.the.fuel.tank.. Note.the.position.of.the.vent.tube;.it.must.be.up.at.the.top. portion.of.the.fuel.tank.to.function.properly..Tighten.the. screw.carefully—do.not.over-tighten. Note:.When.using.a.gas.engine.it.is. recomended.that.an.RF.choke.ring.(JRPA029). be.used..The.servo.lead.must.make.3. passes.around.or.through.the.ring. .Step 6 Remove.the.stopper.from.the.fuel.tank.using.a.Phillips. screwdriver..Remove.the.fuel.lines.from.the.stopper.and. set.them.aside..Prepare.the.tubing.by.placing.a.drop.of. solder.on.the.ends.of.the.brass.tubing.as.shown..This. will.keep.the.fuel.line.from.slipping.off.the.tube.when. combined.with.the.following.steps.
- Page 32 Engine Installation (Gas) .Step 9 .Step 11 Slide.the.fuel.tank.into.the.fuselage.with.the.stopper.facing. Trim.the.cowling.as.necessary.to.clear.the.muffler,. toward.the.top.of.the.fuselage..Use.a.rubber.band.to.keep. carburetor.and.head.of.the.engine..Secure.the.cowling. the.fuel.tank.from.moving.rearward.in.the.fuselage. using.four.4-40.x.1/2-inch.socket.head.screws,.four. pieces.of.cowl.screw.tubing.and.four.#4.washers. .Step 10 Use.two.#2.x.1/2-inch.sheet.metal.screws.to.secure.the. battery.cover.in.position.behind.the.fuel.tank. The.ignition.battery.should.be.placed. next.to.the.fuel.tank.behind.the.firewall.. This.is.to.keep.as.much.separtation. between.the.ignition.and.the.RX. The.battery.pack.should.be.installed. before.installing.the.fuel.tank..The.model. was.flown.with.the.battery.pack.placed. here.when.using.the.Zenoh.20ei.
-
Page 33: Interior.detail.installation
Interior Detail Installation Required Parts .Step 3 •.Fuselage.assembly. •.Front.windscreen Plug.the.switch.harness.into.the.battery.and.receiver..Slide. •.Side.window.(left.and.right). •.Upper.window the.rear.seat.into.position,.guiding.the.wires.from.the. switch.harness.behind.the.seat. •.Front.seat.bottom. •.Front.seat.back •.Rear.seat.bottom. •.Rear.seat.back •.Floor. •.Instrument.panel •.Windscreen.supports. •.Hook.and.loop •.Pilot •.#2.x.1/2-inch.sheet.metal.screw.(4) Required Tools and Adhesives •.Switch.harness. •.Medium.CA •.Phillips.screwdriver. •.Hobby.knife •.Hobby.scissors. •.30-minute.epoxy •.Canopy.glue .Step 1 Install.the.switch.harness.into.the.opening.in.the.rear.. ... - Page 34 Interior Detail Installation .Step 5 .Step 7 Use.four.#2.x.1/2-inch.sheet.metal.screws.to.secure.the. Use.30-minute.epoxy.to.glue.the.windscreen.supports.into. floor.into.the.fuselage..The.floor.will.keep.the.seats.from. position.as.shown. sliding.in.the.fuselage. .Step 8 .Step 6 Use.canopy.glue.to.glue.the.front.windscreen.onto.the. Use.medium.CA.to.glue.the.instrument.panel.into.. fuselage.as.shown. the.fuselage...
- Page 35 Interior Detail Installation .Step 9 .Step 12 Use.a.hobby.knife.and.hobby.scissors.to.trim.the.side. Complete.the.window.installation.by.trimming.and. windows..Use.canopy.glue.to.attach.the.side.windows.. installing.the.upper.window.in.the.fuselage. into.position. .Step 13 .Step 10 Use.hook.and.loop.to.secure.the.pilot.in.the.fuselage. Trim.the.rear.window.and.use.canopy.glue.to.secure.the. rear.window.in.position. .Step 11 Repeat.Steps.9.and.10.for.the.opposite.side.windows.
-
Page 36: Wing.installation
Wing Installation Required Parts .Step 2 •.Wing.(left.and.right). •.Short.strut.pin.(4) Thread.two.of.the.mid-span.studs.into.the.wing..The. •.Mid-span.stud.(4). •.4mm.nut.(4) threads.of.the.studs.should.be.flush.to.the.top.of.the.wing •.Wing.strut.end.(4). •.Long.strut.pin.(4) •.Retainer.clip.(8). •.Aluminum.wing.tube •.Wing.strut.wing.bracket. •.4-40.locknut.(8) •.1/4-20.nylon.wing.bolt.(2) •.Mid-span.cross.brace.(2) •.4-40.x.3/4-inch.socket.head.screw.(8) •.4-40.x.3/8-inch.socket.head.screw.(4) •.4-40.x.1/2-inch.socket.head.screw.(4) •.Front.wing.strut.(left.and.right) •.Rear.wing.strut.(left.and.right) Required Tools and Adhesives •.Hex.wrench:.3/32-inch. •.Threadlock •.Nut.driver:.1/4-inch .Step 3 Attach.the.front.and.rear.wing.strut.to.the.brackets.. ... -
Page 37: Wing Installation
Wing Installation .Step 4 .Step 6 Thread.the.wing.strut.ends.and.4mm.nuts.on.the.ends.. Slide.the.aluminum.wing.tube.into.the.fuselage..The.wing. of.the.struts. is.then.slid.onto.the.wing.tube..Plug.the.servo.lead.in.the. wing.into.the.extension.inside.the.fuselage. .Step 5 Install.the.mid-span.supports.and.cross.brace.as.shown.. The.brace.and.supports.attach.using.two.4-40.x.3/8-inch. .Step 7 socket.head.screws.and.4-40.locknuts..The.supports. The.wing.is.held.in.place.using.a.1/4-20.nylon.wing.bolt. attach.to.the.mid-span.studs.using.two.long.strut.pins.and. two.retainer.clips. - Page 38 Wing Installation .Step 8 .Step 9 Confirm.that.there.is.a.piece.of.tubing.on.the.pin.before. Secure.the.strut.ends.to.the.wing.using.two.retainer.. inserting.it.into.the.brace..If.not,.install.a.piece.of.tubing. pin.clips. to.prevent.vibration.and.radio.interferrence..Slide.the.. short.pins.from.the.strut.ends.into.the.brace.at.the. fuselage..It.will.be.necessary.to.adjust.the.strut.ends.. to.align.without.binding.or.twisting.the.wing..Once. adjusted,.tighten.the.4mm.nuts.against.the.ends.to.. prevent.them.from.changing.position. Note:.Use.threadlock.on.the.strut. ends.and.4mm.nuts.to.prevent.them. from.vibrating.loose.in.flight.
-
Page 39: Control.throws
Control Throws Note:.Aileron.throw.is.measured.at.the.trailing. The.amount.of.control.throw.should.be.adjusted.as.closely. as.possible.using.mechanical.means,.rather.than.making. edge.of.the.aileron.nearest.the.fuselage. large.changes.electronically.at.the.radio..By.moving. the.position.of.the.clevis.at.the.control.horn.toward.the. Elevator: outermost.hole,.you.will.decrease.the.amount.of.control. High.Rate:. 2-inch.(51mm).up/down throw.of.the.control.surface:.moving.it.toward.the.control. Low.Rate:. 1 -inch.(32mm).up/down surface.will.increase.the.amount.of.throw;.moving.the. pushrod.wire.at.the.servo.arm.will.have.the.opposite. Note:.Elevator.throw.is.measured. effect..Moving.it.closer.to.center.will.decrease.throw,. at.the.trailing.edge.of.the.elevator. and.away.from.center.will.increase.throw..Work.with.a. next.to.the.fuselage. combination.of.the.two.to.achieve.the.closest.or.exact. control.throws.listed. Rudder: High.Rate:. 2 -inch.(57mm).left/right Aileron: Low.Rate:. 1 -inch.(38mm).left/right High.Rate:. 1 -inch.(28mm).up -inch.(28mm).down Note:.Rudder.throw.is.measured. Low.Rate:. 3/4-inch.(19mm).up at.the.bottom.of.the.rudder. -
Page 40: Pre-Flight
Pre-Flight Charge.both.the.transmitter.and.receiver.pack.for.your.airplane..Use.the.recommended.charger.supplied.with.your. particular.radio.system,.following.the.instructions.provided.with.the.radio..In.most.cases,.the.radio.should.be.charged.the. night.before.going.out.flying. Check.the.radio.installation.and.make.sure.all.the.control.surfaces.are.moving.correctly.(i.e..the.correct.direction.and.with. the.recommended.throws)..Test.run.the.engine.and.make.sure.it.transitions.smoothly.from.idle.to.full.throttle.and.back.. Also.ensure.the.engine.is.tuned.according.to.the.manufacturer’s.instructions,.and.it.will.run.consistently.and.constantly.at. full.throttle.when.adjusted. Check.all.the.control.horns,.servo.horns.and.clevises.to.make.sure.they.are.secure.and.in.good.condition..Replace.any. items.that.would.be.considered.questionable..Failure.of.any.of.these.components.in.flight.would.mean.the.loss.of.your. aircraft. Adjusting the Engine .Step 1 Completely.read.the.instructions.included.with.your.engine.and.follow.the.recommended.break-in.procedure. .Step 2 At.the.field,.adjust.the.engine.to.a.slightly.rich.setting.at.full.throttle.and.adjust.the.idle.and.low-speed.needle.so.that.a. consistent.idle.is.achieved. .Step 3 Before.you.fly,.be.sure.that.your.engine.idles.reliably,.transitions.and.runs.at.all.throttle.settings..Only.when.this.is. achieved.should.any.plane.be.considered.ready.for.flight. Range Test Your Radio Before.each.flying.session,.be.sure.to.range.check.your.radio..See.your.radio.manual.for.the.recommended.range.and. instructions.for.your.radio.system..Each.radio.manufacturer.specifies.different.procedures.for.their.radio.systems..If.using. a.gasoline.engine,.check.the.range.first.with.the.engine.not.running.and.note.the.distance..Next,.start.the.engine..With.the. model.securely.anchored,.check.the.range.again..The.range.test.should.not.be.significantly.affected..If.it.is,.don’t.attempt. to.fly!.Have.your.radio.equipment.checked.out.by.the.manufacturer. Instructions for Disposal of WEEE by Users in the European Union This.product.must.not.be.disposed.of.with.other.waste..Instead,.it.is.the.user’s.responsibility.to.dispose.of.their.waste. -
Page 41: Building.and.flying.notes
Building and Flying Notes... -
Page 42: 2007.Official.ama.national.model.aircraft.safety.code
2007 Official AMA National Model Aircraft Safety Code GENERAL 8..I.will.not.operate.model.aircraft.carrying.pyrotechnic. devices.which.explode.burn,.or.propel.a.projectile. 1..A.model.aircraft.shall.be.defined.as.a.non-human- of.any.kind..Exceptions.include.Free.Flight.fuses.or. carrying.device.capable.of.sustained.flight.in.the. devices.that.burn.producing.smoke.and.are.securely. atmosphere..It.shall.not.exceed.limitations.established. attached.to.the.model.aircraft.during.flight..Rocket. in.this.code.and.is.intended.to.be.used.exclusively.for. motors.up.to.a.G-series.size.may.be.used,.provided. recreational.or.competition.activity. they.remain.firmly.attached.to.the.model.aircraft.during. 2..The.maximum.takeoff.weight.of.a.model.aircraft,. flight..Model.rockets.may.be.flown.in.accordance.with. including.fuel,.is.55.pounds,.except.for.those.flown. the.National.Model.Rocketry.Safety.Code;.however,. under.the.AMA.Experimental.Aircraft.Rules. they.may.not.be.launched.from.model.aircraft..Officially. 3..I.will.abide.by.this.Safety.Code.and.all.rules. designated.AMAAir.Show.Teams.(AST).are.authorized. established.for.the.flying.site.I.use..I.will.not.willfully. to.use.devices.and.practices.as.defined.within.the.Air. fly.my.model.aircraft.in.a.reckless.and/or.dangerous. Show.Advisory.Committee.Document. manner. 9..I.will.not.operate.my.model.aircraft.while.under.the. 4..I.will.not.fly.my.model.aircraft.in.sanctioned.events,. influence.of.alcohol.or.within.eight.(8).hours.of.having. air.shows,.or.model.demonstrations.until.it.has.been. consumed.alcohol. proven.airworthy. 10..I.will.not.operate.my.model.aircraft.while.using.any. - Page 43 2007 Official AMA National Model Aircraft Safety Code Radio Control 7..With.the.exception.of.events.flown.under.official.AMA. rules,.no.powered.model.may.be.flown.outdoors.closer. 1..All.model.flying.shall.be.conducted.in.a.manner.to. than.25.feet.to.any.individual,.except.for.the.pilot.and. avoid.over.flight.of.unprotected.people. located.at.the.flight.line. 2..I.will.have.completed.a.successful.radio.equipment. 8..Under.no.circumstances.may.a.pilot.or.other.person. ground-range.check.before.the.first.flight.of.a.new.or. touch.a.model.aircraft.in.flight.while.it.is.still.under. repaired.model.aircraft. power,.except.to.divert.it.from.striking.an.individual. 3..I.will.not.fly.my.model.aircraft.in.the.presence.of. 9..Radio-controlled.night.flying.is.limited.to.low- spectators.until.I.become.a.proficient.flier,.unless.I.am. performance.model.aircraft.(less.than.100.mph).. assisted.by.an.experienced.pilot. The.model.aircraft.must.be.equipped.with.a.lighting. 4..At.all.flying.sites.a.line.must.be.established,.in.front.of. system.which.clearly.defines.the.aircraft's.attitude.and. which.all.flying.takes.place..Only.personnel.associated. direction.at.all.times. with.flying.the.model.aircraft.are.allowed.at.or.in.front. 10..The.operator.of.a.radio-controlled.model.aircraft.shall. of.the.line..In.the.case.of.airshows.demonstrations. control.it.during.the.entire.flight,.maintaining.visual. straight.line.must.be.established..An.area.away.from. contact.without.enhancement.other.than.by.corrective. the.line.must.be.maintained.for.spectators..Intentional. lenses.that.are.prescribed.for.the.pilot..No.model. flying.behind.the.line.is.prohibited.
- Page 44 ©.2007.Horizon.Hobby,.Inc.. 4105.Fieldstone.Road. Champaign,.Illinois.61822. (877).504-0233. horizonhobby.com 9942...
Need help?
Do you have a question about the Piper J-3 Cub and is the answer not in the manual?
Questions and answers