Ecobee Smart Si Installation Manual
Hide thumbs
Also See for Smart Si:
- User manual (44 pages) ,
- Installation manual (40 pages) ,
- User manual
Table of Contents
Advertisement
Quick Links
Download this manual
See also:
User Manual
Advertisement
Table of Contents

Subscribe to Our Youtube Channel
Related Manuals for Ecobee Smart Si


Summary of Contents for Ecobee Smart Si
- Page 1 ©2014 ecobee 477 Richmond St West | 2nd Floor, Toronto | Ontario | M5V 3E7 | Canada Toll free 1.877.932.6233 www.ecobee.com EB-SmartSiIM-01-rev3...
- Page 2 Smart Si Thermostat Installation Manual...
-
Page 3: Table Of Contents
FCC Compliance Statement Specifications Wiring Requirements INSTALLING THE SMART Si THERMOSTAT Step 1. Power Off HVAC Equipment Step 2. Remove Existing Thermostat Step 3. Install the Smart Si Thermostat Step 4. Connect the Wiring Step 5. Power On HVAC Equipment... - Page 4 CONFIGURING THE SMART Si THERMOSTAT Equipment Thresholds Test Equipment Reset HVAC Equipment Settings Performing a Hardware Reset Rebooting the Smart Si Thermostat Configuring Reminders and Alerts Alerts List of Alerts 3-YEAR LIMITED WARRANTY...
-
Page 6: Getting Started
GETTING STARTED Welcome The ecobee Smart Si thermostat has been designed in partnership with HVAC contractors to ensure the installation process is simple and efficient. This step-by-step Installation Manual will walk you through all aspects of the installation. To ensure an on-going service relationship with your customers, please register all of your ecobee thermostats in your Contractor Portal. -
Page 7: Before You Begin
Please read it carefully before beginning the installation. For information on how to operate the ecobee Smart Si thermostat, please see the Smart Si Thermostat User Manual. The Smart Si thermostat is designed to be mounted on the homeowner’s wall in a convenient location. -
Page 8: Hvac System Compatibility Information
HVAC System Compatibility Information The Smart Si thermostat is designed to operate with low-voltage heating and cooling systems. It is not designed for use with line-voltage or millivolt heating and cooling systems. The Smart Si thermostat supports: Up to 2 heat and 2 cool stages on a conventional system. -
Page 9: Approvals
Approvals This product was designed and built in accordance to RoHS directive 2002/95/EC and contains no hazardous substances as defined by this directive. FCC Compliance Statement This equipment has been tested and found to comply with the limits for Class B digital devices, pursuant to Part 15 of the FCC Rules. -
Page 10: Specifications
FCC ID: WR9EBSTAT IC: 7981A-EBSTAT Warning: Changes or modifications not expressly approved by ecobee Inc. could void the user’s authority to operate the equipment. Specifications Temperature ranges Heat: 45 to 79 °F (7 to 26 °C) by default Adjustable from 45 to 120° F (7 to 49° C) Cool: 65 to 92 °F (7 to 33 °C) by default... -
Page 11: Wiring Requirements
Wiring Requirements The following table shows the maximum wire lengths allowed: Thermostat to HVAC Equipment 18 AWG 20 AWG 22 AWG 128 ft/380 m 80 ft/240 m 50 ft/150 m Terminal Description and Electrical Ratings Terminal Description Voltage Current (Max) Unused 1st stage compressor 24V AC... -
Page 12: Installing The Smart Si Thermostat
Step 2. Remove Existing Thermostat Disconnect the wires to the existing thermostat and remove it from the wall (if you are installing the Smart Si thermostat in the same location). Step 3. Install the Smart Si Thermostat The ideal location for the thermostat is approximately 5 ft (1.5 m) above floor level in the main living area. - Page 13 In the kitchen or other areas of potentially high heat and/or humidity In an area that could restrict air flow To install the thermostat: 1. Gently separate the backplate from the thermostat. 2. Place the thermostat backplate on the wall. Make sure that any existing wires can be inserted through the opening on the thermostat.
-
Page 14: Step 4. Connect The Wiring
To connect the thermostat to the equipment: 1. Connect the wires as shown in the wiring diagrams. 2. Attach the Smart Si thermostat to the backplate. Ensure that the pins on the thermostat align with the terminal block on the backplate. - Page 15 1-stage Furnace 1-stage AC Smart Si Thermostat Single stage heat/cool...
- Page 16 Repurpose G wire as C wire Smart Si Thermostat Use jumper wire included in box to connect Y and G on the furnance Repurpose the original G wire as C wire. Note that the furnance controls the fan in this configuration.
- Page 17 1-stage Furnace 2-stage AC Smart Si Thermostat Single stage heat, dual stage cool...
- Page 18 2-stage Furnace 1-stage AC Smart Si Thermostat Dual stage heat, single stage cool...
- Page 19 2-stage Furnace 2-stage AC Smart Si Thermostat Dual stage heat, dual stage cool...
- Page 20 Air Handler 1-stage Heat Pump Y/Y2 Smart Si Thermostat Single stage heat pump with auxiliary heat...
- Page 21 2-stage Heat Pump Air Handler Y/Y2 Smart Si Thermostat Dual stage heat pump with auxiliary heat...
- Page 22 Air Handler 1-stage AC Boiler Smart Si Thermostat * Remove RH/RC factory jumper C terminal to be connected to heating transformer common Boiler with air handler and single-stage cool...
- Page 23 Air Handler 1-stage AC 2-stage Boiler Smart Si Thermostat * Remove RH/RC factory jumper C terminal to be connected to heating transformer common Dual stage boiler with air handler and single stage cool...
- Page 24 2-stage AC Air Handler Boiler Smart Si Thermostat * Remove RH/RC factory jumper C terminal to be connected to heating transformer common Single stage boiler with air handler, dual stage cool...
- Page 25 2-stage AC Air Handler 2-stage Boiler Smart Si Thermostat * Remove RH/RC factory jumper C terminal to be connected to heating transformer common Dual stage boiler with air handler, dual stage cool...
-
Page 26: Step 5. Power On Hvac Equipment
Step 5. Power On HVAC Equipment After you’ve completed the wiring, you can apply power to the heating and air conditioning equipment. The Smart Si thermostat receives power from the equipment and will automatically power on. -
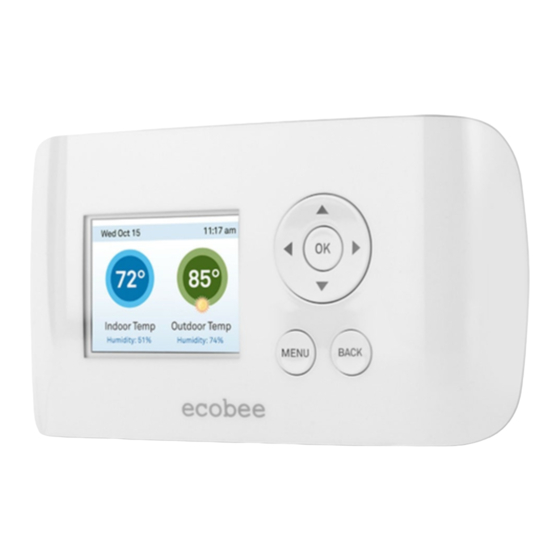
Page 27: Using The Navigation Buttons
Using the Navigation Buttons The navigation buttons located on the right of the Smart Si thermostat let you select options and control the Smart Si thermostat. ▲ On the Home screen, press ▲ to (up) increase the temperature set point by 1°F... - Page 28 MENU MENU Pressing displays a list of all available options. If a menu is currently MENU displayed, pressing MENU will cancel any unsaved changes and return to the Home screen. BACK On a menu screen, press BACK to go BACK back to the previous screen.
-
Page 29: Configuring The Smart Si Thermostat
CONFIGURING THE SMART Si THERMOSTAT The first step after installing the Smart Si thermostat is to configure the settings for the various devices (such as a furnace or air conditioner) that are being connected. Equipment To configure the The Equipment settings let you configure the equipment settings: devices connected to the thermostat. - Page 30 from running when the outdoor temperature is too low, thus resulting in damage to the compressor. You can also set this value to determine when you want the auxiliary heat (if installed) to engage to help meet the set temperature. The temperature range is adjustable from 0 to 65 °F (–17.8 to 18.3 °C) or can be completely disabled.
-
Page 31: Thresholds
Heat Fan Control Configures the furnace fan to be controlled by the Smart Si thermostat or the HVAC system during heat cycles. Normally the HVAC system controls the fan during heat cycles. - Page 32 temperature when the system mode is in auto change-over. The delta is adjustable from 2 to 10 °F (1.1 to 5.5 °C). The default value is 5 °F (2.8 °C). Compressor Settings Min Cycle Off Time Configures the compressor off time between cycles. This ensures the compressor does not short cycle (which could affect the operating life of the system).
-
Page 33: Advanced Settings
and set temperature before the system calls for heat. A smaller difference means shorter cycle times, whereas a larger difference results in longer cycle times. The temperature range is adjustable from 0 to 3 °F (-17.5 to 26.5 °C) in 0.5°F (0.3°C) increments. - Page 34 Reverse Staging If enabled, the thermostat will cycle down from the higher stages so that as it approaches set point it will only be running in stage 1. The thermostat calculates which stage to start the HVAV equipment in depending on the indoor and set point temperature delta.
-
Page 35: Test Equipment
Heat Min On Time Sets the minimum equipment run time in heat mode: 1 to 20 min (default is 5 min). Temp Correction Lets you program an offset between the real temperature at thermostat and the displayed temperature. If you find that the temperature where the thermostat is located does not represent the room temperature, change the offset to compensate for the difference. -
Page 36: Reset Hvac Equipment Settings
Reset HVAC Equipment Settings You can quickly restore all HVAC equipment To reset the Smart Si settings on the Smart Si thermostat back to their thermostat: factory defaults. Any user setting (not related to From the Home screen, the equipment installed) will remain unchanged. -
Page 37: Configuring Reminders And Alerts
UV Lamp If the HVAC system uses a UV lamp for air purification, the Smart Si thermostat can generate an alert indicating that it is time to clean or replace the lamp. You can set the Last... -
Page 38: Alerts
Off, and set the Frequency of the maintenance interval. Alerts The Smart Si thermostat can generate alerts if the temperature in the home goes over or under a pre-programmed level. This protects the home from damage due to freezing and/or excessive heat. -
Page 39: List Of Alerts
HVAC system due for regular Reminder maintenance. Auxiliary Heat Run Auxiliary heat source is running Time too often. Auxiliary Outdoor Your Smart Si thermostat Temperature auxiliary heat has been called to run when the outdoor temperature exceeds the programmed set point. -
Page 40: 3-Year Limited Warranty
3-YEAR LIMITED WARRANTY ecobee warrants that for a period of three (3) years from the date of purchase by the consumer (“Customer”), the ecobee Smart Si thermostat (the “Product”) shall be free of defects in materials and workmanship under normal use and service. During the warranty period, ecobee shall, at its option, repair or replace any defective Products, at no charge. - Page 41 Product within the terms stated above. ECOBEE SHALL NOT BE LIABLE FOR ANY LOSS OR DAMAGE OF ANY KIND, INCLUDING ANY SPECIAL, INCIDENTAL OR CONSEQUENTIAL DAMAGES RESULTING, DIRECTLY OR INDIRECTLY, FROM ANY BREACH OF ANY WARRANTY, EXPRESS OR IMPLIED, OR ANY OTHER FAILURE OF THIS PRODUCT.
Need help?
Do you have a question about the Smart Si and is the answer not in the manual?
Questions and answers