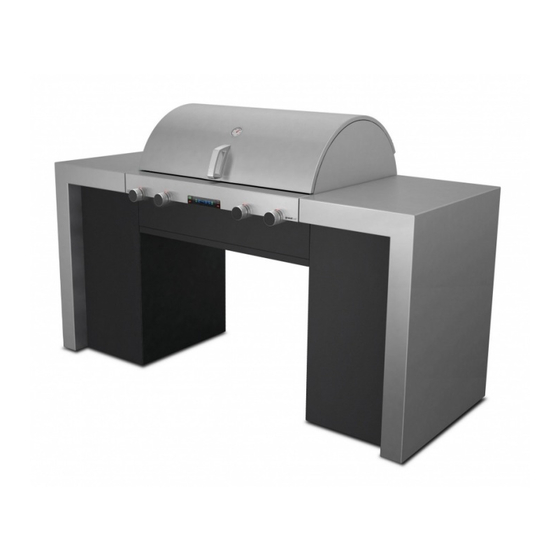
Grandhall X series Assembly Instructions Manual
Hide thumbs
Also See for X series:
- Operating instructions manual (52 pages) ,
- Assembly instructions manual (12 pages)
Table of Contents
Advertisement
P80184008A 171109
17/11/09
Assembly instructions
IE
GB
Instructions d'assemblage
CH
FR
Montageanweisungen
AT
CH
DE
Istruzioni per il montaggio
CH
IT
Montage-instructies
LU
BE
NL
Montering
SE
6:21 PM
Page 1
Kokoamisohjeet
FI
Instrucciones de armado
ES
Instruções para Montagem
PT
Monteringsvejledning
DK
Montering
NO
Instrukcje
PL
X-series
0087
Advertisement
Table of Contents

Subscribe to Our Youtube Channel
Summary of Contents for Grandhall X series
- Page 1 P80184008A 171109 17/11/09 6:21 PM Page 1 X-series Assembly instructions Kokoamisohjeet 0087 Instructions d’assemblage Instrucciones de armado Montageanweisungen Instruções para Montagem Istruzioni per il montaggio Monteringsvejledning Montage-instructies Montering Montering Instrukcje...
- Page 2 P80184008A 171109 17/11/09 6:21 PM Page 2 ASSEMBLY CAUTION: Two people are needed to assemble this appliance. Lay a piece of cardboard on the ground (refer to Pre-Assembly instructions). With the help of an assistant remove the barbecue head from the carton and put it on the cardboard. Retain the box for the following step.
- Page 3 P80184008A 171109 17/11/09 6:21 PM Page 3 Install island side panel bracket assembly to island side panel set. Flange nut 1/4" Hex-head screw 1/4" x 2 " Qty. 8 Qty. 8 Part # S313G04092 Part # S165G04092 Pan-head screw 3/16" x 3/8" Qty.
-
Page 4: Cooking Component Installation
P80184008A 171109 17/11/09 6:21 PM Page 4 Install back up batteries in the battery box and connect wires. AA x 8 Install gas cylinder. LEAK CHECK GAS CONNECTIONS Install grease tray heat shield and grease tray. Ref # 22 Place the four pins on the grease tray heat shield into the four holes in the grill bowl as shown. -
Page 5: Using The Rotisserie
P80184008A 171109 17/11/09 6:21 PM Page 5 USING THE ROTISSERIE NOTE: Remove the cooking grids and secondary cooking rack. Holding forks Ref # 53 Remove all components from the carton. NOTE: To avoid damage to the holding forks (Ref # 53) do not tighten the nuts unless assembled to the spit rod (Ref # 54). -
Page 6: Warnings Information
P80184008A 171109 17/11/09 6:21 PM Page 6 INJECTOR WARNINGS INFORMATION • MINIMUM CLEARANCES FROM COMBUSTIBLE MATERIALS MUST BE: REAR – 450 mm SIDES – 250 mm TOP – 1000 mm 1.04 0.90 1.04 mm – I 3+ (28-30/37) – I 3B/P (30) 0.90 mm –... - Page 7 P80184008A 171109 17/11/09 6:21 PM Page 7 COOKING WITH HOOD OPEN 250˚ COOKING WITH HOOD DOWN DIMENSIONS 1950 mm 840 mm 870 mm...
-
Page 8: Parts List
P80184008A 171109 17/11/09 6:21 PM Page 8 PARTS LIST Description Part # Description Part # Hood assembly – outer P0014513A5 Valve without jet – right, 30 mbar P03246010A Protective pads P05518018I 43a-2 Valve without jet – right, 50 mbar P03246011A Temperature gauge P00601357B Manifold... -
Page 9: Parts Diagram
P80184008A 171109 17/11/09 6:21 PM Page 9 PARTS DIAGRAM This diagram is provided to assist you identify parts if replacement is necessary. Contact your place of purchase or the manufacturer to enquire about parts, availability and or service. Items included in your barbecue may differ from the Parts List, depending on region or specific dealer specifications. - Page 10 P80184008A 171109 17/11/09 6:21 PM Page 10 NOTES...
- Page 11 P80184008A 171109 17/11/09 6:21 PM Page 11 NOTES...
- Page 12 P80184008A 171109 17/11/09 6:21 PM Page 12 SERVICE service@grandhall.eu Grand Hall Europe PO Box 431 7570 AK Oldenzaal The Netherlands T: +31 (0) 541 531669 F: +31 (0) 541 534563 www.grandhall.eu NOTE: This information is a guide only. Items included in your BBQ All specifications are subject to change specification may differ depending on region or specific dealer specification.


Need help?
Do you have a question about the X series and is the answer not in the manual?
Questions and answers