Table of Contents
Advertisement
CONTENTS
CONTENTS . . . . . . . . . . . . . . . . . . . . . . . . . . . . . . . . . . . . . . . . . . . . . . . . . . . . . . . . . . . . . . . . . . . . . . . . . . . . . .1
FRONT PANEL . . . . . . . . . . . . . . . . . . . . . . . . . . . . . . . . . . . . . . . . . . . . . . . . . . . . . . . . . . . . . . . . . . . . . . . . . . . .2
BACK PANEL . . . . . . . . . . . . . . . . . . . . . . . . . . . . . . . . . . . . . . . . . . . . . . . . . . . . . . . . . . . . . . . . . . . . . . . . . . . . . .3
SETTING UP - BASIC SETUP . . . . . . . . . . . . . . . . . . . . . . . . . . . . . . . . . . . . . . . . . . . . . . . . . . . . . . . . . . . . . . . . .4
ADVANCED SETUP . . . . . . . . . . . . . . . . . . . . . . . . . . . . . . . . . . . . . . . . . . . . . . . . . . . . . . . . . . . . . . . . . . . . . . . . .5
ABOUT ANALOGUE SYNTHESIS . . . . . . . . . . . . . . . . . . . . . . . . . . . . . . . . . . . . . . . . . . . . . . . . . . . . . . . . . . . . . .6
ABOUT FM SYNTHESIS . . . . . . . . . . . . . . . . . . . . . . . . . . . . . . . . . . . . . . . . . . . . . . . . . . . . . . . . . . . . . . . . . . . . .15
ABOUT EFFECTS . . . . . . . . . . . . . . . . . . . . . . . . . . . . . . . . . . . . . . . . . . . . . . . . . . . . . . . . . . . . . . . . . . . . . . . . . .18
NOVATIONISH - NOVATION JARGON . . . . . . . . . . . . . . . . . . . . . . . . . . . . . . . . . . . . . . . . . . . . . . . . . . . . . . . . . . .22
ABOUT PROGRAMS . . . . . . . . . . . . . . . . . . . . . . . . . . . . . . . . . . . . . . . . . . . . . . . . . . . . . . . . . . . . . . . . . . . . . . . .23
ABOUT DRUM MAPS . . . . . . . . . . . . . . . . . . . . . . . . . . . . . . . . . . . . . . . . . . . . . . . . . . . . . . . . . . . . . . . . . . . . . . .24
ABOUT PERFORMANCES . . . . . . . . . . . . . . . . . . . . . . . . . . . . . . . . . . . . . . . . . . . . . . . . . . . . . . . . . . . . . . . . . . .25
MULTITIMBRAL USE . . . . . . . . . . . . . . . . . . . . . . . . . . . . . . . . . . . . . . . . . . . . . . . . . . . . . . . . . . . . . . . . . . . . . . . .27
SELECTING PROGRAMS & PERFORMANCES . . . . . . . . . . . . . . . . . . . . . . . . . . . . . . . . . . . . . . . . . . . . . . . . . . .29
SELECTING DRUM MAPS AND DRUM MAP PROGRAMS . . . . . . . . . . . . . . . . . . . . . . . . . . . . . . . . . . . . . . . . . . .30
EDITING & WRITING ARPEGGIATOR PATTERNS . . . . . . . . . . . . . . . . . . . . . . . . . . . . . . . . . . . . . . . . . . . . . . . . .31
EDITING & WRITING PROGRAMS . . . . . . . . . . . . . . . . . . . . . . . . . . . . . . . . . . . . . . . . . . . . . . . . . . . . . . . . . . . . .34
EDITING & WRITING PERFORMANCES . . . . . . . . . . . . . . . . . . . . . . . . . . . . . . . . . . . . . . . . . . . . . . . . . . . . . . . . .37
MASTER VOLUME SECTION . . . . . . . . . . . . . . . . . . . . . . . . . . . . . . . . . . . . . . . . . . . . . . . . . . . . . . . . . . . . . . . . .41
MODE SECTION . . . . . . . . . . . . . . . . . . . . . . . . . . . . . . . . . . . . . . . . . . . . . . . . . . . . . . . . . . . . . . . . . . . . . . . . . . .42
DISPLAY SECTION . . . . . . . . . . . . . . . . . . . . . . . . . . . . . . . . . . . . . . . . . . . . . . . . . . . . . . . . . . . . . . . . . . . . . . . . .53
ARPEGGIATOR SECTION . . . . . . . . . . . . . . . . . . . . . . . . . . . . . . . . . . . . . . . . . . . . . . . . . . . . . . . . . . . . . . . . . . . .54
INPUTS SECTION . . . . . . . . . . . . . . . . . . . . . . . . . . . . . . . . . . . . . . . . . . . . . . . . . . . . . . . . . . . . . . . . . . . . . . . . . .60
VOCODER SECTION . . . . . . . . . . . . . . . . . . . . . . . . . . . . . . . . . . . . . . . . . . . . . . . . . . . . . . . . . . . . . . . . . . . . . . . .63
OSCILLATOR SECTION . . . . . . . . . . . . . . . . . . . . . . . . . . . . . . . . . . . . . . . . . . . . . . . . . . . . . . . . . . . . . . . . . . . . .66
FILTER SECTION . . . . . . . . . . . . . . . . . . . . . . . . . . . . . . . . . . . . . . . . . . . . . . . . . . . . . . . . . . . . . . . . . . . . . . . . . .81
LFO SECTION . . . . . . . . . . . . . . . . . . . . . . . . . . . . . . . . . . . . . . . . . . . . . . . . . . . . . . . . . . . . . . . . . . . . . . . . . . . .88
ENVELOPES SECTION . . . . . . . . . . . . . . . . . . . . . . . . . . . . . . . . . . . . . . . . . . . . . . . . . . . . . . . . . . . . . . . . . . . . . .92
EFFECTS SECTION . . . . . . . . . . . . . . . . . . . . . . . . . . . . . . . . . . . . . . . . . . . . . . . . . . . . . . . . . . . . . . . . . . . . . . . .98
PART EDIT SECTION . . . . . . . . . . . . . . . . . . . . . . . . . . . . . . . . . . . . . . . . . . . . . . . . . . . . . . . . . . . . . . . . . . . . . . .111
TROUBLESHOOTING . . . . . . . . . . . . . . . . . . . . . . . . . . . . . . . . . . . . . . . . . . . . . . . . . . . . . . . . . . . . . . . . . . . . . . .119
SPECIFICATION . . . . . . . . . . . . . . . . . . . . . . . . . . . . . . . . . . . . . . . . . . . . . . . . . . . . . . . . . . . . . . . . . . . . . . . . . . .124
BANK MESSAGES . . . . . . . . . . . . . . . . . . . . . . . . . . . . . . . . . . . . . . . . . . . . . . . . . . . . . . . . . . . . . . . . . . . . . . . . .125
MIDI CONTROLLER TABLE . . . . . . . . . . . . . . . . . . . . . . . . . . . . . . . . . . . . . . . . . . . . . . . . . . . . . . . . . . . . . . . . . . .126
MIDI NRPN TABLES . . . . . . . . . . . . . . . . . . . . . . . . . . . . . . . . . . . . . . . . . . . . . . . . . . . . . . . . . . . . . . . . . . . . . . . .127
PROGRAM BANK A . . . . . . . . . . . . . . . . . . . . . . . . . . . . . . . . . . . . . . . . . . . . . . . . . . . . . . . . . . . . . . . . . . . . . . . . .128
PROGRAM BANK B . . . . . . . . . . . . . . . . . . . . . . . . . . . . . . . . . . . . . . . . . . . . . . . . . . . . . . . . . . . . . . . . . . . . . . . . .129
PROGRAM BANK C . . . . . . . . . . . . . . . . . . . . . . . . . . . . . . . . . . . . . . . . . . . . . . . . . . . . . . . . . . . . . . . . . . . . . . . . .130
PROGRAM BANK D . . . . . . . . . . . . . . . . . . . . . . . . . . . . . . . . . . . . . . . . . . . . . . . . . . . . . . . . . . . . . . . . . . . . . . . . .131
DRUM MAP A . . . . . . . . . . . . . . . . . . . . . . . . . . . . . . . . . . . . . . . . . . . . . . . . . . . . . . . . . . . . . . . . . . . . . . . . . . . . .132
DRUM MAP B . . . . . . . . . . . . . . . . . . . . . . . . . . . . . . . . . . . . . . . . . . . . . . . . . . . . . . . . . . . . . . . . . . . . . . . . . . . . .133
DRUM MAP C . . . . . . . . . . . . . . . . . . . . . . . . . . . . . . . . . . . . . . . . . . . . . . . . . . . . . . . . . . . . . . . . . . . . . . . . . . . . .134
DRUM MAP D . . . . . . . . . . . . . . . . . . . . . . . . . . . . . . . . . . . . . . . . . . . . . . . . . . . . . . . . . . . . . . . . . . . . . . . . . . . . .135
PERFORMANCE BANK A . . . . . . . . . . . . . . . . . . . . . . . . . . . . . . . . . . . . . . . . . . . . . . . . . . . . . . . . . . . . . . . . . . . .136
PERFORMANCE BANK B . . . . . . . . . . . . . . . . . . . . . . . . . . . . . . . . . . . . . . . . . . . . . . . . . . . . . . . . . . . . . . . . . . . .137
MONOPHONIC PRESET PATTERNS . . . . . . . . . . . . . . . . . . . . . . . . . . . . . . . . . . . . . . . . . . . . . . . . . . . . . . . . . . . .138
POLYPHONIC PRESET PATTERNS . . . . . . . . . . . . . . . . . . . . . . . . . . . . . . . . . . . . . . . . . . . . . . . . . . . . . . . . . . . .139
DISTRIBUTORS . . . . . . . . . . . . . . . . . . . . . . . . . . . . . . . . . . . . . . . . . . . . . . . . . . . . . . . . . . . . . . . . . . . . . . . . . . . .140
INDEX . . . . . . . . . . . . . . . . . . . . . . . . . . . . . . . . . . . . . . . . . . . . . . . . . . . . . . . . . . . . . . . . . . . . . . . . . . . . . . . . . . .141
1
Advertisement
Table of Contents

Related Manuals for Novation SuperNova II


Summary of Contents for Novation SuperNova II
-
Page 1: Table Of Contents
NOVATIONISH - NOVATION JARGON ........ -
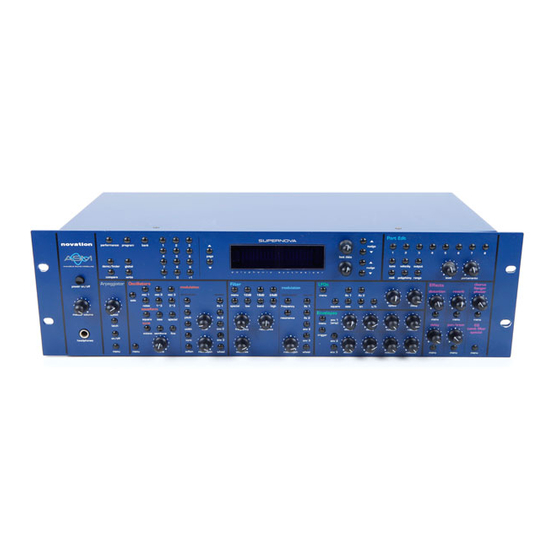
Page 2: Front Panel
FRONT PANEL Vocoder Part Edit perf prog find global compare write bank menu Arpeggiator page power on/off data menu on/off latch tune velocity output pedal solo prog mute key sync speed gate time balance midi polyphony range special mute part level master volume Oscillators Filter... -
Page 3: Back Panel
7 - Headphones - Socket. Use this 1/4 inch Jack Socket to monitor the Left & Right output of the Supernova II Rack via headphones. This output will drive any type of headphones. The Supernova II Racks headphone amplifier will deliver a louder signal if low impedance headphones are used. -
Page 4: Setting Up - Basic Setup
Setting up Connect the Master left & Right Audio Outputs ( & the Aux. 1, Aux. 2 & Aux. 3 Audio Outputs if required ) of the Supernova II Rack to a suitable amplifier or mixing desk’s stereo inputs & set the Master Volume control on the Supernova II Rack to a reasonably high output level ( 9 - 10 ). -
Page 5: Advanced Setup
“Echo Back” ) to the “ON” or “Enabled” position. Now when selecting a “Track” in the computer Software / Sequencer that is assigned to the same channel as the Supernova II Rack is set to receive on ( If this is a Performance you can set the receive channels individually for each “Part”. -
Page 6: About Analogue Synthesis
ABOUT ANALOGUE SYNTHESIS OSCILLATORS - pitch To understand synthesis, it is necessary to have some understanding about sound itself. Sound is a vibration or oscillation. These vibrations create changes in air pressure which is picked up by your ears & is perceived as sound. When dealing with musical sounds the vibrations or oscillations occur at regular intervals &... - Page 7 Sync Waveform This Sync Effect creates very piercing & metallic sounds & are used a lot as lead sounds. It is worth noting that the Supernova II Rack does not require 2 oscillators to create this effect. The Sync “Effect” is created by the Analogue Sound Modelling process without the need for a Sync Oscillator, there is merely a “Sync”...
- Page 8 ABOUT ANALOGUE SYNTHESIS Sync Skew also effects the standard Square & Saw waveforms. The effect is to “swash” the waveform at the end of its cycle with positive modulation & swashing the waveform at the beginning of the cycle. On a square wave, moderate amounts of this effect produce similar effects to Pulse width modulation except width modulation over 100% can be achieved allowing may cycles to be “swashed”...
- Page 9 ABOUT ANALOGUE SYNTHESIS Square Waveform Softened Square Waveform The Harden parameter is completely variable & can reduce a square wave to only one harmonic producing a Sine wave. The Harden process can also be applied to the noise generator providing control over the harmonic content of the noise. Below is an example of the “Harden”...
- Page 10 ABOUT ANALOGUE SYNTHESIS Below is a diagram showing the signal path in the Supernova II Rack & all the waveforms at various locations. Signal Path Diagram MIXER Osc 1 Osc 1 output ( Sq wave Softened with Osc 1 level...
- Page 11 ABOUT ANALOGUE SYNTHESIS Cutoff Cutoff Cutoff Frequency Frequency Frequency Volume Volume Volume No Resonance Mid Resonance High Resonance Frequency Frequency Frequency Low Pass Filter with Resonance Responce Curves Cutoff Cutoff Cutoff Frequency Frequency Frequency Volume Volume Volume No Resonance Mid Resonance High Resonance Frequency Frequency...
- Page 12 Release time is used to adjust the time it takes when the key is released for the level to go from the sustain value to zero. ( Fade out ) The Supernova II Rack also offers additional envelope features to the classic ADSR types allowing even more flexibility, see the diagram below: Volume Key "On"...
- Page 13 ABOUT ANALOGUE SYNTHESIS Volume Key "On" Key "Off" Sustain level Attack Decay Infinite Sustain Release Time Time Time with Time +ve Sustain Rate Low values like +01 will produce a very slow rise & high values will produce a quick rise to full intensity. When this parameter has a -ve value, during the “Sustain”...
- Page 14 & with the development of DSP technology, digital effects have become available in modern synthesisers. However when in a “Multimbral” application, all the sounds are generally passed through one set of effects. In the Supernova II Rack, a block of 7 effects is part of the “Program”...
-
Page 15: About Fm Synthesis
ABOUT FM SYNTHESIS Basic Theory Earlier in this manual we were introduced to the basics of subtractive synthesis & became familiar with terms such as harmonics, timbre, waveforms & oscillators. FM Synthesis is the technique of using one waveform ( Oscillator ) to Frequency Modulate - FM - another to produce a resultant more harmonically complex waveform. - Page 16 When using the Supernova II Rack for FM synthesis it is important to note that it is ALWAYS Oscillator 3 that is heard as an output to the mixer section. If you are creating sounds from scratch we recommend using the program D126 “FM Init Program” as a start-...
- Page 17 Fmpt Xylo Hi Output The Supernova II Racks effect section is arguably one of the most powerful in a synthesiser of this type today. With all this power it is possible to obtain a level of production that was previously unattainable.
-
Page 18: About Effects
This is where EQ comes in. Muffled sounds have insufficient treble, so adjusting the Treble EQ will either boost or reduce the tre- ble. Similarly, the Bass EQ will either boost or reduce the bass. In the Supernova II Rack there is a Treble EQ control & a Bass EQ control. - Page 19 & where the sound source is in the hall”. Different types of rooms & halls have different acoustics. For this reason, Supernova II Rack features several different Reverb types. These range from very, very small rooms like the “Dry Chamber” setting to the very large hall like the “Large type 2” setting.
- Page 20 A “Stereo” version can be considered to be two concrete walls & this is the type that the Supernova II Rack uses. The distance from the walls determines the delay time & in the example below the dis- tance between the left wall &...
- Page 21 A large distance produces a long delay & a short distance produces a short delay. In the Supernova II Rack, the Delay time is the time of the longest delay. The shorter delay will be a percentage of this value.
-
Page 22: Novationish - Novation Jargon
Performance This is the most complex type of sound Supernova II Rack can create. It is made up of 8 different sounds called Parts. These Parts can be layered or set up as splits to form the Performance. Performances are accessed by pressing the Performance button. Other Manufacturers sometimes call these Multis, Multisetups or Combinations. -
Page 23: About Programs
Performance have their own Effects Section. This allows all the “Parts” of a Performance to sound exactly the same in Performance mode as they do in Program mode. This is unique to the Supernova II Rack & is literally like having the equivalent of 8 separate synthesisers with 8 sets of effects sections allowing a very high level of production to be achieved with just one box. -
Page 24: About Drum Maps
Supernova II Rack with a sequencer as a Drum Map can be assigned to a single “Part” of a Performance allowing many different drums to be played on one MIDI channel. Each Drum Map contains 50 Programs. Below is a block diagram of a Supernova II Rack Drum Map. -
Page 25: About Performances
Performance mode is also the mode in which you can use Supernova II Rack “Multitimbrally”. This allows Supernova II Rack to play up to 8 different sounds simultaneously on 8 different MIDI Channels. Each “Part” of a Performance can have a separate MIDI... - Page 26 NOTE: There is only one Arpeggiator Speed control in a Performance. Adjusting the speed of any Parts Arpeggiator will control all 8 Arpeggiators. Below is a simplified block diagram of a “Performance” in the Supernova II Rack. Arpeggiator Oscillators Mixer...
-
Page 27: Multitimbral Use
& set the MIDI Channel to whatever channel required ). You should now hear the Bass sound when MIDI channel 1 is played into the Supernova II Rack. If you wish to assign the Effects from the Program to the Part then press the “Output” button & set the parameter “Effects used”... - Page 28 MULTITIMBRAL USE The Part is Muted / No response at all - If the Part light flashes steadily, even with no MIDI input, the Part is Muted. The Part is Muted / No response at all - Does the Part light flash when MIDI is sent? - Yes - The Assigned outputs may be different to the ones connected, check the setting of the Outputs menu for the offending Part.
-
Page 29: Selecting Programs & Performances
SELECTING PROGRAMS & PERFORMANCES There are a lot of sounds in Supernova II Rack & they are arranged into “Banks”. There are 4 Banks of 128 Performances, ( 512 Performances in total ) 8 Banks of 128 Programs, ( 1024 Programs in total ) & 8 Drum Maps each with 50 Programs. Pressing the Program button will activate the Program Mode &... -
Page 30: Selecting Drum Maps And Drum Map Programs
& can be recorded on Computer Software / Sequencer. Selecting sounds via MIDI is very simple, just send the appropriate MIDI Bank number & Program change commands to Supernova II Rack from the Computer Software / Sequencer. To change Programs &... -
Page 31: Editing & Writing Arpeggiator Patterns
There are 4 notes being played C, E, G & A# creating a C 7 Chord. Supernova II Rack scans the master keyboard & “labels” each of the played notes with a note number, starting with the lowest (if the “Fill in” parameter is set to “Off-Up” or “On-Up”) . In this case C = 1, E = 2, G = 3 &... - Page 32 EDITING & WRITING ARPEGGIATOR PATTERNS “Off” position. In this position you can program your patterns more efficiently but for the best results when played, it should be set to”On”. In this position the missing notes are inserted by the Arpeggiator so that larger or less numbers of notes than are pro- grammed into the pattern are used.
- Page 33 EDITING & WRITING ARPEGGIATOR PATTERNS NOTE: NOTE: The “Fill In” parameter does not apply for Polyphonic patterns & does nothing if switched “On” or “Off”. NOTE: NOTE: Glide will only work when the polyphony of the Program / Part is set to Mono. Several Monophonic &...
-
Page 34: Editing & Writing Programs
Editing Programs is easy on the Supernova II Rack as virtually all the controls needed to create a sound are on the front panel. First make sure that Supernova II Rack is in the Program mode. The Program button should be lit. Now it is just a case of adjusting the knobs &... - Page 35 Write to store The Supernova II Rack is asking confirmation that you wish to write over the destination Program, replacing it with the newly edited sound. Also on the top line of the display it can be seen that there is the category parameter. This is where you set the category of the Program so that the “Finder”...
- Page 36 EDITING & WRITING PROGRAMS The parameter is “Drum played as” with a value of E3. This parameter determines the note the Drum Program will be pitched at. This is not the note on the master keyboard that the Drum Program is triggered from, ( this is not assignable ) but it is the pitch of the Program. This can be set with the higher Data knob or directly using the master keyboard.
-
Page 37: Editing & Writing Performances
EDITING & WRITING PERFORMANCES Editing Performances is very easy. After Pressing the Performance button the button lights & the Display shows: Blaster Master Perf AOOO Performances are made up of 8 Parts. The next thing to do is select the “Part” of the Performance you wish to edit. To do this press the appropriate Part button in the Part edit section. - Page 38 Controllers & NRPNs on the MIDI channel assigned to the Part of the Performance, so in a Multitimbral Performance each Part can be individually edited, recorded on a sequencer & played back into the Supernova II Rack.
- Page 39 EDITING & WRITING PERFORMANCES NOTE: NOTE: To assign no Program to a Part ( Off ) press set the Polyphony Parameter in the Polyphony button menu to “Off”. NOTE: NOTE: Only one Performance can be used at any one time. Performances cannot be used as Parts of other Performances & you cannot assign different Performances to different MIDI channels &...
- Page 40 The Supernova II Rack is asking confirmation that you wish to write over the destination Performance, replacing it with the newly edited Performance. On the top line of the display Supernova II Rack is asking if you wish to update ( re-write ) all the Programs used in the currently selected Performance.
-
Page 41: Master Volume Section
NOTE: This can be overridden by MIDI Controller Data. If a MIDI Controller 97 with a value of “0” has been received by the Supernova II Rack, no output will be heard regardless of the position of this knob. To reset the volume either transmit the relevant MIDI Volume level or move the Volume knob. -
Page 42: Mode Section
Find - Button With so many sounds it can be a little difficult to find your favourite sounds quickly. For this reason Supernova II Rack features a “Finder” mode that can find similar types of sounds. Supernova II Rack has 20 “Categories” of sounds. They are as follows:... - Page 43 The lower parameter is “Global MIDI chan”. In this case with a value of 1. This parameter determines the Global MIDI Channel for the Supernova II Rack. This Channel is used when in Program Mode & for transmission & reception of Sysex data. Use the lower Data knob to adjust this parameter. The range of this parameter is 1 to 16.
- Page 44 The lower parameter is “Pedal/breath control”. In this case with a value of Off. This parameter determines if the Supernova II Rack re-maps incoming Pedal data & Breath Control MIDI data ( CC no 2 ) into Mod wheel data ( CC no 1 ), Aftertouch data or any controller from 3 to 119 & Pitchbend data . Use the lower Data knob to adjust this parameter.
- Page 45 The higher parameter is “Breath mode”. In this case with a value of Absolute. This parameter determines how incoming Breath controller information is interpreted by Supernova II Rack. Use the upper Data knob to adjust this parameter. If this is set to Absolute then the destination ( the parameter assigned with the “Breath control” para- meter on Page 4 of global mode ) will be modulated directly regardless of its setting in the currently assigned program.
- Page 46 NOTE: If there is no MIDI feedback loop connected at all ( a sequencer with MIDI out of the Supernova II Rack connected to MIDI in on the sequencer & MIDI out of the sequencer connected to MIDI in on the Supernova II Rack for example ) & local control is set to off, the knobs &...
- Page 47 Rack asks which Program you want to restore, which is selected using the lower Data knob, & then pressing the “Write” button again Supernova II Rack asks for the location ( Program bank & number ) that you wish to store the program in. The range of this parameter is One prog, One perf, One patt, All progs, All perfs, All patts, Prog Change table, Globals, All data, Prog bank A, Prog bank B, Prog bank C, Prog bank D, Perf bank A, Perf bank B, Dmap a, Dmap b, Dmap c &...
- Page 48 The higher parameter is “Vel sensing”. In this case with a value of Hard. This parameter alters the velocity curve of the Supernova II Rack. Use the upper Data knob to adjust this parameter. This is global & applies to all modes. In the Hard position, large Velocity changes are required to create a big change in response. This is good for weighted &...
- Page 49 This is not a definite “Fix it” for Packet errors. If the problem still persists try a different Computer/Sequencer package/MIDI Interface. Packet errors are not a “Bug” in the Supernova II Rack but a problem with the device recording & playing back the Sysex dump.
- Page 50 This “Program change table” is assigned to MIDI Bank 0( Controller 32 with a value of 0 ). If this message is received the Supernova II Rack will switch from normal operation to the Program Change table. Any Program changes received after that will be re-mapped according to the Program Change table.
- Page 51 MODE SECTION parameter is set to On, Notes & Velocity can be entered directly from the master keyboard. To do this set this parameter to On, then select a Pattern & select the number of steps in the pattern required in page 18 of Global mode. Now go to page 19 of global mode &...
- Page 52 Program or Performance is selected, the Program and/or Performance buttons will flash & the Compare button will be lit indicating that the sound currently being produced by the Supernova II Rack is the original still stored in memory. Write - Button This button is used to write the currently selected Performance, Program , Global Data &...
-
Page 53: Display Section
DISPLAY SECTION bank page data prog The display shows the currently selected Performance or Program Name, Bank & Number. When editing Knobs on the front panel, the relevant parameter name & value is displayed. Data - Knobs When editing parameters in Menus, the upper Data Knob on the right of the display is used to edit the higher parameter’s value. Similarly the lower parameter’s value can be edited in the same way using the lower Data knob. -
Page 54: Arpeggiator Section
ARPEGGIATOR SECTION Arpeggiator menu on/off latch mute key sync speed gate time This section contains all the Knobs & buttons associated with the Arpeggiator. Menu - Button When this button is pressed, a series of pages is available on the display containing parameters relevant to this section. In the Arpeggiator Section there are 7 pages available. - Page 55 ARPEGGIATOR SECTION tion the Arp will behave as above except that it will stop when it reaches the end of the pattern. This is like playing a loop on a sampler. Again another powerful feature for live performance. The range of this parameter is Constant & Pattern. This parameter is memorised with a Program.
- Page 56 ARPEGGIATOR SECTION Page 4 looks like so: Fill in On-played Sync 16th The higher parameter is “Fill in”, in this case with a value of On - Played. This parameter applies only to Monophonic patterns, it has no affect on polyphonic patterns. Use the upper Data knob to adjust the value.
- Page 57 Data knob to adjust the value . If this parameter is set to “Program” then no MIDI note data appears when the Arpeggiator is played but the Supernova II Rack is played by the Arpeggiation. If this parameter is set to Program & MIDI then the Supernova II Rack is heard playing the Arpeggiation &...
- Page 58 2 (Sustain) socket & assign the socket to act as a suitable polarity Footswitch socket on page 9 of the global mode. The Supernova II Rack can read Sustain information as Arpeggiator latch On / Off, so depressing the Sustain Pedal connected to the Input/sw 2 socket will switch the Arpeggiator Latch “On”...
- Page 59 ARPEGGIATOR SECTION Speed - Knob This knob controls the speed at which the Arpeggiator sweeps through is patterns. Anticlockwise the speed is slow, clockwise the speed is fast. The range of this parameter is 64 bpm to 191bpm. This parameter is memorised with Programs in Program mode & Performances in Performance mode.
-
Page 60: Inputs Section
When this is set to On, the envelopes are constantly gated on as if C3 was being played constantly. This allows signals fed into the Inputs ( & that are assigned as Special waveforms to the Oscillators ) to be passed through the Supernova II Racks synthesis engine without requiring a MIDI Note message to trigger the envelopes. - Page 61 The "Gain" can be set individually for each channel. The Inputs on the Supernova II Rack can be used in 3 different ways, Firstly an Input can be used to "Tack on" to an effects chain in a Program or to the Effects chain of a Part of a Performance. Secondly as waveform that con be processed by the Filter, LFOs, ENVs &...
- Page 62 NOTE: If no MIDI note is sent to the Supernova II Rack & the Constant gate parameter is set to Off no sound will be heard & if no signal is present on the assigned Input at the moment the MIDI Note is played then no sound will be heard.
-
Page 63: Vocoder Section
NOTE: NOTE: There is only 1 Vocoder in the Supernova II Rack. You cannot have a Performance with several different vocoders on different parts. When this button is pressed a series of pages is available on the display containing parameters relevant to this section. - Page 64 The display is showing “Vocoder spectrum”. On this page the Supernova II Rack displays the Audio spectrum of the modulator in 42 bands on the screen. This is for display & is not memorised. Setting up the Inputs for use with the Vocoder.
- Page 65 VOCODER SECTION Now the Vocoder should be working & all that remains is to adjust the Sibilance & width parameters to taste. Also note that the full effects section is available on the selected Part or Program as well. In addition to this in Performance the “Effects used” parameter in the Output menu of the Part edit section allows the use of completely different effects settings from those found in the original Program.
-
Page 66: Oscillator Section
OSCILLATOR SECTION Oscillators modulation menu solo copy unison destination source lfo 1 osc 1 osc 2 osc 3 noise lfo 2 pitch square special tune voice control width level env 2 menu env 3 sync oct /semi cents portamento hardness wheel This section contains all the knobs &... - Page 67 OSCILLATOR SECTION Page 2 looks like so: Formant width Sync skew The higher parameter is “Formant width”. In this case with a value of +10. This parameter determines how much Formant Width is applied to the selected Oscillator. Use the upper Data knob to adjust the value of this parameter.
- Page 68 OSCILLATOR SECTION Osc1 Button Osc2 Button Osc3 Button Button Button Noise Button 1*3 - FM - Button 2*3 - FM - Button Noise - FM - Button All these buttons “select” which oscillator is going to be manipulated by the other parameters in this section. Osc 1 button selects Oscillator 1, Osc 2 button selects Oscillator 2, Osc 3 button selects Oscillator 3, 1*3 button selects the output of the Ring Modulator between Oscillators 1 &...
- Page 69 OSCILLATOR SECTION NOTE: NOTE: It is only possible to copy an Oscillator to another oscillator. NOTE: NOTE: To exit this mode without copying an Oscillator, press the copy button again. ( the Copy button is unlit ) Unison - Button This button activates the Unison mode..
- Page 70 OSCILLATOR SECTION When this knob is turned anticlockwise one click from the -1 oct 0 semi setting position the display shows: Octave Semitones Of course the upper data knob should alter octaves & scale the semitones appropriately. Similarly the semitone values of +/- 12 should be interpreted as octave shifts &...
- Page 71 OSCILLATOR SECTION meter. In the “Percussive” position the Oscillators are reset on note on. This makes it possible to create “Punchy” basses & Drum sounds. In the “Ensemble” position all the Oscillators are free running & this allows the creation of fat string sounds etc. The range is Percussive &...
- Page 72 OSCILLATOR SECTION The lower parameter is “Unison detune”. In this case with a value of 8. This parameter determines the relative detuning of voices when the Unison mode above is active. Use the lower Data knob to adjust this parameter. When this parameter is set to low values only small shifts in tuning are applied to the different voices. When this parameter is set to high values only larger shifts in tuning are applied to the different voices.The range of this parameter is 000 to 127.
- Page 73 This is an extremely powerful feature of the Supernova II Rack. These controls affect the modulation of the selected oscillator. The buttons on the left are all “Destinations”. They can all be modulated by the “Sources” which are the buttons on the right. The amount of modulation applied from any source is determined by the setting of the Mod Depth Knob.
- Page 74 OSCILLATOR SECTION Possible Combinations & the effects Produced. NOTE: NOTE: All these parameters are memorised with a Program. Button Level Knob This combination controls the Volume of the selected Oscillator, Noise Generator or Ring Modulator. Turning the Level Knob fully clockwise turns the selected sound source to full volume &...
- Page 75 OSCILLATOR SECTION Pitch Button Level Knob This combination controls the Pitch Tracking of the selected oscillator. Turning the Level Knob fully clockwise makes the selected Oscillator track the master keyboard in the normal way. i.e. Notes played one octave apart on the master keyboard are transposed one octave apart.
- Page 76 OSCILLATOR SECTION Pitch Button Mod Depth - Knob ENV 3 Button This combination controls the Pitch Modulation of the selected Oscillator by ENV 3. Turning the Mod Depth Knob fully clockwise introduces Pitch shift from ENV 3 to the selected Oscillator in a Positive direction. ( Up) Turning the Mod Depth Knob fully anti- clockwise introduces Pitch shift from ENV 3 to the selected Oscillator in a Negative direction.
- Page 77 OSCILLATOR SECTION Width Button Mod Depth - Knob LFO 2 Button This combination controls the Pulse Width Modulation of the selected Oscillator by LFO 2. Turning the Mod Depth Knob fully clock- wise introduces Pulse Width Modulation from LFO 2 to the selected Oscillator in a Positive direction. Turning the Mod Depth Knob fully anticlockwise introduces Pulse Width Modulation from LFO 2 to the selected Oscillator in a Negative direction.
- Page 78 OSCILLATOR SECTION Sync Button Level Knob This combination controls the Sync Effect on the selected Oscillator. Turning the Level Knob fully clockwise introduces the Sync Effect fully to the selected Oscillator & fully anticlockwise there is no Sync Effect at all. The range of this parameter is 000 to 127. NOTE: NOTE: This does not apply to the Noise, 1*3 &...
- Page 79 OSCILLATOR SECTION NOTE: NOTE: This does not apply to the Noise, 1*3 & 2*3 Ring Modulator outputs. No audible effect to these sound sources will be heard if an attempt is made to adjust this parameter when these sound sources are selected & the display will show “Not Available”. Sync Button Mod Depth -...
- Page 80 OSCILLATOR SECTION Harden Button Mod Depth - Knob ENV 2 Button This combination controls the modulation of the Harden Effect on the selected Oscillator by ENV 2. Turning the Mod Depth Knob fully clockwise introduces Harden Effect from ENV 2 to the selected Oscillator in a Positive direction. Turning the Mod Depth Knob fully anticlockwise introduces Harden Effect from ENV 2 to the selected Oscillator in a Negative direction.
-
Page 81: Filter Section
FILTER SECTION Filter modulation menu 12dB 18dB 24dB source special band high lfo 1 lfo 2 frequency resonance freq env 2 env 3 overdrive Q norm reso/width wheel This section contains all the knobs & buttons associated with the Filter. Menu Button When this button is pressed a series of pages is available on the display containing parameters relevant to this section. - Page 82 FILTER SECTION The lower parameter is “Res MWh LFO2 amt”. In this case with a value of +63. This parameter determines how the Modulation Wheel affects the amount of Modulation of the Resonance of the Filter from LFO 2. In the central position of the lower Data knob there is no change to the Filter Resonance when the Modulation Wheel is engaged. Anticlockwise of centre there will be an increasing amount of Negative modulation.
- Page 83 FILTER SECTION The higher parameter is “Overdrive curve.” In this case with a value of -64. This parameter determines the characteristic of the Overdrive effect. Use the upper Data knob to adjust this parameter. With a set- ting +00 normal clipping type of Distortion occurs. With at +ve value additional symmetrical distortion effects are introduced. With at -ve value addition asymmetrical distortion effects are introduced.The range of this parameter is -64 to+64.
- Page 84 FILTER SECTION Special - Button When the special filter button is pressed the display shows: Filter type Res LPF Filter width The higher parameter is “Filter type”. In this case with a value of Res LPF. This parameter determines what type of Special filter is applied. Use the Higher data knob to adjust this parameter. There are 9 dif- ferent special filters.
- Page 85 This is an extremely powerful feature of the Supernova II Rack. These controls affect the modulation of the Filter. The Buttons on the left are “Destinations”. They can all be modulated by the “Sources” which are the buttons on the right. The amount of modula- tion applied from any source is determined by the setting of the Mod Depth Knob.
- Page 86 FILTER SECTION Possible Combinations & the effects Produced. NOTE: NOTE: The range of all these parameters is -64 to +63. All these parameters are memorised with a Program. Frequency Mod- Knob LFO 1 Button This combination controls the amount of change to the Filter Cutoff Frequency ( Initially set by the Frequency knob ) by LFO 1. With the Frequency Mod knob set to the central position there is no change to the Filter Cutoff Frequency.
- Page 87 FILTER SECTION Resonance/Width - Knob LFO 2 Button This combination controls the amount of change to the Resonance ( Initially set by the Resonance knob ) by LFO 2. With the Resonance Mod knob set to the central position there is no change to the Resonance. Anticlockwise of centre there will be an increasing amount of Negative modulation.
-
Page 88: Lfo Section
LFO SECTION LFOs menu lfo 1 lfo 2 square speed delay This section contains all the Knobs & buttons associated with the LFOs. The LFOs ( Low Frequency Oscillators ) produce regular electronic variation which are normally too low a frequency to be heard when converted into audio vibrations. However when used to modify various elements of the sound they can be used to create regular changes in pitch ( Vibrato ) or Pulse width &... - Page 89 LFO SECTION Page 3 looks like so: MWh speed mod AT speed mod The higher parameter is “MWheel speed mod”. In this case with a value of +10. This parameter determines how the Mod Wheel effects the speed of the selected LFO. If this parameter is set to 0 there is no change to the selected LFO’s speed.
- Page 90 LFO SECTION means if a Delay is set using the LFO Delay Knob then LFO modulation will be present a the start of the note & will “Fade out” over the Delay period. The range of this parameter is In & Out. This parameter is memorised with a Program. The lower parameter is “Delay trigger”.
- Page 91 LFO SECTION The Square button selects a waveform that looks square ( from which it gets its name ) & changes instantly from one level to another. This is useful for Trill & Computer Game effects. The S/H button selects the Sample & Hold waveform. ( sometimes called Random ) At a regular interval ( governed by the Speed knob ) the level of the LFO jumps to a new random level &...
-
Page 92: Envelopes Section
ENVELOPES SECTION Envelopes menu env 1 (amp) attack decay sustain release multi env 2 overload env 3 (poly limit) delay velocity track prog level This section contains all the Knobs & buttons associated with the Envelopes. The Envelopes are used to shape a sound over time. Env 1 ( the Amplifier Envelope ) is assigned to the Amplifier &... - Page 93 ENVELOPES SECTION Env intensity Env intensity Env level note ( C3 ) Env level note ( C3 ) Env level track = +00 Env level track = +00 Env level track = -63 Env level track = +63 Keyboard Keyboard On the left a Env level note with a value of +00 produces no change in envelope level at different points along the master key- board.
- Page 94 ENVELOPES SECTION Volume Key "On" Key "Off" Sustain level Attack Decay Infinite Sustain Release Time Time Time with Time no Sustain Rate When this parameter has a +ve value, during the “Sustain” phase of the envelope the Sustain value will rise to full at a “Rate” determined by this parameter as can be seen below: Volume Key "On"...
- Page 95 ENVELOPES SECTION Page 6 looks like so: Env 2 A-D repeat The higher parameter is “Env 2 A-D repeat”. In this case with a value of 022. This parameter controls the number of times the Attack/Decay cycles of the selected envelope repeat before entering the sustain phase of the envelope.
- Page 96 ENVELOPES SECTION The higher parameter is “Env 3 A-D repeat”. In this case with a value of 022. This parameter controls the number of times the Attack/Decay cycles of the selected envelope repeat before entering the sustain phase of the envelope. The operation of this parameter is identical to Env 1 A-D repeat parameter on page 3 but applies to Envelope 2.
- Page 97 Program level parameter. When pressed & held down the the button will light when the polyphony for the Supernova II Rack is exceeded. This is handy for establishing if overvoicing is occurring. This is best done by pressing the side of the button so that the light can be clearly observed.
-
Page 98: Effects Section
This section contains all the Knobs & buttons associated with the Effects Section. There are 7 effects available on each Program in the Supernova II Rack. Delay Level - Knob This knob adjusts the level of the Delay effect to be assigned to the selected Program. Turning this knob fully anticlockwise will allow the signal to be unaffected by the Delay, turning this knob fully clockwise will fully implement the Delay effect. - Page 99 EFFECTS SECTION Page 2 looks like so: Stereo width Delay ratio The higher parameter is “Stereo width”. In this case with a value of 010. This parameter determines how wide the stereo image of the delay is. Use the upper Data knob to adjust this parameter. In the 000 position the delay is Mono.
- Page 100 This parameter determines the type of Reverb effect.. Use the higher Data knob to adjust this parameter. There are 16 different types of reverb available in the Supernova II Rack. Turning this knob fully anticlockwise selects Gated reverse reverb. This is a special reverb where the reverb builds to a point &...
- Page 101 EFFECTS SECTION Page 2 looks like so: Reverb decay Reverb HF damp The higher parameter is “Reverb decay”. In this case with a value of 080. This parameter adjusts the rate at which the Reverb effect decays away.. Use the higher Data knob to adjust this parameter. The range of this parameter is 000 to 127.
- Page 102 EFFECTS SECTION Page 1 looks like so: Type Phaser Speed 1 The higher parameter is “Type”. In this case with a value of Phaser. This parameter adjusts the type of effect the Chorus/Flanger/Phaser will be. Use the upper Data knob to adjust this parameter. The range of this parameter is Phaser, Chorus/Flanger, Quad Chorus, Ensemble &...
- Page 103 EFFECTS SECTION Page 4 looks like so: Speed 2 Inertia The higher parameter is “Speed 2”. In this case with a value of 080. This parameter determines the secondary Speed of the Chorus/Flanger/Phaser. The primary speed is determined by the Speed knob on the front panel.
- Page 104 EFFECTS SECTION The lower parameter is “Wheel level”. In this case with a value of 010. This parameter determines how much the Mod Wheel controls the amount of Chorus/Flanger/Phaser effect or the Threshold at which the speed of the Chorus/Flanger/Phaser effect is switched over depending on the value of the “Wheel mode” parameter above.
- Page 105 EFFECTS SECTION Page 2 looks like so: Distortion curve Distortion wheel The higher parameter is “Distortion curve”. In this case with a value of +64. This parameter determines the characteristic of the Distortion effect. Use the upper Data knob to adjust this parameter. With a set- ting +00 normal clipping type of Distortion occurs.
- Page 106 EFFECTS SECTION Page 2 looks like so: Pan depth Dry level The higher parameter is “Pan depth” In this case with a value of 080. This parameter controls the intensity of the Autopan & Tremolo effects. Use the upper Data knob to adjust this parameter. In the 000 position there is no movement of sound in the stereo field &...
- Page 107 EFFECTS SECTION NOTE: NOTE: No effect will be heard when altering this parameter if the Comb Boost parameter is set to 00 The lower parameter is “Comb boost”. In this case with a value of +10. This parameter adjusts the amount of boost to harmonics the Comb Filter provides . Use the lower Data knob to adjust this para- meter.
- Page 108 & then chorused sounds quite different to a sound that has been Chorused then Delayed then Reverbed. There are 19 different effects configurations available in the Supernova II Rack.
- Page 109 EFFECTS SECTION C > D > R C > R > D C/F/P C/F/P Delay Delay SERIES/PARALELL CONFIGURATIONS D + [ R > C ] D + [ C > R ] Delay Delay C/F/P C/F/P R + [ D > C ] R + [ C >...
- Page 110 EFFECTS SECTION The range of this parameter is D+R+C, D>R>C, D>C>R, R>D>C, R>C>D, C>D>R, C>R>D, D+[R>C], D+[C>R], R+[D>C], R+[C>D], C+[D>R], C+[R>D], D>[R+C], R>[D+C], C>[D+R]. [R+C]>D, [D+C]>R & [D+R]>C. This parameter is memorised with a Program in Program Mode or memorised with a Program or Performance in Performance Mode depending on the value of the Part’s “Part FX”...
-
Page 111: Part Edit Section
Program. See writing Performances into memory on page 37 for details. NOTE: NOTE: Part selection can be transmitted & recorded as controller data to a sequencer & the played back to the Supernova II Rack. Tune - Button NOTE: NOTE: This button only works in Performance mode. - Page 112 PART EDIT SECTION The lower parameter is “Part detune”. In this case with a value of +25 This parameter Detunes the Program by the amount selected using the upper Data knob. The range of this parameter is -64 to +63 cents.
- Page 113 PART EDIT SECTION Page 1 looks like so: Part outputs 1 & 2 Effects used Part The higher parameter is “Part outputs”. In this case with a value of 1and2. This parameter determines which set of outputs the currently selected Part will be output from. Use the upper Data knob to adjust this parameter.
- Page 114 The MIDI channel for the Part can be set via MIDI by holding down the page down button & while holding it down playing a note into the Supernova II Rack on the desired channel. It is not possible to set the Part’s MIDI channel to Omni or Global using this method.
- Page 115 PART EDIT SECTION Page 3 looks like so: Pedal/breath This parameter determines whether the currently selected Part will respond to the type of MIDI controller data which is generated when footswitch 3 is pressed when it is acting in "Pedal" mode (it is configured to "Pedal-R" or "Pedal-T" on page 10 of the Global Menu).
-
Page 116: Program Mode
PART EDIT SECTION Polyphony - Button This button works in Performance & Program mode. This button alters the Polyphony of the currently selected Program or Part. When this button is pressed, the display shows parame- ters relevant to this section. There are a maximum of 2 parameters displayed. One for each line on the display. The upper & lower Data knobs on the right of the display are used to alter these parameter’s values. - Page 117 The Range for the Part can be set via the master keyboard by holding down the page up ( for the Highest note ) or page down ( for the Lowest note ) buttons & while holding down, playing a note on the Supernova II Rack at the desired split point. You can set both parameters simultaneously by holding down both page buttons.
- Page 118 PART EDIT SECTION NOTE: NOTE: It is only possible to copy effects settings in Performance mode. Page 3 looks like so: Copy to prog effects All part effects The parameter is “Copy to prog effects all part effects”. This is a copying utility that allows copying of the effects settings in the “Part Effects Buffer” of ma Performance to the currently selected program.
-
Page 119: Troubleshooting
LFOs, Delays and/or Arpeggiator do not sync to MIDI Clock. Check the Clock parameter in the Global Mode is set to Ext. ( refer page 44 ) If this is set to external, check the Supernova II Rack is synced by varying the tempo of the Sequencer. If the Supernova II Rack speeds up & slows down accordingly, Supernova II Rack is synced to MIDI Clock. - Page 120 Check that Memory Protect is set to Off & Sysex reception is set to Normal ( RX as sent ). If you are sending C or D Bank Perfs or E,F,G or H Bank Progs from an Expanded Supernova II Rack ( Supernova II Rack Pro ) to a standard Supernova II Rack, then these sounds will not go into the Supernova II Rack as corresponding banks do not exist in the standard machine.
- Page 121 NOTE: NOTE: Under no circumstances switch off the Supernova II Rack while this procedure is happening. Doing so may result in very erratic behaviour & may lead to the Supernova II Rack needing to be sent back for service! Once the Flash has been loaded the Supernova II Rack will automatically reboot as normal running the new OS.
- Page 122 NOTE: This is not caused by the Supernova II Rack but by the transmitting device. This is caused by the software or the hardware used to transmit the OS to the Supernova II Rack. Do what it says, switch the Supernova II Rack off & re-try.
- Page 123 TROUBLESHOOTING ATARI Never had a problem ever, an 8meg 16 bit machine can cream the lot of em. AMIGA Bars & Pipes Pro works but it could be down to the interface. WORKSTATIONS Workstations such as KORG’s Trinity/X-series/O1w & ROLAND Workstations do not to our knowledge at this stage support sysex in .mid files.
-
Page 124: Specification
24 VOICE EXPANSION BOARD. ( For standard Supernova II models & Supernova II Pro only ) Additional Voices 24 Voices This can be fitted to the Supernova II & Supernova II Pro. If fitted to the Supernova II Pro the 12 voice expander card must be discarded and this one installed in it’s place. Once installed the polyphony will be 48 voices. -
Page 125: Bank Messages
BANK MESSAGES When the following MIDI bank select messages are sent to the Supernova II Rack the following Modes are selected. NOTE: NOTE: These messages are expressed as the LSB of the MIDI bank message ( CC32 data values ) only as the MSB MIDI bank message (CC0 data values ) are not required to select a new bank. -
Page 126: Midi Controller Table
MIDI CONTROLLER TABLE 0 – Bank Select MSB 64 – Sustain / Arp Latch 1 – Modulation Wheel 65 – Arp Latch 2 – Breath Controller 66 – Osc 1 Pitch Env 3 3 – Arp Pattern Select 67 – Osc 2 Pitch Env 3 4 –... -
Page 127: Midi Nrpn Tables
MIDI NRPN TABLES Sorry at the time of going to press these tables were unavailable, but will be available on our web site http://www.novationuk.com ASAP. NOTE: NOTE: Simply recording any knob movement or button press will enable control via MIDI. Examining this recording will reveal the Controllers/NRPN’s identity if specific information is required immediatley. -
Page 128: Program Bank A
PROGRAM BANK A Sintillator M-Wh Pulsebass Skewed Arp Synth Scratch Softena Bass M-Wh Staccato Filter Velo 303 Vienna Bender Velocity Mutes Piki Its Not OK Rez Square M-Wh Garage Kick DetuneBass M-Wh FM EP Randevous 2 harp T-chu Wave Comb Snare Ravin On Arpy 30Dist Velo 303 Dist... -
Page 129: Program Bank B
PROGRAM BANK B Filtered H2O SuperBassSt'n 1 SuperBassSt'n 19 Synth Backslip Width Bass M-Wh Staccato Square Wheel 303 Leader Lonely Olive D’you know Pick Z-Plane VeloPick Perci Blip M-Wh Kickin Hardcore Simple Bass 2 Giggin EP Snotty Nose U-no Brass Snared Screaming Raver Harmonic Dist303... -
Page 130: Program Bank C
PROGRAM BANK C Neuroglider Basse Die Roboter Synth Stop Scratch Bace Staccato Pulse TB Vac>scene Ring on a lead Gated Pad Poppy SupJupVelBrass1 Dreamin Pick M-Wh 202 Kick ThunderFloorBass Phased EP Synced M-Wh Muck Jubrassic Wabbler Raversiren Powerchord PsyGrund Lead or Bass Airy Fairy Smooth Strings Ring Rise... -
Page 131: Program Bank D
PROGRAM BANK D Synced Formant 1 Max Bass Sawtooth Seq. jh Communicator Click Bass M-Wh Xpander 2000 jh Trance4 M-Wh FiltaMatrix M-Wh SimpleEnvVeloArp Fin Pluck it! "I" FM Bell Lead 909 Kick Wart Bass Metal Knoll ComeToDance M-Wh Slide Brass M-Wh FM Lead 1 Gritty Program Hard Cheese M-Wh... -
Page 132: Drum Map A
DRUM MAP A 909 Kick 2 Rim Shot 808 Snare 2 808 Clap 909 Snare Electro Low Tom 1 Closed High Hat 1 Electro Low Tom 2 Closed High Hat 2 Electro Mid Tom Open High Hat 1 Electro Hi Tom 1 Electro Hi Tom 2 Crash Cymbal 1 Crash Cymbal 3... -
Page 133: Drum Map B
DRUM MAP B 909 Kick 2 Rim Shot 808 Snare 2 808 Clap 909 Snare2 Electro Tom 5 Closed High Hat 3 Electro Tom 4 Closed High Hat 4 Electro Tom 3 Open High Hat 2 Electro Tom 2 Electro Tom 1 Crash Cymbal 1 Crash Cymbal 2 Ride Cymbal... -
Page 134: Drum Map C
DRUM MAP C Res FX 1 Wip 1 Res FX 2 Force Field 2 Res FX 3 Res FX 4 Vindaloo Noise Spit U Like M-Wh RainPicks Spit U Like2M-Wh Infiltrator SFX Burbler Down Osc Rain Piz Filter Sweep KHz Ringglass Explosion Liquinova M-Wh... -
Page 135: Drum Map D
DRUM MAP D Init Program Init Program Init Program Init Program Init Program Init Program Init Program Init Program Init Program Init Program Init Program Init Program Init Program Init Program Init Program Init Program Init Program Init Program Init Program Init Program Init Program Init Program... -
Page 136: Performance Bank A
PERFORMANCE BANK A Blaster Master Juicy Gaff Pad on Spec Agro Pad Tech Terror Ambi Bambi Liquid Goo Solaris Layered Pianos Perci Organ SuperStabber Brass+Lead Popsickle TooPad SintillatedWorry Chime On Cool Pad Choccie The Pizzacato PaddiWhack Klavikle OrchStrings Ravers in 7th! Liquid Sweep Donna Supernova! Classic Combo... -
Page 137: Performance Bank B
PERFORMANCE BANK B Energy Rusher! Pianas Pad SQ Law SuperObiewan 2 Enormous 5th Syncathetic SuperUtopian 3 Slappa Bass Plastic Crackpot A Pile of Perf FM Rhodes 3PtWfx AtmosSpace Can Basher! SuperHard The Dark Horse SuperSaturated News & Weather Slow'n'Slippery SuperGlider Picked Gat/Harp On Your Face Arty Farty... -
Page 138: Monophonic Preset Patterns
MONOPHONIC PRESET PATTERNS 3/3 Up Slightly Accented DOWN 3/3 Dn Accented UP & DOWN1 3/3 Dn Slightly Accented UP & DOWN2 3/3 Up/Dn Accented PLAYED 3/3 Up/Dn Slightly Accented WALKINGUP 9/8 Pattern Accented WALKINGDOWN 9/8 Pattern Slightly Accented WALKINGPLAYED Walking Up2 Accented RANDOM1 Walking Up2 Slightly Accented RANDOM2... -
Page 139: Polyphonic Preset Patterns
POLYPHONIC PRESET PATTERNS Bass Trance 1 BASS5 303 Trance 1 BASS6 303 Trance 1v1 BASS7 303 Trance 2 BASS8 Bass Trance 2 BASS9 303 Trance 3 BASS10 303 Trance 3v1 BASS11 303 Trance 4 BASS12 303 Trance 4v1 BASS13 303 Trance 5 BASS14 UP DN Variation BASS15... -
Page 140: Distributors
Ph 00 33 1 3960 0271 yayo@intertepoz.com info@dmc-music.com www.studtech.com CANADA studiotech@wanadoo.fr NEW ZEALAND SWEDEN Novation USA Ltd South Pacific Music Distrib (Mainline Musikmania A4 Westacott Business Centre GERMANY Music) Oftergatan 30 Maidenhead Office Park TSI GmbH 42 Taharoto Road... -
Page 141: Index
INDEX 1*3 - Button 68 Chorus Delay 102 Drum Map c 134 1*3 - FM - Button 68 Chorus Feedback 102 Drum Map d 135 12dB - Button 83 Chorus Inertia 103 Drum played as 36 18dB - Button 83 Chorus Mod depth 102 Drum Program 112 2*3 - Button 68... - Page 142 LFO Delay 89, 90 Normal- Button 90 LFO Section 2, 88 Note 31, 32, 51 gain 60, 61, 64 LFO slew amoun 88 NOVATION JARGON 22 Gain compensate 104 LFO wave 102 NRPN Tables 127 Gate 31, 32, 51, 59 LFOs 59...
- Page 143 INDEX Overdrive curve 83 Power On/Off - Switch 41 SETTING UP 4 Overload 97 PPM meters 60 sibilance 63 Overload / Poly Limit - Button 97 Pre Effects level 104 Sibilance level 63 overvoicing 97 Preglide 71 Sibilance type 63 Prog - Buttons 53 Slow 90 Packet error 49...
- Page 144 INDEX Troubleshooting 119 Tune 35, 37, 68 Tune - Button 111 Type 100 Unison 69 Unison - Button 69 Unison Detune 72 Unison mode 71, 72 update 40 Upgrading 121 User 31 User Pattern 51 VCO drift 72 Vel sensing 48 Velocity 32, 37, 51, 55, 97, 112 Velocity - Button 112 Velocity - Knob ( ENV 1 ) 97...
- Page 145 NOTES...
- Page 146 The lightning flash with arrowhead symbol within an equilateral triangle, is intended to alert the user to the presence of uninsulated “dangerous voltage” within the product’s enclo- sure that may be of sufficient magni- tude to constitute a risk of electric shock to persons. The Exclamation point within an equilateral triangle, is intended to alert the user to the presence of important operating and maintenance (servicing) instructions in the literature accompanying this product.
- Page 147 Specifications subject to change: The information contained in this manual is believed to be correct at the time of going to press. However, Novation reserves the right to change or modify the specification without notice or obligation to update existing units. While every effort is made to make sure no errors are present in this document, Novation cannot accept responsibility or liability for loss of data, incorrect operation or misleading operation due to errors.
- Page 148 For More Information Contact: A4 Westacott Business Centre, Maidenhead Office Park, Maidenhead, Berkshire, England. SL6 3RT. Ph: +44 (0) 1628 828888 Fax: +44 (0) 1628 825599 E-Mail:sales@novationuk.com Web Site: http//www.novationuk.com...
Need help?
Do you have a question about the SuperNova II and is the answer not in the manual?
Questions and answers