Table of Contents
Advertisement
Quick Links
Advertisement
Table of Contents

Subscribe to Our Youtube Channel
Related Manuals for Novation SL Mk III


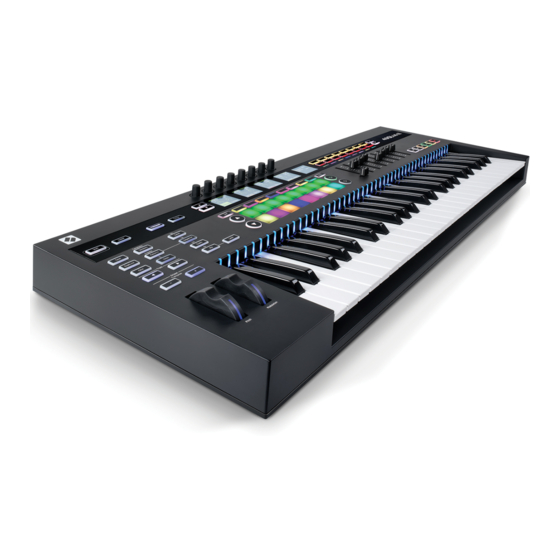
Summary of Contents for Novation SL Mk III
-
Page 2: Table Of Contents
CONTENTS KEYBOARD SETTINGS . . . . . . . . . . . . . . . . . . . . . . . . . . . . . . . 21 INTRODUCTION . - Page 3 NOVATION Disclaimer A division of Focusrite Audio Engineering Ltd . Novation has taken all possible steps to ensure that the Windsor House, information given here is both correct and complete . In no Turnpike Road, event can Novation accept any liability or responsibility for...
-
Page 4: Introduction
100 to 240 VAC - BEFORE you plug it into the mains . We recommend you only use the supplied PSU . Power supplies for your SL MkIII can be purchased from your music dealer or directly from Novation if you have lost yours... -
Page 5: Hardware Overview
HARDWARE OVERVIEW The SL MkIII 49- and 61-note versions have the same front panel controls and rear panel connections . 1 . Power On/Off button 14 . Up/down page buttons 2 . DC power jack: 12V DC, 1A, power supply 15 . -
Page 6: Features
FEATURES Sequencer view The SL MkIII has a 16-step sequencer per Part . The 16 ‘Steps’ of a Part have their own ‘view’ with settings that affect just steps, and the 16-step sequence is referred to as a ‘Pattern’, again with its own ‘view‘ where you can adjust settings relating to each 16-step pattern . -
Page 7: Options
Pattern Scrolling In Steps mode, you can press the Up/Down buttons to the left of the pads to scroll through your patterns . Pressing the pads takes you to the pattern before (up) or after (down) . So you know which pattern you are on when you move through patterns using the arrow up/down buttons, the 5th screen will show you which pattern is visible on the pads . - Page 8 Gate Select Gate to edit the length of MIDI notes assigned to each Step in the current pattern . Use the up/down arrow buttons to the left of the screens to access steps nine to 16 . The screen will show a single Gate value for each step of the pattern containing one or more notes .
- Page 9 Pattern The next item in the Options menu is ‘Pattern’, which itself contains four sub-options: ‘Start Position’, ‘End Position’, ‘Direction’ and ‘Sync Rate’ . Editing these settings alters the playback of Patterns in interesting ways (we recommend playing around here to achieve ‘happy accidents’) . Pattern changes will take effect when playback reaches the end of the Pattern . The adjustable settings are as follows: Global INCONTROL...
-
Page 10: Patterns View
Patterns view Press the ‘Patterns’ button to open Patterns view . Here you can select MIDI patterns within the current Session . The eight Patterns for each track are laid out horizontally in rows across the 8x2 pad area . The pads represent each Pattern, and each row takes the colour of its Part . -
Page 11: Automation View
Automation view In Patterns view, press the Options button to enter Automation view . In this view, each control type, as well as the name of any controls with automation for the selected Track, are displayed on the screens as ‘lanes’ . Use the soft buttons below the screens to select a different Track to see its automation . -
Page 12: Automation
Automation With the SL MkIII’s Sequencer recording, you can automate the movement of the following Template controls: • Rotary Knobs • Faders • Soft Buttons • Pads (press/release & pressure) • Pitch & Modulation Wheels • Pedals Once a control moves its corresponding LED or screen will light red, and the control will begin overwriting any of its existing automation data as the Transport advances . -
Page 13: Templates
TEMPLATES Each Part works within a Template . In other words, each Part uses a Template to determine which MIDI messages should send for each control and on which MIDI Channel and output it should send those messages . You can access and edit Templates in Templates view . - Page 14 Select Template Channel (MIDI Channel) To change the Template for a Part: The SL MkIII doesn’t have a global MIDI channel, each Part has its own MIDI channel . The MIDI channel for a Part is set 1 . Press Shift and Sessions buttons to enter the using the Channel control on the third screen .
-
Page 15: Arpeggiator (Arp)
ARPEGGIATOR (ARP) The SL MkIII’s Arp (Arpeggiator) gives you the ability to program classic, ‘machine-like’ arpeggios, perfect for techno and many other electronic genres . Tempo Grid Options Latch Turn Arp On/Off To turn the arpeggiator on or off hold Shift and press the Arp button . This Arp button will light white showing it is on . With the arpeggiator on, held notes on the keyboard will arpeggiate . -
Page 16: Arp Part
Arp Part Arp Sync Rate Arp can only arpeggiate one Part at once, so by default, this This changes the musical rate the Arp runs relative to the SL is set to ‘Selected Part’ . However, using the soft buttons MkIII’s clock . -
Page 17: Arp Velocity
Arp Velocity Additional Arp Notes Arp note Velocity can be between 1 and 127 (standard for While using Up/Down 1 with an octave range greater than MIDI velocities) or ‘Played’ (default) . one, when the arp moves down, reducing the octave range to one will cause the Arp to continue falling through all the When set to Played, the output notes from the arpeggiator octaves until it reaches one . -
Page 18: Global Settings
GLOBAL SETTINGS MIDI Clock Rx/Tx MIDI Clock Rx Press the Global button to enter the Global Settings view . Any settings changed in this view affect the whole device The following steps enable or disable receiving of external and do not change with the Session . These settings save MIDI clock messages: when you turn off the SL MkIII via the power switch . -
Page 19: Midi Out 2
MIDI Out 2 Clock Out PPQN When set to ‘Out’, the SL MkIII can use two MIDI DIN When the Transport is running, the Clock Out sends ‘clock outputs . This means the device can send MIDI clock to two pulses’... -
Page 20: Cv Calibration
CV Calibration You may need to calibrate the CV Pitch output ports to precisely represent the pitch range . Press the soft button under ‘Calibrate’ to enter calibration mode . Tempo Grid Options Latch To calibrate a CV Pitch port: 1 . -
Page 21: Firmware And Bootloader Version
Firmware and Bootloader Version KEYBOARD SETTINGS Octave These show the firmware installed on your SL MkIII . Knowing this information may be helpful in the case of troubleshooting . The octave up and down buttons (+ and - buttons) change the octave offset of the keyboard . -
Page 22: Swing
Swing TRANSPORT The SL MkIII’s Swing function moves MIDI notes off their Located at the far-right side of the SL MkIII is a row of buttons mathematically precise positions to achieve a more natural known as the ‘Transport’ . or human sound . Start/Stop/Continue The result is more ‘swing’... -
Page 23: Zones
ZONES Zones is a powerful feature that divides the keyboard into areas, aka ‘Zones’ . Zones can be one note or the whole keyboard . Zones are customisable: you could, for example, set your drum sounds to play in one octave, bass in another, synth sounds in another etc . -
Page 24: Set Destination For A Zone
Aftertouch messages can also be customised using the press it a second time . The key LEDs will pulse, and the SL Novation Components software editor . MkIII will prompt you to choose a low key on the keyboard followed by a high key, thus setting the Zone range . -
Page 25: Session Management
SESSION MANAGEMENT A ‘Session’ on SL MkIII contains the eight Parts on the SL MkIII with each made up of eight patterns (containing 16-steps) . The Session also contains the Templates, Scales, Arp settings, and Zones . By sending a Session to SL MkIII, from Components, you can restore all the steps, automation data and assignments . -
Page 26: Scales
SCALES Enable/Disable Scales Scales view provides an excellent entry point for beginners to start learning the fundamentals of chords and scales . It also serves as an excellent refresher for intermediate players whose knowledge of harmony has become rusty . Tempo Grid Options... - Page 27 Sequence Transpose with Pads Turn Scale On/Off per Part When you’re in the Scale Setting menu you can also control You can enable scales mode for each Part . To do this press the Sequence Transpose setting with the 8x2 grid of pads . the soft buttons above the pads (below the screens) .
-
Page 28: Midi Ports/Routing
COMPONENTS Novation Components is the librarian and editor software for the SL MkIII . Components is available as an online application and standalone to your computer for use without an internet connection . You can access both versions of Components from the following link: components .novationmusic .com... -
Page 29: Daw Feature Support
INCONTROL Press the ‘InControl’ button to enter InControl mode . InControl integrates the SL MkIII with DAWs like Pro Tools, Cubase, Reaper, Logic, Reason and Ableton Live . The chart below shows which DAW features InControl supports . To exit InControl, you can either press any other view or press the InControl button again to take you back to the previously selected view . -
Page 30: Hui
• ‘SL MkIII InControl’ may behave differently . For example, in Pro Tools the Arm • MIDIIN2/MIDIOUT2 (Novation SL MkIII) button will flash when on . Send Control Press the Options button to access the encoder assignment menu . You can set the encoders to control send levels . Use the page up/down buttons next to the screens to access send groups A through E . - Page 31 Control surface mode to HUI (partial) and set the input and Note: The ‘Novation SL MkIII InControl’ port may show as output port to ‘Focusrite A .E . – Novation SL MkIII – SL MkIII ‘MIDIIN(put)’/’MIDIOUT2’ or similar on Windows .
-
Page 32: Ableton Live
Finally, in the ‘MIDI Ports’ section set ‘Track’, ‘Sync’ the left-most soft button selects track 1, the next from the left and ‘Remote’ to ‘On’ for ‘Novation SL MkIII (SL selects track 2, and so on . MkIII MIDI) . Be sure to do this for both Input and Output options . - Page 33 The Screen Label Grid The screen label provides an overview of which controls Pressing Grid changes the pads to a ‘drum view’ . The Grid currently display across the screens . When a Live device button will turn green . This view is ideal for playing Ableton changes or you bank through the parameters of a device, Live’s Drum Racks as it allows you to use pads to play drums this label will update to show what you can currently control .
- Page 34 Displaying Device Chains and Device Selection In Options view, the upper part of the screens show the device chain on the currently selected track . These devices may be Ableton instruments, audio/MIDI effects, or third-party plug-ins . • Click a pink pad to select the devices you wish to control . This turns the pad bright pink and selects the name of the device on the screen above .
-
Page 35: Logic Pro X
2 . Choose ‘New’ followed by ‘Install’ . The soft buttons above the faders control mute and solo for 3 . Choose Novation 49SL MkIII or Novation 61SL MkIII eight tracks . When you solo a track, the muted tracks will and click ‘Add’... -
Page 36: Reason
3 . Click ‘the Auto-detect Surfaces’ button . A dialogue window with a progress bar will appear . Enable ‘Use with Reason’, and ‘Novation SL MkIII SL MkIII From DIN 1’ and you can control Reason with the SL MkIII . You can control all Instruments, Effects and Utilities in a Reason Rack (see picture below), as well as move between tracks . - Page 37 Soft Buttons 1-24 Option button You can use these buttons to navigate inside Reason’s This toggle’s Reason’s metronome On/Off . It will light white devices . For example: when active, and orange when off . For Redrum, the eight soft buttons under the screens select Up/Down buttons channels 1-8;...
- Page 38 Copyright 2016 STMicroelectronics License Redistribution and use in source and binary forms, with or without modification, are permitted provided that the following conditions are met: Redistributions of source code must retain the above copyright notice, this list of conditions and the following disclaimer . Redistributions in binary form must reproduce the above copyright notice, this list of conditions and the following disclaimer in the documentation and/or other materials provided with the distribution .
Need help?
Do you have a question about the SL Mk III and is the answer not in the manual?
Questions and answers