Table of Contents
Advertisement
CONTENTS
Introduction........................................................... 2
In the Package.................................................................2
Product Registration.........................................................2
Using This Manual........................................................ 2
MIDI Controller Section Main Features......................... 2
Audio Section Main Features........................................ 2
Synthesizer Features.......................................................2
Quick Start Guide.................................................. 3
Conventions used in this Manual.................................... 3
Connecting Up To equipment......................................... 3
Stand Alone Operation.................................................... 3
Playing the Synthesizer.................................................... 3
Windows XP USB Driver Installation............................. 4
MAC OS X USB Driver Installation................................. 4
About ASIO on Windows XP........................................... 4
About Core Audio on MAC OS X..................................... 4
Selecting The X-Station as the Audio Device................. 5
The X-Station Control Panel........................................... 5
About Latency.................................................................. 5
Selecting The X-Station as the Audio Device in LOGIC.. ........ 6
Selecting The X-Station as the MIDI Device in Reason.. ........ 7
Controlling a VST Plug-In or Reason Instrument........................ 7
Factory Supplied Templates........................................... 7
Using The Programmable Template Controls................ 8
Sending A Snapshot Of The Controls............................10
Selecting A Sound On External MIDI Devices.............. 10
Audio Connection And Setup.........................................10
Monitoring......................................................................10
Recording And Listening................................................10
Recording And Listening With Effects............................11
MIDI Tutorial......................................................... 12
Introduction................................................................... 12
How MIDI Ports Are Used............................................ 12
MIDI Messages............................................................. 12
Detailed Operation.............................................. 15
Front Panel Layout....................................................... 15
Modes And Menus....................................................... 16
Using Menus................................................................ 16
Entering Text................................................................ 16
The Template Common Menu...................................... 17
Template Edit Mode (Editing A Template).................... 18
The Template Edit 'CC' Pages..................................... 18
The Template Edit 'MMC' Pages.................................. 19
The Template Edit 'Note On/Off' Pages....................... 20
The Template Edit 'SYSEX MESSAGE' Pages............ 20
The Template Edit 'Program Change' Pages............... 21
Using The X / Y Touchpad........................................... 21
Using The Footswitch Or Pedal................................... 22
Saving A Template To Memory..................................... 22
The Dual Multi Effects Processor................................. 23
The Delay Effect........................................................... 23
The Reverb Effect......................................................... 24
The Chorus Effect......................................................... 24
The Compressor........................................................... 25
The Distortion Effect..................................................... 26
The EQ Processor........................................................ 26
Advanced Features............................................. 27
Using The Transport Buttons....................................... 27
The Global Mode Menu.............................................. 27
Saving The Global Settings To Memory....................... 29
Upgrading The Operating System From MIDI............. 29
Synthesis Tutorial............................................... 30
Elements Of A Sound.................................................. 30
The Oscillators And Mixer............................................ 31
The Filter....................................................................... 32
Envelopes And Amplifier.............................................. 33
LFOs............................................................................. 35
Memories...................................................................... 35
Summary...................................................................... 35
The KS Synthesizer............................................. 36
Introduction................................................................... 36
Selecting KS Synth Patches........................................ 36
Editing A Synth Patch (Sound)..................................... 37
Saving A Synth Patch................................................... 37
Using Menus................................................................ 38
The Oscillator / Mixer Section..................................... 38
The Filter Section......................................................... 40
The LFOs Section........................................................ 41
The Envelopes Section................................................ 42
The Arpeggiator Section............................................... 43
The Effects Section...................................................... 44
The Oscillator Menu..................................................... 44
The Mixer Menu........................................................... 45
The Filter Menu............................................................ 47
The LFO Menu............................................................. 47
The Arpeggiator Menu.................................................. 49
The Sync Menu............................................................ 50
The Wheels Menu........................................................ 51
The Aftertouch And Breath Menu................................. 52
The Pan Menu.............................................................. 53
The KS Synth Mode Global Menu................................ 54
Routing MIDI To And From The KS Synthesizer.......... 54
The KS Synth General Settings................................... 55
Saving The KS Synth General Settings....................... 55
Appendix.............................................................. 56
Troubleshooting............................................................ 56
Using The X-Station With Reason............................... 57
Known Anomalies With Reason.................................. 57
Preset Template Listings...........................................58-61
The KS Synth Patch Preset Listings............................ 62
MIDI Implementation Chart........................................... 64
Safety CE Notices And Approvals................................ 65
•
•
1
Contents
Advertisement
Table of Contents

Related Manuals for Novation X-Station


Summary of Contents for Novation X-Station
-
Page 1: Table Of Contents
About ASIO on Windows XP... 4 About Core Audio on MAC OS X... 4 Selecting The X-Station as the Audio Device... 5 Selecting The X-Station as the Audio Device in Cubase..5 The X-Station Control Panel... 5 About Latency... 5 Selecting The X-Station as the MIDI Device in Cubase... -
Page 2: Introduction
Using This Manual - Main Features - Conventions Used Thank you for purchasing the X-Station controller keyboard and synthe- sizer. The X-Station is a state of the art product, it turns any com- puter into a complete, professional music & audio production workstation with hardware synthesizer, audio &... -
Page 3: Quick Start Guide
2) Insert Dry or rechargeable batteries (recommended) . 3) Connect the X-Station to a powered USB Hub. The X-Station will run on all types of ‘C’ size dry or re-chargeable cells. Nicad batteries are rechargeable and will last approx 6 hours. -
Page 4: Windows Xp Usb Driver Installation
Driver Installation - Windows XP and MAC OS X USB Driver Software Installation In order to use all of the features of the X-Station it must be connected to a computer system using the supplied USB cable. The USB connec- tor is located on the rear panel. -
Page 5: Selecting The X-Station As The Audio Device
Cakewalk Sonar, MOTU Digital Performer or Propellerhead Reason and select the X-Station as the Audio and MIDI Device. Selecting the X-Station as the Audio Device in Cubase SX or SX2 In Cubase SX or Cubase SX2 open the ‘Device setup’ window from the pull down menu under ‘Devices’... -
Page 6: Selecting The X-Station As The Midi Device In Cubase
From the drop down box titled ‘Driver’ select ‘Novation X-Station’ NOTE : If just ‘X-Station’ is listed, turn the power off and then on again to the X-Station. The computer will then recognise that the unit is con- nected and will make available as a selection the correct ‘Novation X-... -
Page 7: Selecting The X-Station As The Audio Device In Reason
Controlling a VST Plug-In Instrument or a Reason Instrument The X-Station control panel is arranged in the format of a typical ana- logue subtractive synth design and Templates in the form of electronic memories that contain the specific control information for each instru- ment are preset in the X-Station. -
Page 8: Using The Programmable Template Controls
Using The programmable Template Controls In addition to the 5 preprinted labels there are a further 3 blanks which may be customised for any specific instrument. To fit a template label, simply place over the synthesizer control panel area. ReMOTE audio template: blank Check the front panel display area to see that PLAY mode is selected (the LED above the button will be lit when in PLAY mode). -
Page 9: Sending A Snapshot Of The Controls
Audio Connection And Setup At this stage it is assumed that the X-Station is connected to a comput- er and both the computer and the X-Station are switched on. Now that the software drivers have been installed, connect the X- Station to the other system devices. -
Page 10: Changing The Action Of The Pitch / Mod Joystick
‘out of time’ feel, or as an echo if this delay time is long. The X-Station has a zero latency monitoring feature whereby a knob is provided to balance the previously recorded material with the live sound to be recorded. -
Page 11: Stereo Recording
An outstanding feature of the X-Station is the ability to record and / or monitor complete with effects, such as Reverb, without the need for an external hardware effects box or without the need to engage additional effects processors within the recording software. -
Page 12: Midi Tutorial
These are used by the X-Station to receive incoming MIDI information. It is possible to configure the X-Station to immediately re-transmit this MIDI information to any of the X-Station MIDI Out ports or to the USB port. This is detailed on page 25. The X-Station can process incoming MIDI from the MIDI IN port or the USB port simultaneously. -
Page 13: Midi Messages
The X-Station employs system exclusive messages for two distinct pur- poses. Firstly, they can be used to back up all of the X-Station memo- ries and global data. This feature is extremely useful in building up a Template library or a Synth program library on a computer or for making a safety copy of data in case the worst should happen. - Page 14 X-Station. See page 17 for details on assigning MMC. A MIDI Implementation Chart provides a concise way of telling at a glance which MIDI messages an instrument will transmit and respond to. A MIDI Implementation Chart for the X-Station can be found on page • •...
-
Page 15: Detailed Operation
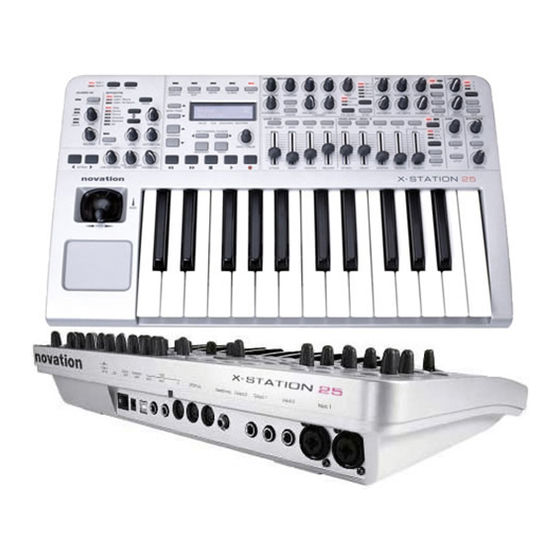
2 for the X axis (horizontal) and 2 for the Y axis (vertical). 10. Aftertouch Sensitive Semi-Weighted Keyboard X-Station 25 has a 25 note keyboard (2 octaves), X-Station 49 has a 49 note keyboard (4 octaves), X-Station 61 has a 61 note keyboard (5 octaves). -
Page 16: Modes And Menus
X-Station is switched on. KS Synth Mode In this mode, the X-Station can be used as a Novation KS Synthesizer. This mode is selected by pressing the PLAY button once more while already in Play Mode. Pressing the PLAY button once more toggles back to Template Play Mode. -
Page 17: The Template Common Menu
Template data. Any MMC func- tions assigned to buttons are not sent in a snapshot. Note that when the X-Station is turned on, it always automatically starts up in Play Mode. However, at this time, an auto snapshot is not trans- mitted, even if this setting is On. -
Page 18: Template Edit Mode (Editing A Template)
It is always the last touched control which is edited. If no control has been touched since the X-Station was turned on, the default control selected for editing will be Pot one (the knob at the top left corner). The... -
Page 19: The Template Edit 'Nrpn' & 'Rpn' Pages
MSB Number (Menu Page 3) Sets the MSB (Most significant byte) of the NRPN / RPN number. For NRPN numbers less than 128 (such as those used by the Novation Supernova 1 Rack and Nova Laptop), ensure that this setting is zero. -
Page 20: The Template Edit 'Note On/Off' Pages
The Template Edit ‘Note On/Off’ Pages - The Template Edit ‘SYSEX’ Pages This is similar to the display shown when other types of MIDI informa- tion are transmitted by a control (see page 5). Shown on the top line is the type of MMC command defined, while on the bottom line at the left is the MMC number of the command, followed by the usual MIDI mes- sage type, MIDI channel and port routing displays. -
Page 21: The Template Edit 'Program Change' Pages
DETAILED OPERATION The Template Edit ‘Program Change’ Pages - The X / Y Touchpad The Template Edit ‘Program Change’ Pages The following Menu pages are available if Control Type on menu page 1 is set to ‘Program Change’. These are only available if the control being edited is a button : Template Edit 'Program Change' Pages Page Function... -
Page 22: Using The Footswitch Or Pedal
The socket on the rear panel excepts a ‘Tip Ring Sleeve’ type of 1/4” Jack. The X-Station sends power to the Tip and Sleeve and the poten- tiometer in the pedal returns a voltage ( 0 - 5 Volts ) on the Ring con- nection. -
Page 23: The Dual Multi Effects Processor
A further press of the TEMPLATE WRITE button completes the write procedure and confirmation is shown on the display : TEMPLATE SAVED After about half a second, the X-Station returns to Template Edit Mode or Template Select Mode where it was before the write procedure was invoked. -
Page 24: The Reverb Effect
The Reverb Effect - The Chorus Effect Use the BOTTOM LINE knob to select the most suitable ratio. A Simple, equal 1 to 1 ratio is the first entry in the table. This setting sends a delay of equal time to the left and right output chan- nels. -
Page 25: The Compressor
DETAILED OPERATION The Mod Centre function moves the middle point between the Min and Max values. Turn the BOTTOM LINE knob to experiment with this con- trol for the desired effect. Press the BANK PAGE Up button and a final Menu display page appears as below : Feedback : Feedback... -
Page 26: The Distortion Effect
The Distortion Effect - The EQ Processor Release Time The compressor needs to know how quickly to turn off the compression effect once the signal level drops to below the threshold level. Turning the BOTTOM LINE knob adjusts the Release time from 50mS to 5 Seconds. -
Page 27: Advanced Features
Using such a program is recommended for building a library of templates and synthesizer programs. A System Exclusive dump can be replayed into the X-Station from a sequencer or sysex librarian at any time. A single Template dump or... -
Page 28: The Global Mode Menu
As the OS is received a percentage of receipt is displayed. When com- pleted, a prompt is made to switch the X-Station Off and then back On again. Retain Template Values (Menu Page 13) Determines whether the ‘current values’... -
Page 29: Saving The Global Settings To Memory
Saving The Global Settings To Memory Once any of the Global settings have been altered in Global Mode, they may be written to a special area of X-Station memory for instant recall the next time the X-Station is switched on. -
Page 30: Synthesis Tutorial
Elements Of A Sound It is recommended that this chapter is read carefully if Analogue sound synthesis is an unfamiliar subject. Users familiar with this subject can skip this chapter and move on to the chapter - The KS Synthesizer on Page 34. -
Page 31: The Oscillators And Mixer
SYNTHESIS TUTORIAL The Oscillators And Mixer The Oscillator is really the heartbeat of the Synthesizer. It generates an electronic wave (which creates the vibrations). This Waveform is pro- duced at a controllable musical pitch, initially determined by the note played on the keyboard or contained in a received MIDI note message. The initial distinctive tone or timbre of the waveform is actually deter- mined by the wave’s shape. -
Page 32: The Filter
There are has three independent Oscillators and a separate Noise Oscillator. Some synths such as the Novation KS 5 often have a separate Mixer section available on the front panel. On the X-Station’s KS Synth imple- mentation, a single LEVEL knob within the OSC / MIXER section is used to adjust the levels of the Oscillators and Noise generator. -
Page 33: Envelopes And Amplifier
SYNTHESIS TUTORIAL The diagram below shows the response of a typical low pass filter. Frequencies above the cut off point are reduced in volume. Cut off Cutoff frequency Frequency Volume Volume Frequency Frequency When resonance is added, frequencies at the cut off point are boosted in volume. -
Page 34: Sustain Level
Envelope Generators, this Envelope only has Attack and Decay phases. It is possible to make the Envelope settings vary according to how hard a note is played on the X-Station keyboard. Notes struck with a good Sustain Sustain... -
Page 35: Lfos
! If not recon- nected in exactly the same way, the sound would be lost forever. Modern machines such as the Novation KS 4 / KS 5 have all the blocks in one compact unit and the sound generating or modifying blocks are arranged in a sensible fashion. -
Page 36: The Ks Synthesizer
Effects for the KS Synthesizer’s Effects. * Hypersync Templates are not used. * It is not possible to use the X-Station as a MIDI controller and KS Synth simultaneously. The X-Station can either be in the template mode or the synth mode at any one time. -
Page 37: Editing And Saving Synth Patch
THE KS SYNTHESIZER Editing A Synth Patch (Sound) Once familiar with the sounds that are available, use the PROGRAM buttons to select Synth patch number 299 - ‘Init Program’. This is a very basic synthesizer sound which can be used as a starting point to create a new, more interesting sound for your own use. -
Page 38: Using Menus
Using Menus - The Oscillator / Mixer Section Using Menus Many of the more specialised features and utilities of the KS Synth are accessed from menus. There are nine separate menus, each of which consists of several pages linked together. In KS Synth mode, the top row of buttons in the Envelopes section of the front panel are used to access menus by pressing the relevant but- ton. -
Page 39: The Oscillator / Mixer Section
THE KS SYNTHESIZER Obtaining A Classic Square / PWM Sound The PWM sound is one of the classic analogue synthesizer sounds. Select the factory initialisation sound (299 - ‘Init Program’). This sound use only use Oscillator 1 as the source waveform. For this oscillator select a square waveform using the WAVEFORM knob in the Oscillators section. -
Page 40: The Filter Section
The Filter Section SYNC Button This function provides a way of producing interesting, piercing, metallic sounds. It does this by using the frequency of Oscillator 1 to periodically restart the waveform used by Oscillator 2. This technique is known as Oscillator Sync. -
Page 41: The Lfos Section
THE KS SYNTHESIZER ENV DEPTH Knob Controls the amount of change to the filter Cut off (set by the FRE- QUENCY knob) by the Modulation Envelope. In its central position there is no change to the filter Cut off frequency. Adjusting the knob anticlockwise from centre will introduce an increasing amount of nega- tive modulation. -
Page 42: The Envelopes Section
The Envelopes Section The Envelopes Section AMP & MOD Envelopes The Envelopes are used to shape a sound throughout its duration. The AMP Envelope always determines the volume of the sound with respect to its duration. The MOD Envelope may be used to control other sound elements of the synthesizer throughout the duration of the sound. -
Page 43: The Arpeggiator Section
THE KS SYNTHESIZER TRIGGER Button Controls the triggering of the Envelope currently selected by the AMP / MOD / ENV 3 button. This function only applies to a sound which has been set up to behave in a monophonic manner (see Polyphony Mode on Page 42). -
Page 44: The Effects Section
These controls do not affect any of the KS Synth’s sound parameters. However, they can be defined to transmit user defined MIDI information in a similar manner to the way controls are used in a standard X-Station Template. This is described in the section detailing KS Synth General Settings on page 53. -
Page 45: The Oscillator Menu
THE KS SYNTHESIZER Preglide Semitones (Menu Page 4 ‘OSC Preglide’) A Preglide is applied to the pitch of the Oscillators starting at a pitch determined by the Preglide amount in semitones. Gliding up from a pitch occurs when the display indicates between -12 to -1, and gliding down from a pitch occurs when the display indicates between 1 to 12. -
Page 46: The Mixer Menu
The Mixer Menu OSC 2 to 3 FM Manual Level (Menu Page 7 ‘OSC 23 FM Level’) Controls the amount that Oscillator 3 is directly Frequency Modulated by Oscillator 2. Whilst playing a note, adjust this value by using the PERF / PROG / DATA knob. -
Page 47: The Filter Menu
THE KS SYNTHESIZER The Filter Menu To complement the front panel controls in the Filter section, there are other functions located within the Filter Menu. This is selected by pressing the HOLD button in the Amp Env section on the front panel. Use the BANK / PAGE up/down buttons to scroll through the Menu functions available - See the table below. -
Page 48: The Lfo Menu
The LFO Menu LFO Keysync Initial Phase Offset (Menu Pages 4 & 11 ‘LFO1 Init Phase’) This setting provides an alternative point in the LFO’s waveform cycle where the waveform will be restarted from when LFO Keysync is set to ON. -
Page 49: The Arpeggiator Menu
THE KS SYNTHESIZER The Arpeggiator Menu To complement the front panel controls in the Arpeggiator section, there are many other functions located in the Arpeggiator Menu. This is selected by pressing the DEST button in the Mod Env / Env 3 section on the front panel. Use the BANK / PAGE up/down buttons to scroll through the Menu functions available - See the table below. -
Page 50: The Sync Menu
The Sync Menu The Sync Menu All of the settings associated with synchronising the Arpeggiator, LFOs and Effects to the Arpeggiator clock are found here. The Sync Menu is selected by pressing the GATE but- ton in the Mod Env / Env 3 section on the front panel. Use the BANK / PAGE up/down buttons to scroll through the Menu functions available - See the table below. -
Page 51: The Wheels Menu
THE KS SYNTHESIZER The Wheels Menu This menu controls how the much response there is to Pitch and Modulation from the built in Pitch / Modulation joystick. The Sync Menu is selected by pressing the F1 button in the Mod Env / Env 3 section on the front panel. Use the BANK / PAGE up/down buttons to scroll through the Menu functions available - See the table below. -
Page 52: The Aftertouch And Breath Menu
In order to hear the effect of any of these settings, press a key down firmly on the X-Station keyboard or blow into the breath controller while adjusting the values. All Aftertouch settings will respond to the Aftertouch generated by play- ing the X-Station keyboard. -
Page 53: The Pan Menu
THE KS SYNTHESIZER The Pan Menu The Panning function performs the same function as the Panning knob on a mixing console. It can be used to position a sound anywhere from left to right in the stereo field. The Pan Menu is selected by pressing the F3 button in the Mod Env / Env 3 section on the front panel. -
Page 54: The Ks Synth Mode Global Menu
MIDI output is also set to X-Station. MIDI data will now flow from the X-Station into the sequencer and the sequencer will route this data out of the sequencer into the X-Station. The KS synth will then respond to this data and play as expected. -
Page 55: The Ks Synth General Settings
Except for the Audio Channel 1 settings, all of these features can be re- programmed in a similar fashion to programming a control in Template Edit Mode in a standard X-Station Template. Simply press the TEM- PLATE EDIT button from within KS Synth Mode and edit the feature in the normal way. -
Page 56: Appendix
MIDI and Audio and it is found that the X-Station cannot be selected as the MIDI input - either the X-Station is grayed out or it does not appear in a list of available MIDI devices close the application, wait for 10 sec- onds, reopen the application and try again. -
Page 57: Using The X-Station With Reason
It is possible the template in use has been programmed incorrectly. To check which controller numbers are being sent, observe the LCD dis- play when a control is moved. The X-Station will be sending these val- ues over MIDI or USB. -
Page 58: Preset Template Listings
(Cubase names any external controller as ‘Generic Remote’) Click on the import button at the right of the pop up page. Import the ‘X-Station’ file from the CD Rom or from the hardrive if this file has been downloaded from the Novation website. -
Page 59: Preset Template Listing
MIDI assignable controls blue. Click on the control to be assigned and then turn the appropriate control on the X-Station. Once the control(s) have been learnt, the MIDI button should be clicked to disable the learn mode. If needed a new template.als file can then be made by clicking Options-Preferences-Defaults and then clicking the save button within the Set - Save Template section of the pop up box. - Page 60 PWM POSITION import a setup file. There are no pref- PWM ENV MOD erences to set up. The X-Station oper- PWM POSITION ating system only allows a button to ENV DEPTH LFO DEPTH...
-
Page 61: Preset Template Listings
Options-Control Surfaces tab from the top menu. Click the "add new sur- face" button. Select "Cakewalk generic surface" from the Control Surface list and click ok. Set the MIDI input port to the X-Station. Set the MIDI output port to None. Click Ok. -
Page 62: The Ks Synth Patch Preset Listings
The KS Synth Patch Preset Listings Bank1 Category Name Bass ArkBass Dance Trance Attack Arpeggio Round In Circles Dance Azzeed Get me to Heaven EP/Clav Rodywhirl Strings How Long String Strings PPG Me Organ Je' t'aime Soft Lead First Solo Bass Garage Bass Arpeggio... - Page 63 APPENDIX Bank2 Category Name Bass Passion Bass Dance Cake dear? Arpeggio Rhythm Flight Dance Go Lieth Paddle Wheel Bass Bass Addict Trance Join the Club EP/Clav Chick Career Bass Thick Bass Bells Big Benny Bass Travelator Hard Lead Arabia Arpeggio Game Show Dance A Touch 2 Much...
-
Page 64: Midi Implementation Chart
MIDI Implementation Chart Version 1.0 - 13 / 4 / 2004 Model : Novation X-Station Function Basic Default 1 - 16 Channel Changed 1 - 16 Mode Default Messages Altered **************** Note True 0 - 127 Number Voice **************** Velocity... -
Page 65: Safety Ce Notices And Approvals
Dette apparat overholder det gaeldenda EF-direktiv vedr¯rendareadiost¯j.Cet appareil est conforme aux prescriptions de la directivecommunautaire 89/336/EC The information contained in this manual is believed to be correct at the time of going to press. However, Novation reserves the right to change or modify the specification without notice or obligation to update existing units.
Need help?
Do you have a question about the X-Station and is the answer not in the manual?
Questions and answers