
Related Manuals for Edge-Core ECW5110-L


Summary of Contents for Edge-Core ECW5110-L
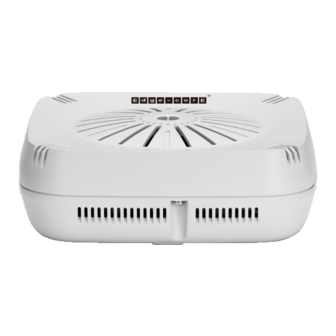
- Page 1 ECW5110-L IEEE 802.11a/b/g/n I n s t a l l a t i o n G u i d e Enterprise Access Point www.edge-core.com...
- Page 2 I n s t a l l a t i o n G u i d e ECW5110-L 802.11a/b/g/n Dual-Band Enterprise AP E042014-CS-R02 149100000236A...
-
Page 3: How To Use This Guide
How to Use This Guide This guide includes detailed information on the Access Point (AP) hardware, including network ports, power, and cabling requirements. This guide also provides general installation guidelines and recommended procedures. To deploy this AP effectively and ensure trouble-free operation, you should first read the relevant sections in this guide so that you are familiar with all its hardware components. - Page 4 How to Use This Guide ◆ Chapter 6 - AP Management — Connecting to the AP for management and information on the system status LEDs. ◆ Appendix A - Troubleshooting — Information for troubleshooting AP installation and operation. Related This guide focuses on AP hardware and installation, it does not cover software Documentation configuration of the AP.
-
Page 5: Table Of Contents
Contents How to Use This Guide Contents Figures Tables 1 Access Point Overview Hardware Description Key Hardware Components Key Technical Specifications 2 Installation Overview Package Contents AP Installation Tasks 3 AP Enclosure General Installation Guidelines AP Location Radio Interference How to Mount the Unit Wall Mounting Suspended Ceiling T-Rail Mounting... - Page 6 Contents How to Connect to Radio Interfaces How to Connect to the RJ-45 Port Copper Cabling Guidelines 10/100BASE-TX Pin Assignments 1000BASE-T Pin Assignments Connection Procedure 6 AP Management Understanding the System Status LEDs How to Connect to the Console Port How to Set an IP Address How to Reset the AP A Troubleshooting...
-
Page 7: Figures
Figures Figure 1: Front View Figure 2: Rear View Figure 3: Installing the AP on a Wall Figure 4: Installing the AP on a Ceiling T-rail Figure 5: Making a Connection to the RJ-45 Port Figure 6: Connecting the AC Power Adapter Figure 7: System LEDs Figure 8: Console Port Connection Figure 9: Wall Mounting the AP... -
Page 8: Tables
Tables Table 1: Key Technical Specifications Table 2: AC Power Adapter Specifications Table 3: Network Status LED Table 4: Maximum Twisted-Pair Copper Cable Lengths Table 5: 10/100BASE-TX MDI and MDI-X Port Pinouts Table 6: 1000BASE-T MDI and MDI-X Port Pinouts Table 7: System Status LEDs Table 8: Console Cable Wiring Table 9: Troubleshooting Chart... -
Page 9: Access Point Overview
The ECW5110-L enterprise access point (AP) is built with leading-edge technology to deliver reliable high-performance connectivity for your data network. The ECW5110-L is a dual-band IEEE 802.11a/b/g/n access point that is designed to deliver high-performance wireless services for clients in an enterprise environment. -
Page 10: Key Hardware Components
Chapter 1 | Access Point Overview Hardware Description Key Hardware The ECW5110-L consists of serveral key harware components. This manual describes each specific component, or related components, together with their Components installation requirements and procedures in each chapter. To understand each component in detail, refer to the relevant section. -
Page 11: Figure 2: Rear View
Chapter 1 | Access Point Overview Hardware Description Figure 2: Rear View Console Port T-rail Mounting Clamps Wall Mounting Slots RJ-45 Ethernet Port RJ-45 Ethernet Port The RJ-45 port labeled “Ethernet” provides a 1000BASE-T data and Power-over- Ethernet (PoE) power connection to the unit. For more information, see “How to Connect to the RJ-45 Port”... -
Page 12: Key Technical Specifications
Chapter 1 | Access Point Overview Key Technical Specifications Key Technical Specifications The following table contains key system specifications for the AP. Table 1: Key Technical Specifications Item Specification Ports One 10/100/1000 Mbps RJ-45 port Network Interface RJ-45 Port: ◆ 1000BASE-T, PoE (PD) Console Port RS-232, RJ-45 connector... -
Page 13: Installation Overview
◆ “AP Installation Tasks” on page 14 Package Contents After unpacking the AP, check the contents to be sure you have received all the components. ◆ ECW5110-L Enterprise Access Point ◆ AC Power adapter ◆ Wall-mount bracket ◆ Console cable (RJ-45 to DB-9) ◆... -
Page 14: Ap Installation Tasks
Chapter 2 | Installation Overview AP Installation Tasks AP Installation Tasks Follow these tasks to install the AP in your network. For full details on each task, go to the relevant chapter or section by clicking on the link. Task 1 Unpack package and check contents Unpack your AP and check the package contents to be sure you have received all the items. -
Page 15: Figure 4: Installing The Ap On A Ceiling T-Rail
Chapter 2 | Installation Overview AP Installation Tasks Figure 4: Installing the AP on a Ceiling T-rail Position the AP’s ceiling-mount clip holders on either side of the T-rail. Turn the AP until the two clips lock the AP to the T-rail. Task 3 Connect Cables Connect network cable to the RJ-45 port for your network connection. -
Page 16: Figure 6: Connecting The Ac Power Adapter
Chapter 2 | Installation Overview AP Installation Tasks Task 4 Connect the AC Power Adapter and Power On Connect the AC power adapter to the AP and to an AC power source. Alternatively, the AP can be powered by a network connection to the RJ-45 port from a PoE switch. -
Page 17: Figure 7: System Leds
Chapter 2 | Installation Overview AP Installation Tasks Figure 7: System LEDs System Status LEDs. Task 6 Make Initial Configuration Changes The AP is designed to be managed from a wireless access controller (EWS4502 or WAC4502) through the Control and Provisioning of Wireless Access Points (CAPWAP) protocol. -
Page 18: Figure 8: Console Port Connection
Chapter 2 | Installation Overview AP Installation Tasks Figure 8: Console Port Connection Console Port. For information on AP configuration: Refer to the AP controller (EWS4502 or WAC4502) Administrator’s Guide and CLI Command Reference. – 18 –... -
Page 19: Ap Enclosure
AP Enclosure The AP includes its own built-in features for mounting the unit to a wall or suspended ceiling T-rail. Before continuing with AP installation, first review the general guidelines and requirements in this chapter. This chapter includes these sections: ◆... -
Page 20: Radio Interference
Chapter 3 | AP Enclosure How to Mount the Unit ◆ Place the AP away from power and telephone lines. Radio Interference The avoidance of radio interference is an important part of wireless network planning. Interference is caused by other radio transmissions using the same or an adjacent channel frequency. -
Page 21: Suspended Ceiling T-Rail Mounting
Chapter 3 | AP Enclosure How to Mount the Unit Figure 9: Wall Mounting the AP Wall Screw Hole Wall-Mount Bracket Wall Plugs and Screws Suspended Ceiling To mount the AP to a suspended ceiling T-rail (Figure 10), perform the following T-Rail Mounting steps: Choose a location on a ceiling T-rail where the access point will be installed and... -
Page 22: Figure 10: Attaching The Ap To A Suspended Ceiling
Chapter 3 | AP Enclosure How to Mount the Unit Figure 10: Attaching the AP to a Suspended Ceiling Ceiling T-rail Mounting Clip Mounting Holder – 22 –... -
Page 23: Power Requirements
Power Requirements This chapter focuses on how to power-on the AP. The AP can be powered through a PoE connection or by using the included AC power adapter. This chapter includes these sections: ◆ “AC Power Adapter” on page 23 ◆... -
Page 24: How To Use The Ac Power Adapter
Chapter 4 | Power Requirements How to Use the AC Power Adapter How to Use the AC Power Adapter To power on the AP using its AC power adapter, perform the following steps: Caution: Use ONLY the AC power adapter supplied with this AP, otherwise the product may be damaged. -
Page 25: How To Power The Ap Using Poe
Chapter 4 | Power Requirements How to Power the AP Using PoE How to Power the AP Using PoE The AP can derive its operating power directly from the RJ-45 port when connected to a network device that provides IEEE 802.3af Power over Ethernet (PoE) or IEEE 802.3at PoE+. -
Page 26: Network Connections
Network Connections This chapter focuses on making connections to the AP’s network interfaces, including details on network cable specifications. The AP features one 1000BASE-T RJ-45 port, as well as wireless interfaces. The sections that follow describe the network interfaces. This chapter includes these sections: ◆... -
Page 27: Cable Labeling And Connection Records
Chapter 5 | Network Connections Cable Labeling and Connection Records Cable Labeling and Connection Records When planning a network installation, it is essential to label the opposing ends of cables and to record where each cable is connected. Doing so will enable you to easily locate inter-connected devices, isolate faults and change your topology without need for unnecessary time consumption. -
Page 28: Understanding The Network Status Led
Chapter 5 | Network Connections Understanding the Network Status LED Understanding the Network Status LED The AP includes an LED indicator to indicate network link status and activity. The LED is shown below and is described in the following table. Figure 13: Network Status LED Network Link/Activity Table 3: Network Status LED... -
Page 29: How To Connect To The Rj-45 Port
Chapter 5 | Network Connections How to Connect to the RJ-45 Port controller. For more information, refer to the EWS4502 or WAC4502 Administrator's Guide. How to Connect to the RJ-45 Port The connection between the AP’s RJ-45 port and a LAN switch requires an unshielded twisted-pair (UTP) cable with RJ-45 connectors at both ends. -
Page 30: 10/100Base-Tx Pin Assignments
Chapter 5 | Network Connections How to Connect to the RJ-45 Port 10/100BASE-TX Pin Most 100BASE-TX RJ-45 ports support automatic MDI/MDI-X operation, so you can use straight-through or crossover cables for all network connections to PCs, Assignments switches, or hubs. In straight-through cable, pins 1, 2, 3, and 6, at one end of the cable, are connected straight through to pins 1, 2, 3, and 6 at the other end of the cable. -
Page 31: Connection Procedure
Chapter 5 | Network Connections How to Connect to the RJ-45 Port Table 6: 1000BASE-T MDI and MDI-X Port Pinouts MDI Signal Name MDI-X Signal Name Bi-directional Pair A Plus (BI_DA+) Bi-directional Pair B Plus (BI_DB+) -52V power (Negative V GND (Positive V port port... -
Page 32: Figure 15: Making Twisted-Pair Connections
Chapter 5 | Network Connections How to Connect to the RJ-45 Port Figure 15: Making Twisted-Pair Connections RJ-45 Ethernet Port Attach the other end to the RJ-45 port on the AP. Make sure the twisted pair cable does not exceed 100 meters (328 ft) in length. As the connection is made, check that the attached network device port LED turns on to indicate that the connection is valid. -
Page 33: Ap Management
AP Management The AP supports network management from a wireless access controller (EWS4502 or WAC4502) through the Control and Provisioning of Wireless Access Points (CAPWAP) protocol. For manual static set up of the AP, you can also make a direct connection to the console port (out-of-band) using the included console cable. -
Page 34: Understanding The System Status Leds
Chapter 6 | AP Management Understanding the System Status LEDs Understanding the System Status LEDs The AP includes LED indicators that indicate system and port status. The LEDs are shown below and are described in the following table. Figure 16: System Status LEDs Network Link/Activity Power/Diagnostic Table 7: System Status LEDs... -
Page 35: How To Connect To The Console Port
Chapter 6 | AP Management How to Connect to the Console Port How to Connect to the Console Port The RJ-45 Console port on the AP is used to connect to the AP for out-of-band console configuration. The console device can be a PC or workstation running a VT- 100 terminal emulator, or a VT-100 terminal. -
Page 36: Figure 18: Console Port Connection
Chapter 6 | AP Management How to Connect to the Console Port Follow these steps to connect to the Console port: Attach one end of the included console cable to a DB-9 COM port connector on the management PC. Use a USB to male DB-9 adapter cable (not included) if needed. -
Page 37: How To Set An Ip Address
Chapter 6 | AP Management How to Set an IP Address How to Set an IP Address The AP requires management from a wireless access controller (EWS4502 or WAC4502), which can automatically discover the AP. If the network environment requires that you first configure a static IP address for the AP and AC, follow these steps: Make a connection to the AP's Console port and log in to the CLI (see previous section). -
Page 38: How To Reset The Ap
Chapter 6 | AP Management How to Reset the AP How to Reset the AP The Reset button on the AP can be used to restart the device and set the configuration back to factory default values. Use a sharp object, such as the tip of a pen, to depress the Reset button. One push of the button restarts the system software using default values. -
Page 39: A Troubleshooting
Troubleshooting Diagnosing LED Indicators Table 9: Troubleshooting Chart Symptom Action ◆ Power LED is Off Check connections between the power adapter and the wall outlet. ◆ Check the LAN connection if using PoE power. ◆ Contact your dealer for assistance. ◆... -
Page 40: Installation
Chapter A | Troubleshooting Installation Installation Verify that all system components have been properly installed. If one or more components appear to be malfunctioning (such as the power cord or network cabling), test them in an alternate environment where you are sure that all the other components are functioning properly. -
Page 41: Reset The Access Point
Chapter A | Troubleshooting Reset the Access Point ◆ Check that the null-modem serial cable conforms to the pin-out connections provided in “How to Connect to the Console Port” on page Reset the Access Point If all other recovery measure fail, and the AP is still not functioning properly, take any of these steps to reset the AP’s hardware: ◆... -
Page 42: Index
Index Numerics indicators, LED injector module 10/100 pin assignments installation tasks 1000BASE-T pin assignments installation troubleshooting interference, radio introduction antenna position antennas, external key components basic installation tasks baud rate, console LED indicators bracket kit port link status LEDs location guidelines cable Ethernet cable compatibility labeling and connection records... - Page 43 Index radio interfaces, connecting radio interference reset.AP RJ-45 connection RJ-45 port serial port site selection specifications, key status LEDs system LEDs tasks, installation technical specifications temperature specifications troubleshooting LEDs wall mount bracket wall mounting wireless problems – 43 –...
- Page 44 Declaration of Conformity (DoC) can be obtained from www.edge-core.com -> support -> download -> declarations & certifications ECW5110-L E042014-CS-R02 149100000236A...
Need help?
Do you have a question about the ECW5110-L and is the answer not in the manual?
Questions and answers