Table of Contents
Advertisement
Quick Links
User's Manual
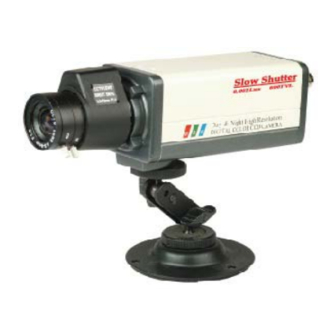
CC25NVD‐H
Press the center Button to Enter the OSD Menu.
Move Up or Down to move thru the menu options and left or right to
change values on the menu,
Press the center button again to get into sub menus.
Always remember to save before you exit.
When you Highlight the Return Option, press the right button to either exit ,
save and exit or just return.
These buttons are located at the Back of the Camera
Advertisement
Table of Contents

Subscribe to Our Youtube Channel
Related Manuals for COP-USA CC25NVD?H


Summary of Contents for COP-USA CC25NVD?H
- Page 1 User's Manual CC25NVD‐H Press the center Button to Enter the OSD Menu. Move Up or Down to move thru the menu options and left or right to change values on the menu, Press the center button again to get into sub menus. Always remember to save before you exit. When you Highlight the Return Option, press the right button to either exit , save and exit or just return. These buttons are located at the Back of the Camera ...
- Page 2 1. EXPOSURE DEFAULT HLI AREA DEFAULT HBLC AREA Lens: HBLC/D‐WDR: HLI (High Level Interface) AGC :( Increases Brightness , the DC IRIS (Use this feature when higher the setting the more noise using a DC Lens) OFF / BLC / HLI / D‐WDR HBLC ( It is Highlight Backlight will get on the video) Go to Submenu and adjust the Compensation. And what this will do is intensify settings: BLC MODE:( Backlight the area around the OFF AGC disabled E.Shutter (1/60 ~1/100000) Compensation) bright light to help you see the object better. If LOW Low AGC Setting Bright (001~100) you leave this off, regular MIDDLE Middle AGC Setting DC REF (000~20) Manual (Backlight Compensation HLI will do its work and will only black out the HIGH High AGC Setting ELECTR.( use this feature when will be in effect whenever the bright lights but will not using a non‐DC Lens) DC L drawn area detects low ...
- Page 3 2. COLOR WB MODE: AWC>PUSH ATW ( Auto Tracking White Balance) Adjust the white balance by focusing at a white object or white sheet of paper and It Automatically adjusts the color between press enter to adjust the color. 1.800K and 10500K. AWC ( Preset White Balance) Use this option if the lighting conditions Use this option when many white objects appears on the scene and also when a object changes constantly merges to the scene with similar color shade MANUAL(Adjust the color manually) Adjust the RED and BLUE settings with values To all the features there is a R‐Y and B‐Y color adjustment. ranging from 0~255 R‐Y GAIN (000~255) We recommend leaving at default value of 128 M.WB R (000~128) B‐Y GAIN (000~255) We recommend leaving at default value of 128 M.WB B(000~128)
- Page 4 3. DAY & NIGHT C‐SUP and A‐SUP:(000~100) Default is 40. Use these settings to reduce the color or aperture settings. For this function to work, the 3D DNR must be OFF. The Higher the number, the higher is the supression. MODE: BURST: EXT: (This requires the use of an external mechanism and cannot be used AUTO (BURST /DAY>NIGHT/NIGHT>DAY/DWELL ON on this camera.) TIME) When this is selected, a COLOR ‐ B/W picture will be Camera switches from Color to B/W depending on shown .This will increase the noise . BURST (ON/OFF) the illumination of the scene. When this is Selected a true B/W picture will be ON COLOR shown on screen no hints of color. When this is selected, a COLOR ‐ B/W picture will be shown .This Stays on DAY mode and Color will increase the noise . DAY/NIGHT (007~030) B&W This Option sets the brightness level which will Stays on Night mode and B/W determine when to switch from DAY to NIGHT mode. When this is Selected a true B/W picture will be shown on screen no hints of color. hi t EXT. NIGHT/DAY (006~029) Camera switches from Color to B/W depending on ...
- Page 5 4. FUNCTION MIRROR ON This Option allows you to mirror the image horizontally OFF Disables the feature SHARPNESS (0~30) Adjust the Image Sharpness decreasing or Increasing the Values LSC (Lens Shading compensation) which compensates brightness of four lens’ corners. So that the LSC function activates to get a clear image effectively. Is recommended to leave it OFF. ON ‐ SET LEVEL (0~30) 5. MOTION MOTION DET. (ON/OFF) This Function allows to identify the area where the motion is detected AREA SELECT. 1~4 This function enables up to 4 motion areas. AREA SEL: SENSITI. (001~30) Adjust each square to cover movement anywhere on the screen area.There are 4 area The higher selections that you can choose from. You will notice that each area will be displayed the setting, the more movement it will catch. with a pink box, the area within pink box is where the motion will be activated. DISPLAY ( OFF/ICON/TRACE ) MASK MODE (ON/OFF) If set to Icon, this icon will pop‐up when detects motion TOP (000~122) If set to Trace, the masking area will be shown on the screen in a red transparent BOTTOM(000~122) background . LEFT(000~122) HOLD TIME RIGHT(000~122) For example if you have the setting at 4, the camera will not RETURN(000~122) signal motion until 4 seconds later as long as that object is still moving within the selected mask area. If you want instant motion detection notification, then please set this at 0.
- Page 6 6. PRIVACY MASK (1~8) This camera has up to 8 masking areas. These 8 Masking Areas can be setup anywhere in the screen. and each mask can be enabled or disabled anytime. MODE (ON/OFF) 7. SETUP Title: (ON/OFF) If you choose to have a User Title, change this option to On, then select it. This will allow you to manually insert a title by selecting each individual character. This simply displays the title of the camera title up on the screen Manual DPC (Dead Pixel Compensation ‐ OFF/MANUAL) This feature tells the camera to compensate for any dead pixels by filling that dead pixel in with a nearby pixels color. Normally this should not ever be a problem and you can leave this off, but if it is, we recommend using the Auto Method below as opposed to this manual setting. WHITE THR (1~255) AdjustWhite Threshold BLACK THR (1~255) Adjust Black Threshold DPC LEVEL (1~255) Controls the DPC levels AUTO DPC‐ (This Feature fills the dead pixels automatically, but if there's no dead pixels, leave it OFF) DPC LEVEL(1~30) Select the intensity of the dead pixel correction . DPC RUN It Automatically compensates for the dead pixels, to use this feature, cover the camera with hands or anything that blocks light and push the enter to run the DPC. OLPF (optical low pass filter) ‐ This feature is used if you choose to use different filters over the lens. Since this lens is fixed, changing this value will have no effect on the picture. Monitor (Choose the monitor Type used ) (CRT or LCD) Gamma (0.20~1.00) Gamma is an electronic correction carried out by the camera circuitry to balance the brightness seen by the camera to that of the monitor. Normally .45 is the best ...
- Page 7 8. SYSTEM CAMERA ID: N/A COMMUNI.:N/A LANGUAGE: ENGLISH/CHINESE 9. EXIT EXIT FACTORY SET:(YES/NO) This feature restores the factory default settings. SAVE & EXIT: Saves the Changes and Exit the OSD. EXIT: EXIT: Exit without saving your changes...
Need help?
Do you have a question about the CC25NVD?H and is the answer not in the manual?
Questions and answers