Advertisement
Quick Links
Advertisement

Related Manuals for COP-USA CD55NV-DSP-09


Summary of Contents for COP-USA CD55NV-DSP-09
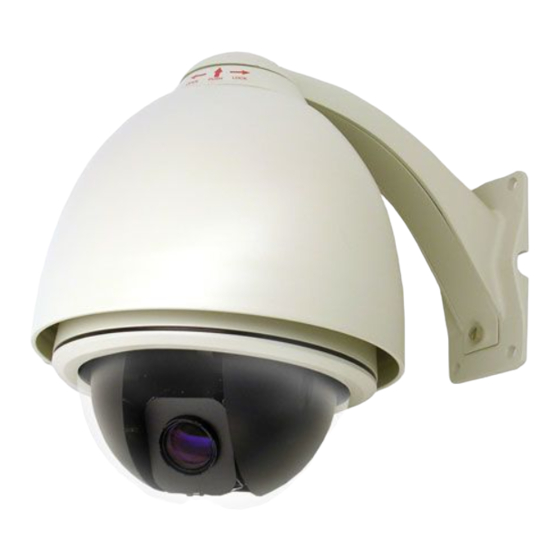
- Page 2 Installation/Operation Manual for High Speed Dome Camera V1.2 Please read the operation manual carefully before installing this unit ※...
-
Page 4: Safety Precautions
SAFETY PRECAUTIONS CAUTION RISK OF ELECTRIC SHOCK. DO NOT OPEN! CAUTION: TO REDUCE THE RISK OF ELECTRICAL SHOCK, DO DOT OPEN COVERS. NO USER SERVICEABLE PARTS INSIDE. REFER SERVICING TO QUALIFIED SERVICE PERSONNEL The lighting flash with a arrowhead symbol, in an equilateral triangle, is intended to alert the user. - Page 6 INSTALLATION INDEX Important Safeguards The Installation of the System 1. The Style of the Installation 2. Steps of Installation The outlines description III. Appendix I Lightning Proof and Surge Signal Proof Appendix II The Cleaning of Clear Down Cover Appendix Ⅲ Ⅲ Ⅲ Ⅲ Ⅲ AC24V Wire diameter and transmission distance comparison chart Appendix Ⅳ...
-
Page 8: Important Safeguards
IMPORTANT SAFEGUARDS All the safety and operating instruction should be read before the units is operated. The power supply for the dome:AC24V/1. 7A, Which is displayed on the bottom of the pedestal or other place of the dome. Do not attempt to disassemble the camera. In order to prevent electric shock, do not re- move screws or covers. - Page 9 I. The Installation of the System The Style of the Installation a) Wall Installation 4-ø9 ø152 ø219 202.5 Figure 1 b) In-Ceiling Installation 4-ø9 ø80 ø100 Figure 2 c) Indoor Ceiling Installation d) Indoor Embedded Installation ø156 Direct ø135 ø197 Figure 3 Figure 4 The Installation of...
- Page 10 Steps of Installation a) Wall Installation 1) Unpacking the carton and carefully take out the dome camera and its attachments. 2) Take out the cover of the wall-installed bracket. (Figure5) . 3) Take out system control wires from the bracket(Figure 6) . 4) Fix the bracket on the wall(Figure7)...
- Page 11 bracket and go through it. Aiming the "MARK" of the bracket to the "MARK" of the flange, push the dome upward to the end and rotate it with the direction of the arrow until it is clicked and tightened(Figure11) . 4) And then, please fix the dome to the bracket with bolts.
- Page 12 4) Put the decoration ring near the ceiling and rotate it clockwise until it is tightened(Figure15) . 5) (Figure 16) shows the system is installed. 6) The names of some parts are as follows: A):Base Plate B): Pedestal C): Decoration Ring D):Pedestal Assembly MARK Decoration Ring Figure 15...
- Page 13 3) According the material of ceiling, choose the different tools to drill (Figure19) . 4) Fixup the "installation pedestal" with the embedded mount(Figure 20) . M4 × 12 countersunk head screw(3pcs) Figure 19 Figure 20 5) For easy installation, adjust the three swing mounting clips to let the distance between the clips and the flange a little longer than ceiling thickness.
- Page 14 II. The outlines description The synthetical wires as follows (Figure22) ,Orange isRS485+、 Yellow is RS485-;While you are using AC24V power line,the red and black is the input side of the power ;BNC connector is the video-out side (Take carefully while you connect these wires). RED CONNECTOR RED LINE (AC24V IN) (POWER IN)
- Page 15 VIDEO OUT ALM-4:Channel 4 collector alarm input:1 VIDEO GND ALM-3:Channel 3 collector alarm input:2 ALM-2:Channel 2 collector alarm input:3 1: AC24V IN ALM-1:Channel 1 collector alarm input:4 2: AC24V IN GND:Common collector alarm input:5 3: RS485+ COM:Common collector alarm output:6 4: RS485- NC:Close collector alarm output:7 No:Open collector alarm output:8...
- Page 16 III. Appendix Appendix Ⅰ Ⅰ Ⅰ Ⅰ Ⅰ : Lightning Proof and Surge Signal Proof The product adopts TVS lightning proof technology to prevent from damage by lightning strike below 1500 W and impulse signals such as surge; but it is also necessary to abide by the following precautions to ensure electrical safety based on practical circumstances: Keep the communication cables at least 50 meters away from high...
- Page 17 Appendix Ⅱ Ⅱ Ⅱ Ⅱ Ⅱ : The Cleaning of Clear Down Cover To obtain constant clear videos, user should clean the down cover periodically. Be cautious when cleaning. Hold the down cover ring only to avoid direct touch to the acrylic down cover. The acid sweat mark of fingerprint will corrode the coating of down cover and scratch on down cover will cause vague images.
- Page 18 Appendix Ⅳ Ⅳ Ⅳ Ⅳ Ⅳ : : : : : Wire Gauge Conversion Chart Bare Wire diameter (Approximate) (Approximate) Bare wire cross sec- metric size(mm) tional area(mm ) 0.050 0.00196 0.060 0.00283 0.070 0.00385 0.080 0.00503 0.090 0.00636 0.100 0.00785 0.110 0.00950...
- Page 19 IMPORTANT SAFEGUARDS All the safety and operating instructions should be read before the units is operated. During the course of transportation, storage and installation, the product should be avoided from incorrect operations such as heavy pressing, strong vibration etc., which can cause damage of product as there are sophisticated optical and electronic devices inside the machine.
- Page 20 I. Description of Functions The intelligent dome camera is a hi-tech CCTV product which incorporates high-clarity color camera, panoramic speed-variable PAN/TILT, multifunc- tional decoder, universal character generator, CPU processor, memory chip into a whole. It can largely reduce connection and installation processes of components in the system, rise up reliability of the system and facilitate installation and maintenance.
- Page 21 Character Overlapping. The humane structure of the menu makes all setups and programming of the dome camera more convenient and easy. Angle display. The dome could display the panning angle, tilting angle and the view angle of the camera. Proportional pan function. The speed dome will depend on the amount of zoom.
- Page 22 Functions of the Camera (when setting the camera display is "ON", the icons can be displayed on the screen,only SONY series of camera have the display function) Description of the Focus Control Mode: the user can adjust the focus of the camera manually.
- Page 23 II. Setup of the Menu of the Dome Camera Basic Operation of the Menu Open the main menu of the setup by the control keyboard or by the matrix via the operation "Call No. 64 preset position or No.95 preset position". Besides that, continuously test No.1 preset position twice in 4 seconds, you can also open the menu;...
- Page 24 PLAY-ON/ANGLE DISPLAY-OFF/ DOME LABEL DISPLAY-OFF/ D-ZOOM-OFF/ PT INTERLOCK - AF AUTO/BLC-OFF/ AUTO HOME -OFF/ PARK TIME -4MIN/FAN-AUTO/ TIMP DISPAY-OFF. EXIT:to quit the main menu. SYSTEM SETUP SYSTEM INFORMATION: to display the system SYSTEM SETUP information. 1.SYSTEM INFORMATI ON 2.AUTO FLIP AUTO FLIP: to ON/OFF the dome 180°auto flip.
-
Page 25: Display Setup
DISPLAY SETUP CAMERA ID: when it is set at ON, address of DISPLAY SETUP dome camera appears on the screen such as "CAM 1.<CAMERA ID> 2.<ANGLE DISPLAY> 001". The default setting is ON. 3.<PRESET LABEL> 4.<DOME LABEL> a) DISPLAY: to ON/OFF the dome address. 5.RETURN b) POSITION: to set the position of dome address, there are four positions to be displayed: TOP-L (top-... - Page 26 at the bottom of the monitor. DISPLAY SETUP c) RETURN: to return to the DISPLAY SETTING 1.<CAMERA ID> 2.<ANGLE DISPLAY> menu. 3.<PRESET LABEL> DOME LABEL: to enter the DOME LABEL 4.<DOME LABEL> 5.RETURN submenu. a) DISPLAY: to ON/OFF the display of the dome DOME LABEL label.
-
Page 27: Motion Setup
options Manual/Automatic. When camera screen is CAMERA SETUP opened under automatic state, ASS displays on 1.D-ZOOM 2.DISIPLAY screen. (Only sony camera has this function) 3.FOCUS MODE:MANUAL 4.ICR AUTO WB/AE SETUP 5.BLC 6.L-SYNC a) AE MODE: to set the automatic exposure to 7.SLOW SHUTTER MANU/AUTO/SHUTTER mode;... - Page 28 played on screen as the pictures: in the picture, MOTION SETUP "PRESET NO" stands for NO.1 present position, the 1.<PRESETS> 2.<AUTO SCAN> topic is "NO LABEL". Using PANLEFT/RIGHT can 3.<PATROLS> 4.<PATTERNS> remove the cursor, TILT UP/DOWN can modify the 5.<CLEAR> 6.EDIT DOME LABEL number, press the "CLOSE", exit edit mode and 7.RETURN...
- Page 29 set the start and end position first. And if the start and MOTION SETUP end position are the same. The dome camera will 1.<PRESETS> 2.<AUTO SCAN> scanning for 360°。To press "CLOSE" to exit. 3.<PATROLS> 4.<PATTERNS> f) CLEAR SCAN: the clear the setting of the scanning, 5.<CLEAR>...
- Page 30 d) CLEAR PATROL: to clear the patrol. MOTION SETUP e) RETURN: to return to the PROGRAM SETTING 1.<PRESETS> 2.<AUTO SCAN> menu. 3.<PATROLS> 4.<PATTERNS> PATTERNS: to enter the PATTERN setting 5.<CLEAR> 6.EDIT DOME LABEL submenu. 7.RETURN a) PATTERNS: to edit the pattern number. No 1-3 for optional.
-
Page 31: Privacy Mask
PRIVACY MASK PRIVACY MASK: to set the privacy number. 1-4 PRIVACY MASK for optional. (different cameras have different choose) 1.PRIV ACY MASK MASK SHADE: to set the color of the mask area. 2.MASK SHADE WHITE 3.DISPLAY DISPLAY: to ON/OFF the privacy function 4.EDIT MASK EDIT MASK: to edit the mask area. - Page 32 d) PWR RESUME: to ON/OFF the function, which ADVANCE SETUP the dome camera will be back to the scene before 1.<HOME SETUP> 2.<PASSWORD> the power off. 3.<CAM ID SETUP> e) RETURN: to return to the ADVANCE SETTING. 4.<FAN CONTROL> 5.LANGUAGE:ENG Menu.
- Page 33 a) FAN: to set the work condition of the fan: ON / OFF ADVANCE SETUP / AUTO. 1.<HOME SETUP> 2.<PASSWORD> b) OPEN TEMP: to set the work temperature of the 3.<CAM ID SETUP> 4.<FAN CONTROL> fan under AUTO condition. 5.LANGUAGE:ENG 6.SET NORTH POSSTION c) TEMP DISPLAY: to ON/OFF the display of the 7.RETURN...
- Page 34 III. Setup of the Dome Camera Connection of the System 1) The Systematic Drawing of the Dome Camera Monitor Power Input AC24V OUT POWER IN VIDEO OUT Power Adapter Multiplexer Matrix Speed Dome RS-485 RS-485 RS-485 RS-485 Protocol Adapter Code Converter Protocol Adapter RS232 AD Matrix...
- Page 35 Setup of Coding Switch of Dome Camera. As shown in Figure 2, SW1 is used to set address of the dome camera from 1 - 1023. The coding switches from DIP-10 to DIP-1 are equivalent to a 10-bit binary digital. DIP-10 is MSB while DIP-1 is LSB. The state "ON" of each bit means 1 while "OFF"...
-
Page 36: Setup Of The Protocol And The Default Baud Rate
Setup of the Protocol and the Default Baud Rate. As shown in Figure 2-1 & 2-2, SW2 is used to set the protocol of communi- cation and the baud rate used by the dome camera. DIP-4 to DIP-1 of SW2 is used to select protocols and 16 different protocols can be selected in maximum. - Page 37 Setup of the Baud Rate of Communication. As shown in Figure 2-1 & 2-2, SW2 is used to set the protocol of communi- cation and the baud rate used by the dome camera. DIP-6 and DIP-5 of SW2 are used to select the baud rate of communication and 4 different baud rates can be selected in maximum.
- Page 38 IV. Technical data table High speed dome Power supply AC24V 50/60Hz 1.70A Power consumption Indoor:15W Outdoor:35W Synchronization Internal / External Preset position Cruising track Pattern 120 sec for each, 3 patterns Alarm 4 input & 1 output Privacy zone masking 6 (only for some cameras which with this function) Zoom-rotation The dome will adjust the manual control speed...
- Page 39 Camera 16 × 18 × 22 × 23 × 27 × Camera Color Color Synchronization Internal Internal / Extrinsic Image sensor 1/4”Color CCD Scan system 2:1 interval line scan Horizontal resolution > 470TVL ≥ 480TVL Active 470,000 pixels 752 × 582(440K) 758 ×...
- Page 40 V. Troubleshooting Problems Possible Causes Remedies Replace Power supply fault No action when Correct Bad connection of the power power is switched on Replace Transformer damaged Abnormal self- Mechanical failure Repair check. Images Reinstall Camera inclined with motor noise Power supply not enough Replace Reinstall Video signal fault...
- Page 41 VI. Appendix Appendix I: RS485 Bus Basic Knowledge Characteristics of RS485 Bus As specified by RS485 standards, RS485 Bus is of half-duplexed data transmission cables with characteristic impedance as 120Ω. The maximum load capacity is 32 unit loads (including main controller and controlled equipment).
- Page 42 The connection of 120 Ω termination resistor: The termination resistor is ready on the Protocol PCB. There are two kinds of connection. Refer to the Protocol PCB jumper setting form (refer to Figure 2). 1) In the Picture it is the factory default connection. The jumper is seated on Pin2&Pin3 and the termination resistor is not connected.
Need help?
Do you have a question about the CD55NV-DSP-09 and is the answer not in the manual?
Questions and answers