Advertisement
These buttons are located inside the dome on the
back of the CCD Board.
Packing List:
‐ 1 Arlen Screwdriver
‐ 1 mini flat screwdrive
‐ 1 kit with screws and anchors
User's Manual
CD250XIR‐WDR
Press the center Button to Enter the OSD Menu.
Move Up or Down to move thru the menu options and left or right to
change values on the menu,
Press the center button again to get into sub menus.
Always remember to save before you exit.
When you Highlight the Return Option, press the right button to either exit ,
save and exit or just return.
‐ 1 Specification Sheet
‐ 1 mini flat screwdrive
‐ 1 DC connector
DOWNUPLEFTRIGHTENTER
MENU
EXPOSURE
COLOR
DAY & NIGHT
EFFECT
MOTION
PRIVACY
ENHANCE
SYSTEM
Advertisement
Table of Contents

Subscribe to Our Youtube Channel
Summary of Contents for COP-USA CD250XIR-WDR
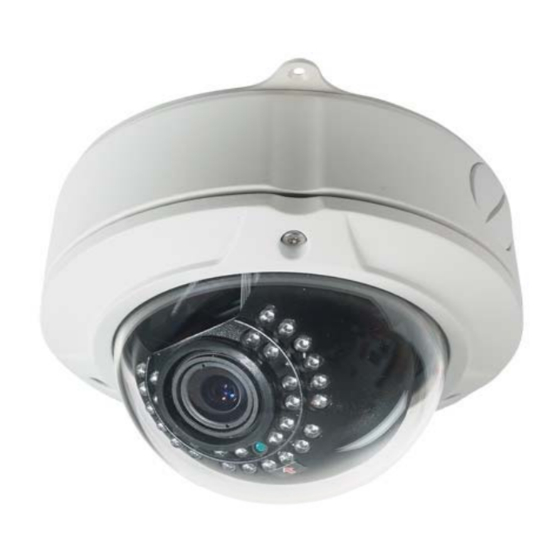
- Page 1 User's Manual CD250XIR‐WDR DOWNUPLEFTRIGHTENTER MENU Press the center Button to Enter the OSD Menu. EXPOSURE Move Up or Down to move thru the menu options and left or right to COLOR change values on the menu, Press the center button again to get into sub menus. DAY & NIGHT Always remember to save before you exit. EFFECT When you Highlight the Return Option, press the right button to either exit , save and exit or just return. MOTION PRIVACY ENHANCE SYSTEM These buttons are located inside the dome on the back of the CCD Board. Packing List: ‐ 1 Arlen Screwdriver ‐ 1 Specification Sheet ‐ 1 mini flat screwdrive ‐ 1 mini flat screwdrive ‐ 1 kit with screws and anchors ‐ 1 DC connector ...
- Page 2 1. EXPOSURE EXPOSURE MENU NORMAL / BLC / WDR / HLI SENSE UP OFF / X2~X1024 OFF / LOW / MIDDLE / HIGH LENS ELECTR / DC IRIS BRIGHTNESS 0~99 EXIT Brightness: Lens: Exposure Settings : Sense up: (Slowshutter Speed) Brightness control ELECTR.( you must use this option Normal it ranges from 0~99 as default setting) To be used under normal light X2~X1024 Manual Slowshutter Go to Submenu and select the conditions ,where none of the mode select from low x2 up to high speed for the Shutter. conditions listed below are present x1024 ‐ 1/100000 to 1/60FLC AGC :( Increases Brightness , the ‐ AUTO BLC ( Backlight Compensation) higher the setting the more noise ‐ X2 to X1024 WDR (Wide Dynamic Range) will get on the video) ...
- Page 3 2. DAY & NIGHT MODE SMART LED / NIGHT / DAY / AUTO BURST ON/OFF DAY / NIGHT 0~255 NIGHT / DAY 0~255 DELAY TIME 0~10 CDS_START 0~255 CDS_END 0~255 EXIT MODE: BURST: DELAY TIME: SMART LED ON This Function controls the switching time between DAY mode to Adjusts the IR level and also adjust the brightness When this is selected, a COLOR ‐ B/W picture will be NIGHT mode, and From NIGHT mode to DAY mode. depending on the distance of the object shown .This will increase the noise . NIGHT CDS: Stays on Night mode and B/W When this is Selected a true B/W piocture will be CDS_START This Option sets the CDS Sensor level which will determine when Stays on DAY mode and Color to switch from DAY to NIGHT mode. And to turn the IR Cut ON DAY/NIGHT This Option sets the brightness level which will ...
- Page 4 4. MOTION MOTION DET. ON/OFF ALARM MODE OFF/MESSAGE/AREA SENSITIVITY 0~120 AREA SELECT MODE ON/OFF START X (0~15) / Y(0~15) X (0~16) / Y(0~16) OUTPUT TIME 0~10 AUTO ZOOM ON/OFF (N/A) EXIT MOTION DET. (ON/OFF) AREA SELECT. 1~4 This Function allows to identify the area where the motion is detected This function enables up to 4 motion areas. MODE ON/OFF Enable and Disable the MOTION AREA. ALARM MODE : START X (0~15) / END X(0~16) Draws the Horizontal Motion Area OFF ‐ Will not notify when Motion is Detected START Y((0~14) / END Y(0~15) MESSAGE ‐ Will Show a man in motion icon on top of the screen. Draws the Vertical Motion Area Draws the Vertical Motion Area AREA ‐...
- Page 5 MASK SELECT This camera has up to 8 masking areas. These 8 Masking Areas can be setup anywhere in the screen. and each mask can be enabled or disabled anytime. MODE (ON/OFF) Enables or Disables the Privacy Masks . Make sure you are selecting the right privacy mask, looking at the MASK SELECT number. COLOR you can choose from 7 different mask colors. TOP/LEFT/RIGHT/BOTTOM/MOVE Use these commands to adjust the size of the Mask and Location by looking at the drawing, you will see which is TOP/RIGHT/BOTTOM and LEFT. X is to move one of the area's point Horizontally. Y is to move one of the area's point Vertically. MOVE X move the Mask Area horizontally 4. ENHANCE GAMMA 0.3~1.0 3D‐DNR MONITOR CRT/LCD OFF/AUTO OFF/AUTO LENS CORR. 0~50 EXIT Use these features to enhance the quality of the video Gamma ‐ (Adjust the Brightness 0.3 brighter 1.0 darker) 3D‐DNR‐ (This Feature is to reduce the Background noise in a low light environment.) Monitor‐ (Choose the monitor Type used ) DPC‐ (N/A) LENS CORR. ‐ Helps enhance the brightness at the corners of the screen Values range from 0 to 5 from dark to bright. ...
- Page 6 5. SYSTEM COMM ID. RS‐485 BAUDRATE TITLE ON/OFF TITLE EDIT LANGUAGE ENGLISH / CHINESE LOCATION RETURN SYNC INTER / AUTO AUTO V‐PHASE RETURN EXIT TITLE: TITLE: EDIT: ( edit the camera title using LOCATION: ( use the directional these characters move around buttons to move the title using the directional buttons and location) press the center button to select). RETURN @#*+_/(=) 1234567890 OWERTYUIOP ASDFGHJKL: ZXCVBNM,.? _ _ _ _ _ _ _ _ _ _ _ _ _ RETURN CLEAR...


Need help?
Do you have a question about the CD250XIR-WDR and is the answer not in the manual?
Questions and answers