Table of Contents
Advertisement
V
:
12375
ersion
uk
D
:
#269-2010
ateD
e
:
01/11
Dition
cD
t
Assembly and operating instructions
Failure to observe these instructions can affect or damage the device and other objects and lead to personal injury.
Please read the relevant chapters of this instruction manual prior to assembly and before every start-
up operation. Follow the steps in the indicated order and observe the safety warnings.
These instructions form part of the product. They should therefore always be sto-
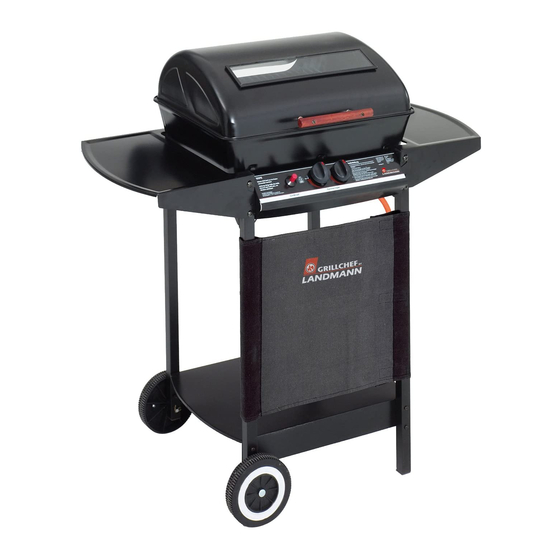
"Lava rock gas barbecue"
Please read before starting!
red with the product and passed on to every subsequent user.
12375
Advertisement
Table of Contents

Related Manuals for Landmann 12375


Summary of Contents for Landmann 12375
- Page 1 12375 ersion #269-2010 ateD 01/11 Dition "Lava rock gas barbecue" Assembly and operating instructions Please read before starting! Failure to observe these instructions can affect or damage the device and other objects and lead to personal injury. Please read the relevant chapters of this instruction manual prior to assembly and before every start- up operation.
-
Page 2: Table Of Contents
Table of contents Technical data .............................3 Delivery contents ............................4 Pack of fixing bolts ..........................4 Exploded view .............................5 Controls ...............................6 Function ..............................6 Utilisation ..............................7 Guarantee and disclaimer ...........................7 Safety instructions ............................8 Definition of terms used ........................8 Danger "Hot surfaces and parts" ......................9 Danger "Gas is highly flammable"... -
Page 3: Technical Data
Technical data Certifications Deutscher Verein des Gas- und Was- Test number - 0085 serfaches (DVGW) (German Technical and Scientific Association for Gas and Water) Barbecue Appliance category according to DIN EN 498 Total weight approx. 16.8 kg Dimensions (L x H x W) approx. -
Page 4: Delivery Contents
Delivery contents Pos. Qty. Designation Pos. Qty. Designation Mounting bracket Window (pre-assembled) Standing leg upper hinge (pre-assembled) Wheel leg 2.5 kg Lava rocks Axle Spacing sleeve for lid handle Wheel Lid handle Lower shelf Bolt M5x60 Bolt M5x35 Grill Bolt for hinge Lava rock grill Splint Burner (pre-assembled) -
Page 5: Exploded View
Exploded view 26 11 GRILLCHEF... -
Page 6: Controls
Controls Pos. Designation Function Piezo igniter Ignite gas on burner (press). Flame regulator left Ignite the left burner (keep depressed briefly and turn to "lar- ge flame" setting). After ignition adjust the heat input for the left burner (turn). right Fill burner with gas to ignite (keep depressed and turn to "large flame"... -
Page 7: Utilisation
(e.g. lava rocks) that are not expressly approved for use with this barbecue (in the event of any uncertainty please contact our customer service department). • if LANDMANN GmbH & Co. Handels-KG original spare parts are not used. GRILLCHEF... -
Page 8: Safety Instructions
Safety instructions Definition of terms used The following pictograms and symbols are used in these instructions to point out hazards and important information. Safety instructions Pictogram and signal word Note on ..a possible danger that can result in severe personal injury or damage to property if the stated measures are not observed. -
Page 9: Danger "Hot Surfaces And Parts
Danger "Hot surfaces and parts" During operation some parts of the barbecue can become very hot, particularly those that are close to the fire bowl. Possible consequences: • Severe burns from touching parts near the fire bowl. • Fire or smouldering fire if flammable materials or substances are near the grill. Safety measures prior to using the grill: •... -
Page 10: Danger "Gas Is Highly Flammable
Danger "Gas is highly flammable" Liquid gas is highly flammable and explosive. Possible consequences: • Serious personal injury or damage to property if escaping gas ignites in an environment in which it is not controlled. Safety precautions: • Only use the grill outdoors and ensure the area is well-ventilated. •... -
Page 11: Danger "Gas Displaces Oxygen
Danger "Gas displaces oxygen" Liquid gas is heavier than oxygen. Therefore, it settles on the ground, displacing the oxygen at that level. Possible consequences: • Suffocation resulting from a lack of oxygen if the concentration of gas is allowed to in- crease. -
Page 12: Assembly
Assembly Before starting Here are a few tips to help you assemble your grill quickly and successfully: • Check that no parts are missing by placing all of the individual parts on an empty table (we reserve the right to make minor technical alterations, such as the content of the small parts bag). -
Page 13: Carrying Out Assembly
Carrying out assembly Assembly step 1 • Assemble the legs (19 + 20) to the shelf (23) using M5x35 bolts (24) and M5 nuts (28). Make sure that the smaller threaded holes of the legs are facing inwards (for assembling the mounting bracket (18)). •... - Page 14 Assembly step 3 • Carefully position and align the fire bowl (13) on the frame. • Secure the fire bowl in place (13) with both cross bars (17) – Do this using four M5x30 bolts (30) and M5 nuts (28). Do not fit both centre bolts at this stage - only fit the four outer bolts.
- Page 15 Assembly step 5 • Connect the igniter cable (10b) to the pin on the Pi- ezo igniter (31). Make sure that it is firmly secured in place. • Position the front panel (16) between the wheel leg (20) and the standing leg (19) so that the nozzles of the adjusting element (16a) are inserted in the burner hoses (10a).
- Page 16 Assembly step 8 • Position the lid (1) on the fire bowl (13) so that both lid hinges (3) interlock with the fire bowl hinges (11). • • Insert one bolt (25) through each drill hole on the lid and fire bowl hinges. •...
-
Page 17: Connecting Gas Cylinder And Shutting Off
Please follow the operating instructions of the leak detection agent. The following part is included in the delivery contents. It complies to the standards applicable in the country to which it has been supplied by LANDMANN. • Gas hose -approved hose of sufficient length, allowing installation without any kinks. -
Page 18: Connecting The Gas Cylinder
Connecting the Gas Cylinder Danger "Ignition of escaping gas" Liquid gas is highly flammable and explosive. Possible consequences: • Serious personal injury or damage to property if escaping gas ignites in an environment in which it is not controlled. Safety precautions: •... - Page 19 Shut off Gas Cylinder 1. Close the cylinder valve (turn operating lever (G2) to a 3 o'clock position). 2. Press the release button (G3) and pull the pressure reducer (G1) upwards. 3. Store the pressure reducer (G1) with the gas hose (G5) underneath the barbecue. Make sure that the gas hose is not kinked or twisted in any way.
-
Page 20: Operation
Operation Starting up the grill 1. Check to ensure that ..– there are not, and will not be, any flammable materials or substances nearby. Minimum distance to flammable materials or substances: 2m above and 1m to the side; distance to flame resistant materials or substances - min 0.25 m. -
Page 21: Switching Off Grill
Switching off grill 1. Close the cylinder valve on the gas bottle (turn G1 clockwise). 2. Turn the flame regulator (B) to "•" (off). 3. Wait until all of the parts have cooled down and then clean any soiled components. 4. -
Page 22: Cleaning
Cleaning Barbecue To ensure that your grill serves you well for many years to come, it should be cleaned after each use with washing-up liquid, a brush and a cloth - ensure that all parts have cooled down first. This is much easier than cleaning it at a later stage when the dirt has dried. -
Page 23: Maintenance
Maintenance The grill is maintenance free. Nevertheless, you should check it at regular intervals. The intervals depend on how often the grill is used and the environmental conditions to which it is exposed. Barbecue • Check to ensure that all parts of the grill are present and assembled (visual inspection). •... -
Page 24: Trouble Shooting
Trouble shooting If there is a fault despite due care, this chapter may help you to resolve the malfunction. Malfunction Cause Remedy There is a smell of gas Leak in the gas system 1. Close the cylinder valve immediate- ly (turn operating lever (G2) to a 3 o'clock position). - Page 25 Malfunction Cause Remedy Strong flaring up and buring of lava Lava rocks are dirty Operate barbecue for approximately 10 rocks minutes at full power with the lid (1) closed (no food) Fatty foods Remove any large areas of fat prior to bar- becuing or place the meat on a grill plate or reduce the barbecue temperature Popping or bubbling noise...
- Page 26 26 GRILLCHEF...
-
Page 27: Declaration Of Conformity
Declaration of Conformity DIN EN 498 (Oktober 2009) 18.10.2010 GRILLCHEF... - Page 28 LANDMANN® Ltd. Unit 6 Blackstone Road Stukeley Meadows, Huntingdon PE29 6EF United Kingdom e-mail: enquiries@landmann.co.uk internet: www.landmann.co.uk Hotline Monday to Thursday 9am to 5pm, Friday, 9am to 4pm. Barbecue Helpline **01480 - 421 720, Sales Office fax: **01480 - 458 876...
Need help?
Do you have a question about the 12375 and is the answer not in the manual?
Questions and answers