Table of Contents
Advertisement
Quick Links
12202UK_#387-2005_02/05bt_rk
1
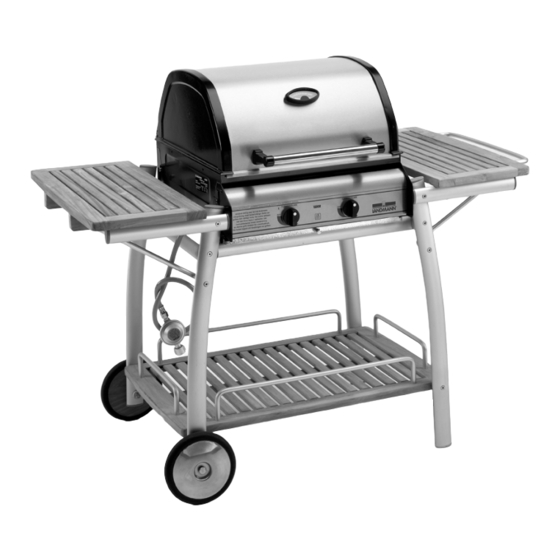
Assembly Instruction for
flat bed BBQ Art.-No. 12202
IMPORTANT:
READ ALL INSTRUCTIONS AND OPERATIONS
BEFORE OPERATING THIS UNIT.
FOLLOW THE CORRECT LIGHTING AND USAGE
PROCEDURES. HANDLE METAL PARTS WITH CARE
TO AVOID INJURIES. FOLLOW ALL STEPS IN
ORDER. NEVER ALLOW CHILDREN TO OPERATE
THIS UNIT.
Advertisement
Table of Contents

Related Manuals for Landmann 12202


Summary of Contents for Landmann 12202
- Page 1 12202UK_#387-2005_02/05bt_rk Assembly Instruction for flat bed BBQ Art.-No. 12202 IMPORTANT: READ ALL INSTRUCTIONS AND OPERATIONS BEFORE OPERATING THIS UNIT. FOLLOW THE CORRECT LIGHTING AND USAGE PROCEDURES. HANDLE METAL PARTS WITH CARE TO AVOID INJURIES. FOLLOW ALL STEPS IN ORDER. NEVER ALLOW CHILDREN TO OPERATE...
-
Page 2: Table Of Contents
Contents: 1.: Technical data 2.: Function 3.: Single part list 4.: Fixing elements 5.: Exploring drawing 6.: Mounting steps 7.: Preparation 8.: Installation 9.: Warning and safety points 10.: Safety precautions 11.: Lighting instructions 12.: Storage 13.: Cleaning instructions 14.: Barbecue Safety Hints Warnings: Ensure to use this appliance outdoors. -
Page 3: Technical Data
The capacity of a 13kg Propane Gas Bottle is sufficient for a heating period of approx. 15 hours with full power. You have purchased a high quality LANDMANN Gas Appliance. This appliance has been made with regard to the European Gas Standard (EN 498) and bears the certification no. -
Page 4: Function
Function Pilot Gas Control Ignition: With all gas controls on the Barbecue in the 'OFF' position, turn the gas cylinder valve to the on position at the regulater. Push in the Barbecue ignition gas control knob and turn anticlockwise until spring resistance is felt. Hold in this position for 3-5 seconds to allow gas flow, and then continue to turn anticlockwise to 'HIGH"' position. -
Page 5: Single Part List
Single part list Lid Sheet II Drip pan Lid Sheet I Drip pan handle Left side panel Screw M5x6 Right side panel Hose Hinge Pin Regulator Top hinge Gas Hose connection Handle bracket Hose Clamp Lid handle Bolt M6x12 Cooking Grill Washer M6 Hot Plate Nut M6... -
Page 6: Exploring Drawing
Exploring drawing... -
Page 7: Mounting Steps
Mounting steps... - Page 9 1.: Attach the Body assy (14) on the trolley (see page 8 ) using the 2 hook shaped brackets provided. Attach brackets to side of gas assy with bolts and nuts provided One at front left side and the other at rear right hand side to hold the body assy in place.
- Page 10 5.: FIT GREASE TRAY TO THE BBQ Fit the drip pan handle (23) to the front edge of the drip pan (22), using the screw (24) supplied. Slide the drip pan into place from the front of the barbecue below the control panel (20).
-
Page 11: Preparation
Preparation You will need to purchase a Propane bottle with a 27mm clip on valve to operate this barbecue which can be obtained from your nearest Gas Retailer. Energy saving tips: a.: Reduce the opening time of the lid. b.: Preheat the barbecue for 5 minutes low then 10 minutes medium. (with Lid open) c.: Do not preheat longer than recommended. -
Page 12: Warning And Safety Points
Warning and Safety Points Please read the following points before using your barbecue: 1.: Please follow all assembly instructions in this manual, if instructions are not followed it may cause problems in use. 2.: This barbecue will become very hot when being used, care is to be taken especially when pets, children or elderly people are present. -
Page 13: Safety Precautions
10.: Safety Precautions Always test gas line for leaks at connector with soapy water after making connections. The top must always be open when lighting the burner. Use oven gloves and sturdy, long handled barbecue tools when cooking on the grill. Be prepared if an accident or fire should occur. -
Page 14: Storage
12.: Storage Your Gas bottle must be stored outdoors in a well ventilated area and must be disconnected from your barbecue when not being used. Ensure that you are outdoors and away from any sources of ignition before attempting to disconnect your gas bottle from your barbecue. When you are using your barbecue after a period of storage, please ensure to check for gas leaks and check for any obstructions in the burner etc. -
Page 15: Burner 2
Trouble Shooting Problem Possible Cause Solution Burners will not light using LP gas cylinder empty Replace with full cylinder the ignition system Faulty regulator Have regulator checked or replaced Obstructions in burners Clean burners Obstructions in gas jets or hose. Clean jets and hose. Electrode wire is loose or Reconnect wire disconnected on ignition valve. - Page 16 Keep this guarantee in a safe place. LANDMANN always takes every precaution to ensure that your purchase reaches you in the best condition. If you are unhappy with your choice in any way please contact the Customer Service Department: LANDMANN Ltd., P.O.
Need help?
Do you have a question about the 12202 and is the answer not in the manual?
Questions and answers