Oki C911dn User Manual
Hide thumbs
Also See for C911dn:
- User manual (320 pages) ,
- Manual do usuário (320 pages) ,
- Mode d'emploi (147 pages)
Table of Contents
Advertisement
Quick Links
User's Manual
Basic
Preparing the printer
to print
C911dn
C931/C931e/C931DP
C941/C941e/C941DP
ES9411dn ES9431dn
ES9541dn
This manual contains cautions on how to use this product safety.
Before you use this product, please make sure that you read this manual.
Carefully store this manual close to hand so.
Before
1
use
2
Setting Up
3
Printing
Basic Device
4
Operations
Appendix
Index
Advertisement
Table of Contents

Subscribe to Our Youtube Channel
Related Manuals for Oki C911dn


Summary of Contents for Oki C911dn
-
Page 1: Preparing The Printer
Preparing the printer to print Printing Basic Device Operations Appendix Index C911dn C931/C931e/C931DP C941/C941e/C941DP ES9411dn ES9431dn ES9541dn This manual contains cautions on how to use this product safety. Before you use this product, please make sure that you read this manual. -
Page 2: Manual Configuration
Step Checking the product Parts nomenclature and functions Opening the box and installing the printer Using the device to its fullest C911dn/C931dn/E9411dn/ES9431dn Set-up Guide 45583101EE Rev1 Easy Guide (Set-up Guide) Installing the device Turning ON and OFF the power supply 91.6 kg... -
Page 3: About The Enclosed "Software Dvd-Rom
When the "software DVD-ROM" enclosed with the device is placed in the DVD-ROM drive, the following menu screen will be displayed. Memo z This example uses the Windows screens. z If using a Macintosh, double-click the [OKI] icon. You can add and select printer You can install and set the device drivers. -
Page 4: Reading The Manual
Reading the Manual Symbols Note z These are cautions and restrictions for the correct operation of the device. Make sure to read to avoid misoperation. Memo z Knowledge of the information before using the device is useful and can act as a reference. Reading is recommended. Reference z These are the reference pages. -
Page 5: Illustrations
Illustrations Screens The device illustrations used herein show the The images of the control panel and PC used C931 model unless otherwise specified. herein are examples. The images may differ from actual products and screens. Illustrations may differ from the actual product. - 5 -... -
Page 6: Inscriptions
Inscriptions The following inscriptions are used in this manual. z C911dn → C911 z C931dn → C931 z C941dn → C941 z ES9411dn → ES9411 z ES9431dn → ES9431 z ES9541dn → ES9541 ® ® z Microsoft Windows 7 64-bit Edition operating system → Windows 7 (64bit version) ®... -
Page 7: About The Product Warranty
All rights are reserved by Oki Data Corporation. You must not copy, transfer, translate, etc. the content herein without authorization. You must obtain written permission from Oki Data Corporation before doing any of the above. -
Page 8: Emergency First Aid
4-11-22 Shibaura, Minato-ku, Tokyo 108-8551, Japan For all sales, support and general enquiries contact your local distributor. Importer to the EU/Authorized representative OKI Europe Limited (trading as OKI Printing Solutions) Blays House Wick Road Egham Surrey, TW20 0HJ United Kingdom For all sales, support and general enquiries contact your local distributor. -
Page 9: For Your Safety
For Your Safety Read the User’s Manual for your safety before using the product. Cautions related to safety WARNING A warning provides additional information which, if ignored, may result in a risk of personal injury. A caution provides additional information which, if ignored, may result in equipment malfunction CAUTION or damage. -
Page 10: Table Of Contents
Contents Contents Manual Configuration ................2 About the Enclosed "Software DVD-ROM" ...........3 Reading the Manual .................4 Symbols ........................4 Keys, Buttons, and Symbols ..................4 Illustrations ......................5 Screens ........................5 Inscriptions ......................6 About the Product Warranty ..............7 Emergency first aid .................8 Manufacturer ..................8 Importer to the EU/Authorized representative ..........8 Environmental information ...............8... - Page 11 Contents Using the Device to its Fullest Extent ............31 Options ......................... 31 Color management server ..................32 2. Setting Up ................33 Installing the Device ................33 Installation Conditions ..................... 33 Installation Procedure ....................36 Opening the Package and Installation ................ 36 Opening the Package and Moving the Device .................
- Page 12 Contents 3. Printing ................81 Paper ....................81 Usable Paper Types ....................81 Paper Feed and Output Methods Selectable for Each Paper type ........85 (Landscape) and (Portrait) Icons ................ 87 Printing from Trays ................88 Setting Paper in Trays 1 to 5 ..................88 Printing from Trays ....................
- Page 13 Basic Windows Functions ..............128 Displaying the Properties Window ................128 Displaying the print setup window ................128 Specifications ..................129 Main specifications ....................129 Network interface specifications ................132 USB interface specifications ..................133 Dimensions ......................134 Index ..................135 Oki contact details ..............139 - 13 -...
-
Page 14: Viable With C911/C931/C941/Es9411Dn/Es9431Dn/Es9541Dn
Viable with C911/C931/C941/ES9411dn/ES9431dn/ES9541dn Viable with C911/C931/C941/ES9411dn/ ES9431dn/ES9541dn Abundant color matching functions It is possible to print from various can be used applications The device has functions to The built-in Adobe PostScript3, compensate color misalignment and PCL6 emulation, and XPS emulation density using the control panel, and enable printing from a wide range of can adjust the color balance. - Page 15 Viable with C911/C931/C941/ES9411dn/ES9431dn/ES9541dn Functions can be set using the Usable as a network printer control panel High-quality, high-speed printing is Various device functions can be set possible from various applications. such as changing paper size and (With A4 , 50 sheets a minute using network setup from the control panel.
- Page 16 Viable with C911/C931/C941/ES9411dn/ES9431dn/ES9541dn Use the help function to check if Increasing the quantity of paper you do not understand something that can be fed or if trouble occurs when using the device Mounting the optional expansion Press the [HELP] button on the tray unit enables the continuous control panel to display messages printing of large quantities and the...
-
Page 17: Before Use
A maximum of five optional expansion tray units (trays 2 to 5) can be mounted to C911/C931/C941/ES9411dn/ ES9431dn/ES9541dn. z Printer Unit z Easy Guide (Set-up Guide) C911dn/C931dn/E9411dn/ES9431dn Set-up Guide 45583101EE Rev1 1040 mm 91.6 kg 41 inch 91.6 kg... -
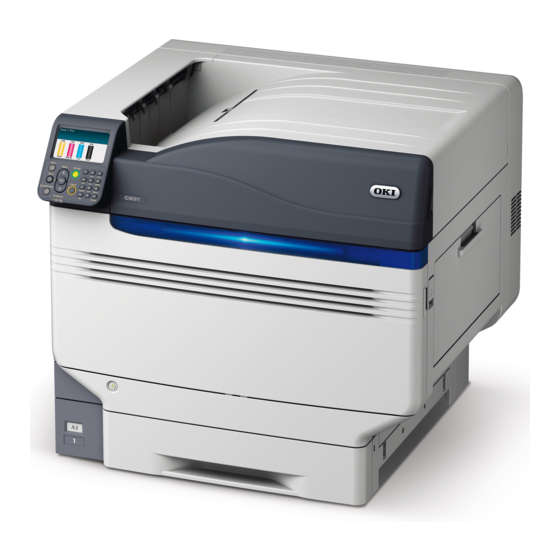
Page 18: Parts Nomenclature And Functions
Parts Nomenclature and Functions Parts Nomenclature and Functions Main Unit Front/Right Side Toner Cover Face Down Stacker Open this to replace the toner cartridge. The printed sheets are placed printed-side down and discharged. Control Panel Right Side Cover Displays the device status and menus, and sets the Open this to replace the multi-purpose tray feed functions. -
Page 19: Back/Left Side
Parts Nomenclature and Functions Back/Left Side Interface Exit Unit There are a LAN (network) interface connector and a Open this when replacing the fuser unit or transfer USB interface connector. See “Interface” (P.23) roller unit, or to clear paper jams. the interfaces. -
Page 20: Printer Interior
Parts Nomenclature and Functions Printer Interior Front Interior Toner Cartridge Slot z The remaining toner quantity is normally displayed Set the toner cartridge here. when "Display remaining toner quantity" has been “Mounting Consumables” (P.39) set using the control panel standby screen. z The toner cartridge is a consumable. -
Page 21: Right Side Interior
Parts Nomenclature and Functions Right Side Interior Multi-purpose Tray/MP Tray Auxiliary Supporter You can print on various papers, including postcards Maintains the paper when paper has been set in the and envelopes, etc. multi-purpose tray. Further, use when printing to the topside of the paper that has been set. -
Page 22: Left Side Interior
Parts Nomenclature and Functions Left Side Interior Face Up Stacker Paper Supporter Open the stacker to set and eject the paper face-up. Secures the paper ejected to the face-up stacker. Auxiliary Supporter Secures so that the ejected paper does not droop. Fuser Unit Fuser Unit’s Lock Lever This unit fixes the toner to the paper. -
Page 23: Interface
Parts Nomenclature and Functions Interface LAN (network) Interface Connector USB Interface Connector Connects the LAN cable. Connects the USB cable. - 23 -... -
Page 24: Control Panel
Parts Nomenclature and Functions Control Panel Liquid crystal panel ATTENTION lamp z Displays the device status and menus. Displays the device status. z There are two types of standby screen: "Remaining Normally OFF. toner quantity display" and "Tray information Lit or flashes orange if an error occurs. display". -
Page 25: Main Control Panel Features
Parts Nomenclature and Functions Main Control Panel Features The control panel can be used to check the device status and implement various device functions. The toner cartridge can be replaced while viewing the liquid crystal display on the control panel. Further, you can also perform operations while checking the messages displayed on the liquid crystal panel if paper jams or device malfunctions occur. - Page 26 Parts Nomenclature and Functions „ Standby Screen Press the scroll button several times to select [Panel Setup], and then press There are two types: "Remaining toner quantity display" and "Tray information display". the [OK] button. Use the following procedure to switch the standby screens.
-
Page 27: Help Screen
Parts Nomenclature and Functions „ Error Screen „ Help Screen If a printer error occurs, the maintenance lamp Press the [HELP] button to display the help will either turn ON or flash, and a message will screen. Further, press the [HELP] button when it be displayed in the liquid crystal panel. -
Page 28: Adjusting The Control Panel Brightness
Parts Nomenclature and Functions Adjusting the Control Panel Select [Panel Setup], and press the [OK] button. Brightness Use the following procedure to adjust the brightness of the liquid crystal panel. Memo z The brightness (backlight) of the liquid crystal panel can be set individually for during control panel operations and when in power save mode. -
Page 29: Using The 10-Key Pad
Parts Nomenclature and Functions Using the 10-Key Pad „ Function Number Input Screen When "Ready To Print" is displayed in the Use to input alphanumeric characters. standby screen, press the [Fn] key and then The characters that can be entered when each press the desired number to display the relevant key is pressed, and the toggling of the input menu item. -
Page 30: Function Numbers Table
Parts Nomenclature and Functions Function Numbers Table Function No. Function No. Menu Item Media Weight (Tray 5) Function No. Function No. Menu Item A3Nobi Paper (Tray 5) Print Secure Job (Encrypted Job) Legal14 Paper (Tray 5) Print Secure Job (Stored Job) A5LEF/A6/Hagaki Paper (Tray 5) Paper Size (Tray 1) A5SEF/Oufuku Hagaki Paper (Tray 5) -
Page 31: Using The Device To Its Fullest Extent
Using the Device to its Fullest Extent Using the Device to its Fullest Extent Options The following options are supplied for the device. „ Expansion tray units (trays 2/3/4/5) Expansion tray unit Expansion tray unit with casters Large-capacity expansion tray unit (Expandable up to 2 levels) (N36130A) (3 trays in one, with casters) -
Page 32: Color Management Server
Using the Device to its Fullest Extent Color management server Recommended for users who want greater color management response and advanced Spot Color adjustment. ® „ Fiery XF Server Option ® Fiery XF Server Option - 32 -... -
Page 33: Setting Up
Installing the Device 2. Setting Up This chapter explains the methods for setting up the device, and for connecting the device to a PC and installing the printer drivers. Note Customers who have purchased C941/ES9541dn should also see the "Separate Volume Spot Color Guide". Reference ... -
Page 34: Installation Precautions
Installing the Device z Front view (with expansion tray mounted) „ Installation Precautions WARNING 400mm Do not install close to high-temperature locations or naked flames. Do not install in locations where chemical reactions occur (e.g., laboratories). Do not install close to combustible solutions such as alcohol or thinners, etc. - Page 35 Installing the Device CAUTION Do not install directly on shaggy rugs or carpets. Do not install in locations with poor air circulation or ventilation such as sealed rooms, etc. Make sure of ventilation if using continuously for long hours in a small room.
-
Page 36: Installation Procedure
Installing the Device Installation Procedure Work according to the relevant procedures and the customer installation conditions. If not mounting any options, skip the reading of the procedures described as "Optional". Opening the Package and Installation Mounting Consumables (P.39) Mounting the Expansion Tray Unit (Optional) (P.44) (Optional) Mounting the Built-in HDD (Optional) (P.48) (Optional) - Page 37 Installing the Device Open the package, and remove the Remove the cover bag enclosing the main printer unit. device accessories ( ), and enclosed manual, protective equipment, and Note shock-absorbing material ( Do not remove the tape securing the protective equipment, paper feed trays, and side covers before transporting the device to its installation location.
- Page 38 Installing the Device Hold the carrying levers while grasping Pull out the tray 1 paper cassette. the carrying handles, and use at least 4 people to lift and carry simultaneously. Note Make sure not hold anywhere other than the carrying handles, such as the paper feed trays or side covers, etc.
-
Page 39: Mounting Consumables
Installing the Device Mounting Consumables Close the toner replacement cover. „ Setting the Toner Cartridge Remove the toner cartridge from its cover bag. Shake the toner cartridge both „ Remove the image drum stopper horizontally and vertically. Memo The image drum is set inside the device at the factory. Reference ... - Page 40 Installing the Device Gently raise the (blue) lever ( ), and Place the image drum that has been removed onto a flat surface covered remove the image drum ( ) while being careful not to touch the green with paper, and remove 4 stoppers cylinder with your hands.
- Page 41 Installing the Device Align the (red) arrow labels on the „ Set the transfer roller unit. image drum with the arrows on the device, and gently insert into the slot Lift the exit unit opener ( ), and pull and push in firmly all the way while out the exit unit.
- Page 42 Installing the Device Take out the transfer roller unit from Set the transfer roller unit to the exit the package. unit. Note Do not touch sponge of the transfer roller unit. Memo The toner used for quality inspection might be adhered to the roller surface.
-
Page 43: Setting Paper
Installing the Device Setting Paper Set the paper with the print surface face-down. This section explains how to set the paper in tray 1 or trays 2/3/4/5. Memo In this section, setting paper in tray 1 is used as an example. -
Page 44: Mounting The Expansion Tray Unit (Optional)
Installing the Device „ Expansion tray unit with casters Mounting the Expansion Tray Unit (Optional) Mount the (optional) expansion tray unit to increase the quantity and types of paper that can be set in the device. The expansion tray unit has a large-capacity tray comprising the 1st and 3rd trays. - Page 45 Installing the Device „ Large-capacity expansion tray unit Remove the expansion tray unit from the package, and remove the buffering and protective materials. Mount the main printer unit to the expansion tray unit. Gently lift the main unit using 4 people min., and align the holes on the base ) to the 2 protrusions ( ) on the...
- Page 46 Installing the Device Push down the lock levers on the Note casters (x2) at the front of the device If using the expansion tray unit and large-capacity expansion tray unit, first mount the expansion tray to lock the casters. unit to the large-capacity expansion tray unit, and then mount the main printer unit to the expansion tray unit.
- Page 47 Installing the Device Rotate the nuts and bolts at the bottom If moving the printer or replacing consumables of each foot to lower the feet. or maintenance units, or setting paper in the tray, check the following points to prevent the printer from toppling.
-
Page 48: Mounting The Built-In Hdd (Optional)
Installing the Device Check that the internal LED lamp ( ) is Mounting the Built-in HDD OFF. (Optional) Mount the (optional) built-in HDD to increase the memory capacity or implement secure printing. Reference For the functions required by the HDD, see "Advanced". „... - Page 49 Installing the Device Close the access cover. Press either the scroll button on the control panel to display the "Functions" screen. Memo Print the "Configuration" on A4 size paper. Set A4 Tighten the access cover screws. size paper in the paper feed tray. Press the scroll button to select [Print Information], and then press the [OK]...
-
Page 50: Turning On/Off The Power
Turning ON/OFF the Power Turning ON/OFF the Power Power Supply Precautions Power Supply Conditions Observe the following power supply conditions. There is a risk of getting Current: 110 - 127VAC an electric shock and/or WARNING (Range 99 - 140 VAC) causing fire. -
Page 51: Connecting Power Cables
Insert the power plug into the power outlet. Memo The "OKI" logo screen will be displayed in the liquid crystal display of the control panel when the device starts. Wait a moment until the standby screen is displayed, and the printing is enabled. -
Page 52: Turning Off The Power Supply
Turning ON/OFF the Power In the following cases, use the following Turning OFF the Power procedure to turn OFF the main power supply. Supply If not using the device for long periods over holidays or during travel, etc. During normal use, use the following procedure If mounting optional or maintenance products. -
Page 53: Test Printing Using The Printer Only
Test Printing Using the Printer Only Test Printing Using the Printer Only Check that printing is actually enabled using the printer only. Check by printing the device setup and setup details, which enable the status to be checked. (Printer information.) Memo ... -
Page 54: Printer Information
Test Printing Using the Printer Only Printer Information During test printing, the following device setup details (printer information) will be printed. Memo Use the printer information to check the functions that are currently usable, the settings table, the software and hardware versions built into the device, and the print quantity, etc. -
Page 55: Connecting The Pc
Connecting the PC Connecting the PC This section explains how to connect the device to a PC, and how to install the printer drivers from the enclosed "Software DVD-ROM". Prepare a PC connected to a DVD drive. Flow for Installing Drivers on a PC Connecting to PC For Windows For Macintosh... -
Page 56: Operating Environment
Mac OS 9.1 to 9.2.2 *1: Only desktop mode is compatible for Windows 8.1 and Windows 8. *2: Download and use the Mac OS 9 printer drivers from the OKI data homepage (http://www.okidata.co.jp/). Printer Driver Types The following types of printer driver can be installed. -
Page 57: Connecting Cables
Connecting the PC „ Connecting LAN Cables Connecting Cables Connect the LAN cable to the LAN Connect the device to a PC or network. (network) interface connector ( The device is equipped with the LAN (network) Connect the other end of the LAN cable interface connectors and USB interface connectors as standard. -
Page 58: Connecting Using Usb Cables
Connecting the PC Connecting Using USB Cables „ Connecting USB Cables Connect the device and PC using USB cables. Note If the printer drivers are not installed on the PC, remove the USB cable fromthe PC, and first install the printer drivers. -
Page 59: Installer Printer Drivers (Windows)
Connecting the PC „ Setting the IP Address in the Installer Printer Drivers Device Using the Control Panel (Windows) Memo If configuring using a small scale network that connects the device to a single PC, set the following IP address Network Connections (conforming to RFC1918). -
Page 60: Administrator Password
Connecting the PC Use the 10-key pad to enter the If setting the IP address manually, press administrator password. the scroll button to select [Manual], and then press the [OK] button. The default factory-set password is "aaaaaa". Press the [OK] button after Go to Step 8 entering each individual character. - Page 61 Connecting the PC Press the scroll button to select Press the [ON LINE] button to complete [Subnet Mask], and then press the [OK] the network setup. button. Network Setup 1/2 Page TCP/IP NetBIOS over TCP EtherTalk IP Address Set IPv4 Address Subnet Mask Use Online button to return to standby screen Enter the subnet mask in the same way...
- Page 62 Connecting the PC „ Setting the IP Address in the PC Select [Internet Protocol Version 4 (TCP/ IPv4)], and click [Properties]. Note If the IP address has already been set in the PC or is acquired automatically, go to “Setting the IP Address in the Device Using the Control Panel”...
- Page 63 Connecting the PC „ Setting the Device Network Click [Device Network Setup]. Memo If you have set up the IP address for this printer by following Steps 1~14 in “Installer Printer Drivers (Windows)” (P.59), then skip this section. Check that the device and PC are connected, and that the power is turned ON, and then insert the "Software DVD- ROM"...
- Page 64 Connecting the PC When the setup is complete, the device Read the "Software License Agreement", will restart automatically, and the and click [Agree]. display will return to the menu selection screen. Click [Exit] in the menu screen to finish. Read the "Environmental advice for „...
- Page 65 Select [Start]> [Devices and Printers]. Memo Click [Custom install] to select "PCL6 Driver" and "XPS Driver". Check that the OKI C931 icon is The printer search will start. When the displayed. printer has been detected, select the Right-click the OKI C931 icon and select device from the table.
-
Page 66: Usb Connections
Connecting the PC USB Connections Read the "Software License Agreement", and click "Agree". Note Check that the device power supply is turned OFF. Setup requires computer administrator privileges. This section described the operating procedure for Windows 7 unless otherwise specified. The screens and operating procedure may differ depending on the OS. - Page 67 Connecting the PC Click [Recommended Install] to start When the installation has finished, click the installation. [Exit]. Memo Click [Custom install] to select "PCL6 Driver" and "XPS Driver". When the following screen is displayed during the installation, connect the In the menu screen, click [Exit]>...
-
Page 68: If Setup Fails
Connecting the PC Check that the OKI C931 icon is Installing Printer Drivers displayed. (Macintosh) Right-click the OKI C931 icon and select and item from the menu, and check Network Connections that all the printer drivers that have been installed are displayed in the sub- To connect Mac OS X and the device via a menu. -
Page 69: Using Ethertalk
Connecting the PC „ Setup Flow „ Using EtherTalk The setup procedure may differ depending on ‰ Enable EtherTalk using the control panel, the print method. and disable sleep mode Bonjour/ If connecting to a network using EtherTalk, it EtherTalk Rendezvous is necessary to enable EtherTalk in the printer, Turning ON the power... - Page 70 Connecting the PC Check that [Network Setup] has been Press the [BACK] button to display the selected, and press the [OK] button. [Admin Setup] screen. Admin Setup 1/2 Page Admin Setup 1/2 Page Network Setup Network Setup USB Setup USB Setup Print Setup Print Setup PS Setup...
- Page 71 ON. Reference “Connecting Using LAN Cables” (P.57) Insert the "Software DVD-ROM" into the Double-click the OKI icon on the desktop. Double-click [Driver]> [Installer for OS X10.5-10.9.pkg]. Enter the Mac OS X administrator password, and click [Install Software].
- Page 72 Enter the Mac OS X administrator password, and click [Install software]. Note If [OKI C931(PS)] is not displayed correctly in Finish the installation by following the [Kind], click [-] to delete the device from [Printers], and repeat Steps 7 to 10 again.
- Page 73 If an optional built-in HDD has been mounted, enable the [Hard Disk] check box. Select the printer displayed as [Bonjour] in [Kind], and check that [OKI C931(PS)] is displayed in [Use]. The name of the printer will be displayed in the format "OKI-C931-(last 6 digits of MAC address)".
-
Page 74: Usb Connections
Installing the printer drivers Adding devices to the PC Note If [OKI C931(PS)] is not displayed correctly in Note [Kind], click [-] to delete the device from [Printer], Upgrading Mac OS X or the printer driver versions may and then repeat Steps 8 to 11 again. - Page 75 Click [Print & Scan]. Click [+]. Select the printer displayed as [USB] in [Kind]. Check that [OKI DATA CORP C931] is displayed in the "Add" screen, and click Check that [OKI DATA CORP C931] is [Add]. displayed as added to the printer list, and close the "Print &...
-
Page 76: If Setup Fails
If setup fails using either a network or USB Printers]. connection, see the enclosed "Troubleshooting/ Daily Maintenance Manual". Right-click the OKI C931 icon, and This manual explains the possible causes of the select [Printer properties]. ([OKI setup trouble and the countermeasures. - Page 77 If using a network connection, click Click [Start], and select [Devices and [Get installed options automatically] in Printers]. [Installable Options]. Right-click the OKI C931 icon, and If using a USB connection, select select [Printer properties]. ([OKI [Installed] in [Hard Disk]. C931(PCL6)] if installing multiple printer drivers.)
- Page 78 If using a network connection, click [Get Click [Start], and select [Devices and Printer Settings]. Printers]. If using a USB connection, enable the Right-click the OKI C931 icon, and [Printer Hard Disk] check box. select [Printer properties]. ([OKI C931(XPS)] if installing multiple printers.) Select the [Device Options] tab.
- Page 79 Connecting the PC ‰ Adding the Built-in HDD „ Mac OS X PS Printer Drivers If using a network connection, click [Get Note This section describes the operations procedures for Printer Settings]. Mac OS X 10.8 unless otherwise specified. Screens and operations procedures may differ depending on the If using a USB connection, enable the version.
- Page 80 Connecting the PC „ Memo - 80 -...
-
Page 81: Printing
For high-quality printing it is necessary to use paper that satisfies conditions regarding quality, thickness, paper finish, etc. If printing on paper not recommended by OKI, thoroughly test the print quality and paper traveling performance, etc., and check that there are no impediments before use. - Page 82 Paper „ Paper Types, Size, and Thickness Note z Paper sources and output are restricted by paper type, size, and thickness. Type Size unit: mm (inches) Thickness Plain paper A3Nobi 328×453 GSM paper weight 52-360g/m (ream weight 45-309kg) A3Wide 320×450 Paper under GSM paper weight 52 to 297×420 64g/m...
- Page 83 Paper Type Size unit: mm (inches) Thickness Envelopes Younaga #3 120×235 Using GSM weight 85g/m paper Kakugata #6 162 × 229 Nagagata #3 120×235 Nagagata #4 90×205 Nagagata #40 90×225 Yougata #0 120×235 Yougata #2 114×162 Yougata #4 105×235 Kakugata #6 162 ×...
-
Page 84: Setting The Paper Weight
Paper „ Setting the Paper Weight Set the paper weight according to the ream weight of the paper to be used. This step is not required for Media Weight (Auto), but in case of paper jam or decrease in printing quality, manual setting is recommended. -
Page 85: Paper Feed And Output Methods Selectable For Each Paper Type
Paper Paper Feed and Output Methods Selectable for Each Paper type O: Usable X: Not usable Settable tray Output bin Trays Type Size Thickness Multi-purpose Tray 1 2 to 5 Face-up Face-down tray (Optional) Plain paper A3Nobi, A3Wide, A3, GSM 64 to 320 g/m (With A4Wide, A4, A5, A6, Duplex) -
Page 86: Output Bin
Paper Settable tray Output bin Trays Type Size Thickness Multi-purpose Tray 1 2 to 5 Face-up Face-down tray (Optional) Postcard Hagaki, Oufuku Hagaki 4-Ren Hagaki Envelope Nagagata #3, Using GSM weight Nagagata #4, 85g/m paper Nagagata #40, Yougata #0, Yougata #2 (C6), Yougata #4, Kakugata #2, Kakugata #3,... -
Page 87: (Landscape) And (Portrait) Icons
Paper icon describes placing the paper horizontally (Landscape) and as viewed from the front of the printer. (Paper is (Portrait) Icons fed vertically.) icon describes placing the paper vertically as viewed from the front of the printer. (Paper is fed horizontally.) Paper Feed Orientation Trays... -
Page 88: Printing From Trays
Printing from Trays Printing from Trays With the exception of some paper sizes, the printer automatically detects the size of paper set in trays 1 to 5 . Further, only the width of the paper size is automatically detected. *: Trays 2 to 5 are optional. Memo z The printer does not automatically detect the following paper sizes. -
Page 89: Printing From Trays
Printing from Trays Set the paper with the print surface Printing from Trays face-down. Open the file to be printed on the PC, and select [Paper Size], [Paper Source], and [Media Weight] to print via the paper driver. This section explains how to print using "Tray 1" or "Auto"... - Page 90 Printing from Trays Use [Paper Source] in the [Paper/ „ Using Windows PCL Printer Quality] tab to select the tray to be Drivers used, and click [Advanced]. Open the file to be printed using WordPad. Click [Page Setup] in the [File] menu. Select the paper size and print orientation, and click [OK].
- Page 91 Printing from Trays „ Using Windows XPS Printer Drivers Select [Weight], and click [OK]. Open the file to be printed using WordPad. Click [Page setup] in the [File] menu. Select the paper size and print orientation, and click [OK]. Click [Print] in the [File] menu. Click [Preferences].
- Page 92 Printing from Trays „ Using Mac OS X Printer Drivers Chick the [Feed] tab in the printer setup panel, and select [Media Type] Open the file to be printed using and [Media Weight]. TextEdit. Click [Page Setup] in the [File] menu. Select the paper size and print orientation using the page setup dialog box, and click [OK].
-
Page 93: Printing From The Multi-Purpose Tray
Printing from the Multi-Purpose Tray Printing from the Multi-Purpose Tray Setting Paper in the Multi- Select [Media Type], and press the [OK] button. Purpose Tray Setting Paper Using the Control Panel If the paper size is "Envelope" or "Custom Size", use the control panel to set the paper size. -
Page 94: Setting Paper
Printing from the Multi-Purpose Tray Press the scroll buttons to select Setting Paper the size of the paper that has been set, The multi-purpose tray prints to the face-up side and press the [OK] button. of the paper that has been set. Note z Do not collate and set paper of different sizes, types, and thicknesses at the same time. - Page 95 Printing from the Multi-Purpose Tray Adjust the paper guide ( ) to the width Adjust the paper guide to fit the width of the paper that has been set. of the paper that has been set. Release and return the setting lever ( Thoroughly sort the paper.
-
Page 96: Printing From The Multi-Purpose Tray
Printing from the Multi-Purpose Tray „ Using Windows PS Printer Drivers Printing from the Multi- Purpose Tray Open the file to be printed using WordPad. Print to the paper set in the multi-purpose tray. The main operating procedures are described Click [Page Setup] in the [File] menu. - Page 97 Printing from the Multi-Purpose Tray Select [Paper Size] from [Paper/Output] Select a suitable value from [Media in the "Advanced Options" tab. Weight] in the "Advanced Options" screen, and then click [OK]. Select [Multi-Purpose Tray] in [Paper Memo Source] in the [Paper/Quality] tab, and z Normally, select [Auto].
- Page 98 Printing from the Multi-Purpose Tray „ Using Windows PCL Printer Drivers Click [Paper Feed Options]. Open the file to be printed using WordPad. Click [Page Setup] in the [File] menu. Select the paper size and print orientation, and click [OK]. Click [Print] in the [File] menu.
- Page 99 Printing from the Multi-Purpose Tray „ Using Windows XPS Printer Drivers Click [Paper Feed Options]. Open the file to be printed using WordPad. Click [Page Setup] in the [File] menu. Select the paper size and print orientation, and click [OK]. Click [Print] in the [File] menu.
- Page 100 Printing from the Multi-Purpose Tray „ Using Mac OS X Printer Drivers Select [Print Options] using the print dialog box. Open the file to be printed using TextEdit. Click [Page Setup] in the [File] menu. Select the paper size and print orientation using the page setup dialog box, and click [OK].
-
Page 101: Outputting Paper
Outputting Paper Outputting Paper The printer outputs the paper either to the face-down stacker or the face-up stacker. The face-down stacker can accumulate approx. 620 sheets of GMS 64g/m paper. The face-up stacker can accumulate approx. 300 sheets of GMS 64g/m paper. - Page 102 Outputting Paper „ Using Windows XPS Printer Drivers „ Using Mac OS X Printer Drivers Memo Open the file to be printed. z This section uses "TextEdit" as an example. Click [Preferences] in the "Print" screen. Open the file to be printed. Select [Printer (Face Down)] in [Output Select [Print] in the [File] menu.
-
Page 103: Using The Face-Up Stacker (Print Face Is Up)
Outputting Paper Open the file to be printed. Using the Face-Up Stacker (Print Face Is Up) Customers using Mac OSX go to “Using Mac OS X Printer Drivers” Step 5. The paper is output with the print side face- up. Paper is stacked in the reverse order from Click [Advanced] in the "Print"... - Page 104 Outputting Paper „ Using Windows XPS Printer Drivers „ Using Mac OS X Printer Drivers Memo Select [Printer (Face Up)] in [Output z This section uses "TextEdit" as an example. Bin] in [Job Options], and click [OK]. Select [Print] in the [File] menu. Select [Print Options] using the print dialog box.
-
Page 105: Basic Device Operations
Setting Power Save Mode 4. Basic Device Operations This chapter explains how to set power save mode, which reduces device power consumption, how to check print quantities, the service life of consumables, remaining maintenance unit quantities and service life, and how to cancel printing. You can set the printer to enter power save mode from the standby screen. -
Page 106: Setting The Time Before The Printer Enters Power Save Mode
Setting Power Save Mode Select [Enable], and press the [OK] Setting the time before the button. printer enters power save mode You can set the time until power save mode is entered. The default factory setting is "1 min." Lengthening the time until power save mode is entered may shorten the time until printing starts. -
Page 107: Setting Sleep Mode
Setting Power Save Mode Press the [ON LINE] button to return to Setting sleep mode the standby screen. The device can be set to enter sleep mode from power save mode when no printing or data has been received after a fixed period of time. The default factory setting is to enable sleep, so implementing this procedure is unnecessary. -
Page 108: Setting The Time Before The Printer Enters Sleep Mode
Setting Power Save Mode Select [Sleep], and press the [OK] Setting the time before the button. printer enters sleep mode You can set the time until sleep mode is entered. The default factory setting is "15 mins." Lengthening the time until sleep mode is entered may shorten the time until printing starts. - Page 109 Setting Power Save Mode Press the [ON LINE] button to return to the standby screen. Memo z The settable times until sleep mode is entered are described below. 1 min., 2 mins., 3 mins., 4 mins., 5 mins., 10 mins., 15 mins., 30 mins., 60 mins.
-
Page 110: Restrictions In Sleep Mode
Setting Power Save Mode Restrictions in sleep mode This section explains the restrictions when the device is in sleep mode. When the device is displaying an error, entering sleep mode may be disabled. Printer driver utility restrictions When the device enters sleep mode, the printer driver and utility functions are restricted as described below. -
Page 111: Network Function Restrictions
Setting Power Save Mode Network function restrictions „ Protocols with client functions do not operate In sleep mode, the following restrictions apply to While in sleep mode, the following protocols with the network functions. client functions do not operate. „ Sleep mode is disabled z E-mail alert In the following cases, the device cannot enter z SNMP Trap... -
Page 112: Setup To Turn Off The Power Supply Automatically
Setup to Turn OFF the Power Supply Automatically Setup to Turn OFF the Power Supply Automatically Setting auto power OFF Select [Power Setup], and press the [OK] button. mode The device can be set to enter OFF mode automatically when no printing or data has been received after a fixed period of time. -
Page 113: Setting The Time Before The Printer Enters Auto Power Off Mode
Setup to Turn OFF the Power Supply Automatically Press the [ON LINE] button to return to Setting the time before the printer the standby screen. enters Auto Power Off mode You can set the time until OFF mode is entered. The default factory setting is "4 hours". -
Page 114: Checking Print Quantities
Checking print quantities Checking print quantities You can check the quantity of printed paper to date. You can also check the quantities printed (fed) from each tray. Press the scroll button Press the [OK] button. To continue checking other items, press Select [Configuration], and press the the [BACK] button and return to 4. -
Page 115: Checking Consumables, And Remaining Maintenance Unit Quantities And Service Life
Checking Consumables, and Remaining Maintenance Unit Quantities and Service Life Checking Consumables, and Remaining Maintenance Unit Quantities and Service Life You can check the remaining quantities and service life of the toner, image drum, belt unit, fixer unit, and waste toner box. Press the scroll button Press the [OK] button. -
Page 116: Canceling Printing
Canceling Printing Canceling Printing To cancel data while printing or during print preparation, press the [CANCEL] button on the control panel. When the [CANCEL] button is pressed, the following screens will be displayed. To cancel printing, select [Yes], and press the [OK] button. -
Page 117: Adding Printers Using Lpd (Tcp/Ip) Protocols
"Print & Scan" screen. network using LPD protocols (TCP/IP). Download the PPD installer for Mac OS X for the printer to be connected from the OKI Data homepage (http:// www.okidata.co.jp/), unzip and start the PPF installer, and then install PPD on the relevant Mac OS. - Page 118 Adding Printers Using LPD (TCP/IP) Protocols Select the [IP] icon. The following screen The "Print & Scan" screen will be will be displayed. Enter the printer IP displayed, and the printer to be used address, "Queue" name, and "Name", (LPD) will be added to the printer list. and then check that the printer to be Select the printer to be used (LPD) as used is selected in "Use", and click the...
-
Page 119: Appendix
Table of control panel menu items Appendix Table of control panel menu items Numbers following the letter F in the menu items indicate the function number. Configuration Tray Count MPTray Tray1 Tray2 Tray3 Tray4 Tray5 Cyan Toner (n.nK) Supplies Life Magenta Toner (n.nK) Yellow Toner (n.nK) Black Toner (n.nK) - Page 120 Table of control panel menu items Print Information Configuration Print F100 Network Print F101 Demo Page DEMO1 Print File List Print PS Font List Print PCL Font List Print IBM PPR Font List Print EPSON FX Font List Print Usage Report Print F102 Error Log...
- Page 121 Table of control panel menu items Menus MPTray Config Tray Configuration Paper Size (A4 X Dimension (210mm/8.3") Y Dimension (297mm/11.7") Media Type (Medium Light) Media Weight (Auto) Tray Usage (Normal Tray) Tray1 Config Paper Size (Cassette Size) X Dimension (210mm/8.3") Y Dimension (297mm/11.7") Media Type (Medium Light)
- Page 122 Table of control panel menu items System Adjust Power Save Time (1 minute) F200 Sleep Time (15 minutes) F201 Auto Power Off Time (4 hours) F202 Clearable Warning (ONLINE) Auto Continue (Off) Manual Timeout (60 seconds) Wait Timeout (40 seconds) Low Toner (Continue) Jam Recovery (On) Error Report (Off)
- Page 123 Table of control panel menu items Paper Black Setting (0) Paper Color Setting (0) Trans. Black Setting (0) Trans. Color Setting (0) SMR Setting Cyan (0) Magenta (0) Yellow (0) Black (0) White *3*5 Clear *4*5 BG Setting Cyan (0) Magenta (0) Yellow (0) Black (0)
- Page 124 Table of control panel menu items Admin Setup Network Setup TCP/IP (Enable) NetBIOS over TCP (Enable) EtherTalk (Disable) IP Address Set (Auto) IPv4 Address (xxx.xxx.xxx.xxx) Subnet Mask (xxx.xxx.xxx.xxx) Gateway Address (xxx.xxx.xxx.xxx) Web (Enable) Telnet (Disable) FTP (Disable) IPSec (Disable) SNMP (Enable) Network Scale (Normal) Gigabit Network (Disable) Hub Link Setting (Auto)
- Page 125 Table of control panel menu items XPS Setup DigitalSignature (Off) DiscardControl (Auto) MC Mode (On) Unzip Mode (Speed) White Page Skip (Off) IBM PPR Setup Character Pitch (10 CPI) Font Condense (12 CPI to 20 CPI) Character Set (SET-2) Symbol Set (IBM-437) Letter O Style (Disable) Zero Character (Normal) Line Pitch (6 LPI)
- Page 126 Table of control panel menu items Others Setup RAM Setup Receive Buffer Size (Auto) Resource Save (Off) Flash Memory Setup Execute Initialize nn% [n.n MB] Resize PS Area HDD Setup Execute *6*7 Initialize PCL nn% (20%) Resize Partition Common mm% (50%) PS ll% (30%) <Apply>...
- Page 127 Table of control panel menu items Calibration Auto Density Mode (On) Auto BG Adjust Mode (0) Adjust Density Execute F300 Adjust Registration Execute F301 Heavy Media Adjust (Off) Heavy Media Mode (Auto) Cyan Density (0) Color Density F310 Magenta Density (0) F311 Yellow Density (0) F312...
-
Page 128: Basic Windows Functions
Click [Setup], and select [Control Click [Setup], and select [Control panel]> [Show devices and printers]. panel]> [Show devices and printers]. Right-click the OKI C931 icon, and Right-click the OKI C931 icon, and select [Printing Preferences]. select [Printing Preferences]. „ Windows Vista/Windows Server „... -
Page 129: Specifications
Specifications Specification Main specification Model C911dn/C931dn/ES9411dn/ES9431dn: N36100A(120V), N36100B(230V), N36100C(100V) C941dn/ES9541dn: N36101A(120V), N36101B(230V), N36101C(100V) C911/ES9411dn: ARM Processor (1GHz) C931/C941/ES9431dn/ES9541dn: ARM Processor (1.2GHz) RAM (standard/ 2GB/2GB max.) Weight C911/C931/ES9411dn/ES9431dn: Approx. 82kg (not including consumables) C941/ES9541dn: Approx. 91kg (not including consumables) Power 110 to 127 VAC (Range 99 to 140 VAC), 50/60 Hz ± 2% 220 to 240 VAC (Range 198 to 264 VAC), 50/60 Hz ±... - Page 130 Specifications C911dn/ C931dn/ C941dn/ ES9411dn ES9431dn ES9541dn Print Color CMYK 50 pages/min. (A4 landscape feed), 28 pages/min. (A3 speed (1-sided) portrait feed) (If auto paper weight is set) CMYK+Spot Color CMYK+Spot Color white: 45 pages/min. (A4 landscape feed), 25 pages/min.
- Page 131 Specifications Paper Multi-purpose Capacity 310 sheets (GSM weight 64g/m , total thickness 31mm max.) feed tray method/ 1st tray Capacity 580 sheets (GSM weight 64g/m , total thickness 53mm max.) Feed Expansion (Optional) Capacity 580 sheets (GSM weight 64g/m , total thickness 53mm max.) quantity tray unit Large-capacity...
-
Page 132: Network Interface Specifications
Specifications Network interface specification z Basic specifications Network protocols z For TCP/IP z For EtherTalk z Connectors 1000BASE-T / 100 BASE-TX / 10 BASE-T (Auto switching and simultaneous use are not possible) Note z The default factory setting is to disable 1000BASE-T. If using with 1000BASE-T, use the control panel to make the following settings. -
Page 133: Usb Interface Specifications
Specifications USB interface specification z Basic specifications USB (supports Hi-Speed USB) z Connectors B receptacle (female) upstream port z Cables 5m max. USB2.0 specifications cable (2m max. recommended) (Do not use shielded cable wires.) z Send mode Full speed (12Mbps±0.25% max.) High speed (480Mbps±0.05% max.) z Power control Self-powered device... -
Page 134: Dimensions
Specifications Dimensions Plan view Side view When the (optional) expansion tray unit is mounted Plan view Side view - 134 -... -
Page 135: Index
Index 10-key pad ..........22 2-sided documents ........19 Detecting Automatically ....... 88 Dimensions ..........134 Documents ..........18 Adjusting brightness ......24, 25 Driver installation ........55 Errors ..........28 Mac OS X .......... 68 Air holes............34 Windows ........... 59 Auto ............89 Auto Power OFF Mode Setup .......... - Page 136 Handle ............24 Mac OS X printer driver [HELP] button ........24, 27 Documents ........24 Help screen ..........20 Main power switch ......18, 51, 52 Hubs ............57 Power conditions ........ 19 Maintenance ..........2 Manual Feed Printing (Multi-Purpose Tray) ..96 Image drum ..........19 Menu button Job list ........
- Page 137 Printer Drivers ........ 55, 89, 96 Expansion tray (optional) ..... 76 Paper ............81 Mac OS X .......... 68 Output ..........101 Types ..........56 Settings ........88, 94 Windows ........... 59 Size ..........82 Printer information ....... 53, 54 Thickness .......... 82 Printing ..........
- Page 138 Securing lever ........17, 20 Upper left side cover ........20 Setting optional drivers USB cable ..........58 Mac OS X .......... 79 Connecting ........57, 58 Windows ........... 76 USB connections Setup ............33 Cannot set up ......68, 76 Network connection ...... 59, 68 Setting up (Mac OS X) ......
-
Page 139: Oki Contact Details
Hungary Fax:+353 (0)1 4049591 Liebermannstrasse A02 603 http://www.oki.ie Telefon: +36 1 814 8000 22345 Brun am Gebirge Oki Systems Ireland Limited - Telefax: +36 1 814 8009 Tel: +43 223 6677 110 Northern Ireland Website: www.okihu.hu Drucker Support: 19 Ferndale Avenue OKI Systems (Italia) S.p.A. - Page 140 Fax: 1-856-222-5260 Lingkaran Syed Pura 59200, Romania Email: LASatisfaction@okidata.com Kuala Lumpur, Malaysia Oki Data de Mexico, S.A. de C.V. Tel: +40 21 303 3138 Tel: (60) 3 2287 1177 Fax: +40 21303 3150 Fax: (60) 3 2287 1166 Mariano Escobedo #748, Piso 8 Website: http://romania.oki.com...
- Page 141 Oki Data Corporation 4-11-22 Shibaura, Minato-ku,Tokyo 108-8551, Japan www.okiprintingsolutions.com 45582402EE Rev3...
Need help?
Do you have a question about the C911dn and is the answer not in the manual?
Questions and answers