Table of Contents
Advertisement
Advertisement
Table of Contents

Related Manuals for Ubiquiti PowerBridge M10


Summary of Contents for Ubiquiti PowerBridge M10
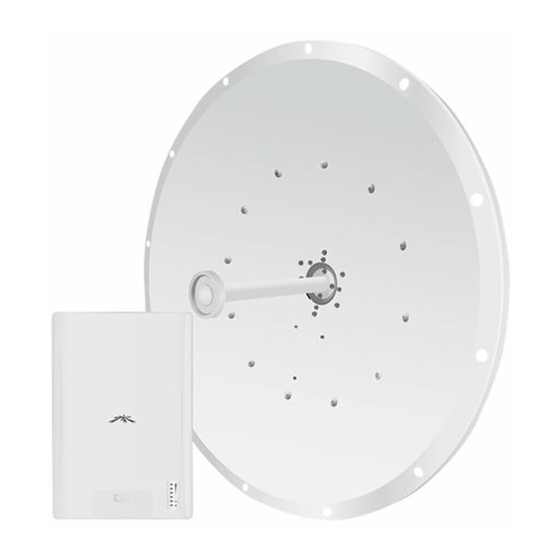
- Page 1 PowerBridge 10 GHz Carrier Class airMAX BaseStation with Dish Antenna...
-
Page 3: Package Contents
Package Contents Package Contents Rocket Dish Feed Main Mounting Bracket Mast Brackets Stabilizer Brackets Tilt Screw M10x150 Bolts (Qty. 2) (Qty. 2) (Qty. 4) M10x100 Bolts M10x25 Bolts M4x12 Screw and M4x18 Screw and (Qty. 2) (Qty. 3) Washer Assembly Washer Assembly (Qty. -
Page 4: Installation Requirements
PowerBridge M10 Installation Requirements • Adjustable wrench or one 16 mm and one 24 mm wrench • Phillips screwdriver Hardware Installation To install the PowerBridge M10, perform the following steps: 1. Align the Rocket to the back of the Dish. - Page 5 Hardware Installation 2. On the front of the Dish, use the four M4x18 Screw and Washer Assemblies to secure the Rocket to the Dish.
- Page 6 PowerBridge M10 3. Connect the Tilt Screw to the back of the Dish using a M10x25 Bolt, a M10 Washer, a M10 Spring Lock Washer, and a M10 Hex Nut. Install a M16 Hex Nut about halfway down on the Tilt Screw...
- Page 7 Hardware Installation 4. Connect the Main Mounting Bracket to the Dish: a. Insert two M10x25 Bolts through the bottom of the Main Mounting Bracket and through the Dish. The bolts should be on the inside facing outward. b. Secure each bolt using a M10 Washer, a M10 Spring Lock Washer, and a M10 Hex Nut.
- Page 8 PowerBridge M10 5. Lift the cover on the Rocket by pressing down and raising it up. Connect an Ethernet cable to the Rocket and place the cover back on the Rocket. There is an opening for the Ethernet cable. Slide the cover over the cable.
- Page 9 Hardware Installation 7. On the front of the Dish, connect the Feed to the Rocket and Dish using the four M4x12 Screw and Washer Assemblies. Note: DO NOT handle the assembled unit by the feed at any time, especially during installation of the dish to the pole. Always hold the dish or the brackets while installing the product.
- Page 10 PowerBridge M10 9. Place the Mast Brackets on the other side of the pole that the Dish will be mounted on and connect them to the Main Mounting Bracket using M10 Washers, M10 Spring Lock Washers, and M10 Hex Nuts.
- Page 11 Hardware Installation 10. Adjust the Azimuth and Elevation. Azimuth can be adjusted by rotating the antenna while supported by the stabilizer bracket. Elevation is adjusted by loosening the Tilt Screw. elevation azimuth 11. Connect the other end of the Ethernet cable from the Rocket to the Ethernet port labeled POE on the PoE Adapter.
- Page 12 PowerBridge M10 12. Connect an Ethernet cable from your LAN to the Ethernet port labeled LAN on the PoE Adapter. 13. Connect the power cord to the power port on the PoE Adapter. Connect the other end of the power cord to a power outlet.
- Page 13 Accessing airOS™ Accessing airOS ™ 1. Make sure that your host machine is connected to the LAN that is connected to the Rocket. 2. Configure the Ethernet adapter on your host system with a static IP address on the 192.168.1.x subnet. 3.
-
Page 14: General Warranty
Buyer for breach of warranty and shall constitute fulfillment of all liabilities of UBIQUITI NETWORKS with respect to the quality and performance of the Products. UBIQUITI NETWORKS reserves the right to inspect all defective Products (which must be returned by Buyer to UBIQUITI NETWORKS factory freight prepaid). - Page 15 Compliance Disclaimer: UBIQUITI NETWORKS does not warrant that the operation of the products is error-free or that operation will be uninterrupted. In no event shall UBIQUITI NETWORKS be responsible for damages or claims of any nature or description relating to system performance, including coverage, buyer’s selection of products for buyer’s application and/or...
-
Page 16: Declaration Of Conformity
UBIQUITI NETWORKS device, megfelel a vonatkozó alapvetõ [Hungarian] követelményeknek és az 1999/5/EC irányelv egyéb elõírásainak. Íslenska Hér me l sir UBIQUITI NETWORKS yfir ví a UBIQUITI NETWORKS device, er í samræmi vi grunnkröfur og a rar kröfur, sem ger ar eru í [Icelandic] tilskipun 1999/5/EC. - Page 17 Declaration of Conformity Latviski Ar o UBIQUITI NETWORKS deklar , ka UBIQUITI NETWORKS device, atbilst Direkt vas 1999/5/EK b tiskaj m pras b m un citiem ar to saist [Latvian] tajiem noteikumiem. Lietuviškai UBIQUITI NETWORKS deklaruoja, kad šis UBIQUITI NETWORKS įrenginys atitinka esminius reikalavimus ir kitas 1999/5/EB...
- Page 18 Pour en savoir plus, rendez-vous sur www.ubnt.com/toughcable Italiano Si consiglia di proteggere le reti dagli ambienti e dagli attacchi ESD più invasivi con il cavo Ethernet schermato-di tipo industriale di Ubiquiti Networks. Per ulteriori informazioni, visitare il sito Web www.ubnt.com/toughcable JL030912...
-
Page 20: Ubiquiti Networks Support
Email: support@ubnt.com Phone (9 a.m. - 5 p.m. PST): 408-942-1153 Online Resources Wiki Page: wiki.ubnt.com Support Forum: forum.ubnt.com Downloads: downloads.ubnt.com w w w . u b n t . c o m © 2012 Ubiquiti Networks, Inc. All rights reserved.
Need help?
Do you have a question about the PowerBridge M10 and is the answer not in the manual?
Questions and answers