Ubiquiti LTU-Lite Quick Start Manual
Hide thumbs
Also See for LTU-Lite:
- Manual (28 pages) ,
- Quick start manual (24 pages) ,
- Quick start manual (19 pages)
Table of Contents
Advertisement
LTU-Lite Quick Start Guide
Package Contents
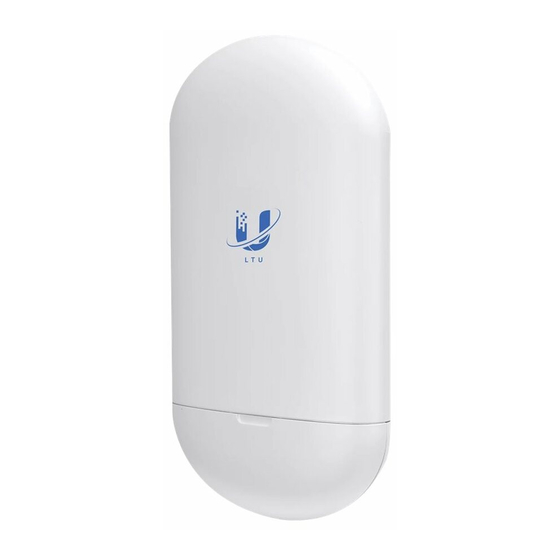
LTU-Lite
Screw Anchors (Qty. 2)
Power Cord
Installation Requirements
LTU PtMP AP, such as model LTU-Rocket
Phillips screwdriver for wall-mounting
Outdoor, shielded Category 6 (or above) cabling and shielded RJ45 connectors are
required for all wired Ethernet connections.
Surge protection should be used for all outdoor installations. We recommend that you use
two Ethernet Surge Protectors, model ETH-SP-G2, one near the device and the other at the
entry point to the building. The ETH-SP-G2 will absorb power surges and safely discharge
http://dl-origin.ubnt.com/qsg/LTU-Lite/LTU-Lite_EN.html[05.02.2020 14:06:04]
LTU-Lite Quick Start Guide
Wall Mount Bracket
Zip Tie
Screws (Qty. 2)
Gigabit PoE (24V, 0.5A) with
Mounting Bracket
Advertisement
Table of Contents

Related Manuals for Ubiquiti LTU-Lite


Summary of Contents for Ubiquiti LTU-Lite
- Page 1 LTU-Lite Quick Start Guide LTU-Lite Quick Start Guide Package Contents LTU-Lite Wall Mount Bracket Screws (Qty. 2) Screw Anchors (Qty. 2) Zip Tie Gigabit PoE (24V, 0.5A) with Mounting Bracket Power Cord Installation Requirements LTU PtMP AP, such as model LTU-Rocket...
-
Page 2: Hardware Overview
LTU-Lite Quick Start Guide them into the ground. Note: For guidelines about grounding and lightning protection, follow your local electrical regulatory codes. Hardware Overview System LED Blue Initial power-up. Flashing White Bootup in progress. http://dl-origin.ubnt.com/qsg/LTU-Lite/LTU-Lite_EN.html[05.02.2020 14:06:04]... -
Page 3: Hardware Installation
LTU-Lite Quick Start Guide White Ready for use. Alternating Firmware upgrade in progress. Blue/White Ethernet Port This 10/100/1000 Ethernet port is used to connect the power and should be connected to the LAN and DHCP server. Reset Button To reset to factory defaults, press and hold the Reset button for more than 10 seconds while the device is powered on. -
Page 4: Wall Mount
LTU-Lite Quick Start Guide Wall Mount http://dl-origin.ubnt.com/qsg/LTU-Lite/LTU-Lite_EN.html[05.02.2020 14:06:04]... - Page 5 LTU-Lite Quick Start Guide http://dl-origin.ubnt.com/qsg/LTU-Lite/LTU-Lite_EN.html[05.02.2020 14:06:04]...
- Page 6 LTU-Lite Quick Start Guide http://dl-origin.ubnt.com/qsg/LTU-Lite/LTU-Lite_EN.html[05.02.2020 14:06:04]...
- Page 7 LTU-Lite Quick Start Guide http://dl-origin.ubnt.com/qsg/LTU-Lite/LTU-Lite_EN.html[05.02.2020 14:06:04]...
-
Page 8: Pole Mount
LTU-Lite Quick Start Guide Pole Mount http://dl-origin.ubnt.com/qsg/LTU-Lite/LTU-Lite_EN.html[05.02.2020 14:06:04]... - Page 9 LTU-Lite Quick Start Guide http://dl-origin.ubnt.com/qsg/LTU-Lite/LTU-Lite_EN.html[05.02.2020 14:06:04]...
- Page 10 LTU-Lite Quick Start Guide http://dl-origin.ubnt.com/qsg/LTU-Lite/LTU-Lite_EN.html[05.02.2020 14:06:04]...
-
Page 11: Connecting Power
LTU-Lite Quick Start Guide Connecting Power WARNING: The switch port must comply with the power specifications listed in “Specifications”. http://dl-origin.ubnt.com/qsg/LTU-Lite/LTU-Lite_EN.html[05.02.2020 14:06:04]... -
Page 12: Accessing The Configuration Interface
LTU-Lite Quick Start Guide Optional Accessing the Configuration Interface 1. Make sure that your host system is connected via Ethernet to the device. 2. Configure the Ethernet adapter on your host system with a static IP address on the 192.168.1.x subnet. - Page 13 LTU-Lite Quick Start Guide The LTU Configuration Interface will appear, allowing you to customize your settings as needed. UNMS Management You can manage your device using UNMS, which lets you configure, monitor, upgrade, and back up your devices using a single application. Get started at www.unms.com...
-
Page 14: Installer Compliance Responsibility
LTU-Lite Quick Start Guide 4. The device will scan for nearby APs. Click Select for the appropriate AP. To run the search again, click Scan. 5. Follow the on-screen instructions. Installer Compliance Responsibility Devices must be professionally installed and it is the professional installer’s responsibility to make sure the device is operated within local country regulatory requirements. -
Page 15: Specifications
LTU-Lite Quick Start Guide The Auto Output Power field is provided to the professional installer to assist in meeting regulatory requirements. Specifications LTU-Lite Dimensions 153 x 84 x 39.5 mm (6.02 x 3.31 x 1.56") Weight 250 g (8.82 oz) -
Page 16: Safety Notices
LTU-Lite Quick Start Guide Operating Frequency (MHz) Worldwide 2400 - 2483.5* 4800 - 6200* US/CA U-NII-1 5150 - 5250 U-NII-2A 5250 - 5350 U-NII-2C 5470 - 5725 U-NII-3 5725 - 5850 2400 - 2483.5 5150 - 5875 Depends on regulatory region. - Page 17 LTU-Lite Quick Start Guide The limited warranty requires the use of arbitration to resolve disputes on an individual basis, and, where applicable, specify arbitration instead of jury trials or class actions. Compliance Changes or modifications not expressly approved by the party responsible for compliance could void the user’s authority to operate the equipment.
-
Page 18: Australia And New Zealand
LTU-Lite Quick Start Guide Radiation Exposure Statement This equipment complies with radiation exposure limits set forth for an uncontrolled environment. This equipment should be installed and operated with minimum distance 24 cm between the radiator and your body. This transmitter must not be co-located or operating in conjunction with any other antenna or transmitter. -
Page 19: Weee Compliance Statement
Operation in the 5.8 GHz frequency band is prohibited in BFWA member states. Other countries listed may use the 5.8 GHz frequency band. WEEE Compliance Statement Declaration of Conformity Online Resources © 2020 Ubiquiti Inc. All rights reserved. http://dl-origin.ubnt.com/qsg/LTU-Lite/LTU-Lite_EN.html[05.02.2020 14:06:04]...
Need help?
Do you have a question about the LTU-Lite and is the answer not in the manual?
Questions and answers