Table of Contents
Advertisement
Please read through this instruction booklet to THOROUGHLY familiarize yourself with the assembly and flight characteristics of this airplane prior
to assembly. Please inspect all parts carefully before starting assembly! If any parts are missing, broken or defective, or if you have any questions
about the assembly or flying of this airplane, please call us at (217) 398-8970 and we'll be glad to help. This product is suitable only for people
of 14 years and older.
Hobbico
®
Inc. guarantees this kit to be free from defects in both material and workmanship at the date of purchase. This warranty does not cover
any component parts damaged by use or modification. In no case shall Hobbico's liability exceed the original cost of the purchased kit. Further,
Hobbico, Inc. reserves the right to change or modify this warranty without notice. In that Hobbico, Inc. has no control over the final assembly or
material used for final assembly, no liability shall be assumed nor accepted for any damage resulting from the use by the user of the final user-
assembled product. By the act of using the user-assembled product, the user accepts all resulting liability. If the buyer is not prepared to accept
the liability associated with the use of this product, the buyer is advised to return this kit immediately in new and unused condition to the
place of purchase. To make a warranty claim send the defective part or item to Hobby Services at the address below:
Hobby Services
3002 N. Apollo Dr. Suite 1
Champaign IL 61822 USA
®
© 2012 Hobbico
, Inc. All rights reserved.
ASSEMBLE ONLY WITH ADULT SUPERVISION
Include a letter stating your name, return shipping address, as much contact information as possible (daytime
telephone number, fax number, e-mail address), a detailed description of the problem and a photocopy of the
purchase receipt. Upon receipt of the package, the problem will be evaluated as quickly as possible.
WARRANTY
Printed in China
™
RTF
HCAA2550Mnl v2.0
Advertisement
Table of Contents

Related Manuals for Flyzone PlayMate


Summary of Contents for Flyzone PlayMate
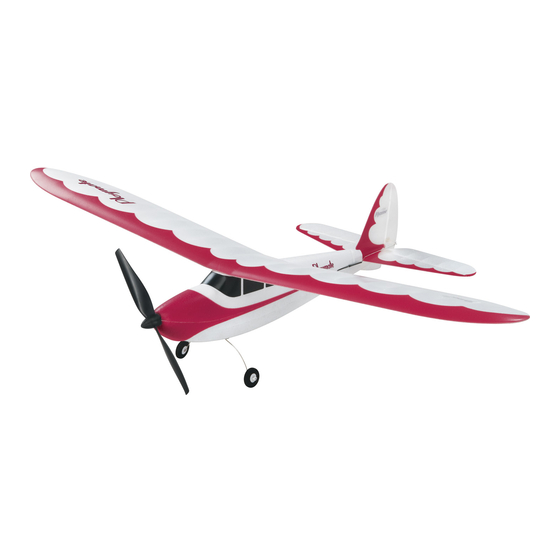
- Page 1 ™ ASSEMBLE ONLY WITH ADULT SUPERVISION Please read through this instruction booklet to THOROUGHLY familiarize yourself with the assembly and flight characteristics of this airplane prior to assembly. Please inspect all parts carefully before starting assembly! If any parts are missing, broken or defective, or if you have any questions about the assembly or flying of this airplane, please call us at (217) 398-8970 and we’ll be glad to help.
-
Page 2: Fcc Requirement
4. Although the Playmate is designed to be successfully fl own by the fl ying instructions carefully and completely. We hope you enjoy fi... -
Page 3: Unpack The Box
WARNING!! Failure to follow all instructions could cause permanent damage to the battery and its surroundings, and cause bodily harm! • ONLY use the Playmate transmitter or optional 1S charger to charge the LiPo battery. • ALWAYS charge in a fi reproof location. -
Page 4: First Flight
5. After each fl ight, remove the battery pack from the airplane and allow it to cool completely before recharging. 6. Do not leave the battery connected to the Playmate for an extended period of time. This can cause permanent damage to the battery. - Page 5 Note: When the LiPo should move up. battery is fi rst plugged into the Playmate, the propeller will not rotate until the left control stick is fi rst moved all the way to the down position and you hear a single beep. Move the left control stick all the way up to full throttle and you will hear another single beep.
- Page 6 ADJUSTING THE CONTROL TRIMS 4. If the elevator does not move in the correct direction according to step #1, you can reverse its movement by pressing and holding either elevator trim button and switching on the power to the transmitter. You will hear three fast beeps confi rming the change. 5.
- Page 7 5 mph [8km/h] or less. If your right. In short, you have to reverse the way you control the the wind is calm or very light, the Playmate will be docile and easy rudder. Here’s a good way to familiarize yourself with the controls: to control.
-
Page 8: After The Flight
Let the glue cure, leaving the tape in place for added strength. REINSTALLING THE PROPELLER 2. Open the fuselage of the Playmate by using the uncut seam as a hinge. If the uncut seam separates, simply reglue it when performing Step 7. - Page 9 3. If the spring is still attached to the propeller, carefully remove it from the propeller. Do not stretch the spring. If you no longer have the spring, contact Product Support at (217) 398-8970, 5. Apply a small amount of CA into the small mounting hole in extension 5.
-
Page 10: Replacement Parts List
REPLACEMENT PARTS LIST To order replacement parts for your Playmate, use the order numbers in the list below. Replacement parts are available only as listed. Replacement parts are not available from Product Support, but can be purchased from hobby shops or mail order/ Internet order fi... -
Page 11: Troubleshooting
To rebind the transmitter to the airplane, turn the transmitter switch to the ON position. Connect the LiPo battery to the airplane. The TTX402 will autobind with the Playmate. Confirm operation of the airplane with the transmitter. If the binding procedure fails, disconnect the battery and turn off the transmitter.
Need help?
Do you have a question about the PlayMate and is the answer not in the manual?
Questions and answers