
Related Manuals for D-Link DSL-1500G++


Summary of Contents for D-Link DSL-1500G++
- Page 1 DSL-1500G++ 2 Mbps G.SHDSL LEASED LINE ROUTER USER MANUAL Ver. 1.0 First Edition (August 2004) RECYCLABLE...
- Page 2 DSL-1500G++ User Manual - 2 -...
-
Page 3: Limited Warranty
Hardware. The Warranty Period shall extend for an additional ninety (90) days after any repaired or replaced Hardware is delivered. If a material defect is incapable of correction, or if D-Link determines in its sole discretion that it is not practical to repair or replace the defective Hardware, the price paid by the original purchaser for the defective Hardware will be refunded by D-Link upon return to D-Link of the defective Hardware. - Page 4 OF THE FOREGOING LIMITED WARRANTY IS REPAIR, REPLACEMENT OR REFUND OF THE DEFECTIVE OR NON-CONFORMING PRODUCT. Copyright .1999 D-Link Corporation. Contents are subject to change without prior notice. D-Link is a registered trademark of D-Link Corporation. All other trademarks belong to their respective proprietors.
- Page 5 No part of this publication may be reproduced in any form or by any means or used to make any derivative such as translation, transformation, or adaptation without permission from D-Link Corporation/D-Link Systems Inc., as stipulated by the United States Copyright Act of 1976.
-
Page 6: Fcc Warning
DSL-1500G++ User Manual FCC Warning This equipment has been tested and found to comply with the limits for a Class B digital device, pursuant to part 15 of the FCC Rules. These limits are designed to provide reasonable protection against harmful interference in a residential installation. This equipment generates, uses and can radiate radio frequency energy and, if not installed and used in accordance with the instructions, may cause harmful interference to radio communications. - Page 7 Warning: Do not open the case to avoid electric shock. Caution: Read this user manual before you operate the system. D-Link Corporation 2F, No.119, Pao-Chung Road, Hsin-Tien,Taipei, Taiwan, R.O.C Tel: 886-2-2910-2626 Fax: 886-2-2910-1515 URL: www.dlinktw.com.tw...
-
Page 8: Table Of Contents
DSL-1500G++ User Manual Contents: 1. Introduction..........................- 10 - 1.1 DSL-1500G++ Overview ..........................- 10 - 1.2 Features ..............................- 10 - 1.3 Application ..............................- 11 - 1.4 Specification ..............................- 12 - 2. Hardware Setup and Startup..................... - 13 - 2.1 Front Panel LED and Rear Panel description..................- 13 - 2.2 Dip Switch illustration..........................- 14 - 2.2 Restore Factory Defaults/Reboot Button....................- 15 - 2.3 Parts check ..............................- 15 -... - Page 9 DSL-1500G++ User Manual 3.2.4.8 DHCP Relay ..........................- 45 - 3.2.4.9 DNS Client ............................- 46 - 3.2.4.10 DNS Relay ..........................- 47 - 3.2.4.11 SNTP Client ..........................- 48 - 3.2.4.12 Security............................- 51 - 3.2.4.13 Ports ............................- 62 - 3.2.4.14 Search for Service ........................- 67 - 4.
-
Page 10: Introduction
DSL-1500G++ User Manual 1. Introduction Thank you for choosing DSL-1500G++ as your broadband access solution. This manual helps you with the setup and configuration of your product. 1.1 DSL-1500G++ Overview DSL-1500G++ G.SHDSL Router is designed for Small and medium-sized businesses to access the Internet and remote office networks by providing a cost-effective high-speed alternative to replace expensive leased-line services. -
Page 11: Application
DSL-1500G++ User Manual 1.3 Application a. Connect to the G.SHDSL IP DSLAM b. connect to another DSL-1500G++ set as CO mode - 11 -... -
Page 12: Specification
DSL-1500G++ User Manual 1.4 Specification SHDSL Compliance Comply to ITU-T G.991.2 (Annex A, Annex B) G. SHDSL Data Rate: N x 64Kbps (N=0~72 for 4 wire, N=0~36 for 2wire, 0 for adaptive) Impedance: 135 ohms Annex obtained from CPE side, CO side auto adjust Configurable: 2-wire or 4-wire mode Default: 2/4 wire (depending on model), Annex A. -
Page 13: Hardware Setup And Startup
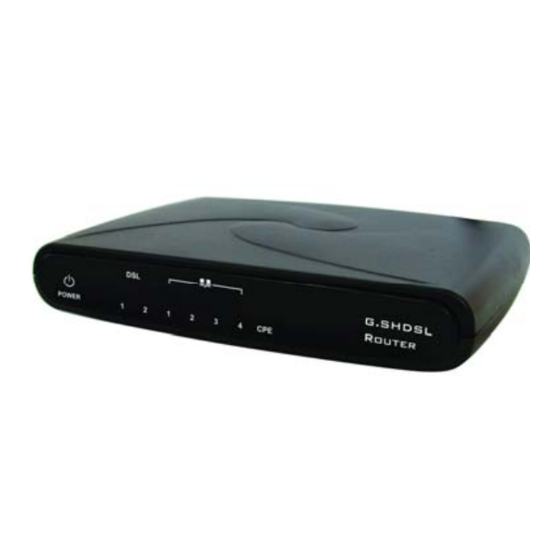
DSL-1500G++ User Manual 2. Hardware Setup and Startup _________________________________________________________________________________________ 2.1 Front Panel LED and Rear Panel description Following pictures are the front panel of 2-wire and 4-wire DSL-1500G++ respectively. Figure 2-1 4-wire DSL-1500G++ Front Panel LED Figure 2-2 2-wire DSL-1500G++ Front Panel LED Power Indicator Power 2. -
Page 14: Dip Switch Illustration
DSL-1500G++ User Manual 2.2 Dip Switch illustration The DSL-1500G++ is equipped with a dip switch, located on its rear panel, in which transmission rate and CO/CPE selection can be configured by manual. Outlook of Dip Switch As the following figure shown, position 1 to 3 is assigned to Rate configuration and position 4 is for CO or CPE selection. -
Page 15: Restore Factory Defaults/Reboot Button
DSL-1500G++ User Manual Note: Default is Rate7 and CPE. 2.2 Restore Factory Defaults/Reboot Button Press the reset button to reset the DSL-1500G++ to its factory-default settings (default configuration file will be uploaded). If you forget your password or cannot access the device, you will need to reset the device to the default settings. -
Page 16: Hardware Connection
DSL-1500G++ User Manual Standard DSL line cable support CD Quick Installation Guide 2.4 Hardware Connection Connect the DSL cable to the DSL port of RJ-11 socket. Use a RJ-45 cable to connect the DSL-1500G++ to the LAN or a PC with Ethernet adapter installed. -
Page 17: Configuring Your Computers
DSL-1500G++ User Manual 2.6 Configuring Your Computers This section provides instructions for configuring the Internet settings on your computers to work with the Router Before you begin By default, the Router automatically assigns all required Internet settings to your PCs. You need only to configure the PCs to accept the information when it is assigned. -
Page 18: Windows Me Pcs
DSL-1500G++ User Manual protocol has already been enabled. Skip to step 10. If Internet Protocol (TCP/IP) does not display as an installed component, click In the Select Network Component Type dialog box, select Protocol, and then click Select Internet Protocol (TCP/IP) in the Network Protocols list, and then click You may be prompted to install files from your Windows 2000 installation CD or other media. -
Page 19: Windows 95, 98 Pcs
DSL-1500G++ User Manual click Select Microsoft in the Manufacturers box. Select Internet Protocol (TCP/IP) in the Network Protocols list, and then click You may be prompted to install files from your Windows Me installation CD or other media. Follow the instructions to install the files. If prompted, click to restart your computer with the new settings. -
Page 20: Assigning Static Internet Information To Your Pcs
DSL-1500G++ User Manual the instructions to install the files. Click to restart the PC and complete the TCP/IP installation. Next, configure the PCs to accept IP information assigned by DSL-1500G++ : Open the Control Panel window, and then click the Network icon. Select the network component labeled TCP/IP, and then click If you have multiple TCP/IP listings, select the listing associated with your network card or adapter. - Page 21 DSL-1500G++ User Manual On each PC to which you want to assign static information, follow the instructions on pages 8 through 11 relating only to checking for and/or installing the IP protocol. Once it is installed, continue to follow the instructions for displaying each of the Internet Protocol (TCP/IP) properties.
-
Page 22: Configure The Dsl-1500G++ From Emweb
DSL-1500G++ User Manual 3. Configure the DSL-1500G++ from EmWeb 3.1 Accessing EmWeb To access EmWeb on the DSL-1500G++ that has been booted with an image containing a factory default configuration: 1. Attach a PC to one of the LAN interfaces. At your web browser, enter the URL:http://192.168.1.1 2. -
Page 23: About The Status Page
DSL-1500G++ User Manual You can select each of the following topics from the menu on the left-hand side of the main window: • Status: information about the current setup and status of the system. • Quick Start: information about how to setup the WAN connection. •... - Page 24 DSL-1500G++ User Manual • Advanced Diagnostics: The Advanced Diagnostics section displays: • Connection Authentication details; this displays details about your current ISP login settings. It also provides a Login Settings hyperlink that allows you to create, modify or delete your existing login setup. - 24 -...
- Page 25 DSL-1500G++ User Manual • Port Connection Status: This section displays information about your port connections: • Port; the ports available on your Router • Type; the kind of traffic that can be transported on each port connected; which of the ports on your Router are currently connected: represents a port that is not connected represents a port that is connected...
-
Page 26: About The Quick Start Page
DSL-1500G++ User Manual • Up-Time; the length of time (in hours: minutes: seconds) that your current session has been connected for • Version: The released firmware version of DSL-1500G++. • Defined Interfaces: This section lists LAN interfaces that have been defined. For more information on defining LAN interfaces, each interface listed has a Show Statistics hyperlink associated with it. -
Page 27: Creating A Login Using Dhcp
DSL-1500G++ User Manual Using a DHCP address from your ISP instead of having a login account. Login using PPPoE. This allows a user to login remotely via PPPoE. Note: Please refer to following sections for details for all settings above-mentioned. 3.2.2.1 Creating a login using DHCP 1. -
Page 28: About System Configuration
DSL-1500G++ User Manual 2. Complete the PPoE Login Options: a. Fill the PPoE username and Password that provided by the ISP in the PPoE Setup section. b. In the PPoE Login Options section, select your PPoE service name as Dial On Demand or Keep-Alive. -
Page 29: Remote Access
DSL-1500G++ User Manual This page displays a table containing all configuration errors experienced by your Router during a current session. The table also tells you: • when the error occurred (in seconds since your system was restarted) • which process the error occurred in •... -
Page 30: Firmware Update
DSL-1500G++ User Manual 3. The Remote Access page is displayed, confirming the number of seconds remaining for remote access. 3.2.3.4 Firmware Update This option allows you to upload firmware images to Router using HTTP. 1. From the System menu, click Firmware update. The following page is displayed: 2. -
Page 31: Restart
DSL-1500G++ User Manual From the Backup Configuration section, click on the . The File Download window is displayed and then select the . The Save As window will prompt and select a file in which to save your backup configuration. Click on Restoring your configuration From the System menu, click on Backup/restore. -
Page 32: About The Configuration Menu
DSL-1500G++ User Manual Click on to reset your Router. The Restart page also provides you with the option of restarting and restoring the factory default settings. Click in the Reset to factory default settings box to check it, and then click on the . -
Page 33: Save Configuration
DSL-1500G++ User Manual • Ports: allows you to configure the ports available on your Router. Note: Please refer to following sections for details for all settings above-mentioned. 3.2.4.1 Save configuration To save your current configuration to Flash ROM: 1. From the Configuration menu, click on Save config. The following page is displayed: 2. - Page 34 DSL-1500G++ User Manual 2. Type details for the new user into the username, password and comment text boxes, and select a May login? Option: • true means that the user can login but not dialing • false means that the user can not login Click on the .
-
Page 35: Lan Connections
DSL-1500G++ User Manual 3.2.4.3 LAN connections This option allows you to: • configure the IP address and subnet of the default LAN connection to the Router. • configure a secondary IP address on the same subnet as the primary IP address. •... - Page 36 DSL-1500G++ User Manual Once you have configured the IP address(es), click on the . A message is displayed confirming that your address information is being updated. If you have changed the primary IP address, you may need to enter the new address in your web browser address box.
-
Page 37: Wan Connection
DSL-1500G++ User Manual 3. Each virtual interface name has an Edit and a Delete link associated with it. To edit a service: a. Click on the Edit link. b. Change the options for the existing virtual interface, then click on Change. The page is reset and the new values are displayed. - Page 38 DSL-1500G++ User Manual Editing a WAN service Click on the Edit link for a specific service. The WAN connection: edit page is displayed. Change the values for the existing service. If you want to carry out advanced editing, click on the links at the top of the edit page. The links that appear depend on the type of service that you are configuring.
- Page 39 DSL-1500G++ User Manual Click on the Create a new virtual interface... hyperlink. On the Create virtual interface page, type the IP address and netmask of the virtual interface, and then click on the The WAN connections page is displayed. If you click on the Virtual I/f link, the Virtual interface page displays a table listing the names of existing virtual interfaces.
-
Page 40: Ip Routes
DSL-1500G++ User Manual 3.2.4.5 IP Routes This option allows you to create static IP routes to destination addresses via an IP interface name or a Gateway address. From the Configuration menu, click on IP routes. The Edit Routes page is displayed: This page lists the following information about existing routes: •... -
Page 41: Dhcp Server
DSL-1500G++ User Manual Deleting a route To delete an existing route, check the Delete box for a specific route. Click on Creating an IP V4 Route Click on the Create new Ip V4 Route hyperlink. The following page is displayed Complete the Create IP v4 Route form in order to configure the route. - Page 42 DSL-1500G++ User Manual Enabling/disabling the DHCP server The DHCP server is enabled by default. If to disable the DHCP server, click on Note: If DHCP relay is enabled, DHCP server will be disabled by default. You can not enable DHCP server unless you disable DHCP relay. Creating a DHCP server subnet Click on the Create new Subnet link.
- Page 43 DSL-1500G++ User Manual This page allows you to: Set the value and netmask of the subnet (either manually or by selecting an IP interface whose value and mask is used instead), and set the maximum and default lease times. Set the DHCP address range (or use a default range of 20 addresses). Set the Primary and Secondary DNS Server addresses or set your System to give out its own IP address as the DNS Server address.
- Page 44 DSL-1500G++ User Manual This page also allows you to add additional option information. At the bottom of the page, click on the Create new DHCP option link. Click on the Option name drop-down list and select a name. Type a value that matches the selected option name in the Option value text box.
-
Page 45: Dhcp Relay
DSL-1500G++ User Manual Complete the following: Type in the IP address that will be given to the host with the specified MAC address. Type in the MAC address and the maximum lease time (default is 86400 seconds). Click on OK. The DHCP Server page is displayed, and details of your new fixed host are displayed under the sub-heading Existing DHCP fixed IP/MAC mappings. -
Page 46: Dns Client
DSL-1500G++ User Manual Note: If DHCP server is enabled, DHCP relay will be disabled by default. You can not enable DHCP relay unless you disable DHCP server. Adding a DHCP server to the DHCP relay list In the Add new DHCP server section, type an address in the New DHCP server IP address text box. -
Page 47: Dns Relay
DSL-1500G++ User Manual Configuring DNS servers Type the IP address of the unknown domain name in the DNS servers: text box. Click . The IP address appears in the DNS servers table. You can add a maximum of three server IP addresses. Each IP address entry has a Delete button associated with it. -
Page 48: Sntp Client
DSL-1500G++ User Manual Configuring the DNS relay list In the Add new DNS server section, type an address in the New DNS server IP address text box. Click on . The address is displayed in the Edit DHCP server list section. To edit an entry, click on an IP address and type a new entry, then click on . - Page 49 DSL-1500G++ User Manual Synchronize Client with NTP Server Click on that forces the SNTP client to immediately synchronize the local time with the server located in the association list (if unicast) or, if anycast is enabled, initiate an anycast sequence to the network. Note: to Synchronize Client with NTP Server, NTP servers, SNTP client mode, and local time zone should be pre-configured.
- Page 50 DSL-1500G++ User Manual The enabled anycast mode takes precedence over any entries currently in the associations list when the sntpclient sync command is issued. The entry will then be substituted for any existing entry in the unicast association list. • Disable - stops synchronization via anycast mode. Click on to validate your setting, after choosing the SNTP Syncroniztion mode.
-
Page 51: Security
DSL-1500G++ User Manual Enter the date and time with yyyy:mm:dd:hh:mm:ss format in the text box to set the system clock. And then click on to validate your setting. Note: if using manual system clock setting, the local time will follow the internal clock set by user. - Page 52 DSL-1500G++ User Manual Enabling Security You must enable Security before you can enable Firewall and/or Intrusion Detection. In the Security State section: Click on the Security Enabled radio button. Click on to update the Security State section. Enabling Firewall and/or Intrusion Detection You must create a security interface before you can enable Firewall and/or Intrusion Detection.
- Page 53 DSL-1500G++ User Manual Click on the button. Configuring security interfaces Security interfaces are based on existing LAN services. You must create a LAN service for every security interface that you want to configure. For details of how to create LAN services, From the Security Interfaces section, click on Add Interface.
- Page 54 DSL-1500G++ User Manual • Type of network connection specified • NAT setting. It contains hyperlinks that allow you to configure NAT. See Configuring • Delete Interface... hyperlink. Click on this to display the Security: Delete Interface page. Check the interface details, then click on the Delete button. Configuring NAT To configure NAT, you need to: Enable Security;...
- Page 55 DSL-1500G++ User Manual hyperlink for the interface that you want to add a global pool to. The following page is displayed: Click on Add Global Address Pool. The following page is displayed: This page allows you to create a pool of network IP addresses that are visible outside your network.
- Page 56 DSL-1500G++ User Manual mask of the IP address. If you chose Use IP Address Range, type in the last IP address in the range of addresses that make up the global address pool. Once you have configured the table, click on .
- Page 57 DSL-1500G++ User Manual interface to the inside. • Port Number; the port number that your transport uses. 4. Once you have configured the table, click on . The table is refreshed and the reserved mapping is added to your NAT configuration. To delete a reserved mapping setup, click on the Delete hyperlink, and then click on Click on Return to Interface List to display the Security Interface Configuration page.
- Page 58 DSL-1500G++ User Manual displayed: Specify the start and end of the port range for the TCP/UDP protocol that you want to filter. Then select TCP or UDP protocol from the Protocol drop-down list. After that, use the Direction drop-down lists to specify whether you want to allow/block inbound traffic, and allow/block outbound traffic.
- Page 59 DSL-1500G++ User Manual Traffic will be allowed or blocked depending on the validator configuration specified when the policy was created. See Configuring Firewall policies Section. This section assumes that you have previously followed the instructions in Configuring Firewall policies Section. To configure a validator: 1.
- Page 60 DSL-1500G++ User Manual 2. Configure the trigger as follows: a. Transport Type; select a transport type from the drop-down list, depending on whether you are adding a trigger for a TCP or a UDP application. b. Port Number Start; type the start of the trigger port range that the primary session uses.
- Page 61 DSL-1500G++ User Manual The Firewall Trigger Configuration page is displayed and details of the deleted trigger have been removed. There are two hyperlinks on the page: a. To add a new trigger, click on New Trigger. b. To display the Security Interface Configuration page, click on Return to Interface List. Configuring Intrusion Detection Settings Intrusion Detection settings allow you to protect your network from intrusions such as denial of service (DOS) attacks, port scanning and web spoofing.
-
Page 62: Ports
DSL-1500G++ User Manual blocks suspicious hosts for once a DOS attack attempt has been detected. Scan Attack Block Duration; type the length of time (in seconds) that the Firewall blocks suspicious hosts for after it has detected scan activity. Victim Protection Block Duration; type the length of time (in seconds) that the Firewall blocks packets destined for the victim of a spoofing style attack. - Page 63 DSL-1500G++ User Manual You can carry out advanced configuration of your Ethernet port attributes. From the Shdsl Port Configuration page, click on View advanced attributes. The Shdsl Port Configuration page is displayed. “Shdsl” is the default port name of SHDSL created in DSL-1500G++ where stands for ATM port.
- Page 64 DSL-1500G++ User Manual Before preceeding any advanced configuration, set 4WActive Line and Active Line as True. If to choose 4-wire mode, select true in the 4Wire Enable drop-down list, and then click on to submit your setting. Similarly, if to choose 2-wire mode, select false in the 4Wire Enable drop-down list, and then click on to submit your setting.
- Page 65 DSL-1500G++ User Manual submit your setting. Finally, replug the loop cables into the devices. 6. Please refer to the Appendix A: Advanced DSL port attributes for detailed information of Shdsl port attributes. From the Ports menu, click on Ethernet. The Ethernet Port Configuration page is displayed: The page displays basic port attributes for the Ethernet port on your Router.
- Page 66 DSL-1500G++ User Manual configuration settings. Click on the Return to basic attribute list to return to the Ethernet Port Configuration page. 12. From the Ports menu, click on Usb-ethernet. The Ethernet Port Configuration page is displayed: 13. You can carry out advanced configuration of your Usb-ethernet port attributes. From the Usb-ethernet Port Configuration page, click on View advanced attributes.
-
Page 67: Search For Service
DSL-1500G++ User Manual 14. Update the port attributes that are available for editing, then click on to update the advanced configuration, or to revert back to the default advanced configuration settings. Click on the Return to basic attribute list to return to the Usb-ethernet Port Configuration page. -
Page 68: Diagnostic And Troubleshooting
DSL-1500G++ User Manual 4. Diagnostic and Troubleshooting _________________________________________________________________________________________ We could simply judge whether connection is correct or incorrect from the status of LED. Please refer to the list below for status of connection. Description Suggestion Make sure Power LED, Ethernet LED, Check all connections whether ware correct, including and DSL LED are lighted. -
Page 69: Appendix A: Advanced Dsl Port Attributes
DSL-1500G++ User Manual Appendix A: Advanced DSL port attributes Attribute Value Default DSP Firmware Version DSP code version number DSP Version DSL driver version number Connected Current connected state: False True – modem is connected to a remote modem False – modem is not connected to a remote modem Annex Type Current Annex Type: Annex_A... - Page 70 DSL-1500G++ User Manual Attribute Value Default Auto Start “True” - A Connection will be established at power up. True “False” - The modem will remain in Idle mode at power Activate Line false – normal operation false true – reset DSP CRCerrors cyclic redundancy check errors occured SEGAerrors...
- Page 71 8. What category best describes your company? Aerospace Engineering Education Finance Hospital Legal Insurance/Real Estate Manufacturing Retail/Chainstore/Wholesale Government Transportation/Utilities/Communication System house/company Other________________________________ 9. Would you recommend your D-Link product to a friend? Don't know yet 10.Your comments on this product? - 71 -...
- Page 72 DSL-1500G++ User Manual - 72 -...
- Page 73 DSL-1500G++ User Manual D-Link Offices JAIPUR BANGALORE CHENNAI M/S. D-Link India Ltd. 14 Anukampa, Mansion II, M.I. Road, Ajmeri Gate, M/S. D-Link (I) Ltd. M/S. D-Link (I) Ltd Jaipur – 302 003. #1014, “Sumati” Floor, JVL Plaza Tele : (0141) 511 3149.
Need help?
Do you have a question about the DSL-1500G++ and is the answer not in the manual?
Questions and answers