iDataLink Maestro RR Install Manual
With gm5 t-harness
Hide thumbs
Also See for Maestro RR:
- Install manual (1403 pages) ,
- How to use manual (201 pages) ,
- Manual (106 pages)
Advertisement
Table of Contents
• 20130903
INSTALL GUIDE
WITH GM5 T-HARNESS
RETAINS STEERING WHEEL CONTROLS,
ONSTAR
, FACTORY AMPLIFIER CONTROL,
TM
12037
ANALOG OUTPUTS AND MORE!
PRODUCTS REQUIRED
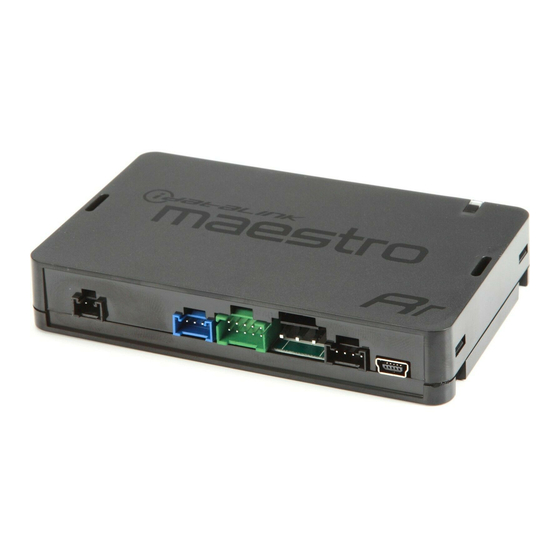
iDatalink Maestro RR Radio Replacement Interface
iDatalink Maestro GM5 Installation Harness
OPTIONAL ACCESSORIES
None
PROGRAMMED FIRMWARE
ADS-RR(SR)-GMS05-AS-EN
NOTICE:
Automotive Data Solutions Inc. (ADS) accepts no responsability for
any electrical damage resulting from improper installation of this product,
be that either damage to the vehicle itself or to the installed device. ADS
recommends having this installation performed by a certified technician.
Please review this guide carefully before beginning any work. Logos and
trademarks used herein are the properties of their respective owners.
Automotive Data Solutions Inc. © 2013
maestro.idatalink.com
Advertisement
Table of Contents

Related Manuals for iDataLink Maestro RR


Summary of Contents for iDataLink Maestro RR
- Page 1 WITH GM5 T-HARNESS RETAINS STEERING WHEEL CONTROLS, ONSTAR , FACTORY AMPLIFIER CONTROL, 12037 ANALOG OUTPUTS AND MORE! PRODUCTS REQUIRED iDatalink Maestro RR Radio Replacement Interface iDatalink Maestro GM5 Installation Harness OPTIONAL ACCESSORIES None PROGRAMMED FIRMWARE ADS-RR(SR)-GMS05-AS-EN NOTICE: Automotive Data Solutions Inc. (ADS) accepts no responsability for any electrical damage resulting from improper installation of this product, be that either damage to the vehicle itself or to the installed device.
-
Page 2: Getting Started
WELCOME INSTALL TYPE 1 *HOW TO DETERMINE IF YOUR VEHICLE IS EQUIPPED Congratulations on the purchase of your iDatalink Maestro Used for vehicles with a factory amplifi er* WITH A FACTORY AMPLIFIER RR Radio replacement solution. You are now s few simple •... -
Page 3: Weblink Reference
PAGE 3 OF 10 WEBLINK REFERENCE • 20130903 DOC.: #12037 Visit maestro.idatalink.com and click on FLASH YOUR MODULE to access the WEBLINK menu. Log in if you are already registered. Create an account if you are not registered. Select your vehicle’s make, year and model. -
Page 4: Install With Factory Amplifier
The RCA connectors labeled BACKUP CAM can be used to retain the functionality of the factory backup camera. STEP 4: • Connect all the harnesses to the Maestro RR module. The module is now ready to be used. Insert the aftermarket radio in the dashboard housing and test all the functionalities. -
Page 5: With Factory Amplifier Wiring Diagram
LEFT-FRONT BACKUP CAM BACKUP CAM CENTER CENTER (NOT CONNECTED) STEP 4 (NOT CONNECTED) STEP 2 FACTORY RADIO HARNESS WIRES FROM VEHICLE GMS05 T-HARNESS BROWN/YELLOW (NOT CONNECTED) BROWN/RED (NOT CONNECTED) MAESTRO RR MODULE Automotive Data Solutions Inc. © 2013 ADS-RR(SR)-GMS05-ASTH-IG-EN maestro.idatalink.com... -
Page 6: Install Without Factory Amplifier
• Remove the factory radio. STEP 5: • Connect the factory harness to the GM5 T-harness. • Connect all the harnesses to the Maestro RR module. • Connect only the available connectors. For example, if the factory harness has two connectors, connect only The module is now ready to be used. -
Page 7: Without Factory Amplifier Wiring Diagram
LEFT-FRONT STEP 5 BACKUP CAM BACKUP CAM CENTER CENTER (NOT CONNECTED) (NOT CONNECTED) STEP 3 FACTORY RADIO HARNESS WIRES FROM VEHICLE GMS05 T-HARNESS BROWN/YELLOW (NOT CONNECTED) BROWN/RED (NOT CONNECTED) MAESTRO RR MODULE Automotive Data Solutions Inc. © 2013 ADS-RR(SR)-GMS05-ASTH-IG-EN maestro.idatalink.com... - Page 8 (-) terminal. STEP 5: • The speaker must be secured under the dashboard. • Connect all the harnesses to the Maestro RR module. The module is now ready to be used. Insert the aftermarket radio in the dashboard housing and test all the functionalities.
-
Page 9: With Aftermarket Amplifier Wiring Diagram
CENTER (NOT CONNECTED) RCA CABLES (NOT CONNECTED) STEP 5 BACKUP CAM BACKUP CAM STEP 3 FACTORY RADIO HARNESS WIRES FROM VEHICLE GMS05 T-HARNESS BROWN/YELLOW (NOT CONNECTED) BROWN/RED (NOT CONNECTED) MAESTRO RR MODULE Automotive Data Solutions Inc. © 2013 ADS-RR(SR)-GMS05-ASTH-IG-EN maestro.idatalink.com... -
Page 10: Radio Control Cable Wiring Diagram
DOC.: #12037 SELECT RADIO BRAND AND CONNECT RADIO CONTROL CABLE ACCORDINGLY. KENWOOD RADIO (NOT CONNECTED) BLAUPUNKT RADIO SW CONTROL - GRAY (NOT CONNECTED) MAESTRO RR MODULE SW CONTROL GROUND - BLACK ECLIPSE RADIO (NOT CONNECTED) BROWN/BLACK BLACK (NOT CONNECTED) BROWN WHITE...
Need help?
Do you have a question about the Maestro RR and is the answer not in the manual?
Questions and answers