Table of Contents
Advertisement
Quick Links
Advertisement
Table of Contents

Subscribe to Our Youtube Channel
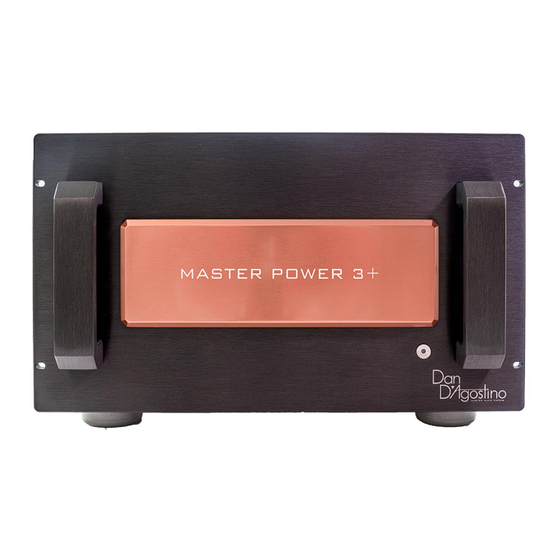
Summary of Contents for Dan D'Agostino MasterPower 3+
- Page 1 power amplifiers...
-
Page 2: Legal Notifications
Legal notifications Dan D’Agostino Master Audio Systems is a registered trademark of D’Agostino LLC. The information in this owner’s manual is subject to change without notice. Current Version 1.0 of this manual was produced by the Dan D’Agostino LLC engineering, sales and marketing departments. - Page 3 Master Power 3+ and Master Power 2+ amplifiers limited warranty D’Agostino LLC warrants the Master Power 3+ and Master Power 2+ amplifiers against manufacturing defects and defects in materials for five years from the date of purchase from an authorized Dan D’Agostino Master Audio Systems dealer, subject to the conditions listed below: 1) The warranty covers only new products purchased from an authorized D’Agostino LLC dealer.
- Page 4 A note from Dan D’Agostino Founder, CEO, and Chief Designer of Dan D’Agostino Master Audio Systems Thank you very much for purchasing one of my Master Power series amplifiers. I’ve designed dozens of amplifiers through the decades, but the Master Power series is one of only a few that carry my own name.
-
Page 5: Package Contents
Package contents If any of the following items are missing, please contact your dealer: 1 Master Power 3+ or Master Power 2+ amplifier encased in protective static cling vinyl 3 XLR-to-RCA adapters 1 owner’s manual 1 AC power cord Unpacking the Master Power 3+ and Master Power 2+ amplifiers The Master Power 3+ and Master Power 2+ amplifiers weigh well in excess of 100 pounds, so they are too heavy for one person to lift safely. -
Page 6: Front Panel
Front panel 1. Standby/Power On button... -
Page 7: Rear Panel
Rear panel 1. Crossover/bridging/bus control panel 5. 3.5mm IR control input cover 6. Fuse cover 2. XLR input jacks 7. 20-amp IEC AC input 3. RS-232 control input 8. Speaker cable binding posts 4. 3.5mm IR control output... - Page 8 Making connections to the amplifier Speaker cables Install the speaker cables first. We recommend the use of high-quality cables terminated with spade or ring lugs that will fit the amplifier’s binding posts. These will provide the best conductivity and the most reliable connection. We advise against the use of pin connectors, banana plugs or bare-wire connections.
- Page 9 12-volt trigger input/output These 3.5mm jacks allow the amplifier to be turned on or off automatically by a preamp or other device that has a 12-volt trigger output, and also allow the 12-volt trigger output signal to be relayed to other components (such as a second Master Power series amplifier). To use the 12-volt trigger feature with the Master Power series amplifier, connect a cable tipped with 3.5mm plugs (stereo or mono) to the trigger output of the preamp and the trigger input of the amplifier.
-
Page 10: Configuring The Channels
Configuring the channels The Master Power 3+ and Master Power 2+ amplifiers offer several configuration options that allow you to combine incoming signals and amp channels, and to filter high- or low-frequency signals out of any channel. All can be easily accessed through the Crossover Adjustment panel on the back. - Page 11 Bridge mode Bridge mode combines two channels to increase their total output to 1,200 watts into 8 ohms. With the Master Power 3+, channels 2 and 3 are bridged. With the Master Power 2+, channels 1 and 2 are bridged. To put the amp in bridge mode, flip the bottom two toggle switches to the left.
-
Page 12: Operation
All-pass (bypass) mode Setting the slider in the middle position puts the channel in all-pass (bypass) mode. No filtering will be applied and the channel will run full- range. Operation Initial power-up of the amplifier To power-up the amplifier, simply push the power button located on the front of the amplifier. -
Page 13: Troubleshooting
Troubleshooting Amplifier will not power up If the amp produces no sound and the LED inside the front standby/power button does not light up when you push the button, perform the following steps in order until normal operation is restored. 1. - Page 14 Sound does not come from one of the channels Follow the steps below in order. If one of these steps succeeds in restoring the sound, stop there and ignore the other steps. 1. Check speaker cable connections for the malfunctioning channel. Reconnect any cables that may have become disconnected.
- Page 15 One or more channels produce only bass, no mid or treble Follow the below steps in order. If one of these steps fixes the problem, stop there and ignore the other steps. 1. If you have changed the crossover adjustments on the Master Power series amplifier from the original factory settings, open the control cover on the rear panel and make sure that the sliding switches on the lower half of the control panel for the channels powering your main speakers are all centered (for full-range speakers) or flipped to the left (for smaller speakers used with a...
-
Page 16: Specifications
Specifications Power output 8Ω 300 watts per channel 4Ω 500 watts per channel 2Ω 1,000 watts per channel Power output, bridged 8Ω 1,000 watts per channel Frequency response 0.1 Hz to 1 MHz, -1 dB 20Hz to 20 kHz, ±0 dB Crossover filters 80 Hz, -18 dB/octave high- and low-pass Distortion... - Page 17 For more information about Dan D’Agostino Master Audio Systems, please visit: www.dandagostino.com...


Need help?
Do you have a question about the MasterPower 3+ and is the answer not in the manual?
Questions and answers