Table of Contents
Advertisement
Model GFP500
Instruction Manual for
Globe Vegetable Cutter Models
GFP500, GVC550
For Service on Your Vegetable Cutter
1. Visit our website at www.globeslicers.com (select the Support / Parts drop
down).
2. Or call the Globe service department at 937-297-7247 and ask for contact
information for your local service company
Visit our website for information on additional products available from Globe.
www.globeslicers.com
Slicers, Mixers, Vegetable Cutters, Meat Choppers and Scales
- IMPORTANT SAFETY NOTICE -
This manual contains important safety instructions which
must be strictly followed when using this equipment.
Model #:
Serial #:
GVC600
and
Advertisement
Table of Contents

Related Manuals for Globe GFP500


Summary of Contents for Globe GFP500
- Page 1 1. Visit our website at www.globeslicers.com (select the Support / Parts drop down). 2. Or call the Globe service department at 937-297-7247 and ask for contact information for your local service company Visit our website for information on additional products available from Globe.
-
Page 2: Table Of Contents
DISCS AND ACCESSORIES AVAILABLE ...................... 14-15 LIMITED WARRANTY ............................ 16 GLOBE FOOD EQUIPMENT COMPANY 2153 DRYDEN RD. DAYTON, OH 45439 PHONE: 937-299-5493 TOLL FREE: 800-3475423 FAX: 937-299-4147 E-MAIL: globeinfo@globeslicers.com WEBSITE: www.globeslicers.com © Globe Food Equipment Company, 2009 Printed in the U.S.A. 3-2009 Page 2... -
Page 3: Attention Owners And Operators
Warnings related to possible damage to the equipment are indicated by: Make certain that this manual is available for easy reference by any operator. Globe has put a warning label on its vegetable cutters. If the warning label or this manual are misplaced, damaged, or illegible, or if you require additional copies, please contact your nearest representative or Globe directly for these items at no charge. -
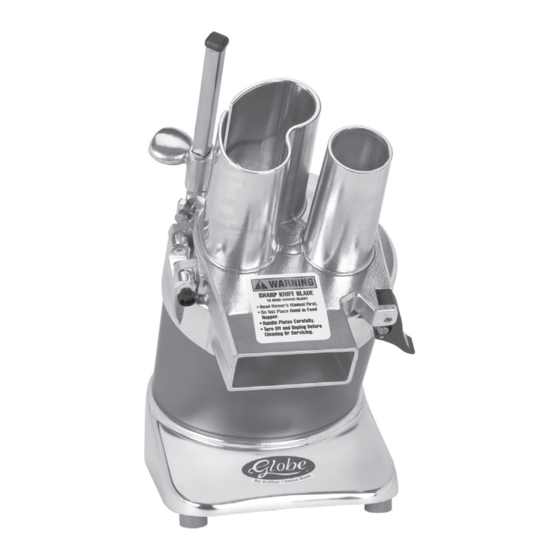
Page 4: Key Components Of The Vegetable Cutter
Key Components of the Vegetable Cutter Food Pusher Guide Rod Plastic Food Pusher Continuous Feed Food Hopper Food Pusher Food Hopper On/Off Latch Ejection Chute GFP500 Food Pusher Plastic Food Pusher Hinge Pin Continuous Feed Food Hopper Food Hopper Base GVC550... -
Page 5: Installation And Proper Grounding
You have no recourse to damage after fifteen (15) days. 2. An ejector plate, food pusher, and instruction manual are packed with the vegetable cutter. If you did not receive all of these materials, contact Globe or your local supplier. TO AVOID SERIOUS PERSONAL INJURY PROPERLY INSTALL VEGETABLE CUTTER IN ADEQUATE WORK AREA •... - Page 6 9. Clean the vegetable cutter using the procedures outlined in the cleaning section (pages 12 and 13) prior to using the vegetable cutter. 10. Contact your local representative or Globe directly if you have any questions or problems with the installation or operation of this vegetable cutter.
-
Page 7: Operating Instructions
Operating Instructions SHARP KNIFE BLADE TO AVOID SERIOUS PERSONAL INJURY: • NEVER put your hand in the food hopper with the on/off latch in the ON position. • ALWAYS turn the vegetable cutter off and unplug the unit before cleaning or servicing. •... -
Page 8: Operating Instructions
Operating Instructions 6. Lift the food pusher up to its highest position and tilt it to the left (Fig. 8-1). 7. Plug in the vegetable cutter. 8. Place a food container under the ejection chute. 9. Trim the food product to fit into the food hopper. Food must not extend above the top of the hopper. -
Page 9: Disc Installation
Disc Installation DISC INSTALLATION NOTE: For ease of installation and removal of discs, the center of the disc (mounting hole) and the disc drive shaft must be clean and dry. NOTE: Make sure the ejector plate is securely on the drive shaft before installing the cutting disc. DO NOT use force or tools to install and remove discs. -
Page 10: Disc Installation
4. Carefully place the cubing/dicing knife with hub down onto the drive shaft (Fig. 10-3). 5. Carefully turn the knife until the drive pins line up with the slots on the knife hub and the knife is securely on the drive shaft (Fig. 10-4). GFP500 and GVC550 GVC600 Fig. 10-3 Fig. -
Page 11: Disc Removal
1. Carefully place hand under disc (palm up) rotate disc slightly back and forth and lift up at the disc hub. CUBING/DICING DISCS GFP500 and GVC550 When removing and handling the cubing/dicing disc hold the knife and cutting grid together with both hands. -
Page 12: Cleaning
4. Remove the ejector plate by lifting it off the disc drive shaft. Wash the food ejector in warm soapy water. 5. Remove the hopper head from the base. a. GFP500 - Loosen and remove the screw from the bottom of hinge. Lift the hopper head up and away from the base. - Page 13 3. Reinstall the hopper head by aligning the hinge with the base. 4. Secure the hopper head to the base. a. GFP500 - Insert the hopper hinge pins into the hinge slots located on the base. Secure the head by tightening the bottom hinge screw.
-
Page 14: Discs And Accessories Available
Discs and Accessories Available 500 SERIES GVC600 SPECIFICATIONS DISC3PK-5 DISC3PK-7 Slicing Disc 5/64”, Slicing Disc 5/32”, Shredding Disc 3/16”, WR3 F1-5 F1-7 Slicing Disc, 1/32” (1mm) cut size F2-5 F2-7 Slicing Disc, 5/64” (2mm) cut size G3-5 G3-7 Slicing Disc, 1/8” (3mm) cut size G4-5 G4-7 Slicing Disc, 5/32”... - Page 15 W14K-5 Cubing Knife Only (for W14-5 and W20-5 disc) EP-5 Ejector Plate P500 Food Pusher for Continuous Feed Hopper (plastic) (GFP500 only) P550L Food Pusher for Continuous Feed Hopper (plastic) (GVC550 only) SpiralSlice-5 Vegetable Spiral Slice Cutter (GVC550 only) Adapter-5...
-
Page 16: Limited Warranty
Limited Warranty Globe Food Equipment Company (“GFE”) warrants to the original purchaser of new equipment that said equipment, when installed in accordance with our instructions within the United States and subjected to normal use, is free from defects in material or workmanship for a period of 2 years on parts (excludes wear/expendable parts and all cutting discs and parts thereof).
Need help?
Do you have a question about the GFP500 and is the answer not in the manual?
Questions and answers