Advertisement
Table of Contents
- 1 Safety Guidelines
- 2 Specifications
- 3 Assembly Instructions
- 4 Operating Instructions
- 5 Care and Maintenance
- 6 How to Check the Running Mat for Proper Lubrication
- 7 Computer Instructions
- 8 Using the Magnetic Safety Key
- 9 Workout Programs
- 10 Troubleshooting
- 11 Troubleshooting Guide
- 12 Exercise Guide
- 13 Target Zone
- 14 Limited Warranty
- 15 Replacement Parts
- Download this manual
Advertisement
Table of Contents
Troubleshooting

Related Manuals for York Fitness Pacer 5000 HRC


Summary of Contents for York Fitness Pacer 5000 HRC
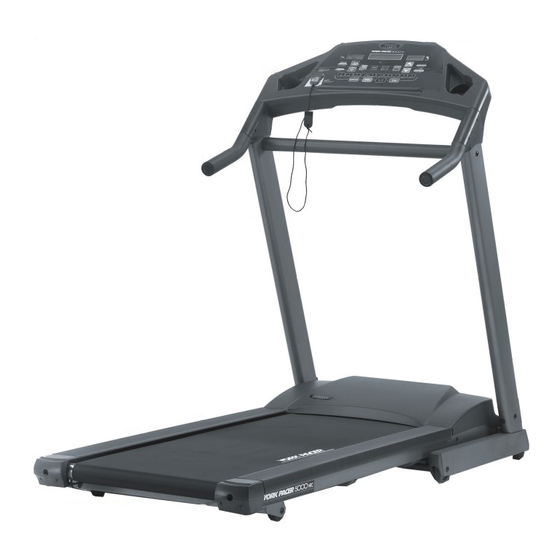
- Page 1 H E A R T R A T E C O N T R O L F O L D A B L E T R E A D M I L L An electronic voice guides you through setting the treadmill computer INSTRUCTION INSTRUCTION...
-
Page 2: Safety Guidelines
WARNING - This appliance must be EARTHED.---IMPORTANT The YORK PACER 5000 HRC is designed for the use and enjoyment of the serious trainer as well as the dedicated user. By following the above precautions and using good judgement and common sense, you will have safe and pleasurable exercise regimen with the YORK PACER 5000 HRC. -
Page 3: Specifications
INTRODUCTION The YORK PACER 5000 HRC TREADMILL has been designed and constructed to provide trouble free usage and enjoyable exercise. You can greatly improve your understanding of the benefits of exercising by carefully reading the instructions given in this manual. -
Page 4: Assembly Instructions
FOR YOU TO ASSEMBLE YOUR PACER 5000 HRC TREADMILL. ASSEMBLY INSTRUCTIONS Product may vary slightly from the item pictured. Ask someone to help you remove all the parts of your YORK PACER 5000 HRC from the carton and place them on the floor carefully. SENSOR WIRE SOCKET... - Page 5 NOTE: DO NOT FULLY TIGHTEN THE BOLTS UNTIL YOU HAVE COMPLETED THE ASSEMBLY. NOTE: DO NOT FULLY TIGHTEN THE BOLTS UNTIL YOU HAVE COMPLETED THE ASSEMBLY. Insert the left handle bar post into the handle bar post mounting tube and secure the fixing bracket onto the base frame, using six allen head bolts and star washers.
- Page 6 Rest the computer console on the front handle MIDDLE WIRE SOCKET bar and connect the computer wire plug to the COMPUTER middle wire socket protruding at the top of WIRE PLUG the handle bar post. Attach the computer console onto the handle bar post mounting tubes as shown.
- Page 7 DESCRIPTION...
- Page 8 PARTS LIST KEY NO. PART NO. Q'TY(PCS) DESCRIPTION 5518-01 CROSS BASE FRAME END CAP 5518-02 CONTROLLER SIGNAL CABLE ( 1250mm ) 5518-03 PVC FOOT STOP 5518-04 M6 X 25mm DOME HEAD SCREW 5518-05 BASE FRAME 5518-06 M8 X50mm ALLEN HEAD BOLT 5518-07 MOVING WHEEL SLEEVE 5518-08...
- Page 9 KEY NO. PART NO. Q'TY(PCS) DESCRIPTION 5518-62 M8 X 6.5mm HEX NUT 5518-63 M8 X 40mm SOCKET HEAD SCREW 5518-64 M8 X 20mm FRINGE HEAD SCREW 5518-65 MOTOR BRACKET 5518-66 OFF POWER SPRING 5518-67 OFF POWER SLEEVE 5518-68 OFF POWER BRACKET 5518-69 M3 X 15mm PHILLIPS SCREW 5518-70...
-
Page 10: Operating Instructions
OPERATING INSTRUCTIONS The following procedure has been proven to be the safest and easiest method of mounting the treadmill. For your protection, carefully read and follow these simple steps: 1. Be sure the treadmill is positioned on a flat, level surface. 2. -
Page 11: Care And Maintenance
The treadmill will then begin to decelerate until it stops. CARE AND MAINTENANCE Use a warm damp cloth with mild detergent to keep your YORK PACER 5000 HRC treadmill clean. Do not clean between the mat and running board---The silicone lubricant is needed for smooth movement of the mat. - Page 12 HOW TO ADJUST THE BELT ALIGNMENT AND TENSION The alignment and tension of the running mat ( walking surface ) has been set up prior to shipping. Should improper tracking of the mat occur ( ie. The walking surface moves too far to the right or the left ), or if you find that the mat slips when you get on, these problems can be corrected.
-
Page 13: How To Check The Running Mat For Proper Lubrication
NOTE: For most people, one leg is stronger than the other, the running mat may tend to move to that side because of the extra pressure exerted by the stronger leg. If this occurs then either dismount the treadmill and allow the mat to track back to the middle, or exert pressure to the side of the mat with the other leg, to track the mat back to the middle. -
Page 14: Computer Instructions
COMPUTER INSTRUCTIONS Your computer is ideal for monitoring your performance and setting yourself targets. You can monitor closely your improving condition and cardiovascular fitness. H E A R T R A T E C O N T R O L F O L D A B L E T R E A D M I L L ELEVATION... -
Page 15: Workout Programs
WORKOUT PROGRAMS QUICK START The default settings are 0% elevation and a speed of 1 Km/H. You may adjust the speed or elevation any time during the workout. The default time for this program is 30 minutes. 1. Turn the power “ON”. 2. - Page 16 SPEED PROGRAMS: Speed interval or Aerobic During speed programs, only the speed will automatically adjust according to the pre-set profile. If you wish to adjust the elevation, you may do so at any time during the workout. However, you will not be able to adjust the speed during the speed program. 1.
- Page 17 HEART RATE CONTROL PROGRAM After you have set your program according to the steps below, the treadmill will activate according to your warm up speed for the duration that you have requested. The treadmill will automatically adjust by speed or elevation to achieve and maintain your target heart rate. After the warm up time, it will take about 3-5 minutes to reach your target heart rate.
- Page 18 TARGET SETTING PROGRAMS You may choose to workout by setting targets with TIME, DISTANCE or CALORIES. All workouts by target have default settings of 0% for elevation and 1 Km/H for speed. You may adjust the speed or elevation any time during the workout. During the workout, the display window will default to show the target counting down.
- Page 19 POSITIONING THE CHEST TRANSMITTER It is recommended that you wear the transmitter against your bare skin to ensure flawless operation. However if you wish to wear the transmitter over a shirt, moisten the shirt well under the rubber electrodes. Attach the adjustable elastic strap to the transmitter. Moisten the rubber electrodes on the underside of the belt as shown.
-
Page 20: Troubleshooting
REPLACING THE TRANSMITTER BATTERY Unscrew the battery hatch with a coin and remove the old battery. Ensure that the new battery is inserted into the hatch correctly with the plus sign facing the battery hatch. Check that rubber gasket is clean, correctly fitted and not damaged, then close the hatch securely. -
Page 21: Troubleshooting Guide
Error 2: Over speed error Error 2 occurs when the actual belt speed is faster than the speed displayed on the console. This is also called run away protection. If the controller is broken, and the motor is running out of control, it is dangerous to the user. So, this is a safety mechanism to shut off the treadmill immediately. - Page 22 ERROR 1 CODE This is a safety feature that can stop the treadmill from functioning. This error can occur because the computer is not receiving the correct information from the speed sensor located near the motor. As a precaution the computer stops the treadmill until it begins to receive the correct feedback.
-
Page 23: Exercise Guide
EXERCISE GUIDE FITNESS Many things contribute to fitness and well being but the most important factor is the condition of your heart and lungs and how efficient they are in delivering oxygen via your blood to your muscles. Your muscles use this oxygen to provide enough energy for daily activity. This is called aerobic activity (with oxygen). -
Page 24: Target Zone
TARGET ZONE PULSE MAXIMUM PULSE RATE RATE 85% OF MAX. EXERCISE SO THAT YOUR PULSE STAYS IN THIS RATE FOR AT LEAST 15-20 MINUTES 70% OF MAX. 55% OF MAX. COOL DOWN LEVEL RESET PULSE TIME WARM UP COOL DOWN THIS IS HOW YOUR PULSE SHOULD BEHAVE DURING GENERAL FITNESS EXERCISE. - Page 25 SELECTING THE ZONE If you have not exercised for some time begin your exercise program in the Healthy Heart Zone. Start for the first few weeks, and gradually progress up to the zone that meets you personal fitness goal. ZONE 1.- HEALTHY HEART - 50 to 59% of Max Heart Rate.
- Page 26 HOW TO MONITOR YOUR HEART RATE DURING EXERCISE Now that you know where your training zone is, you’ll I have to monitor yourself to be sure you’re in it. Here’s a simple rule, if you can’t hold a conversation without gasping for breath you’re probably above your training zone.
- Page 27 HOW LONG TO EXERCISE? To qualify as a true aerobic exercise with all the benefits we're mentioned, you must maintain your heart rate within your training zone for at least 12 uninterrupted minutes. If you exercise longer than 60 minutes the benefits are reduced and the risk of injury is increased. If you're just starting out on a new exercise program we're commend you stay at the 12 minute minimum for at least a week.
-
Page 28: Limited Warranty
LIMITED WARRANTY WARRANTY YORK BARBELL LTD. warrants this product to be free from defects in workmanship and material, under normal use and conditions, for a period of one year on all steel parts, thirty days on all vinyl and upholstery, and ninety days on all other parts. This warranty extends to the original purchaser only. - Page 29 PARTS ORDER FORM Enclose a check or money order with this form for replacement parts. Date of purchase Name of location where purchased Model number Last name, First name Telephone number Address City State Zip/Postcode Part Part Description Q'ty Unit Price Total Total value of order $ Send your order to:...
Need help?
Do you have a question about the Pacer 5000 HRC and is the answer not in the manual?
Questions and answers