Table of Contents
Advertisement
Advertisement
Table of Contents

Related Manuals for York Fitness Treadmill


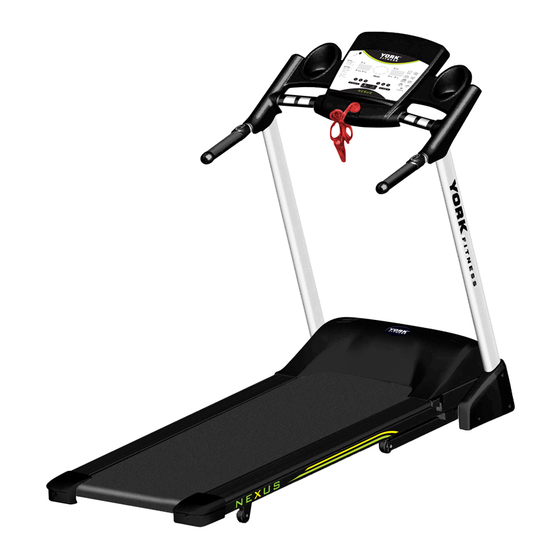
Summary of Contents for York Fitness Treadmill
- Page 1 Treadmill OWNER’S MANUAL 08JUNE2010...
- Page 2 Congratulations on purchasing your exercise equipment from York Fitness. You have chosen a high quality, safe and innovative piece of equipment as your training partner and we are certain it will keep you motivated on the way to achieving your personal fitness goals.
-
Page 3: Table Of Contents
contents safety information customer support assembly instructions operational instructions troubleshooting warranty fitness guide exploded drawing part list... -
Page 4: Safety Information
• The equipment is under no circumstances suitable as a • This product is provided with a safety key. The treadmill will children’s toy. not operate without the safety key inserted. -
Page 5: Customer Support
• Precise description of the issue / defect • Ensure that you inspect the product regularly - at least IMPORTANT!! - Please retain your sales receipt, York Fitness once a week is recommended. Customer Care may request proof of purchase to validate • Ensure that all fixings are tight before use. -
Page 6: Assembly Instructions
4. Unpack the carton - BUT DO NOT TAKE TREADMILL OUT OF THE CARTON » Remove all the parts and packaging from above the treadmill and lay them out on the floor. » Flatten the sides of the carton and remove the rest of the packaging from around the treadmill. - Page 7 assembly instructions STEP 1 STEP 2 WHEN FOLDING COMPUTER CONSOLE DOWN, BE CAREFUL NOT TO TRAP THE WIRE IN THE UPRIGHT POST.
-
Page 8: Final Check
Switch the treadmill on using the on/off switch. Attach the safety key to the console. NOTE: Before you run on the treadmill for the first time, use the Quick Start instruction and allow the treadmill to run independently for 10 minutes. Check the running mat is tightened correctly and runs smoothly. -
Page 9: Operational Instructions
Safety Key The treadmill will only operate when the safety key is in position - if the safety key is removed while the treadmill is in operation, it will stop immediately. Before every workout session please make sure you attach the safety key to the console and the clip at the other end to your clothing. -
Page 10: Major Function Keys
• Display the exercising time counting up or down. Press ENTER twice then adjust by pressing + or - when the treadmill is stopped. The range of counting up is from 00:00 to 99:59 and counting down from 10:00 to 99:00. When the count down reaches 00:00, the monitor will beep for a moment before the treadmill stop. - Page 11 65% of maximum (220 - AGE). THR can be changed at this time using the INCLINE + / - buttons. Press START and the treadmill starts at 0.8 kph, and the user controls the speed. After a 3 1/2 minute warm-up, the incline begins to adjust at a rate 1% every 30 seconds until the target heart rate zone is reached (THR +/- 5bpm).
-
Page 12: Monitoring Your Heart Rate
Monitoring Your Heart Rate The treadmill is fitted with 2 hand pulse sensors. To obtain a pulse reading you must have both your left and right hands on the sensors at the same time. Do not grip the hand sensors too tight and allow the computer a few seconds to display the reading. -
Page 13: Soft Drop Fold Down
1. Fold-up the deck as explained above. 2. Stand in front of the treadmill, square on. 3. Put one hand on each of the handrails and tilt the treadmill towards you to engage the wheels. 4. Use the handrails to push the treadmill to the desired location. - Page 14 » If the surface feels dry and your hand feels clean, then apply more lubricant. Your treadmill comes ready supplied with a bottle of lubrication oil - to use, apply a liberal amount to a lint free cloth and run cloth along the length of the running deck (underneath the mat).
-
Page 15: Adjusting Running Mat Tension/Alignment
3. If your mat moves to the right, using the allen key provided adjust the right screw by 1/2 turn clockwise (if it tracks to the left, perform the same operation on the left screw) 4. Let the treadmill run for a minute to see if it re-aligns to the centre. If more adjustment is needed repeat step 3. -
Page 16: Troubleshooting
If you have a problem with your treadmill, before you do anything else please check that all the cables have been connected correctly. Loose cables are very common and many problems can be solved by making sure the cables are properly connected. -
Page 17: Warranty
This warranty does not extend to any product that has been damaged or rendered defective: (a) as a result of accident, misuse, abuse or lack of reasonable care; (b) by the use of parts not manufactured by York Fitness or sold by York Fitness; (c) by modification of the product; (d) as a result of service by anyone else other than York Fitness or an authorized York Fitness warranty service provider. -
Page 18: Fitness Guide
Begin each workout with a Warm Up session - a few minutes of stretching to help prevent strains, pulls and cramps. 1. Get onto the treadmill, using the handrails for support, and place your feet on the side rails (either side of the running mat). -
Page 19: How Long Should I Exercise For
fitness guide How Long Should I Exercise For? That really depends on your current level of fitness. If you’re just starting out on a new exercise program, you should start gradually and build up - do not try to do too much too quickly. 30 minutes, 3 times a week should be enough. Don’t push yourself too hard - you should never feel exhausted during or following exercise. -
Page 20: Suggested Stretches
Suggested Stretches The correct form for several basic stretches is shown at the right. Move slowly as you stretch—never bounce. 1. Hamstring Stretch Sit with one leg extended. Bring the sole of the opposite foot toward you and rest it against the inner thigh of your extended leg. Reach toward your toes as far as possible. -
Page 21: Exploded Drawing
exploded drawing... -
Page 22: Part List
part list PART NO. DESCRIPTION PART NO. DESCRIPTION 51100-01 Main Frame 51100-53 Graphite Core 51100-02 Console Support & Handle Bar 51100-54 Power Cable 51100-03 Inner Slide Lift Support 51100-55 Circuit Breaker Module 51100-04 Lower Lift Support 51100-56 On/Off Switch 51100-04 Right Upright 51100-57 Power Socket...
Need help?
Do you have a question about the Treadmill and is the answer not in the manual?
Questions and answers
Where the incline