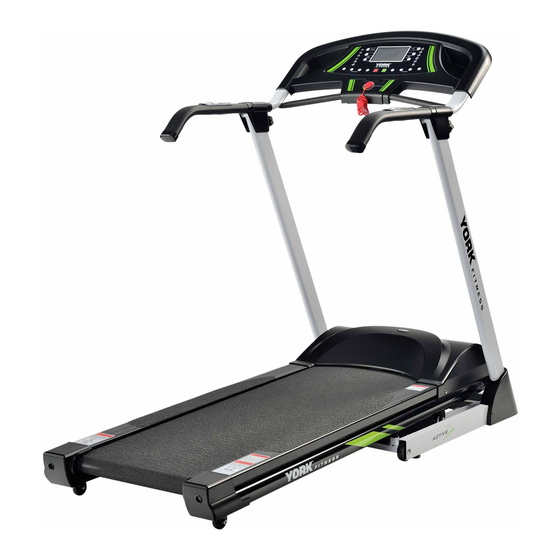
York Fitness Active 120 Owner's Manual
Treadmill exercise equipment
Hide thumbs
Also See for Active 120:
- Owner's manual (20 pages) ,
- Owner's manual (20 pages) ,
- Owner's manual (24 pages)
Table of Contents
Advertisement
Advertisement
Table of Contents

Related Manuals for York Fitness Active 120


Summary of Contents for York Fitness Active 120
- Page 1 Owner’s Manual Active 120 Treadmill 51108 09FEB2012 www.yorkfitness.com...
-
Page 2: Table Of Contents
Table of contents Congratulations on CONTENTS purchasing your exercise equipment from Safety information Customer support Assembly instructions You have chosen a high quality, safe and innovative piece of equipment as your training Operational instructions partner and we are certain it will keep you motivated on the way to achieving your personal fitness goals. -
Page 3: Safety Information
Safety information • After eating, allow 1-2 hours before exercising as Please read this instruction manual before you this will help to prevent muscle strain. begin assembly. Great care has been taken • Never use the equipment in any other manner other to design these instructions and following than the ways explained in these instructions and/or them will help you with quicker assembly and any wall-chart supplied. minimize the risk of injury. • Injuries to health may result from incorrect or excessive training. -
Page 4: Customer Support
• Place of purchase • Information about the place and conditions of use • Precise description of the issue / defect IMPORTANT!! - Please retain your sales receipt, York Fitness Customer Care may request proof of purchase to validate eligibility for warranty service. Warranty cover starts from the date shown on the proof of purchase. -
Page 5: Assembly Instructions
Assembly instructions Prepare your work area - It is important you assemble the product in a clean and uncluttered space. Work with a friend - We recommend you have someone assist you with the assembly as some of the components are quite heavy. Open the carton - Check any warnings on the carton and make sure you have it the right way up. - Page 6 Assembly instructions STEP 1 D x 4 STEP 2 Tighten the knob after setting the handlebar into position. Take care to ensure the wires do not get trapped when you attach the handlebar. www.yorkfitness.com...
-
Page 7: Final Check
STEP 3 B x 4 Final Check Your treadmill is now assembled. Please make the following final checks: • Make sure all screws / bolts are tightened. • Make sure the equipment is on a flat, level surface. Power Up 1. Plug one end of power cable into the treadmill as shown. 2. Plug the other end into a suitable AC outlet (220/240V, 50/60Hz). POWER CORD 3. Switch the treadmill on using the on/off switch. ON/OFF SAFETY SWITCH 4. Attach the safety key to the console. NOTE: Before you run on the treadmill for the first time, allow the treadmill to run independently for 10 minutes. Check the running mat is tightened correctly and runs smoothly. -
Page 8: Operational Instructions
Operational instructions Safety Key The treadmill will only operate when the safety key is in position - if the safety key is removed while the treadmill is in operation, it will stop immediately. Before every workout session please make sure you attach the safety key to the console and the clip at the other end to your clothing. -
Page 9: Major Function Keys
Major function keys KEYS DESCRIPTION PROGRAM Select “Program” mode - MANUAL MODE > P01 > P02 > P03 > P04 > P05 > P06 > P07 > P08 > P09 > P10 > P11 > P12 MODE This button is use for programs setup. START Start the treadmill STOP... -
Page 10: Monitoring Your Heart Rate
Operational instructions Pre-set Programs This treadmill comes with 12 pre-set programs available for you to choose from. 1. Make sure the treadmill is plugged in, switched on and the safety key is in position. 2. Press the PROGRAM button to select the pre-set program you want (P1~P12). 3. The default 30:00 is displayed on the window. Use the SPEED + / - buttons to select your workout time (5:00~99:00). NOTE: Each of the pre-set program is made up of 10 segments and the length of each segment will depend on the time you set for your workout. When end up each segment the treadmill will sound a short beep alarm before changing to next segment. 4. Press START to begin your workout. You can change the speed / incline at any point during the workout and the rest of segments will be adjusted by scale automatically. Body Fat Mode Designed to calculate users’ body fat ratio. 1. Turn on the switch and use the PROGRAM button to select Body Fat Program. -
Page 11: Moving The Treadmill
Fold up Simply lift the running deck to fold (with your left hand). Make sure you hear the sound of the deck locking into position - this ensures the deck is locked in place and will not fall back down. Fold down 1. Place one hand on handle bar, use the other to push the top of the running deck forward. -
Page 12: Troubleshooting
Troubleshooting If you have a problem with your treadmill, before you do anything else please check that all the cables have been connected correctly. Loose cables are very common and many problems can be solved by making sure the cables are properly connected. The following table details the most common problems and how to fix them. -
Page 13: Care & Maintenance
Care & Maintenance Placement in your Home This treadmill should not be placed outdoors, in a garage or an outbuilding. Keep the treadmill in a dry place with as little temperature variation as possible. We recommend placing a mat beneath the treadmill, to protect both the treadmill and your flooring. - Page 14 Care & Maintenance Lubrication An insufficiently lubricated deck will cause the belt, running deck and motor to wear out much quicker. How often you should lubricate depends on usage, we recommend the following: • Light use (less than 3 hours a week) - every 8 months • Medium use (3 to 5 hours a week) - every 4 months • Heavy user (more than 5 hours a week) - every 2 months Keeping the deck lubricated is the most important activity you can carry out to prolong the life of your treadmill.
- Page 15 Adjusting Running Mat Alignment The alignment of the mat has been pre-set at the factory, however, the mat can be caused to run out-of-line by a user’s running style (eg, more weight on one foot), or if it is placed on an uneven surface - so it may need adjusting from time to time.
-
Page 16: Fitness Guide
Fitness guide Starting Your Workout Finishing Your Workout 1. Turn the treadmill to the lowest speed and incline Begin each workout with a Warm Up session - settings. a few minutes of stretching to help prevent strains, pulls 2. Using the handrails for support place your feet on the and cramps. side rails (either side of the running mat). 1. Get onto the treadmill, using the handrails for 3. Stop the treadmill. support, and place your feet on the side rails (either side of the running mat). -
Page 17: How Long Should I Exercise For
How Long Should I Exercise For? That really depends on your current level of fitness. If you’re just starting out on a new exercise program, you should start gradually and build up - do not try to do too much too quickly. 30 minutes, 3 times a week should be enough. -
Page 18: Exploded Drawing
Exploded drawing www.yorkfitness.com... -
Page 19: Part List
Part list York Ref. Ref. Description Qty. York Ref. Ref. Description Qty. 51108-1 BOTTOM FRAME WELDMENT 51108-53 CROSS SCREW ST3*10 51108-2 UPRIGHT POST WELDMENT 51108-54 6 CORNER LOCK NUT M8 51108-3 MAIN FRAME WELDMENT 51108-55 6 CORNER BOLT WELDMENT M8*65 51108-4 CONSOLE BRACKET WELDMENT 51108-56... - Page 20 www.yorkfitness.com...
Need help?
Do you have a question about the Active 120 and is the answer not in the manual?
Questions and answers