Table of Contents
Advertisement
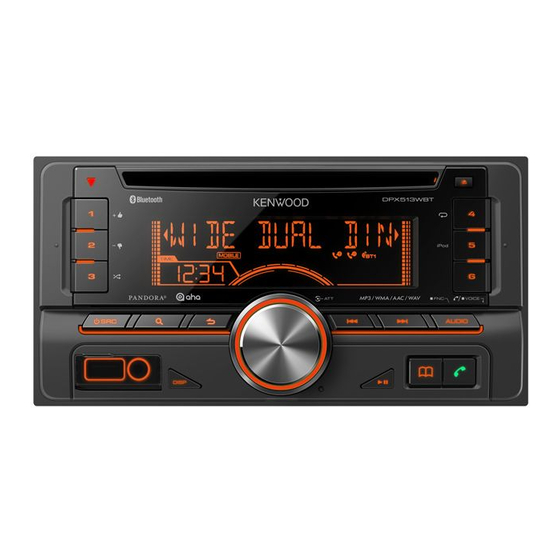
DPX513WBT
DUAL DIN SIZED CD RECEIVER
INSTRUCTION MANUAL
Take the time to read through this instruction manual.
Familiarity with installation and operation procedures will help you obtain the best performance from your new
Dual DIN sized CD receiver.
For your records
Record the serial number, found on the back of the unit, in the spaces designated on the warranty card, and in the space
provided below. Refer to the model and serial numbers whenever you call upon your Kenwood dealer for information or service
on the product.
Model DPX513WBT Serial number
US Residents Only
Register Online
Register your Kenwood product at www.Kenwoodusa.com
© 2013 JVC KENWOOD Corporation
B64-5153-00/00 (KW)
Advertisement
Table of Contents

Related Manuals for Kenwood DPX513WBT


Summary of Contents for Kenwood DPX513WBT
- Page 1 Record the serial number, found on the back of the unit, in the spaces designated on the warranty card, and in the space provided below. Refer to the model and serial numbers whenever you call upon your Kenwood dealer for information or service on the product.
-
Page 2: Table Of Contents
9-5. Direct music search 2-1. Specifications 9-6. About the Audio file 2-2. Trademarks 9-7. About the USB device 9-8. About “KENWOOD Music Editor Light” and 3. Basic operations “KENWOOD Music Control” 3-1. Component names 9-9. About the discs used with this unit 3-2. - Page 3 15. Hands-free phoning 19. Basic operation of remote control 15-1. Receiving a call 19-1. Before using remote control 15-2. Calling a number in the phone book 19-2. Basic opreation 15-3. Alphabet search 19-3. Remote controller On Steering Wheel 15-4. Dialing a number 20.
-
Page 4: Before Use
• When you purchase optional accessories, check with particular installation. If this equipment does cause your Kenwood dealer to make sure that they can harmful interference to radio or television reception, work with your model and in your area. - Page 5 CALIFORNIA, USA • Reorient or relocate the receiving antenna. This product contains a CR Coin Cell Lithium Battery • Increase the separation between the equipment which contains and receiver. Perchlorate Material – special handling may apply. • Connect the equipment into an outlet on a circuit different from that to which the receiver is See www.dtsc.ca.gov/hazardouswaste/perchlorate connected.
-
Page 6: Appendix
: FAT12/ 16/ 32 Maximum Supply current : DC 5 V = 1 A MP3 decode : Compliant with MPEG-1/2 Audio Layer-3 WMA decode : Compliant with Windows Media Audio AAC decode : AAC-LC “.m4a” files WAV decode : Linear-PCM DPX513WBT... - Page 7 Audio section General Maximum output power Operating voltage : 50 W x 4 : 14.4 V (10.5 – 16V allowable) Full Bandwidth Power (at less than 1% THD) Maximum Current consumption : 22 W x 4 : 10 A Speaker Impedance Installation Dimensions (W x H x D) : 4 –...
-
Page 8: Trademarks
Research In Motion Limited. • The Bluetooth word mark and logos are owned by the Bluetooth SIG, Inc. and any use of such marks by JVC KENWOOD Corporation is under license. Other trademarks and trade names are those of their respective owners. - Page 9 English...
-
Page 10: Basic Operations
When listening to the radio, press the button to select a band. [DISP] button Press the button to switch between display modes. [6] button In each of the selected modes, press the button to return to the previous item. DPX513WBT... -
Page 11: How To Select The Item
3-2. How to select the item 3-3. Adjusting the clock For how to select setting items such as a function Press and hold the [Control knob]. setting item, see the following example: The hour display blinks. Example: Adjusting the text scroll of the Turn the [Control knob] to adjust the hour, display and then press the [Control knob]. -
Page 12: Audio Adjustments
150 (Hz) “LPF Low Pass Filter 85/ 120/ 160/ Through (Hz) SUBWOOFER”[2] “SUB-W Subwoofer Phase Reverse (180°)/ Normal (0°) PHASE”[2][3] ON/ OFF “SUPREME Supreme setting SET”[4] “VOLUME Volume offset –8 — ±0 (dB) OFFSET” (AUX: -8 — +8) (0) DPX513WBT... -
Page 13: Listen To The Ipod
In this case, “RESUMING” appears without displaying a folder name, etc. Changing the browse item will display a correct title, etc. • You cannot operate the iPod if “KENWOOD” or “ä” appears on the iPod. English... -
Page 14: Music Search
• If the first character string begins with an article “a”, “an”, Artists “ART***” or “the” in the alphabet search mode, it is searched for in Albums “ALB***” defiance of the article. Songs “PRGM***” Podcasts “PDCT***” Genres “GEN***” Composers “COM***” DPX513WBT... -
Page 15: Skip Search Ratio Setting
5-5. Skip search ratio setting 5-7. APP & iPod Mode You can change the ratio of skip performed as Allowing you to operate iPod with the control on mentioned in <Skip Search> (page 14). the iPod. Press the [5] button. Select the iPod source. -
Page 16: Pandora® (Function Of Iphone®/ Android™/ Blackberry®)
KCA-iP102 connecter (optional accessory). may become unavailable. The source switches, and broadcasting starts • Some functions of Pandora® cannot be operated from this automatically from your current station. unit. • For issues using the application, please contact Pandora® at pandora-support@pandora.com KCA-iP102 DPX513WBT... -
Page 17: Basic Operation
6-3. Basic operation 6-6. Station preset memory You can store a station in the memory. Thumbs up Press the [E] or [F] button to select the Press and hold the [1] button. station. Thumbs down Press and hold the [2] button. Press and hold the button ([3] to [5]) to which you want to assign the selected station. -
Page 18: Aha Radio (Function Of Iphone®/ Android)
Open the Aha Radio application on your device. Open the cover. Connect the iPod to the USB terminal using KCA-iP102 connecter (optional accessory). Press the [SRC] button to select an Aha Radio (“AHA”) source. Refer to <Source selection> (page 11). KCA-iP102 DPX513WBT... -
Page 19: Basic Operations
7-3. Basic operations 7-5. Calling a number in the content You can call the phone number obtained from the Pause and play a content content from a smartphone connected to this unit Press the [L] button. via Bluetooth. Selecting a content Press the [3] button. -
Page 20: Iheartradio (Function Of Iphone®/ Android)
• Use an Apple iPhone or iPod touch running iOS4 via Bluetooth. or later. • Search for “iHeart Link for KENWOOD” in the Apple iTunes App Store to find and install the most current version of the iHeartLink application on your device. -
Page 21: Basic Operations
8-3. Basic operations 8-5. Alphabet search When a city list appears <8-4. Station search> (page Stop/Pause and play a song 21), you can search for a city by alphabet. Press the [L] button. Press the [1] button. Skip track (Custom station) “SEARCH”... -
Page 22: Listen To The Cd/ Audio File
For how to use the [Control knob], refer to <3-2. How to select the item> (page 11). Use the [Control knob] to select a ratio (0,5, 1, 5, 10). The previous item appears. Exit the Function setting mode Press and hold the [6] button. DPX513WBT... -
Page 23: Play Function
You can search for music by entering the track -: Audio file number. For the online manual describing audio files, visit www.kenwood.com/cs/ce/audiofile/. In this online Press the [DIRECT] button on the remote manual, detailed information and notes which are control. -
Page 24: About The Usb Device
Light” and “KENWOOD Music Control” the center of the disc. • When removing a disc from this unit, pull it out • This unit supports the PC application “KENWOOD horizontally. Music Editor Light” (hereinafter “KME-Light”), and Android™ application “KENWOOD Music Control”... -
Page 25: Listen To The Tuner
10. Listen to the tuner 10-1. Listening to the radio 10-4. Preset tuning Recalling a station from the memory. Selecting a tuner source Press the [1] button to select a band. Press the [SRC] button to select “TUNER”. Press the button ([1] to [6]) corresponding to Selecting a band the station you want to listen to. -
Page 26: Pty (Program Type)
Speech and music include the following types of programs. Speech: Program type indicated by white letters Music: Program type indicated by black letters Press the [E] or [F] button to select a station. Exit the PTY mode. Press and hold the [6] button. DPX513WBT... -
Page 27: Tuner Setting
10-6. Tuner setting 10-7. Direct access tuning You can set up the tuner. (Function of remote control) You can search for a station directly by entering Select the Tuner source. frequency. Refer to <Source selection> (page 11). Press the [DIRECT] button on the remote Press and hold the [AUDIO] button. -
Page 28: Listen To The Aux
Refer to <Source selection> (page 11). Use the [Control knob] to select a display Turn on the portable audio player and start (“AUX”, “DVD”, “PORTABLE”, “GAME”, “VIDEO”, playback. or “TV”). Exit the Function setting mode. Press and hold the [6] button. DPX513WBT... -
Page 29: Display Settings
12. Display settings 12-1. Illumination color selection 12-2. Adjusting the Illumination color You can select the illumination color of the panel. You can adjust the illumination color of the panel. Press and hold the [AUDIO] button. Enter the Function setting mode. Select the illumination color you want to adjust. -
Page 30: Display & Illumination Setting
AD-CON : Connection status for BT Audio. (YES: Connected, NO: Not connected) BATT : Battery level of cell-phone. SIGNAL : Signal strength of cell-phone. : Factory setting) Use the [Control knob] to select a setting. The previous item appears. DPX513WBT... -
Page 31: Text Display Selection
12-4. Text Display Selection On Bluetooth audio source Information Display You can change the information displayed on each Title and Artist name “TITLE/ARTIST” of the following sources: Album and Artist name “ALBUM/ARTIST” Press the [DISP]. Play time “P-TIME” Display off “DISP OFF MODE”... -
Page 32: General Settings
6 preset buttons regardless of band (FM1, FM2, FM3, and AM). You can recall a preset station without switching between bands. “KEY BEEP” Setting the operation check sound (beep sound) ON/OFF. “ON” / “OFF” DPX513WBT... - Page 33 English...
-
Page 34: Registering A Bluetooth
Bluetooth device. • When any error code appears while the pairing is in progress, refer to <20-3. Error messages> (page 51). When SMS is received • When the connected Bluetooth device receives SMS, “SMS RECEIVE” is displayed on this unit. DPX513WBT... -
Page 35: Selecting The Bluetooth Device You Wish To Connect
14-3. Selecting the Bluetooth device When a registered device is deleted • When a registered cell-phone is deleted, its phone Book, you wish to connect and log are also deleted. When two or more Bluetooth devices have already been registered, you need to select the Bluetooth 14-5. -
Page 36: Hands-Free Phoning
Operation Selection of number Turn the [Control knob]. Selection of digit Press the [E] or [F]. Press the [Control knob]. Make a call. Number of digits that can be input • You can input a maximum of 32 digits. DPX513WBT... -
Page 37: Calling A Number In The Call Log
15-5. Calling a number in the call log 15-8. During a call Press the [Ú] button. Disconnecting a call Press the [SRC] button. “BT MODE” appears and enter the Bluetooth mode. Use the [Control knob] to select “CALL Switching to the Private mode HISTORY”. -
Page 38: Switching Between Two Connected Cell-Phones
• If the main cell-phone is disconnected when it is taken out Other of the vehicle, the sub cell-phone becomes the main cell- phone if it is held connected. When the disconnected cell- phone is brought back into the vehicle, it is reconnected as the sub cell-phone. DPX513WBT... -
Page 39: Bluetooth Audio
16. Bluetooth audio 16-1. Before use 16-3. Play function • You need to register your Bluetooth audio player Random play before using it with this unit. For more details, see Press the [3] button. <14-2. Registering a Bluetooth device> (page 34). Switches between Folder Random (“FOLDER • You need to select the Bluetooth audio player RANDOM”), All Random (“ALL RANDOM”), and OFF... -
Page 40: Bluetooth Settings
• By default, “0000” is specified. • A PIN code can be specified with up to eight digits. Cancellation of downloading • To cancel downloading of the phone book data, operate the cell-phone. DPX513WBT... -
Page 41: Deleting The Phone Book
Use the [Control knob] to select a setting. The previous item appears. Exit the Bluetooth mode. Press the [Ú] button. Exit the Bluetooth mode. Press the [Ú] button. How to update • For how to update the firmware, access our web site. www.kenwood.com/cs/ce/bt/ English... -
Page 42: Siriusxm™ Satellite Radio (Optional Tuner And Service Required)
15. SiriusXM tuner setting> (page 47). settings> (page 32). 18-5. Preset tuning Recalling a channel from the memory. Press the [1] button to select a band. Press the button ([1] to [6]) corresponding to the channel you want to listen to. DPX513WBT... -
Page 43: Direct Access Tuning
18-6. Direct access tuning 18-8. Parental Lock setting (Function of remote control) You can turn on/off Parental Lock for each channel. You can search for a channel directly by entering its Select the SiriusXM Radio source. number. Refer to <Source selection> (page 11). Press the [DIRECT] button on the remote Press and hold the [AUDIO] button. -
Page 44: Clearing The Parental Lock Setting
About the Mature setting • The setting described in <18-8. Parental Lock setting> (page 43) is ineffective while the Mature setting is held “ON”. Setting the Mature setting to “OFF” will make the setting effective. DPX513WBT... -
Page 45: Parental Lock Pass Code Setting
18-11. Parental Lock pass code 18-12. SiriusXM Replay™ setting You can replay up to the last 60 minutes broadcasting of current channel. You can set a new pass code for Parental Lock setting. Press the [L] button. “REPLAY MODE” appears. Select the SiriusXM Radio source. -
Page 46: Channel Skip Setting
[Control Press and hold the [6] button. knob]. “S” is indicated for the selected channel number. “X” is indicated for channel numbers that cannot be selected. Exit the Function setting mode. Press and hold the [6] button. DPX513WBT... -
Page 47: Siriusxm Tuner Setting
18-15. SiriusXM tuner setting You can set the SiriusXM tuner related items. Press the [Control knob]. Enter the Function setting mode. Use the [Control knob] to select “SETTINGS”. For how to use the [Control knob], refer to <3-2. How to select the item> (page 11). Use the [Control knob] to select an SiriusXM tuner setting item. -
Page 48: Basic Operation Of Remote Control
• Recall preset stations: [1] – [6] On CD/Audio file source • Music selection: [E]/[F] • Folder selection: [FM]/[AM] • Pause/Play: [ENT] • Enter the Music search mode: [R]/[S] • Selecting folders/files during Music search mode: [R]/[S] • Returning to previous folder: [6] DPX513WBT... -
Page 49: Remote Controller On Steering Wheel
On iPod source 19-3. Remote controller On Steering • Enter Music search mode: [R]/[S] Wheel • Selecting items during Music search mode: This unit can be operated using the remote [R]/[S] controller on steering wheel. • Returning to previous item: [6] • The functions and appearance vary depending on • Pause/Play: [ENT] the car model. -
Page 50: Troubleshooting Guide
ö The sound skips when an Audio file is being played. Í The media is scratched or dirty. ò Clean the CD with reference to <9-10. Handling discs> (page 24). Í The recording condition is bad. ò Play the media again or use another media. DPX513WBT... -
Page 51: Error Messages
ö “TOC ERROR” 20-3. Error messages Í The CD is quite dirty. The CD is upside-down. The CD The messages shown below indicates your system is scratched a lot. Í The disc is unreadable. condition. ö “USB ERROR” General Í Some trouble may have occurred to the connected USB device. - Page 52 Í The Pandora application is an older version which ö “N/A VOICE TAG” the unit can not support. Confirm that the Pandora Í Your cell-phone cannot start voice recognition. application is the latest version. ö “PAIRING NG” Í Pairing error. DPX513WBT...
- Page 53 iHeartRadio Messages Aha Messages ö “CANNOT CREATE” ö “ACTN DISABLED” Í Creation of a custom station name failed. Í You performed an unavailable operation. ö “CANNOT SAVE” ö “AHA APP UPDATE REQUIRED” Í Addition to the favorite category failed. Í Upgrade the aha application to the latest version. ö...
- Page 54 Í The unit is unable to complete transferring the tagged information to the iPod. ö “NO TAG FNC” Í An iPod which does not support the tag memory has been connected. ö “WRONG CODE” Í The entered pass code is incorrect. DPX513WBT...
-
Page 55: Accessories/ Installation Procedure
21. Accessories/ Installation Procedure Installation accessories connect the ignition wires to a constant-voltage power source, as with battery wires, the battery may die. • If the console has a lid, make sure to install the unit so that the faceplate will not hit the lid when it is closed or opened. • If the fuse blows, first make sure the wires are not touching other parts to cause a short circuit, and then replace the old fuse with one with a new the same rating. -
Page 56: Connecting Wires To Terminals For Toyota Cars
White+ / White/Black- Front Speaker (Left) A10/A9 Gray+ / Gray/Black- Front Speaker (Right) B2/B1 Green+ / Green/Black- Rear Speaker (Left) B6/B5 Purple+ / Purple/Black- Rear Speaker (Right) Blue Antenna Control (less than 300 mA) Input 1 White Input 2 Black Ground DPX513WBT... - Page 57 Connect to vehicle’s steering wheel Fuse (10A) remote control harness. Depends on the type of vehicle, ⁄ it cannot be connected. To SiriusXM Connect Vehicle Tuner (optional accessory) Wiring harness (Accessory 1) If no connections are made, do not let the wire come out from the tab. Blue/White (Power control wire) When using the optional power amplifier, connect...
-
Page 58: Installation
Accessory 2 (M5 × 8 mm) Fix a cable with a commercial item of tape. Peel off the release coated paper of double-face adhe- sive tape to secure the microphone on the place shown above. Adjust the direction of the microphone to the driver. DPX513WBT... - Page 59 English...
Need help?
Do you have a question about the DPX513WBT and is the answer not in the manual?
Questions and answers